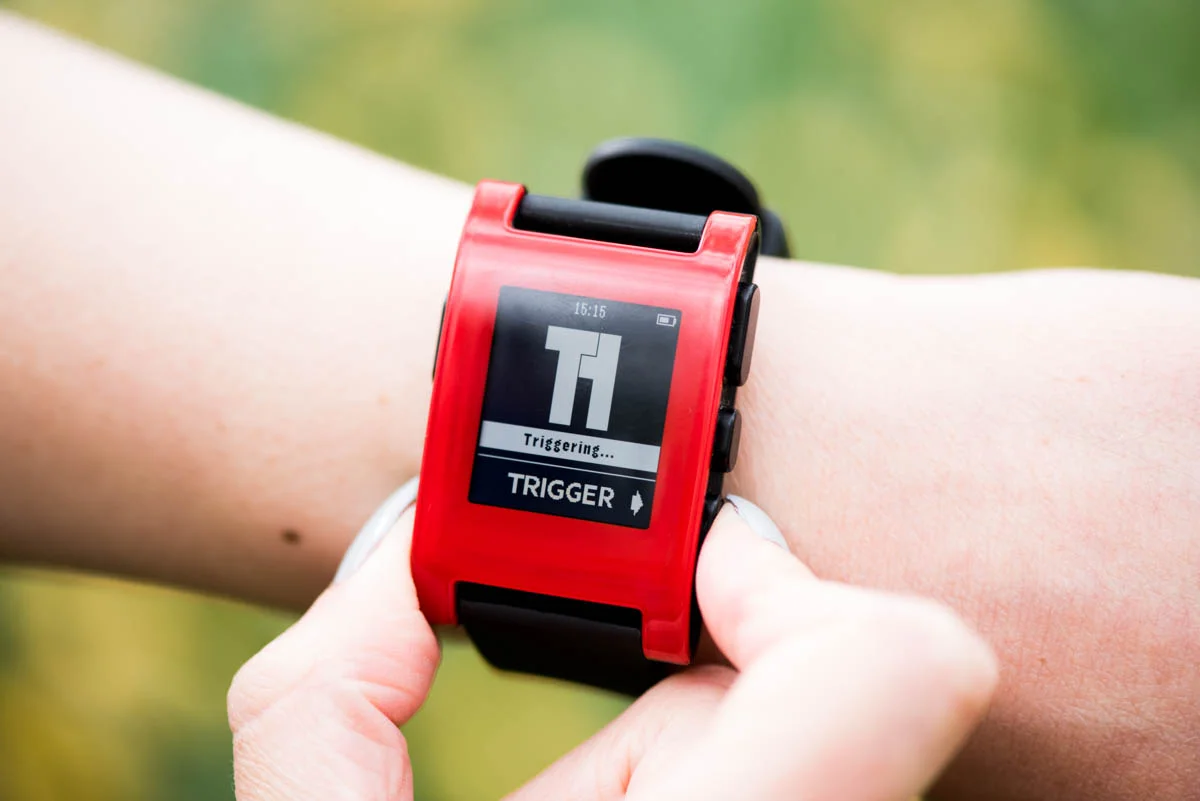
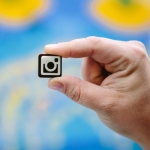
Triggertrap has a shiny new Pebble app. And an iOS one on the way. What other smartwatch photography apps are out there?

When you hear the term 'high-res' thrown about with such abandon when it comes to images for web use, have you ever stopped to think just how big or how high quality and image meant for the web needs to be?
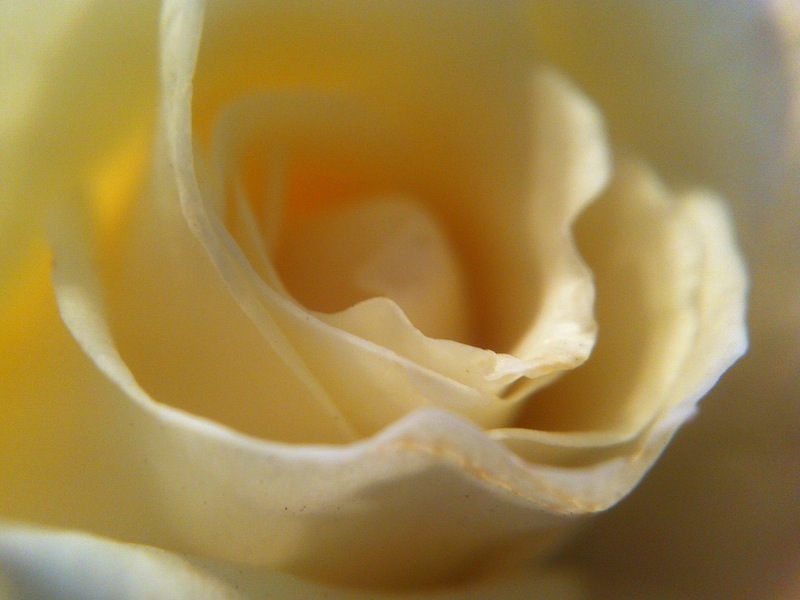
There's an assumption that high-contrast images are more dynamic, more compelling, more inviting. Have a go at some low-contrast photography. You might surprise yourself with the results.
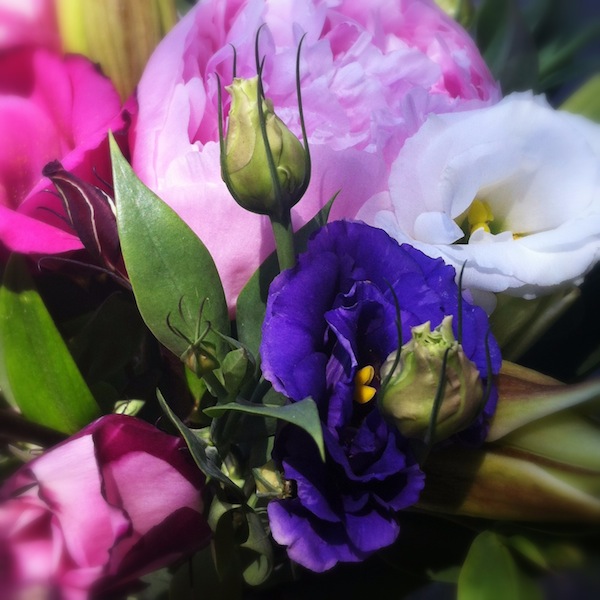
Balance doesn't mean symmetry; it means an internal consistency and tension within your photos. And it's a vital element of composition.
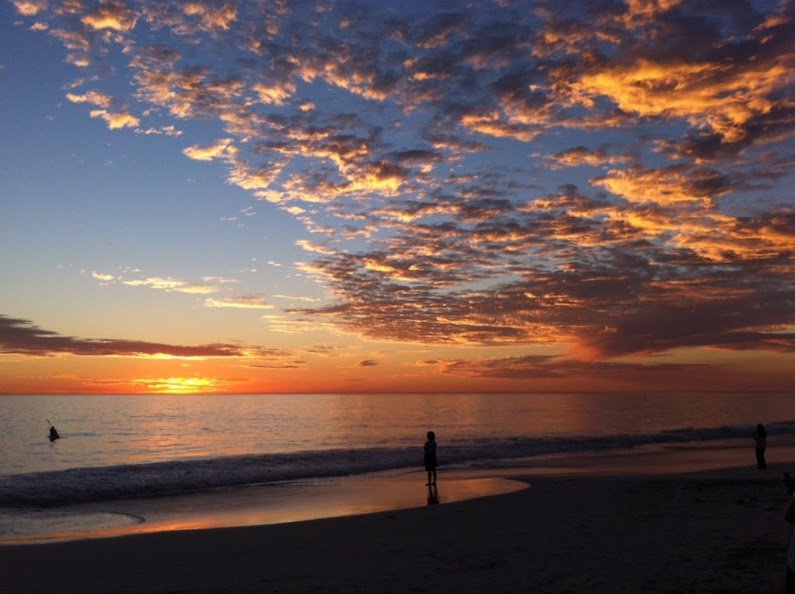
Great photos might be down to a little bit of luck, but most of that 'luck' you make yourself. Don't believe us? Read on...
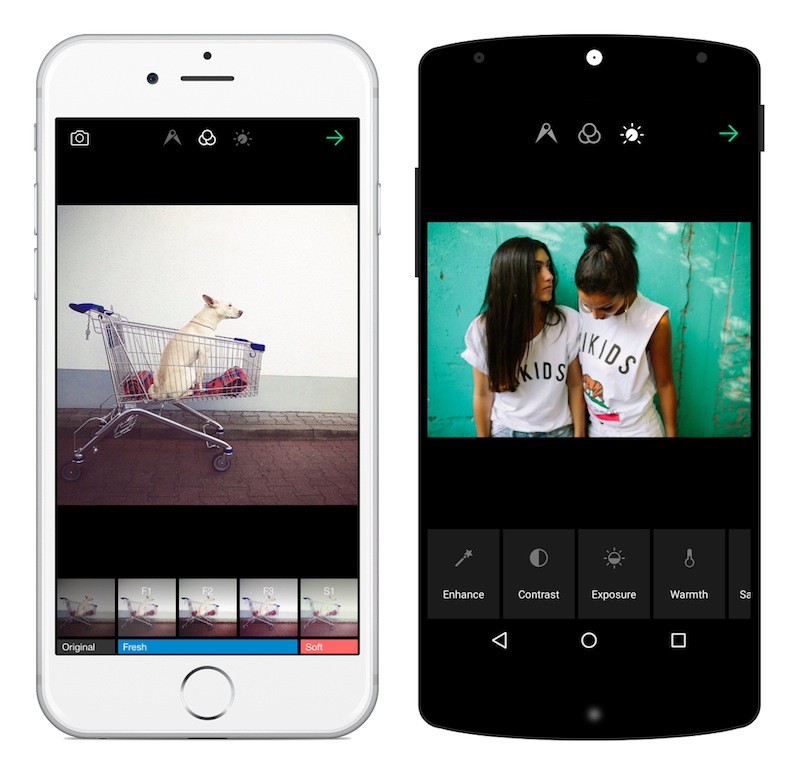
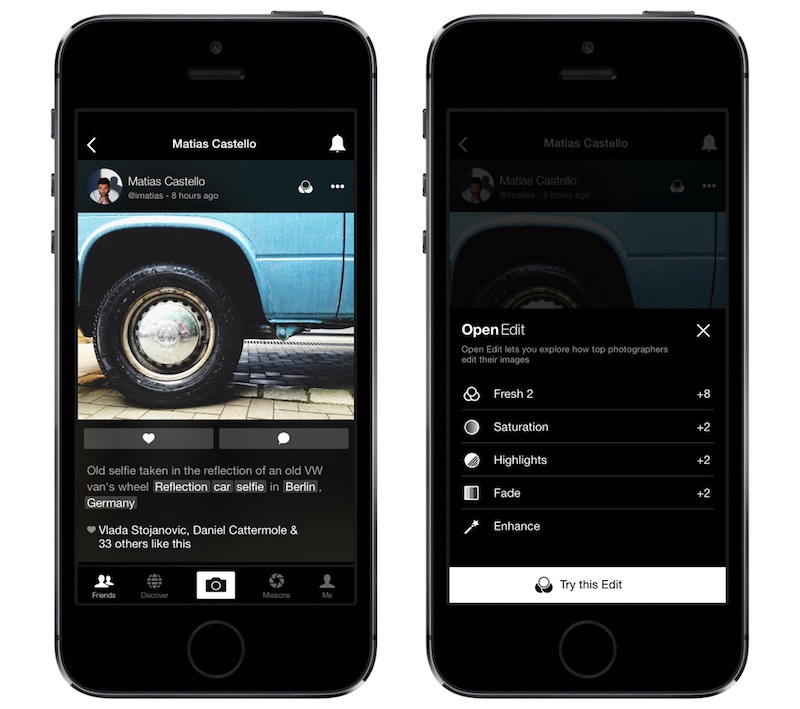
It's been a week of updates to our image-sharing programmes on social media. First Facebook introduced an auto-enhance feature, which will apply the filters that its algorithms calculate are most appropriate for your photos. Then Instagram unveiled five new filters, its first in two years. Now it's the turn of EyeEm, which brings a gaggle of new filters, fine-grained control over their application, and a new feature called Open Edit. The theory behind Open Edit is that it lays bare the post-processing path that a photographer followed to create an image, from the original to the final version. Each crop, tweak, and nudge is set out in a timeline that's made visible to the rest of the EyeEm community. If you see something that you like, you can apply the same edits to your own photos with one tap.
Right now, only certain photographers have the ability to open up their edits to the community, but it's something that will be rolled out to all members in time. The EyeEm team hopes that this open deconstruction of people's photos will lead to a more collaboratively minded community and one that can learn from each other and share their skills.
Can I see what EyeEm is trying to accomplish with Open Edit? Yes, definitely. Sometimes I do look at a photo and wonder precisely what sort of magic the photographer wove in order to create that particular effect. But at the same time, I'm not completely sold on it. The mystery and the secret behind someone else's photos are part of their appeal. Having the edits revealed to you can feel a little like the illusion of a magic trick being shattered when you know how it works. My curiosity means that I want to know, but the romantic in me appreciates the mystique.
From a teaching and learning perspective; I love EyeEm's enthusiasm to allow its users to share their knowledge. But I think that by going one step further, they could make this a much more valuable learning tool. How much people will actually learn from being able to see and apply other people's edits to their own photos will depend hugely on how much they're prepared to engage with the editing process and observe the kinds of impact each adjustment makes. Experimentation is such a valuable part of learning that just being able to apply someone else's workflow to your photos feels as if there's an important step in the process that's being skipped. It's not just about the what that you do to your photos, it's also about the why.
Bring a bit more dialogue to the experience—underpin the action with some explanation—and I think it could really work. Still, lots of people seem to be very excited by EyeEm 5.0, so perhaps I'm the one who's missing the trick here.
Let me know what you think.
You can download EyeEm 5.0 here.
In the run-up to the festive season, it's possible that people will be taking more photos than usual. Parties, pretty lights, and present-opening, afford ample opportunity to take photos and share them on social media. However, research recently commissioned by the online learning company lynda.com revealed some interesting facts about people's photo-taking habits. Aside from the fact that 64% of Brits now use smartphones or tablets to take photos, it would also seem that quite a few people are also too intimidated by the process, or by technology, to have a go themselves. Based on the figures that came out of the survey, we've put together five tips to help anyone who might feel a bit afraid of photography to start taking better photos without too much fuss.
60% of the people questioned spent fewer than 30 minutes learning how to use their cameras properly. Whether you use a smartphone, a point-and-shoot, or an interchangeable lens camera, read the manual. Or the destructions, as we call them. Understanding the capabilities of your picture-taking device will have a noticeable impact on what you can achieve with it.
Apparently, only about 45% of the sample made any attempt to improve the composition of their photos. Our top tip: get closer. And if you're working with a smartphone, get closer physically; don't rely on digital zoom.
Of those surveyed, 71% responded that they relied on the law of averages to return a decent photo. They work on the principle that if they take lots of shots, at least one should work out. Our advice? Slow down and think about what you're doing. What story are you trying to tell? A little contemplation should bring you better results than aerosol clicking.

Almost everyone who responded to the survey stated that they wanted to be able to make their photos look better, but the majority didn't feel that they have the skills to do so. While you can't turn a sow's ear into a silk purse, it is possible to make a few fundamental edits to a photo and elevate it from ordinary to much better looking.
There are three simple adjustments that you should make to every photo you take: to the crop, the colour, and the contrast. They're not time-consuming or complicated and can be accomplished with a basic editing package. You don't need to master Photoshop—or fork out for it—to make them.
As few as one-in-fifty of the survey group made use of any training to help them improve their photography. Seeing as the photographer is the most significant element in creating a great photo, doing a little learning will help enormously in the quest for better images. The good news is that by reading this, you've made a start. To help you even more, you can try a book or two or sign-up to any number of courses. There are hundreds, maybe even thousands out there. Obviously lynda.com, which commissioned the research would like you to look there, but may we suggest that you take a look at the Photocritic Photography School. It's free!
If you want to check out the findings from the survey, click and explore!
 It's Day Three of the Photocritic Holiday Gift Guide and we've switched from interchangeable lens cameras to smartphone photography. In-keeping with our previous (and indeed future) lists, it's a mixture of practical and fun. There should be something here for anyone who ventures out with their smartphone, whether an addict or an occasional shooter!
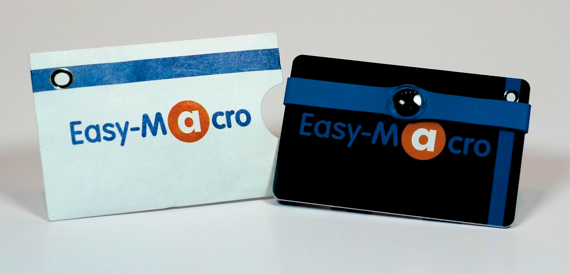
I'm a huge fan of the Easy-Macro band. It's a cheap, portable, and flexible (quite literally) macro photography accessory for your smartphone. It costs $15, it can live in your wallet, and whether you use an iPhone 6 or a Samsung Galaxy, it'll fit on your phone and provides 4× magnification for your photos. It's easy to use and delivers great results. What's not to like?

We featured Fotobit frames here on Photocritic earlier this year, when it was archive-deep in a Kickstarter campaign. Funding goal reached, Fotobit has gone into full-scale production and you can pick up a set of three inter-locking frames for $45 or nine for $99. Choose your photos, snap together the frames in whichever layout you want, and hang them on your wall.
If you want to flaunt your support for Instagram on your sleeve, or thereabouts, Photojojo has some cute lapel pins for $12. If you're a Pinterest or Photoshop supporter, they offer those, too. But, you know, this is the smartphone photographers' gift guide, so keep that one on the quiet side.

If you want to create selectively focused images optically, rather than digitally, take a look at the Lensbaby LM-10. It costs around $70, requires a free-to-download app, and is currently compatible with iPhone 4S, 5, 5C, and 5S and Android devices running Jellybean 4.1 to Kitkat 4.4.
Improvements have been made to smartphone flash since their first glaring white days, but it's still far from perfect. Subjects are startled, appear washed out, and the colour rendition leaves a little to be desired. So why not introduce some off-phone flash? Like the Pocket Spotlight. It's another Photojojo item, costing $30.

Earlier this year I had great fun trying out the palm-sized Projecteo. You select nine images from your Instagram account, they're printed onto a mini slide wheel and despatched to you with a baby projector. For $35. With world-wide shipping.
I succeeded in losing my Tiltpod, or at least temporarily misplacing it, when we moved earlier this year. It was very frustrating. Right now Tiltpods are only compatible with iPhones 4, 4S, 5, and 5S, but I believe Gomite is working on a 6-sized product. The 4/4S version costs $15; the 5/5S case costs $30.

Yes, we know that we're biased, but if we can't publicise our own books here, where can we? And Social Photography is a particularly pretty book full of lovely images, fantastic tips, and useful knowledge when it comes to taking, and sharing, smartphone photos.
Gifts for macro photographers < < Holiday Shopping with Photocritic > > Gifts for high-speed photographers
A bird has just tweeted in my ear that today is International Food Photography Day. We've already quite a few articles here on Photocritic that delve into the mystery of making brown gack look tasty and cold chicken appear hot. But seeing as most people aren't going to be pulling out their dSLRs in Le Gavroche or the French Laundry to take photos of their dinner (or at least, I hope not), we thought that we'd focus on smartphone food photography today, for when you don't have a controllable aperture or variable shutter speeds at your disposal.
We probably sound like a broken record here at Photocritic, urging people to get closer, but we really do mean it. And we definitely mean it for food photography. Lean in.

Use natural light, and lots of it, to photograph food. Avoid flash wherever possible, especially smartphone flash. It's rarely a good look.
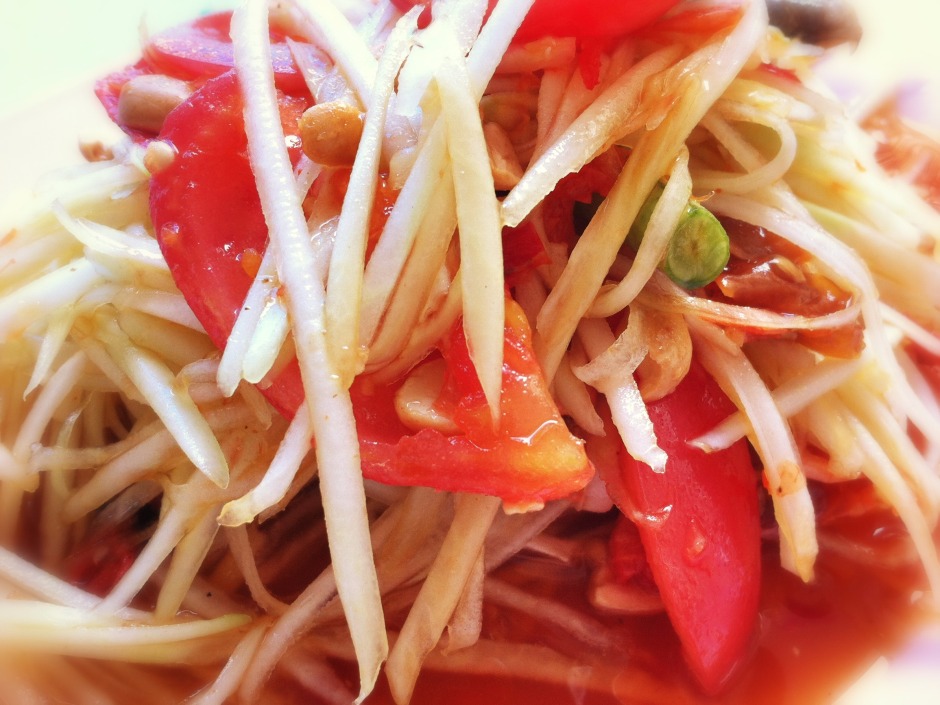
Experiment with different angles when it comes to food photography. Up high, down low, looking across your food. Give it a whirl!
You really do not want clutter distracting from your food. So check for spills, crumbs, and cruet sets in the background. Think about using this tip in conjunction with getting closer and altering your angles for maximum impact.
Wobbly white balance can manage to make even the most delicious, fragrant, and beautiful dish look unappetising. Whites need to look white and not tinged with mouldy greens or unnatural blues. Fire-up Snapseed, load up your image, and push that 'Warmth' slider around until the colours look right.
As well as adjusting the white balance of your food photos, don't forget to give them a quick crop if they need it—especially to slice away anything extraneous or distracting in the background—and to increase the brightness and contrast a smidge. That will give your image a bolder and more appealing feel.
I don't tend to add filters to my food photos, but if that's your thing, Mayfair gives reliably good results in Instagram, I like Vanilla in EyeEm, and ColorVibe is good in Flickr. But it doesn't hurt to play around yourself!
It doesn't matter how tasty your chickpea curry actually is, making it look appealing can be very difficult without some serious styling. The colours are dull and the textures uninteresting. The best photos of food make you want to reach into the image and snatch the cherry off of the top of the cake. They tend to be bright and full of feeling. So be selective in what you photograph. Think about colour, texture, and pattern.
And now you can put your new-found skills to use by entering the Fujifilm and Pink Lady Snap the Rainbow competition!
If at the beginning of last year you'd asked me if one of the best $15 that I'd spend in 2013 might've been on a macro lens attached to an elastic band to use in conjunction with your smartphone, I probably would have looked at you askance. It's not so much that it's a ridiculous idea; actually it's pretty sensible – portable, flexible, affordable. But would it be effective? It wouldn't slip, would it? And it would actually magnify the subject, wouldn't it? And would I really make use of it? It might only be $15, but if I never use it, then it's $15 wasted. In 2014, the answers to those questions—would it work, would I use it, and would it be $15 well-spent—are very definitely yes. I pledged $15 for an Easy-Macro band on Kickstarter and it works a treat. It lives in my wallet, I use it regularly, and I love the results. If I choose to upgrade my iPhone or switch to a different manufacturer, my Easy-Macro will remain compatible. Fabulous!
There isn't just the review here on Photocritic, but I have lots of pretty close-up photos taken with my iPhone to show for it.
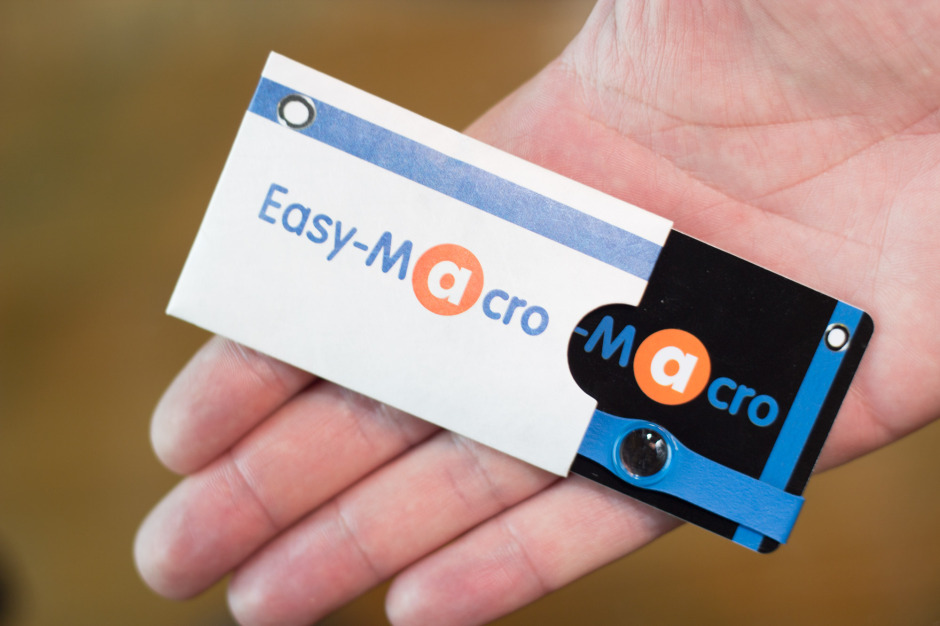
And now due to popular demand, Easy-Macro is expanding its product line. Woohoo!
In addition to the original 4× magnification band, a 2× and a 10× band are being put into production. Pledge $30 to the Easy-Macro Kickstarter campaign and you'll receive a triple pack of magnification bands if it successfully reaches its funding goal. You can then use them individually or stack them one on top of each other for some serious close-ups.

All of the details are available on the Easy-Macro Kickstarter page.

Earlier this week an infographic design agency, NeoMam Studios, sent us an infographic about 'smoasting' which they'd produced on behalf of print company Photobox. Once I'd got over the shock of awful elision of 'social media' and 'boast' to form the ghastly portmanteau word 'smoast', there was one particular statistic that caught my eye. Take a look at the infographic and guess which it was.
Despite the prevalence of Instagram, the host of editing features that are built into apps such as EyeEm, Facebook, and Twitter, and the plethora of free-to-download editing programmes, only 28% of photos are cropped or styled in some way? Wow! I am surprised. And it's something I think deserves remedying.
While Team Photocritic advocates getting as much right in-camera as possible—you'll certainly not be able to turn a sow's ear into a silk purse—we're not beyond a little post-processing, either. If it's good enough for Cecil Beaton and Horst, it's good enough for us, too. A snip here and a swipe there can elevate an ordinary image into something a bit more special.
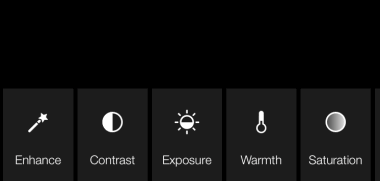
This isn't about air-brushing away half of someone's thigh, but about making minor adjustments to three specific areas: the crop, the colour, and the contrast. Here at Photocritic we call them The Three Cs. They're not complicated and they'll make a world of difference.
However well composed you think your image is, it will almost certainly benefit from having a few pixels shaved off it. It might be a case of reinforcing the rule of thirds, removing a bit of unwanted background that crept into the frame, or getting a bit closer to your subject.

Being a purist, I tend to stick to traditional 4:3 or 3:2 ratios, but don’t feel limited by my prejudices. Select from any of the standard crops, from square to 16:9, or free-style it to adjust the crop any way you like.
At the same time as cropping, make sure to straighten your image, too. Unless you are deliberately tilting the frame for creative reasons, uprights should be upright and horizons should be level. When lines that are expected to be upright or level are wonky, it has an unpleasant impact on our sense of balance. By correcting wonky lines, you'll produce a stronger image.

Light has a temperature, and depending on the source of the light, or the time of day if it’s the sun, that temperature will vary. When the temperature varies, so does the colour of the light. As a general rule, we don’t notice the variation because our eyes cleverly adjust to the changes. Our cameras on the other hand aren’t quite so clever.

Have you ever noticed how white objects in your photos can show up with blue or yellow casts? That’s because the white balance in your photo was off.

It's a relatively easy correction to make using the 'Warmth' or 'White Balance' function in an editing programme. If you think the whites are looking a bit too blue (or if an image looks a little 'cold' over all), nudge the slider to the right. If the whites are too reddish in tone, or the photo looks a bit warm, slide it to the right. It's a case of trial and error to make the right adjustment, but the more that you practise it, the better you'll understand the shortcomings of your camera and how it reacts to different types of light.
Now if you want to intensify or tone down your colours, you can do so using the saturation slider. I don't recommend bumping up the saturation too much; it can result in a cartoon effect rather than a photo!
Contrast is the difference between the dark and light tones in your photos. Images shot on bright sunny days tend to have a lot of contrast, with dark shadows and bright highlights, but those taken in fog won’t have a great deal of tonal variation and will be low contrast. From time to time, you’ll want a low-contrast image, but, generally speaking, your photos can be improved by increasing the contrast a touch. It brings definition and depth to them.

Don’t go overboard, though, as too much of a good thing can turn bad. You’ll find that if you over-cook the contrast you’ll lose too much detail and end up with an ugly image. Subtlety beats brickbats.

If you use Snapseed to make your edits, it's worth getting to know the ambiance slider, too. I've often found that this is a preferable alternative to the contrast slider.
At this point, any other adjustments are gravy. I'm a fan of Snapseed's 'centre focus' options and often apply one of those. You might want to play with a tilt-shift effect. Or there's the waterfall of filters you can try in any programme, but you might find that you prefer your own edits to prefabricated filters, now.
Oh, and don't forget that it all starts with a decent photo, so check out our eight tips for better smartphone photos, too.
Whenever I'm asked for quick tips for better smartphone photos, I usually proffer the same advice that I give to any other type of photographer: get closer and tuck your elbows into your body. But with smartphones (or indeed with some point-and-shoots) that first pointer in augmented with an admonishment to avoid digital zoom. So that's do get closer, but don't get closer using the capability that manufacturers have baked into their devices to accomplish it. Get closer, but nix the digi-zoom.
The truth is, digital zoom sucks. One day it might not, but right now it does. It sucks because digital zoom is nothing more than a glorified cropping tool. Whereas optical zoom relies on the physics of lenses to ensure that what you see appears larger or closer, digital zoom simply crops away the extraneous pixels and enlarges those remaining in the picture. While this might get you closer to your subject—and that's rule number one—it has an unfortunate effect on your images.

By enlarging the pixels that are on display, you've degraded your picture quality. You're spreading your information more thinly over the same surface area. It's the technological equivalent of spreading one teaspoon of jam over a slice of toast rather than two. Even if the processor is clever enough to use interpolation to enlarge the image, there's probably still some degradation.
Don't believe me? Have a look at these examples and tell me which is superior. I'll bet you a friendly pound that you prefer the image where I've got closer to my subject using my hands and my feet rather than the slider on my iPhone.
The first step in the art of getting closer is to do so physically: walk in, reach in, lean in. Getting optically closer is your next step. And if you're still not close enough, take the photo with what you've got and crop in after the fact. You'll still be spreading those pixels more thinly, but at least you'll have better control over the final image.

And if you want to get really close, try an Easy-Macro band. It's $15 well spent.
I wasn't paying attention; it was an advert. But when I heard the words 'And with its big screen, even my photos look fab!' my ears pricked up. Did I actually hear that correctly? It took another few advert breaks to establish that my aural capabilities were not deceiving me and some marketing team somewhere was touting at least one major feature on a smartphone as a screen that's sufficiently large to ensure that poor photos look good. Insert a mildly despondent sigh here. In terms of marketing hyperbole, it does make a welcome change from the might of the megapixel, but I'd prefer a claim that had a ring of credibility to it at least. Logic dictates that a bigger screen won't make an out-of-focus, badly exposed photo look better. It will just make it look bigger. And the out-of-focus-ness more out-of-focus.
What is this smartphone with the magical photo-improving screen? It's the Nokia Lumia 630. You can check out the statement for yourself. It comes at around 15 seconds.
Sorry sweetheart, I don't want to burst your new purchase bubble, but the size of the screen on the Nokia Lumia 630 isn't going to improve your photos if they're already not terribly good. You're responsible for that. Go out, take more photos, think about the composition and the lighting, take more photos, and apply what you've observed. That'll make your photos look better, because they'll be better. Photography's a skill that can be improved with practice and evaluation. Trust me.
As for the marketing team behind the Lumia 630, please don't try to convince people that there's a technological solution for everything. Some improvements require effort and application. I know that might seem awfully old-fashioned and not necessarily fit with the image you're attempting to promote, especially in our increasingly visual society that appreciates immediate advancements, but there's only so far your phone can go. Oh, and lay off the gender-stereotyping, too. Women the world-over, and a great many men, will thank you for it.
New kit. Maybe some cash. Global exhibition. Publication in a 'Best of 2014' photobook. A trip to Berlin. Sound good? They're all prizes that are up for grabs for winners of the EyeEm Global Photography Awards. Starting today, photo-sharing site EyeEm is looking for the best examples of mobile photography to showcase at the Berlin Holzmarkt as part of its photography festival in September this year. There are ten categories into each of which you can submit a maximum of three images.
Open now are the Portraitist, the Illusionist, and the Explorer categories. That round closes on 1 June, to be followed by the Architect, the Street Photographer, and the Illuminator categories, which are open to submissions from 2 June. The final round opens on 16 June and comprises categories the Speedster, the Landscapist, the Storyteller, and the Stylist.
All you have to do is upload your chosen images to EyeEm and tag them with the appropriate category in the Share screen. If you don't already have an EyeEm account, it's free to join.
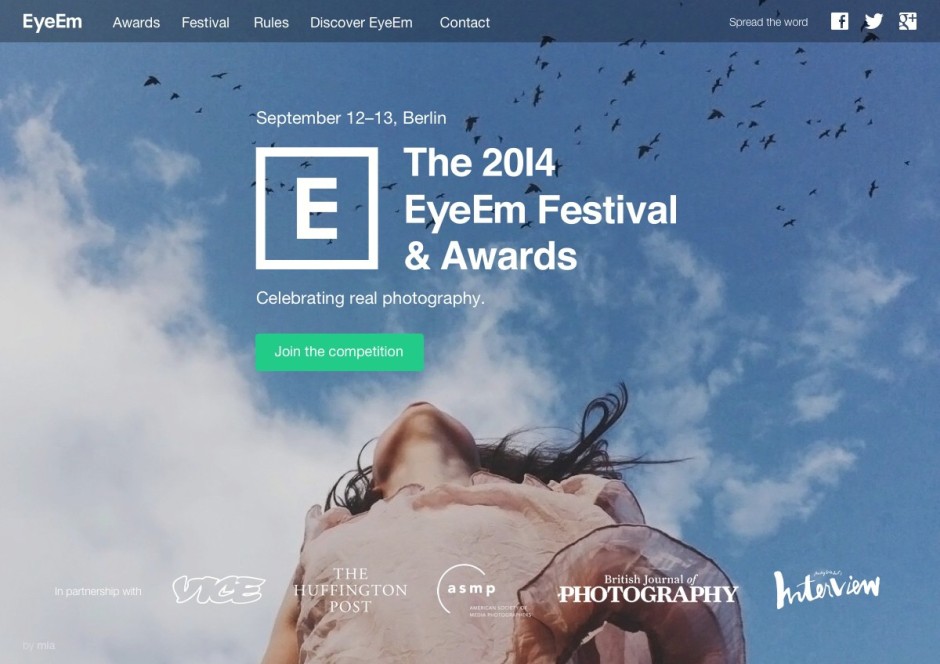
The winners will be chosen by a jury of ten illuminaries from the photographic world, including Anna Dickson, the Huffington Post's Director of Photography, conflict photographer Benjamin Lowy, and Olivier Laurent, who edits TIME's Lightbox magazine. As well as being exhibited at Berlin's Holzmarkt as part of EyeEm's Photography Festival running 12-13 September, winning images will be showcased to the public in London, New York City, San Francisco, Rio de Janeiro, Cape Town, and Tokyo. And the talented entrant named as the EyeEm Photographer of the Year will win a round-trip to Berlin for two, to experience the Festival!
'We’re looking forward to celebrating this new generation of budding photographers, who are defining a new era, with the launch of our Global Photography Festival & Awards,' says Florian Meissner, co-founder and CEO of EyeEm. 'Photography has changed significantly in recent years and at EyeEm we see smartphone photography as a natural evolution of the art form. The creative excellence of our community is the center of EyeEm and the Global Photography Festival & Awards are our way of continuing to support and show the world this incredible talent.'
The EyeEm Photography Festival runs over the 12 and 13 September 2014. It aims to highlight the creative images being made with mobile phones, connect leaders from the photography, devices, and media industry with the next generation of photographers to discuss the state and future of photography, and lay on photowalks, masterclasses, and portfolio reviews for attendees.
All of the details on how to enter the competition and how to book your place at the Festival are available on the EyeEm website. See you there?
HTC's replacement for its HTC One wasn't exactly a well-guarded secret with most of the speculation centred on what exactly it'd be called. But now that the HTC One (M8) is here, it looks as if it has a very interesting camera function that I'm intrigued to try out. What, then, does it have to offer? First, HTC has stuck to its ultrapixel guns, with the emphasis being on the size of the pixels on the sensor, not how many there are to service the 28mm ƒ/2.0 lens. Gone is the 2013 image stabilisation technology, replaced by a smart stabilisation function that works with the ultrapixels. And added is the rear-facing second sensor that allows for better depth detection and Lytro-like control by taking two shots simultaneously with the UFocus function. But there's also Foregrounder, so that you can add effects and play with the background; Copy & Paste, a compositing feature that lets you copy and paste people appearing in one photo into a different image; and Dimension Plus, which allows you to alter the angle of your image by tilting your screen.
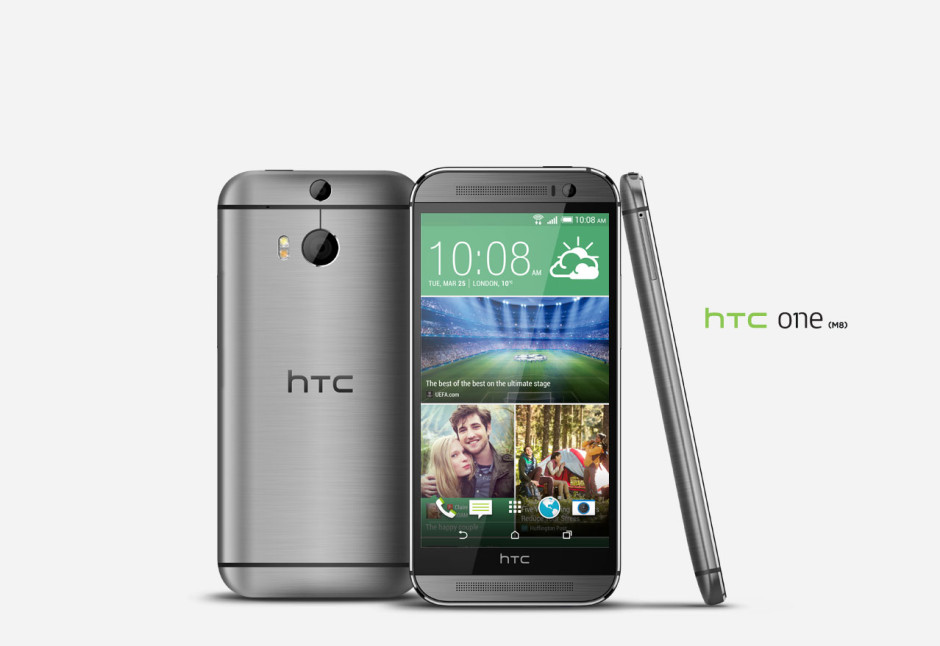
Similar to the flash in the iPhone 5S, the 2014-One has a dual flash that is designed to render better skin tones and a slow-motion video function, as well. And there're manual options for ISO and the like, giving you better control over your exposure.
For all that HTC isn't interested in the megapixel wars, it has bumped up the front-facing camera's megapixellage from 2.1 to 5, though.
The phone's 2.3Ghz Snapdragon 801 processor should be capable of whipping through your edits and if 16GB or 32GB of storage is insufficient for your archive of images, you can always make use of the micro-SD card slot.
The 2014 vintage One has taken cues from Apple, Samsung, and Nokia as well as going its own way when it comes to megapixels and fun and games. But however good the camera is on it, does HTC have the firepower to make it a go-to smartphone?
If you use Snapseed to edit your smartphone photos, you might have noticed the 'Ambiance' slider under the 'Tune Image' settings. Ambiance? Isn't that the mood or feeling you get at a party, not a photographic term? Yes, exactly, and that's why I avoided it for quite a while. I just couldn't figure out how to apply it effectively to my photos. And Google, which owns Snapseed, was hardly helpful. The Google help page ambiance explanation reads:
The Ambiance control is a special type of contrast that controls the balance of light in a photo. It can be used to balance backlit photos or to accentuate contrasts throughout your photo. Swipe right for photos where the subject is darker than the background. Swipe left to increase the contrast of dark objects and create a slight glow around darker objects. This is especially helpful in photos that are slightly flat.
I wasn't aware that there was a 'special type of contrast' available to photographers, just the plain old difference between light and dark, so that was surprising. And it's all very well telling us to 'swipe right for photos where the subject is darker than the background,' but what effect will it have?
As with just about everything associated with photography, the best way to understand it is to use it. So that's how I've come to write this and present you with some compare-and-contrast examples where I have swept the slider both left and right on a series of photos and analysed its impact.
In order to create examples that are clear enough for illustrative purposes, all of the ambiance settings, whether positive or negative, have been exaggerated. Subtlety and demonstration aren't natural bedfellows; that's for the real thing.
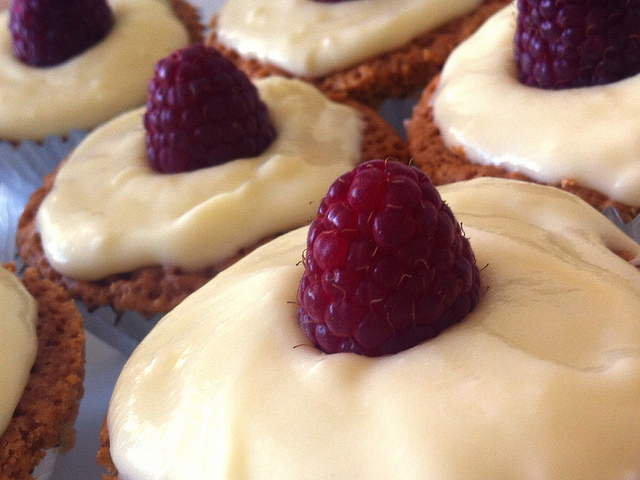
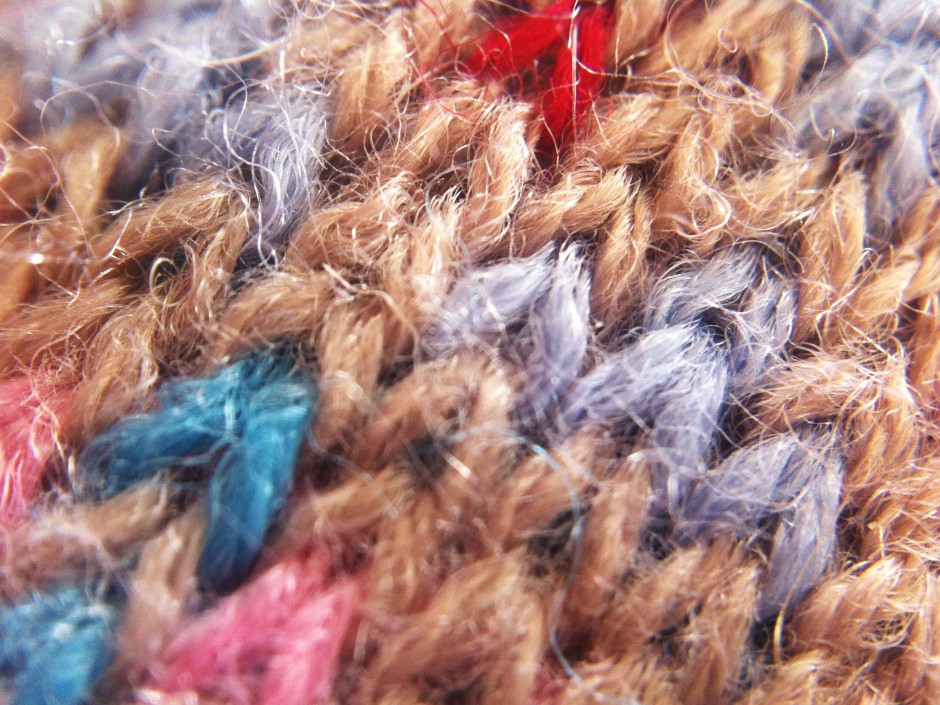
Let's start with this image of some dried berries. I've adjusted the white balance to correct for a light temperature that was out by several thousand Kelvin and cropped it marginally, but that's all. It's a good base.
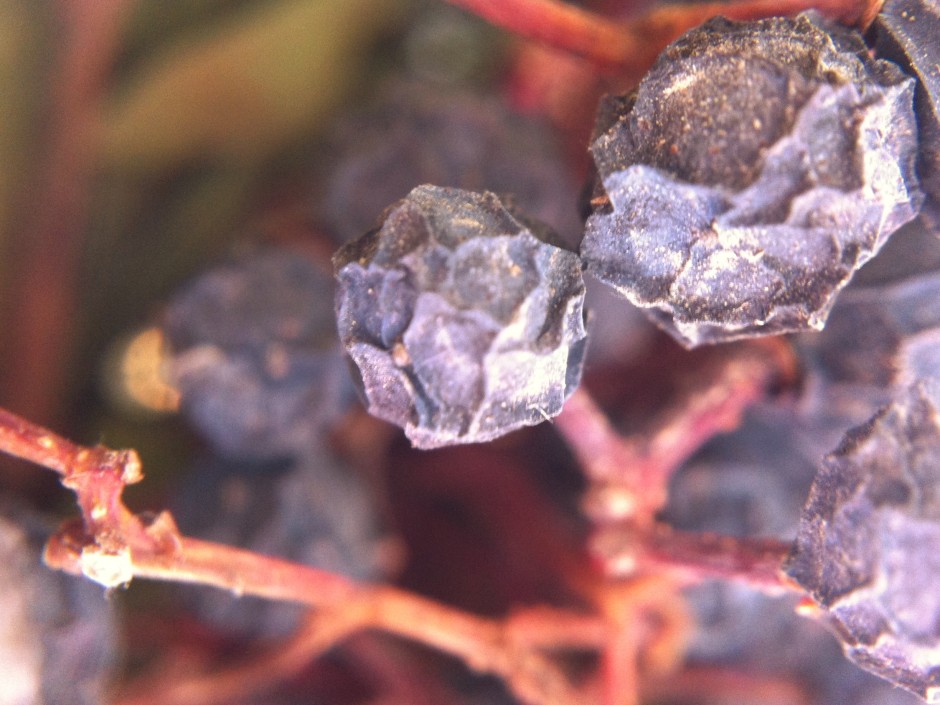
By increasing the ambiance setting by 60 points, you can see that the image has taken on a more reddish tone. The background has also been lightened, but the highlights—say those on the bottom right of the centre berry—haven't become overwhelming, as you might otherwise expect from an increase in contrast. The definition of the berries has improved, but not at expense of the highlights.
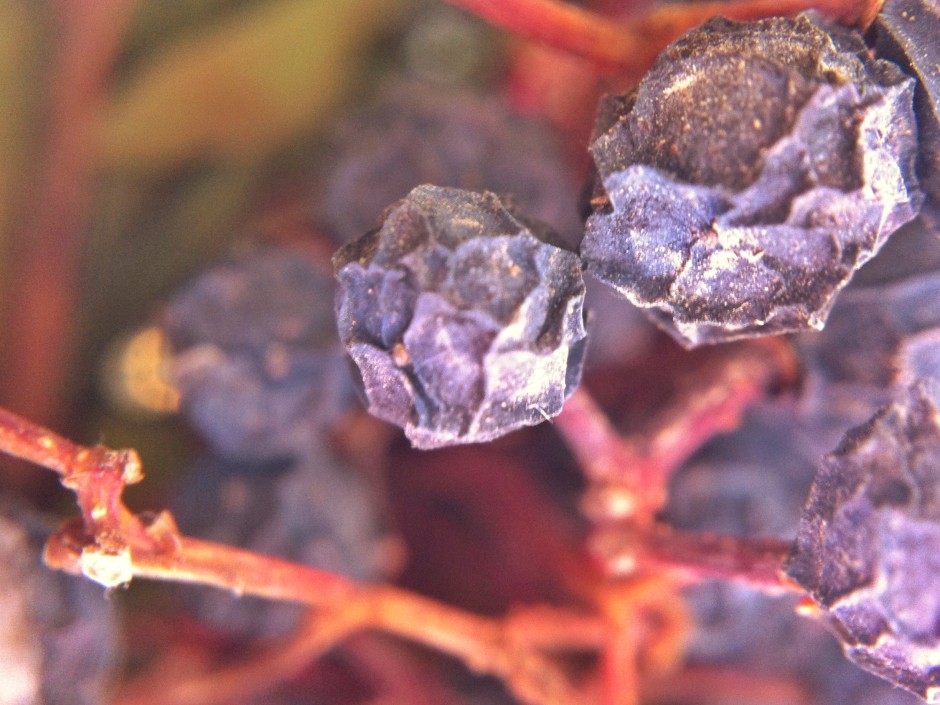
When I swiped the slider to the left and dropped the ambiance by 60 points, you can see that the background became darker, the red tone has diminished, and the berries have become softer looking and less defined. A negative ambiance setting has given the photo a softer, more muted look.

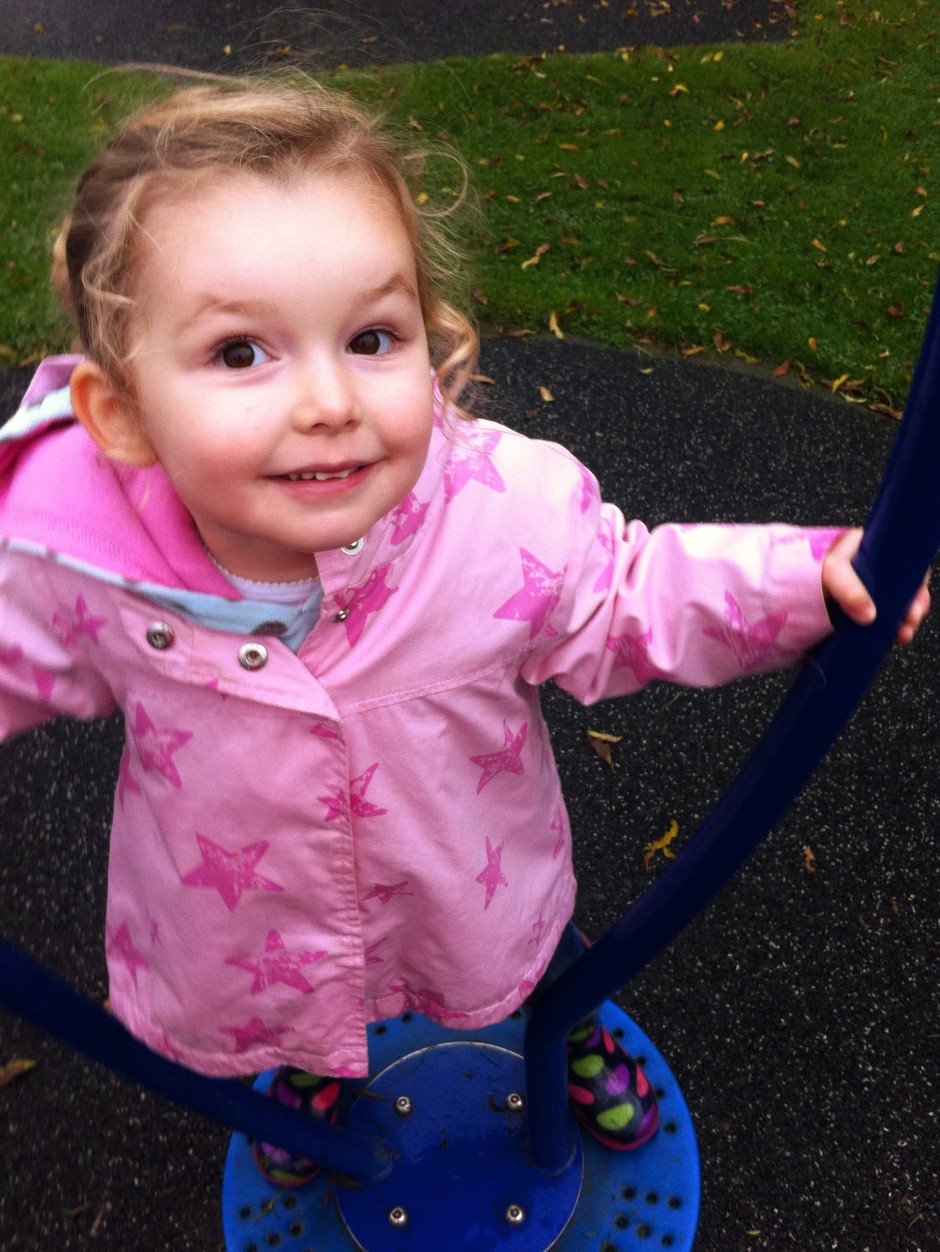
This is my niece, Eva. She's three. She's being spun (by me) on an upright-spinny-device in the park. I've adjusted the original image to correct the white balance, but that's it.
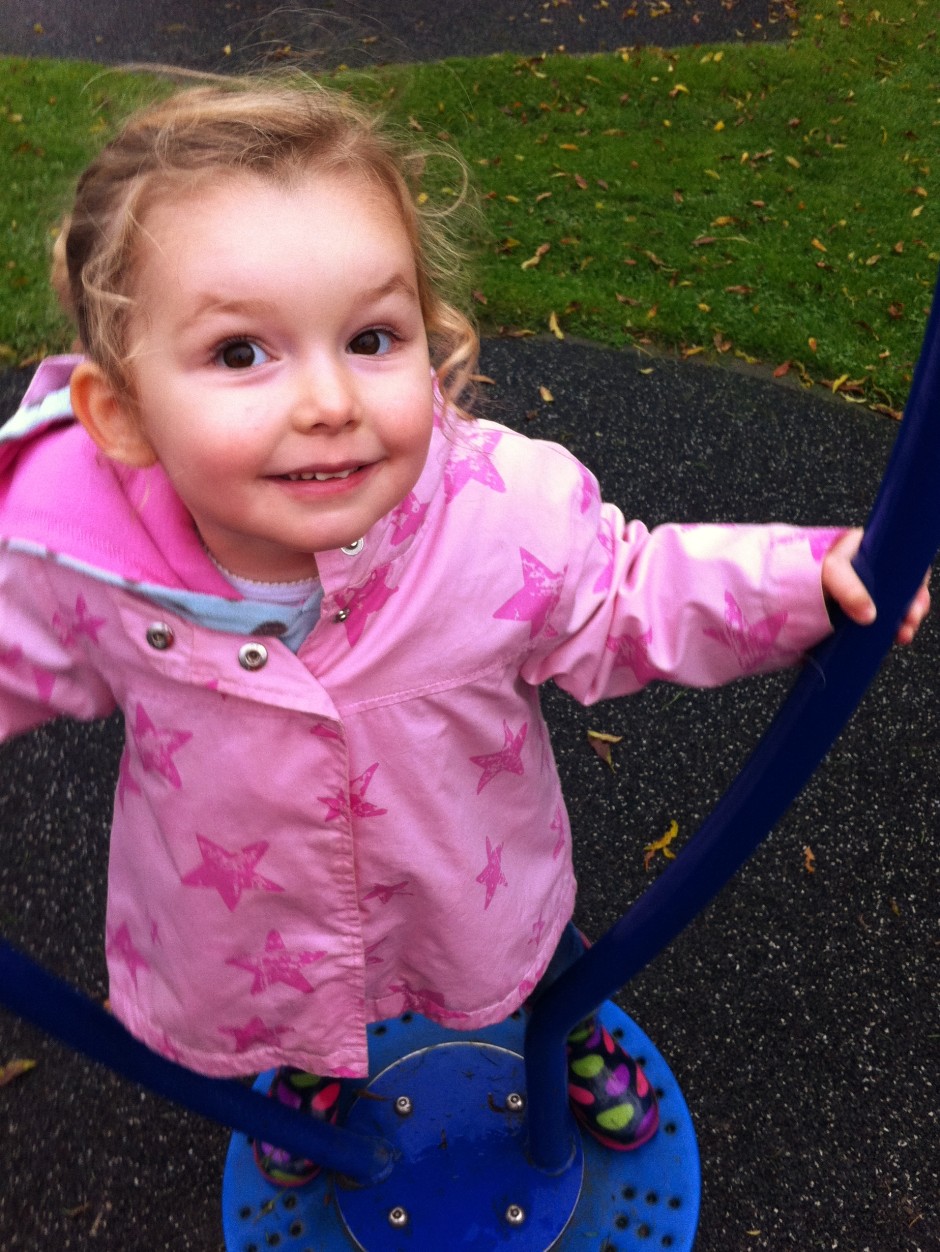
When I increased the ambiance, pushing it to +60 made Eva look as if she's been on a sunbed every day of her life since birth. It was awful. So I went for +30 instead. She still looks comically rosy-cheeked, but not horrifically so. Her coat is an unattractively bright shade of pink, her wellies are deeply saturated, but the grass looks good.
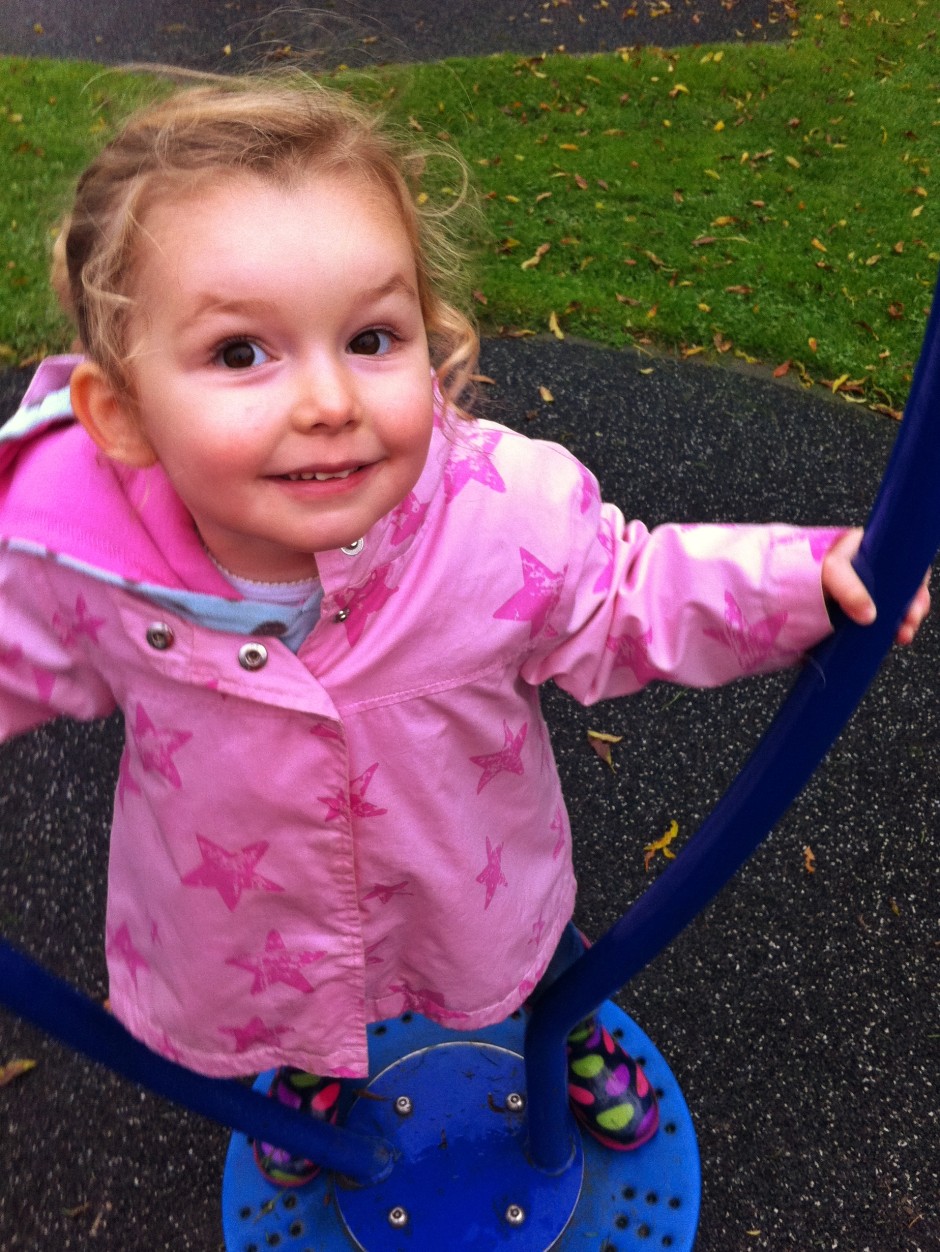
Decreasing the ambiance to -30 had a rather pleasing effect, though. Her skin became more milky and the darker background helped her to gain even prominance in the image. I reckon that decreasing it even further could make for an even better look.
Having tried increasing ambiance in Eva's portrait to unpleasant effect, I didn't even bother trying it with my self-portrait. Decreasing the ambiance, this time to -100, was effective, though. I'm not sure if I prefer the original (again, slightly cropped and heavily adjusted for white balance) image or the edited one, but it's a good demonstration of the tool and shows how it gives a more muted feel to your photos.


Having a swipe and swish with the ambiance slider is definitely something to be considered when you're fiddling with your smartphone photos. The general rule seems to be that left is great for portraits and go right a bit for still lifes. But every photo's different. And maybe 'ambiance' isn't such a terrible descriptor, either. One way is more lively and bouncy and the other more muted and moody. Just like the atmosphere can be at a party.
Portable printers, wireless printers, and smartphone-connected printers aren't anything new, but LifePrint is looking to bring something new to the market. It's seeking Kickstarter funding for its portable, wireless, instant, and socially networked printer that'll be both iOS- and Android-compatible.
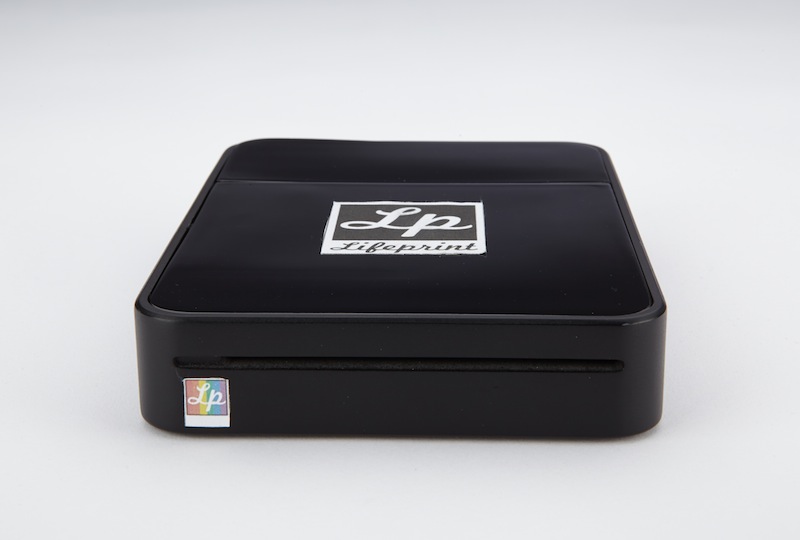
We get the portable, wireless, and instant bits; but what do they mean by social? It means that LifePrint isn't just a printer, but there's an app, too. This will allow you to follow your family and friends and be followed by them in turn, wherever you all are in the world. Anyone you follow can send an image to your printer that you can choose to print, or not. Likewise, you can send your images to your followers' printers, if you're so inclined. Grandmother in Italy should be able to print images of grandchildren in the UK without a hitch. Not that you have to acquire followers if you don't want to; you can remain an undiscoverable recluse if you prefer.
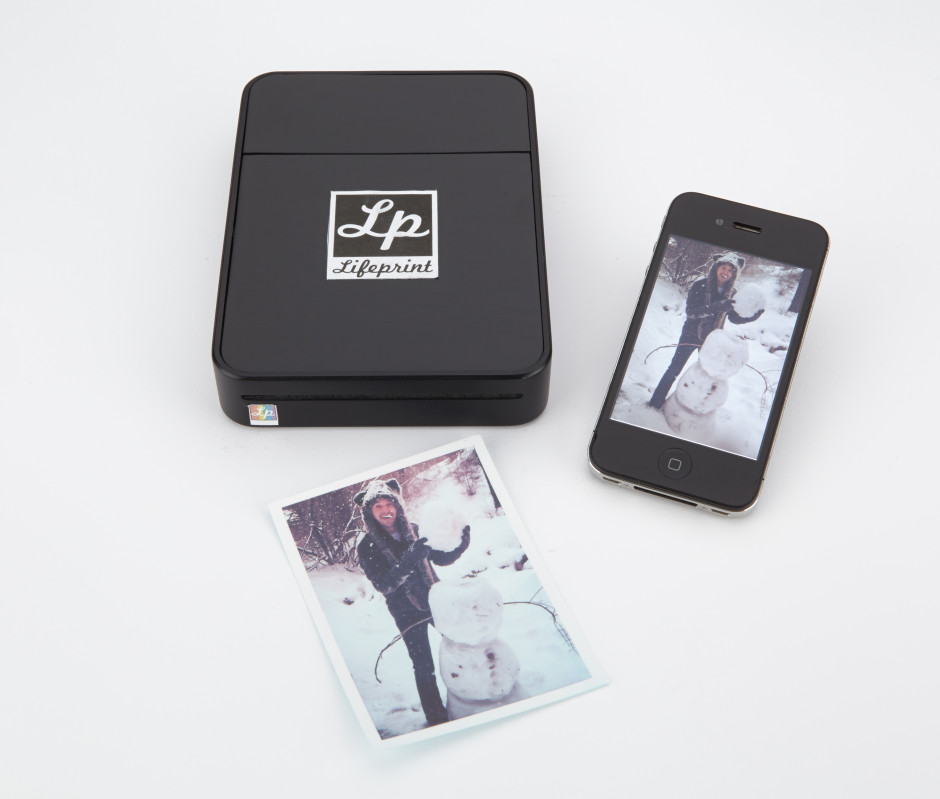
Provided that you have a connection to the Internet, it doesn't matter where in the world your phone is and your printer is. They can be thousands of miles apart, but once you click 'Print' your image should be ready in about 60 seconds.
You can print any photo on your camera roll, and use the LifePrint app's editing tools before you print if you want. It's got the usual filters and borders, as well as speech bubbles and picture-stitching. Once you've printed, you can share your photo to the social media of your choice from the app, too.
All of this is, however, a long way off. LifePrint needs to raise $200,000 before 25 April 2014 to reach its Kickstarter goal, with Earlybird rewards starting at $99. If and when it reaches its funding, the projected shipping dates for printer units is January 2015 for iOS and mid-April 2015 for Android-compatible devices.
Will it make it? Well, according to Kicktraq, if pledges continue at the current rate, it'll get there.

And then the hard work for the LifePrint team really will begin. They have an app to develop and hardware to finalise, manufacture, and ship. If you like what you see, you know what to do over on Kickstarter.
Sometime in September last year I pledged a modest sum of money to Easy-Macro's Kickstarter project. I'd heard about Easy-Macro before then—a magnifying lens set into a rubber band that wraps around your smartphone and sits over its lens—but the new and improved 4× magnication factor in the Kickstarter-funded project made it seem like a great bet. Some 4,106 other people agreed with me and Easy-Macro surpassed its goal with plenty in hand. For me, the appeal of the Easy-Macro wasn't just that it was a fun addition to my smartphone, or that it was cheap, but that it meshed with the ideals of smartphone photography: discreet and easy. It sits my wallet and can be placed around any phone. I don't have to worry about it getting crushed or dropped in a bag and it won't become obsolete if I upgrade my device.
All I needed was for it to be any good. Well, just before Christmas my bright blue band arrived and I'm happy to say that I've been having fun with it ever since.
You use the Easy Macro just as would manually focus a lens set to infinity: by getting as close as you feasibly can to your subject and then moving your smartphone steadily backwards until your subject comes into sharp focus. It does require patience and a steady hand—remember, keep your elbows pushed into your sides to help stabilise yourself—but I've been pleased with the results so far.
Of course it is never going to compete with my 100mm macro on my Canon 6D, but it's not meant to. For a $15 gadget that I can keep in my wallet, what's not to like?

If you missed out on the Kickstarter campaign but are tempted by one, fear not, because you can pick up an Easy-Macro from the Easy-Macro website.
Reflecta has just announced a new Smartphone Scanner that allows you to easily (and fairly cheaply) digitise your prints and negatives to your smartphone for easy sharing. I quite like the sound of this. Capable of digitising 35mm negatives as well as 6 by 4" and 5 by 3" prints, the Smartphone Scanner holds your phone in a cradle while the iPhotojet app works to capture the print or negative that's been inserted into the holder. Once the image has been scanned, you can adjust its brightness and colour before saving it or sharing it to Facebook or by email.

It's compatible with iPhone 4 / 4S / 5 / 5S and Galaxy S2 / S3 / S4 and is supplied with all appropriate cradles. You can power it by USB or battery and it's supplied with four AA batteries, a USB cable, holders and a Quick Start Guide.
The Smartphone Scanner is being distributed by Kenro in the UK and Ireland, and will cost about £40.
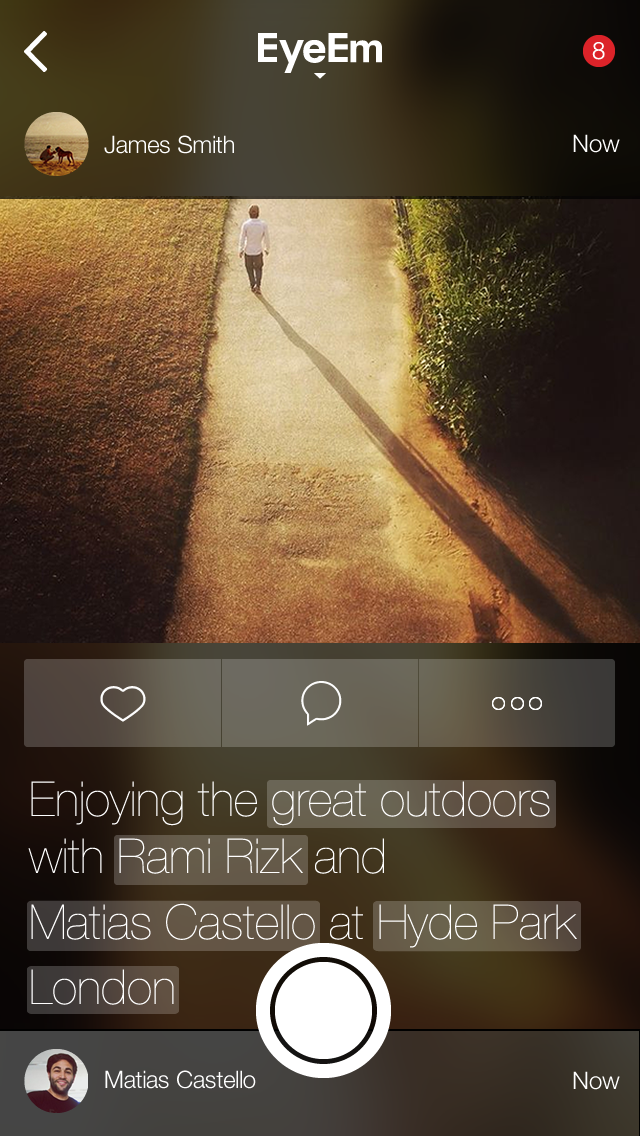
Before Instagram hit the app store with its mission to square crop all of our photos and apply one of a dizzying array of filters, there was a Berlin-based start-up called EyeEm that was offering mobile photographers the opportunity to share their images and get to know each other. Instagram might've grabbed the headlines and the Facebook swag, but EyeEm didn't go anywhere. EyeEm quietly grew its network of users to over 10 million and concentrated on helping them to get the most out of their mobile photography with challenges, blog post tutorials, competitions, and allowing mobile photographers to connect with each other. That's paid off and it's allowed EyeEm to start on its next venture: EyeEm Market. It's what it sounds like, a stock house for mobile images on EyeEm. EyeEm users were invited to join by email this morning and the plan is to launch in late spring 2014.
Terms for members have already been set out: 'You always remain the copyright holder of your images and make 50% net revenue from each photo you sell.'
While EyeEm hasn't disclosed the details of the potential buyers it has approached, it's confident that it could be helping its users to take their first steps into a new branch of the professional image market. To that end, it's published some image guidelines for those who are hoping to make some sales. This includes no pets, no plants in pots, and no selfies (unless they're particularly unusual); and to concentrate on the holy trinity: business, health, and family. Not forgetting geo-tagged landscapes and images that can be hard to otherwise get.
Is this another nail in the coffin of professional photography, showing how everyone can now be a photographer and make money from their smartphone cameras? Regard the situation from one stand-point, and yes, that is exactly what EyeEm Market means. But think about it from a slightly different perspective and it demonstrates how the image market place is changing.
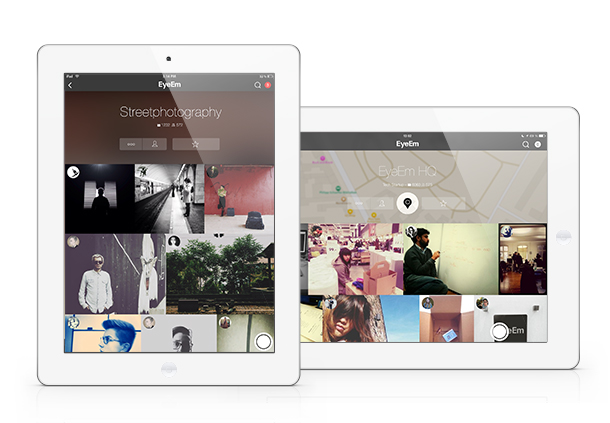
Photo-buyers want mobile images. They're part of the photographic landscape now—part of the zeitgeist, if you will—and we can't put the genie back in the bottle. Instead, we have to embrace it. If we can present photo-buyers with an adequate means of accessing and paying for the images that they want, there's a chance it will drive up quality and ensure that the creative industries are rewarded adequately. It's a damn sight better than images being used without recognition and without recompense because there's no means of buying them.
We can't ignore the market; we have to seize all the opportunties that it presents.
And EyeEm has seized its opportunities and shown that there's more than one way to make a buck from photo-sharing apps.