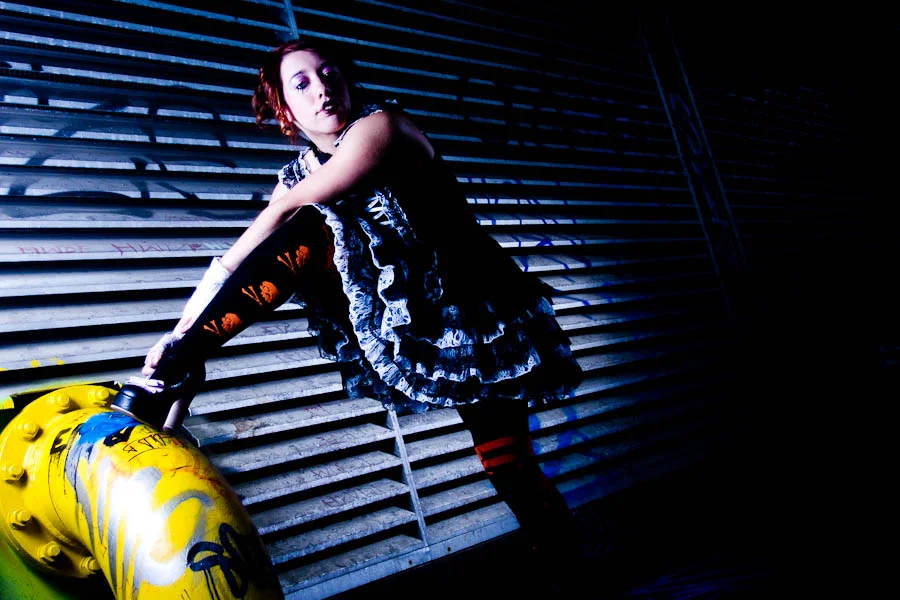
There's no need to be shy of increasing your ISO. There are both creative and practical applications to the third facet of the exposure triangle.

When you hear the term 'high-res' thrown about with such abandon when it comes to images for web use, have you ever stopped to think just how big or how high quality and image meant for the web needs to be?
There's an assumption that high-contrast images are more dynamic, more compelling, more inviting. Have a go at some low-contrast photography. You might surprise yourself with the results.
Balance doesn't mean symmetry; it means an internal consistency and tension within your photos. And it's a vital element of composition.
Great photos might be down to a little bit of luck, but most of that 'luck' you make yourself. Don't believe us? Read on...
As a photographer one of the first things that you need to understand is exposure, or how to control light to create an image. If you're new to photography or have just picked up a camera with manual control for the first time, we suggest that you start here. Learning how to manipulate light to achieve the shots that you want is a life-long project, but these are the foundations.
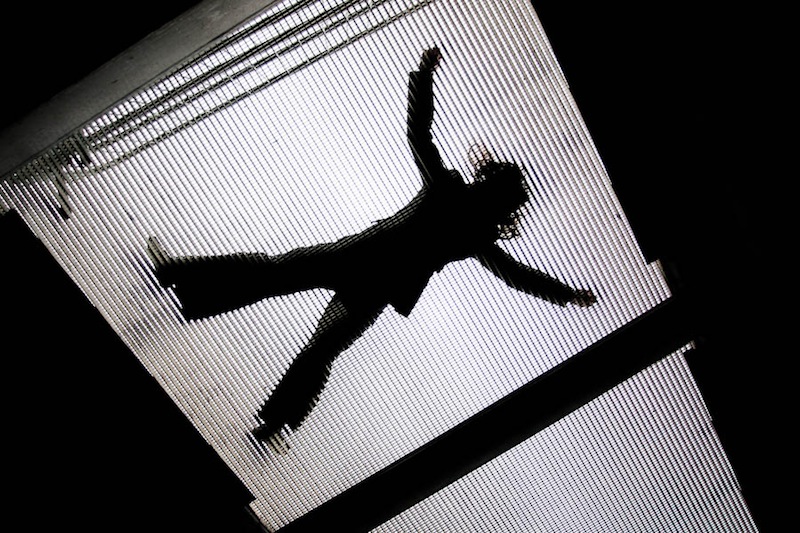
We put pictures—whether they're paintings or photos—into frames to help direct the viewer's eye. The frame is a boundary that directs the gaze: it ensures we know precisely where to look. As well as creating a border from a mounted frame and from the edges of a photo itself, it's also possible to bring focus to your subject and compositional strength and depth by using natural frames within your photos. Despite the name, a 'natural frame' doesn't have to be organic in origin, although trees, streams, and cave mouths do indeed create beautiful natural frames, rather the term describes a frame-within-the-frame. Look out for windows, doorways, and arches—in fact anything that bounces the eye back towards the subject—to act as a frame.
Primarily we appreciate images that include natural frames because they direct the eye straight to the photo's subject. As the eye travels towards the edges of the image—and especially if it contains lines that drag the gaze away from the subject—a frame helps to draw it back toward the focal point, just where you want it.
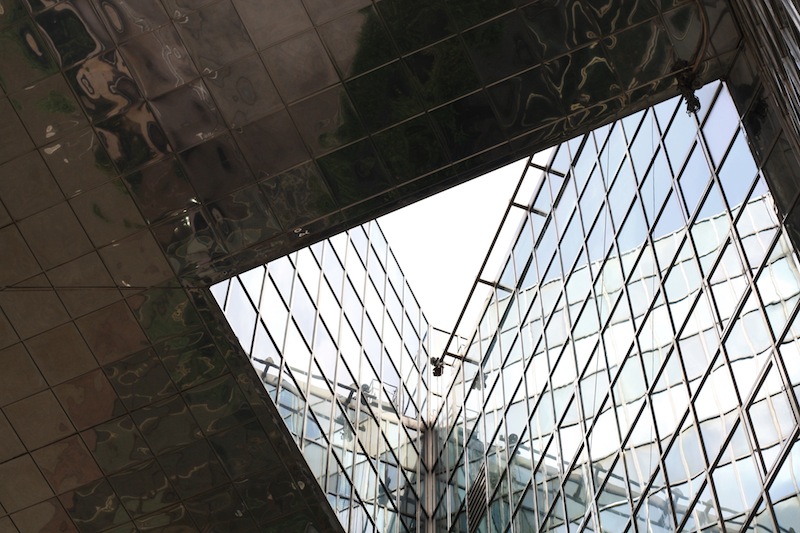
Second, they can bring a sense of perspective and three-dimensionality to an image, giving you the sense that you're looking through one layer of an image and on to another.
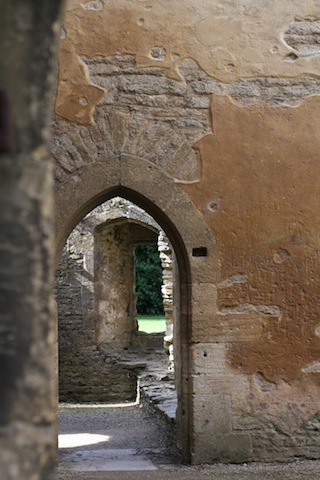
A frame can also give a sense of place or give context to your photos, for example, indoors versus outdoors or a modern area versus a historical one.
Finally, we find images that make use of natural frames attractive because it brings a sense of order to the image, in much the same way that triangles bring order to scenes with multiple subjects. They place limits on the scene and provide it with some boundaries.
Just because your scene has a terrific natural frame within it, it doesn't mean to say that you can ignore any other compositional theory. You still need to consider your use of lines, your subject placement, and the balance of the shot. Remember: combining these compositional techniques can help to elevate a good photo to a great one.
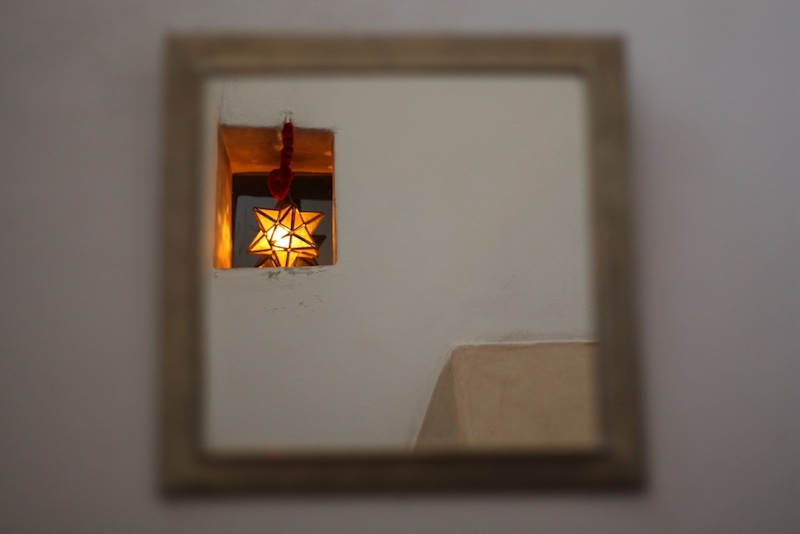
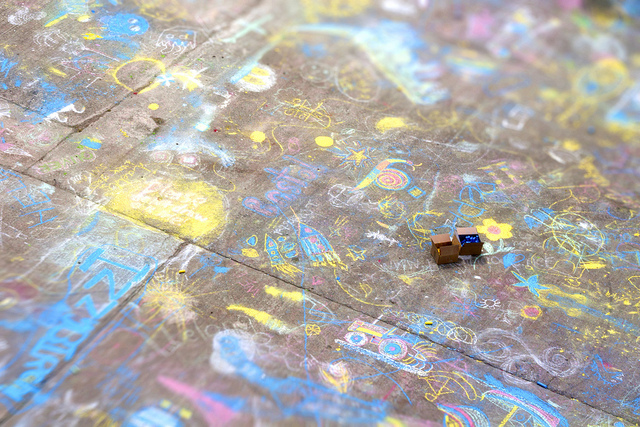
If you're planning on using a natural frame in your composition, consider if you want the frame itself to be sharp or blurred. If your subject and frame are at different distances, but you wish them both to be in focus, you'll need to use a relatively small aperture to achieve an adequate depth-of-field. Of course, having the frame in focus might prove a distraction and defeat its purpose, in which case using a larger aperture and isolating the subject using a shallow depth-of-field will work better.
If you're inside a cave or tunnel and using its natural form to provide a frame for a brightly lit sbject on its outside, you will have to meter accordingly. Spot-metering for the well-lit subject might be the easiest option. Alternatively you could dial in some negative exposure compensation should you prefer to stick with matrix (or evaluative) metering.

In order to capture the full dynamic range of such a scene, with its bright exterior and dark interior, you would need to shoot two differently metered images and combine them using post-processing software.
Using frames-within-a-frame is such an effective compositional tool that it's all too easy to get carried away with them and over-use them. One natural frame within a portfolio is clever; a dozen is cliché. Just because a potential natural frame exists doesn't mean it is the best way to compose the shot; it needs to bear some relationship to the main subject.
If you're not sure if a natural frame is appropriate for your photo, ask yourself: Does the frame add drama to the photo? Does it help to tell a story, add context, or give a sense of depth? Does the frame help to illustrate or enhance the focal point of the photo? If the answer is no to any of these, you might be better looking for an alternative composition.
Pattern. Repetition. When you hear these words, what springs to mind? Maybe a print dress or possibly wallpaper for the former, and likely a sense of ennui for the latter? The words themselves do not necessarily evoke any sense of excitement or anticipation. The prospect of shepherd's pie for supper, every night, for the rest of your life is certainly not the kind of repetition that sets the mouth watering. But the senses are, actually, rather fond of both pattern and repetition. The ear appreciates rhyme, assonance, and alliteration. The eye favours rhythm, flow, and stability, too. By introducing them to your compositions, you have the opportunity to create appealing, compelling images.

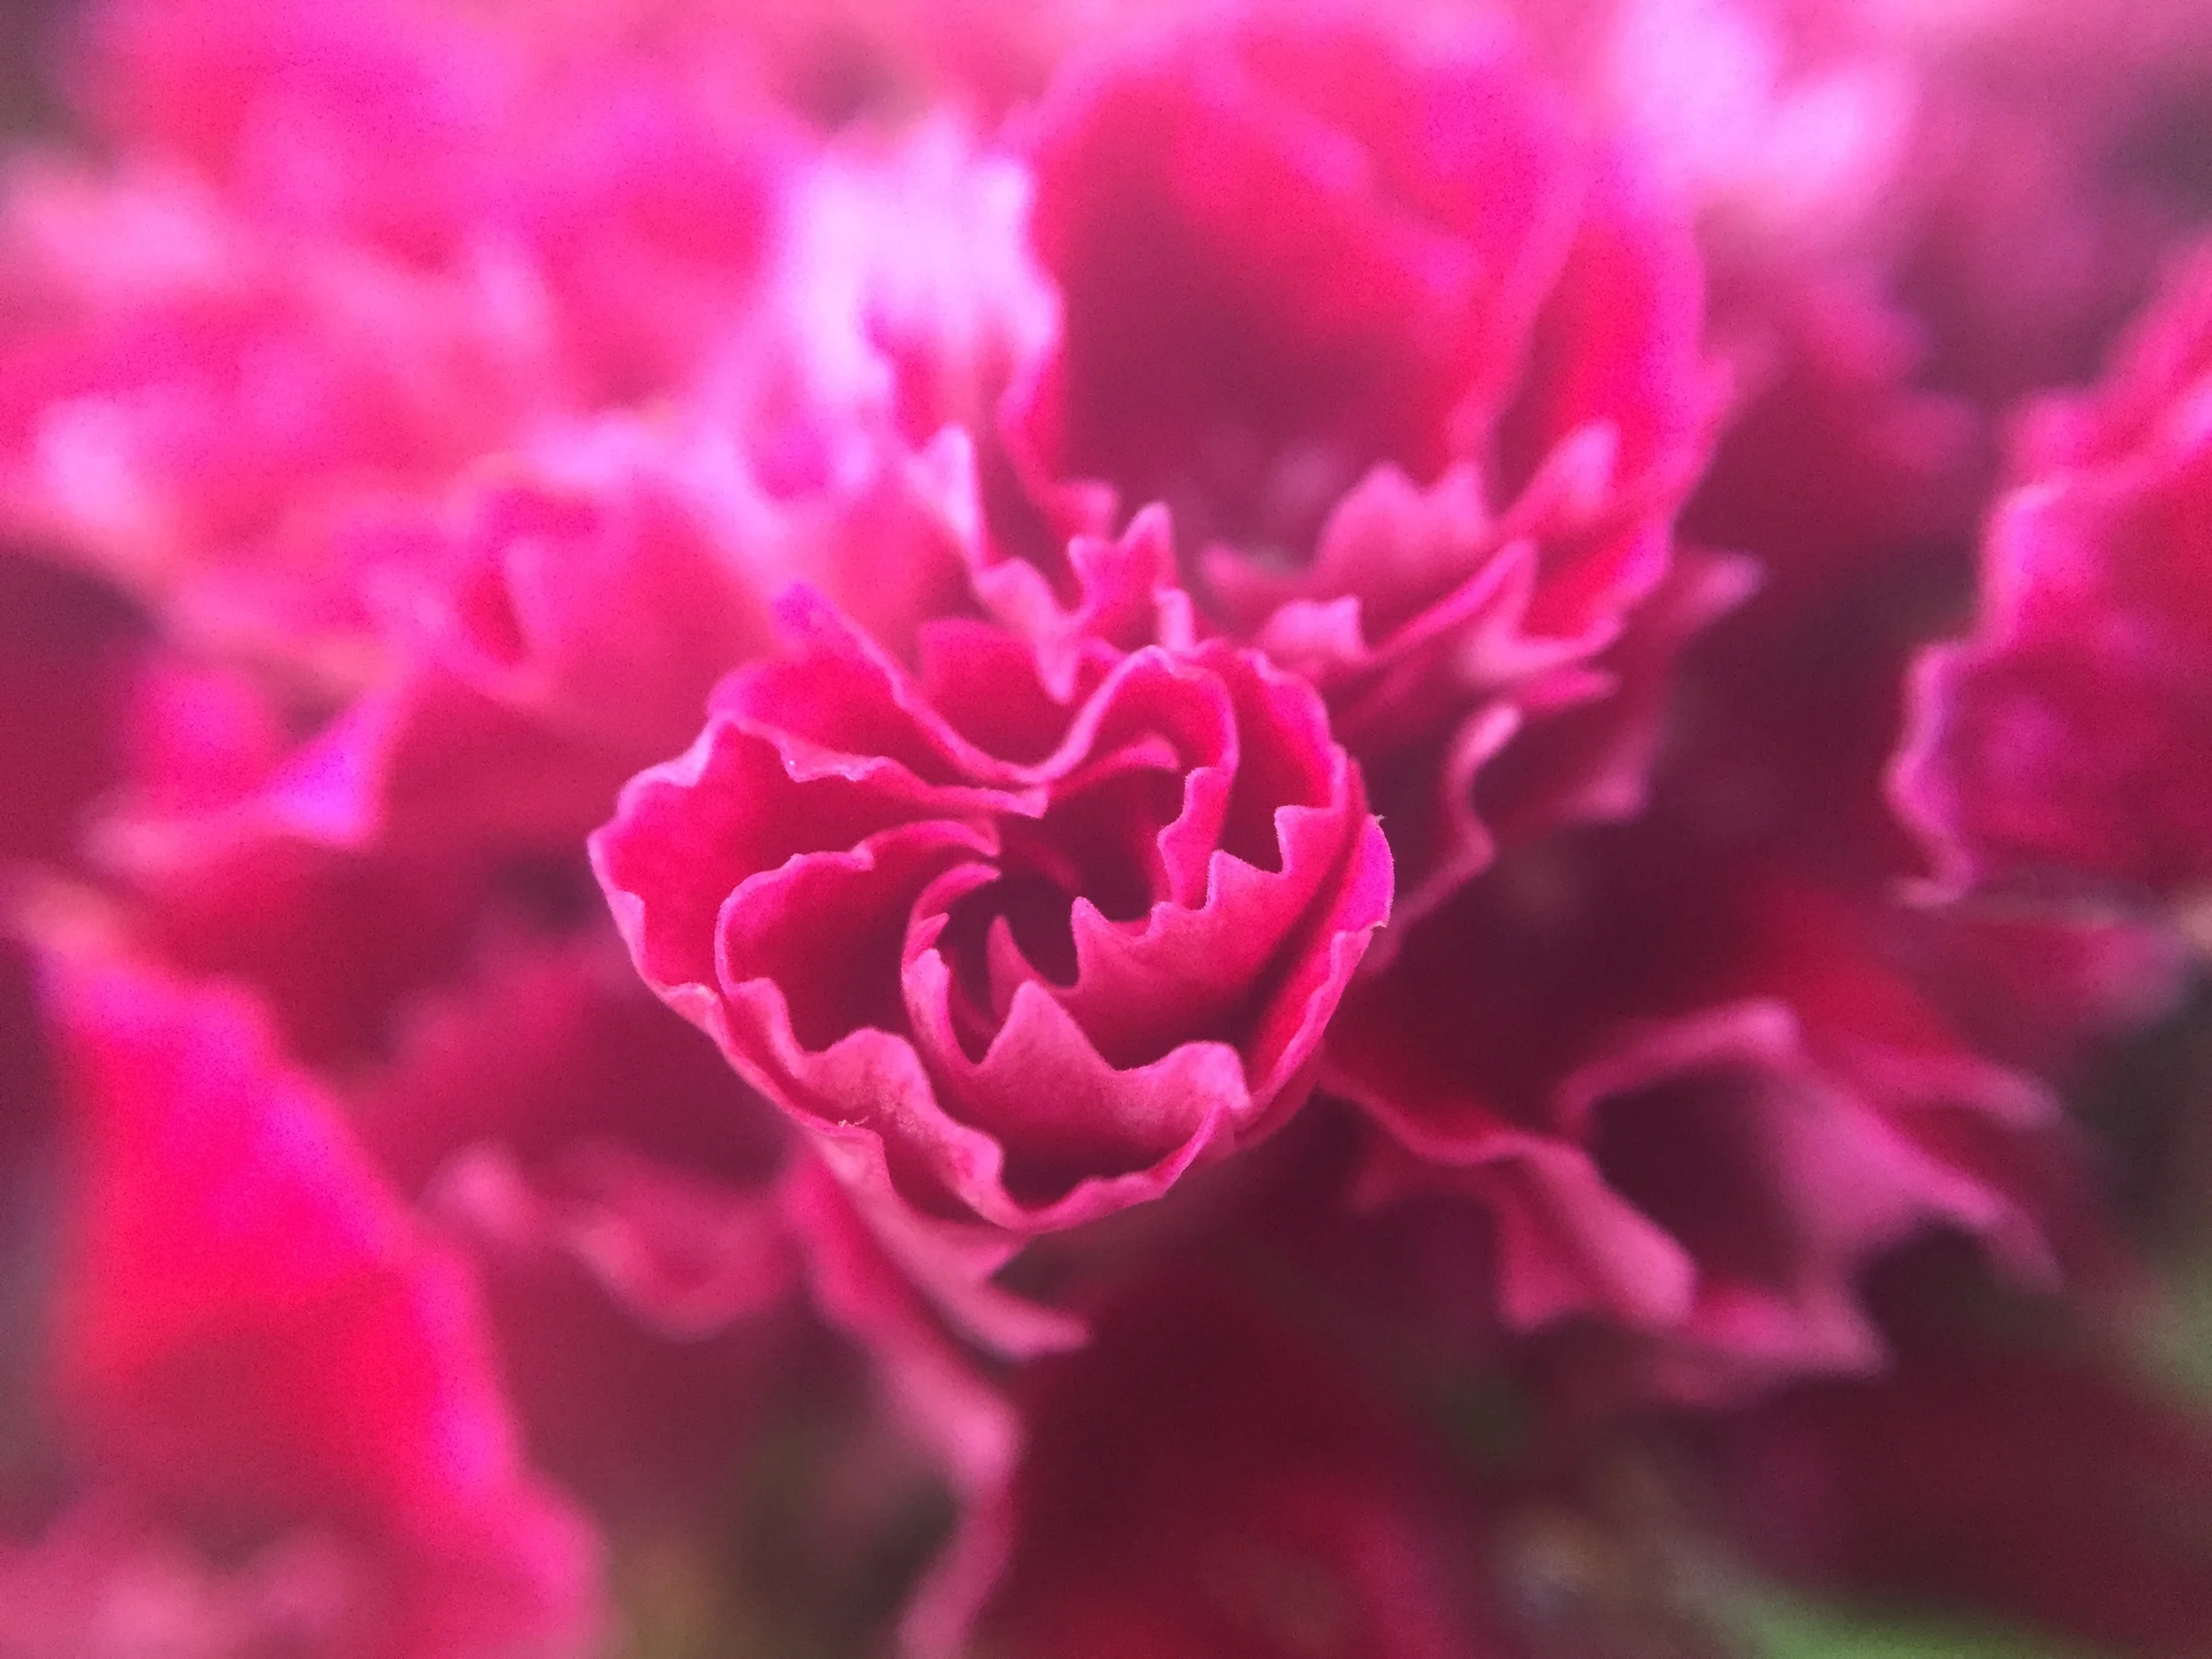
The act of deliberately watching out for patterns to photograph might feel a little, or even a lot, contrived, but once you start you might find it a little difficult to stop. Patterns present themselves both organically and synthetically, from flower petals and fruit peels to tyre-treads and architectural work.

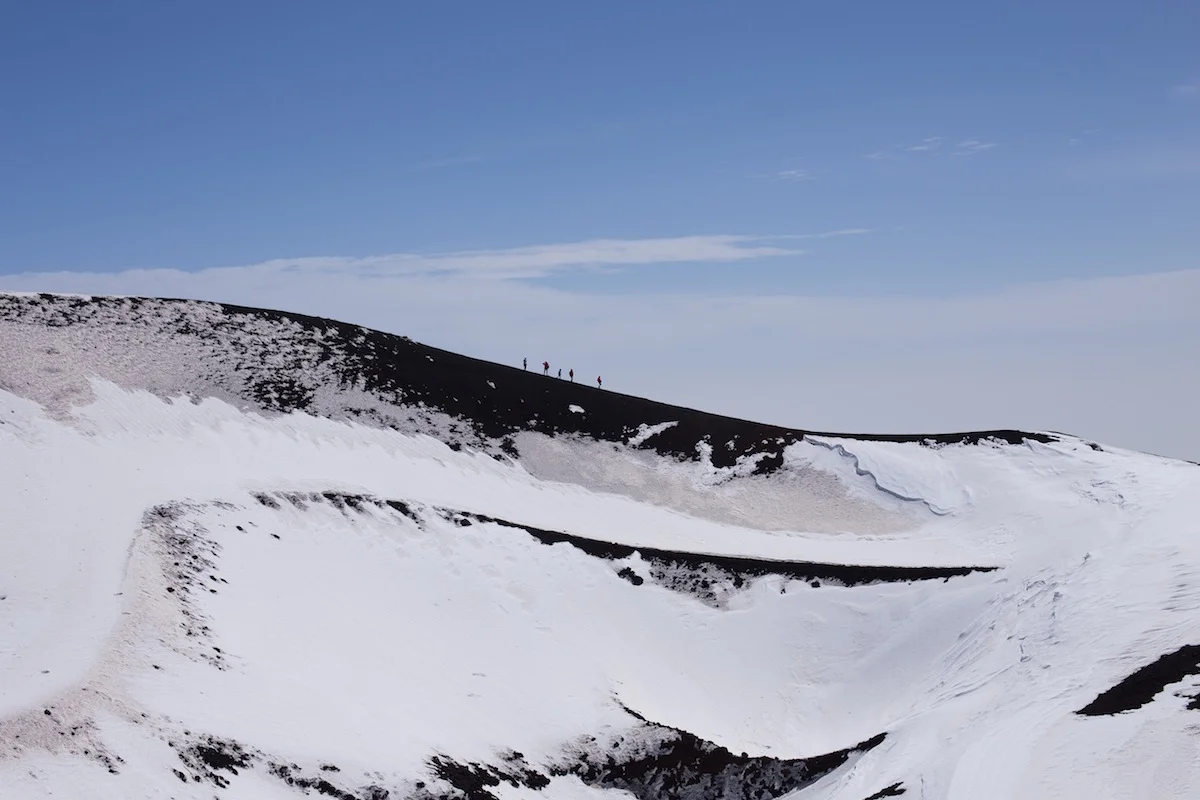
Get in close or shoot from far away; come down low or climb up high and you can pick out patterns wherever you are.
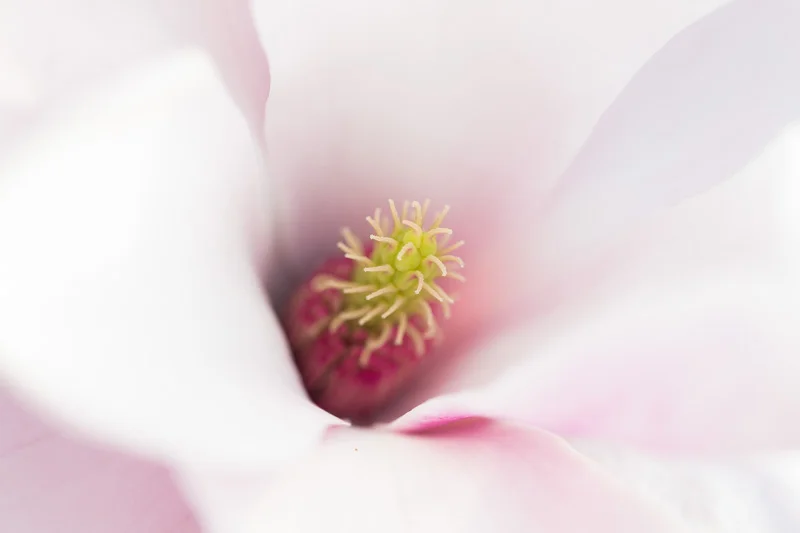
By isolating a pattern from its background, it's possible to imbue it with a sense of the infinite. With no evident beginning or end, for all the viewer knows the pattern extends interminably. Creating this sort of indefinite image is relatively easy: identify a pattern and get in close using either a telephoto or macro lens. By adjusting the aperture of your lens, you can choose a shallow depth of field with the pattern blurring into infinity, or one that's sharper across the frame.

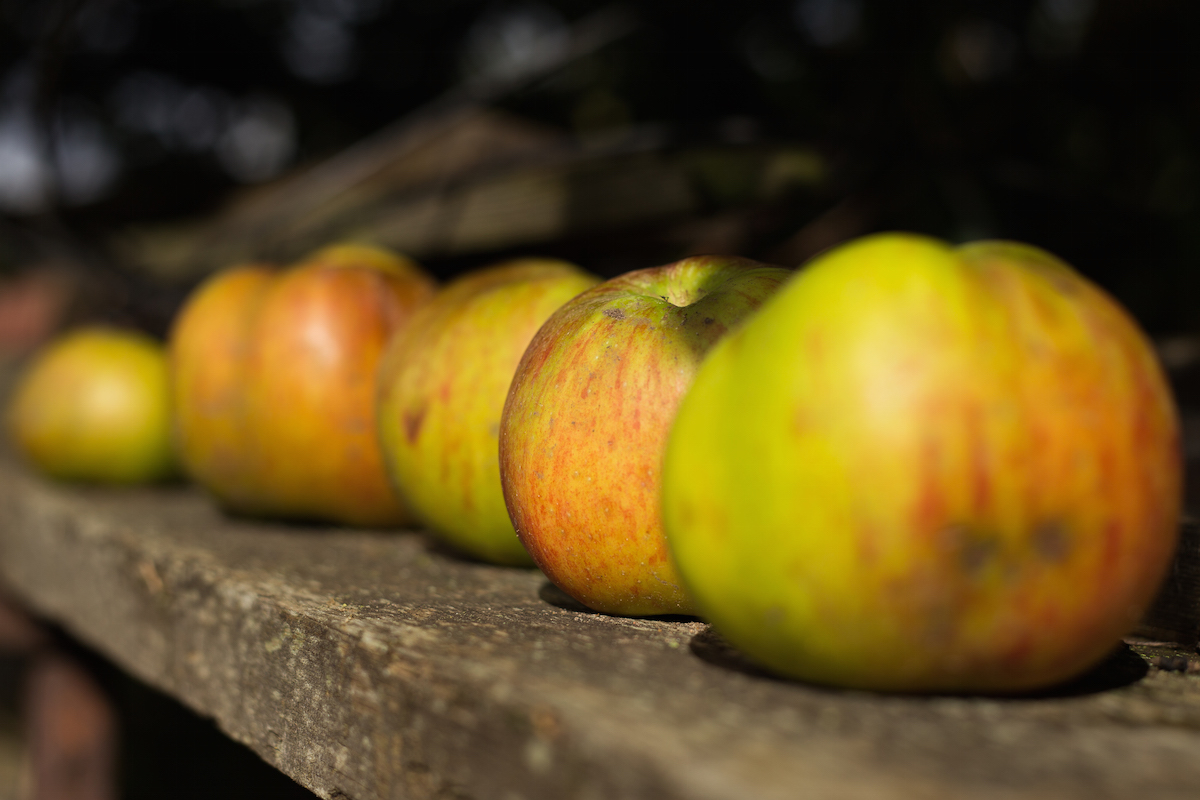
Spot a break in a pattern, make it the focus of your image, and you have a great photo. Look for the red apple in the pile of green, the solitary shoe facing in the wrong direction on the shoe stall at the market, or the silk scarf in the row of woollen ones. Wherever there is an aberrance in a flow, there is a photo.
If you've decided to fill your frame with a single colour, or variations on a particular colour, you might find that it's patterns that give the photo interest.

You'll often find that the constituent parts of the pattern create the compositional imperative for your photo: lines will point in a particular direction and dictate frame orientation or an aberration in a row will set a natural point of focus.

What you need to do is use these indicators to create tension and balance in the frame. Try setting the point of focus off-centre—think of the rule of thirds—and angling lines on the diagonal to prevent them from presenting as flat or confrontational.

Most important is to be certain of what you are trying to convey in your photo—from the feeling of the infinite, the odd one out, to the sense of consistency—to design the strongest image possible.
Remember: pattern and repetition does not have to be boring.
If you're up to date on your photography history, you'll be aware that some of the stuff we used to have to do to get artificial light was basically the same as setting off fireworks next to your camera to capture the photos. Quaint as that feels, this is still the reality for high-speed photographers... If you want a swift way to kill yourself with photography equipment, the high-voltage flashes used to stop fast-moving objects is an easy way to go.
Let me explain. When we're talking about 'high speed' photography, we're not talking about the time it takes to trigger a flash. With a good high-speed flash trigger, you can go from trigger event (say, a laser beam being broken, or a loud enough sound) to strobe flash in a matter of microseconds.
The challenge lies elsewhere: If you're trying to take a photo of something that moves very quickly indeed—say, a bullet—you need a very short burst of light. Now, what photographers traditionally think of as a very short burst of light—like the strobe from your studio flash—is actually a very long burst.
The problem is this: A standard .22 bullet has a muzzle velocity of 340 metres per second. So, if your very high-end camera with a shutter speed of 1/8000 second were to try and capture this bullet in flight, you'd be out of luck. Even at 1/8000 second, your bullet will travel 4.2 cm / 1.6 inches. That means you get a tremendous amount of blur in your photo — you certainly couldn't stop it.
So, what is a poor photographer to do? Well, a flash has a much shorter duration. A PC Buff Einstein (known to have a very short flash duration) will be about 1/13,000 second—but, when translated to our flying bullet, we're left with a blur again—2.6 cm / 1 inch is still a streak of blur. That's no way to stop a bullet, photographicaly speaking.
Even really short-duration strobes—like a Nikon SB-80DX at its lowest power output—has a duration of 1/22,000 second. Impressive, but no match for our trusty bullet — 1.54 cm / 0.6 inches. That's more like it, but still results in a rather blurry image.
So, what's a poor high-speed photographer to do? Well, Harold Edgerton, who was the father of high-speed photography, used an 'air gap flash'. If that sounds fancy, trust me—it really isn't. Imagine an electrode and a cathode, with a spark jumping between the two. In essence, you've got lightning—yes, real lightning—happening in your photography. It isn't difficult—anyone with a basic knowledge of electronics can build one—but it's incredibly dangerous. As in, could-very-well-kill-you-type-dangerous. We're talking at least 20,000 volts to create a spark that's bright enough to use for photography.
There are some slightly-less-likely-to-kill-you solutions out there, but they cost the earth: Upwards of $2,000 for basic short-duration strobes. Interesting, yes, but you'd really have to love high-speed photography to lay down that sort of money to embrace your hobby.
The solution, it seems, might be in technology. The clever lot over at Vela Labs have come up with a device they call the Vela One. It's not available to buy yet, but a Kickstarter campaign is aiming to rectify that situation.
To solve the 'this thing might kill you' and the price-tag issue, they're using LEDs designed for architectural use (i.e. mega-bright LED bulbs), and then they blink them very, very briefly.

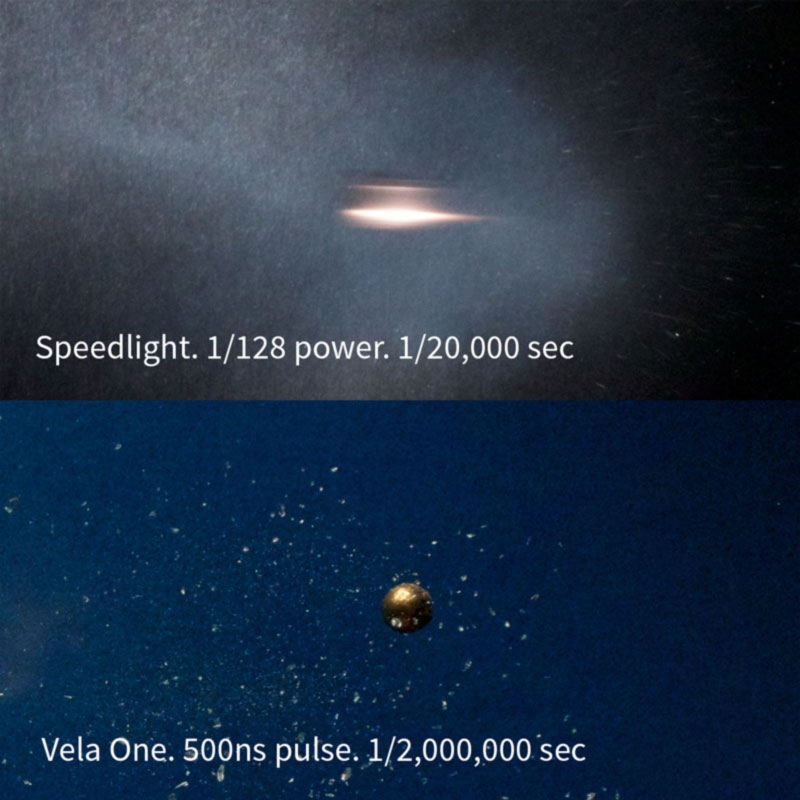
By dumping a ton of power (in fact, 2000 times what they are designed for) into the LEDs for a brief period of time, they're able to get a lot of light out of the LEDs, for a very brief burst. How brief? Well, guys at Vela Labs claim it can be done in 1/2,000,000 of a second—which translates to 0.017 cm—or about twice the width of a human hair. To a photographer, this means pin-sharp photos, even of objects of moving at high speed.
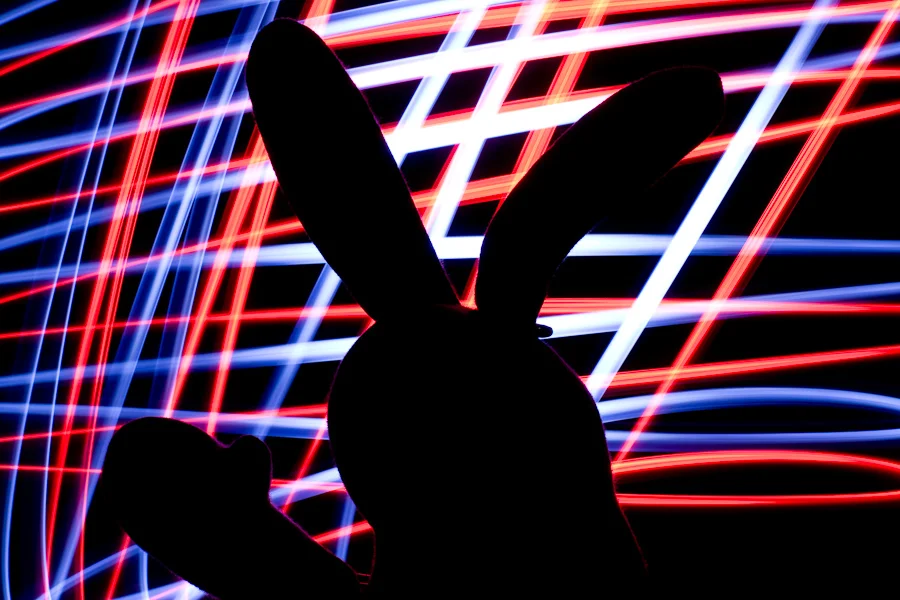
Of course, this doesn't come for free: The cost of super-brief flashes of light is brightness. That is true for an air-gap flash, but also for the Vela One; but it looks as if the One offers a pretty good trade-off between flash duration and brightness. The photos speak for themselves.
At £550, it's not cheap, but it's a lot more affordable than some of the other high-speed options out there (although there's a VIP Early Bird offer of £400, but you need to be quick with only ten available)... And at least it's unlikely to kill you as you use it, which I find is always a feature I look for in most of my photographic kit.
The results? Well, let's take a look:

If you want the Vela One to exist, you'll have to head over to Kickstarter, and be quick about it, too. The campaign ends in only 22 days, so get a wriggle on!
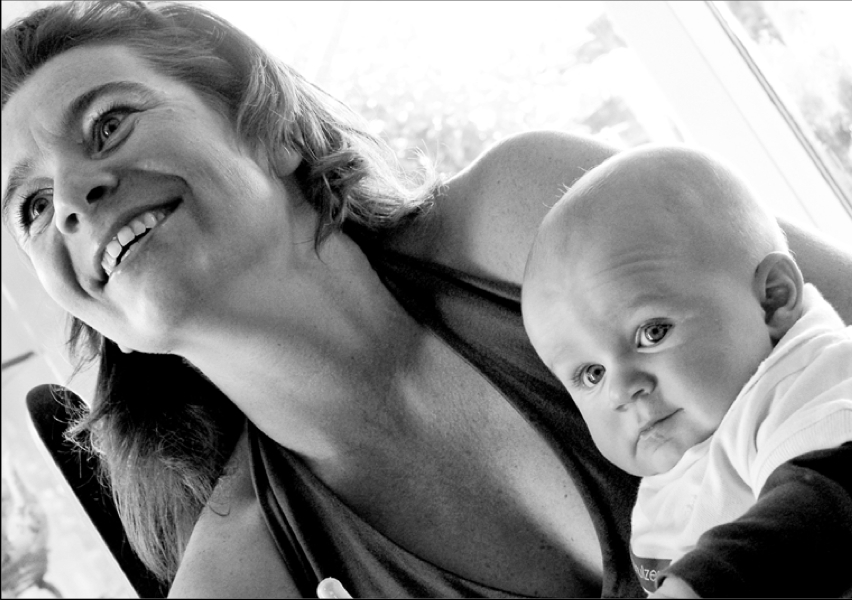
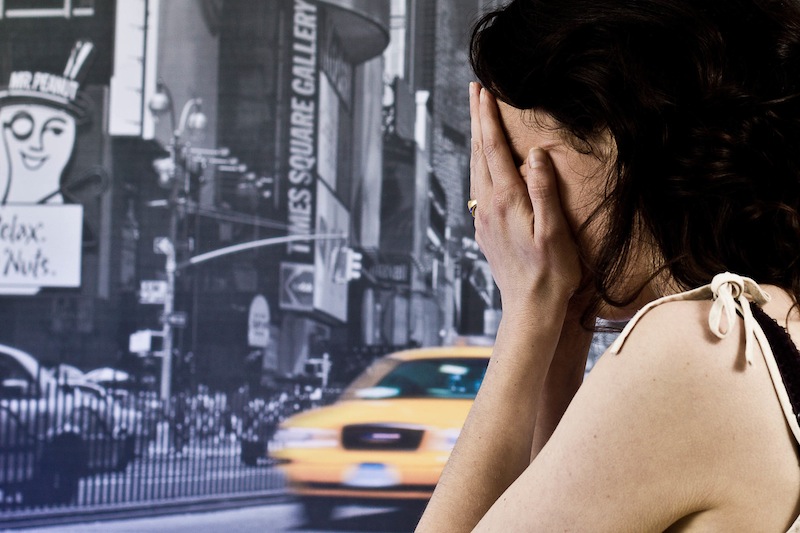
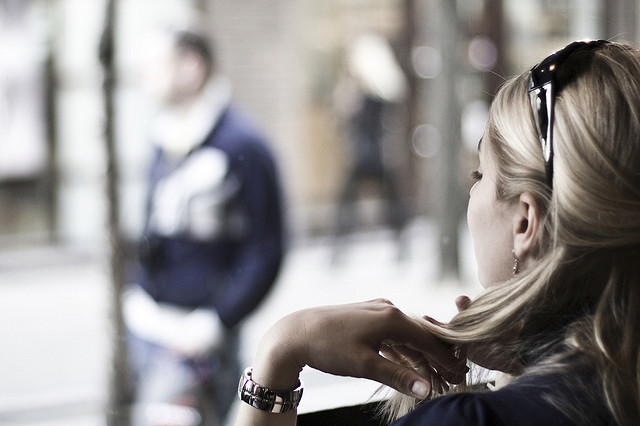
Have you ever had someone take a photo of you and a friend, only to find out later that they cut off the tops of your heads? It looks ridiculous, and if someone’s head 'sticks out' of the composition, your photo is ruined. In other words, it’s not hard to imagine where the don’t-crop-people’s-heads rule came from. When you are working with people and portraits you will soon learn that there are good ways to crop people, and others that are not so good. Cropping heads is at the top of the naughty list. Don’t do it!

Except that, sometimes, cropping heads can be highly effective.
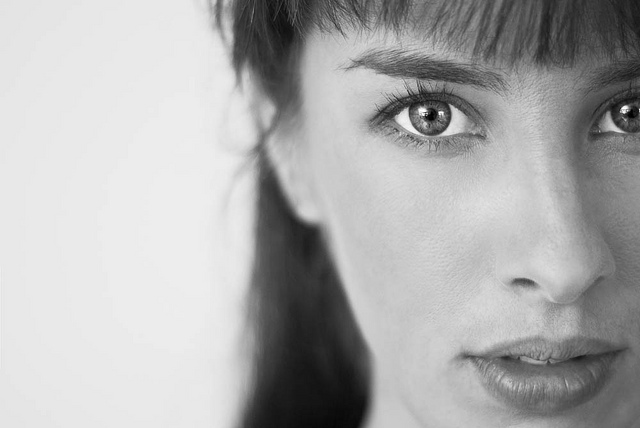
When can you break this rule-of-rules? When you've got in close—really close—to your subject. If your composition is focused only on somebody’s face, it can improve the shot to crop in close.

Don't be afraid to break the rule and crop in close and slice something off of the top, bottom, or sides of the head when the features of the face are the focal point of your composition. The reasoning is this: if you’re going to get in close, get in really close. By filling the frame completely with someone’s face it can make cropping her or his head unavoidable, but it also doesn’t look unnatural.
The key is to decide whether your composition is mainly about the body, upper body (shoulders and above), head, or just the face. Each type of shot has a different purpose, and only the face shots will look natural if you decide to crop the head. Otherwise it merely looks like you failed to plan your shot.
But in-keeping with the adage that if you're going to break the rules, break them properly, if you are going to crop into somebody’s head, make sure that you do it properly. A composition where only a thin sliver of someone’s head is cut off looks accidental. If you go even closer and cut them off across their forehead, the composition looks a lot more powerful, and at least nobody is left wondering whether or not you did it by accident!
Be bold!
 More unusual ways of looking at things, remembering rules, and then breaking those rules, are in my lovely book, The Rules of Photography and When to Break Them. It's available as an e-book and in a dead tree version (UK, US).
When you've been shooting for a while, you might start to notice that as well as being able to handle your camera more deftly, you're also pressing the shutter more instinctively and with a greater degree of conviction that you'll create a good image. Indeed, you are producing a greater number of better photos. While this might seem to be some form of photographic clairvoyance, it's actually rather more prosaic than that. You've actually grown more observant as a photographer and instead of developing some kind of sixth sense, you're learning to look.
First and foremost, and maybe without even realising it, you're becoming more attuned to light, to its quality, to its direction, to its temperature, and to its quantity. You're getting a feel for the type of light that makes for great photography and you're growing a better understanding of where to stand to make the most of it.
If you're still learning about light, start by thinking about from where the light is coming and how it's falling on your subject. Consider what's illuminated, what's in shade, and how where you're positioned will have an imapct on that.
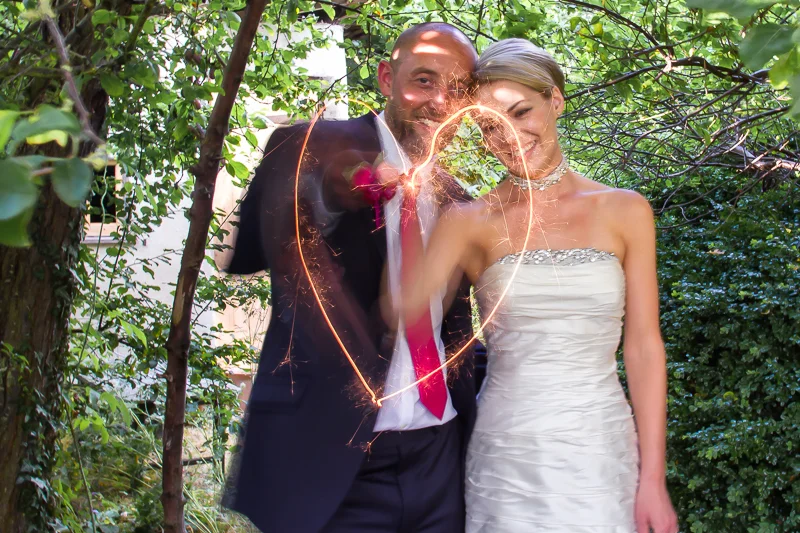
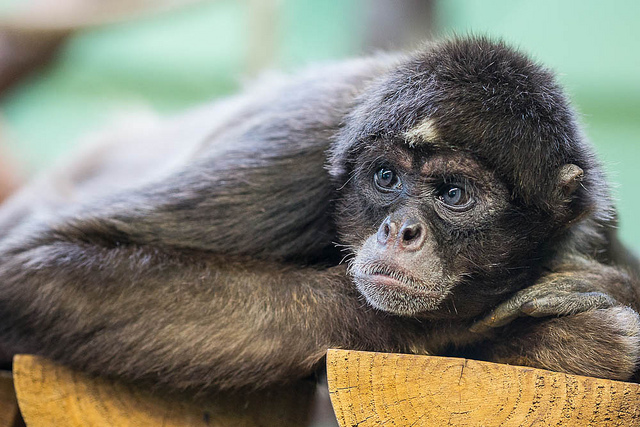
When you understand how a game is played or the schedule of an event, it makes it easy to anticipate how things might go or what should happen next. For example, a tennis player about to receive a serve is likely to stand on the appropriate side of the court; a religious marriage ceremony usually follows a particular format. These are illustrative examples of 'domain knowledge.' By knowing how tennis is played and religious weddings are conducted, it gives you a fighting chance of predicting what’s going to happen next.
That sort of 'domain knowledge' is vital in many aspects of life, but it's also darned useful when it comes to photography, whether it’s nature, landscape, portrait, wedding, or even street photography.
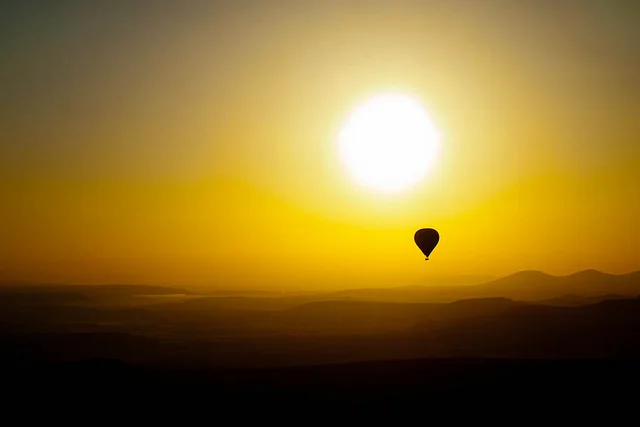
The more familiar we are with our subject matter, the better we become at anticipating its 'movement': its pace, nuance, and rhythm. If you photograph enough sunrises and sunsets, you'll develop an intimate knowledge of how the light changes as the sun sinks beneath the horizon or the impact of clouds on colour. Similarly, if you spend enough time observing people in a particular public place, you’ll become more familiar with the way they interact with one another within that space. Complete enough portrait sessions and you’ll become quicker at noticing how comfortable or otherwise your subjects are in front of the camera, and interact with them so that you are able to capture their essence.
When it comes to sports photography, knowing how the game works and what to expect is a vital element in ensuring that you can get a shot. Understanding the idiosyncracies and routines of animals will help you with your wildlife and your pet photography.
This increased observance, whether of people, environment, or structure, increases your chances of capturing a precise moment because you know what to expect.
It helps then, to be prepared for whatever it is that you're planning on photographing. As well as doing some research, make an effort to actively think about what you see. Even when you're out and about and not especially in a position to be taking photos, train your eye to look for 'moments': for shafts of light, for interactions and reactions, for interesting backgrounds or subjects. Being able to anticipate what comes next will help you to get the shots you want.
Perhaps the most common mistake anyone who's new to photography makes is adopting a 'scatter-gun' approach. All too often when confronted with a scene worthy of photographing, the temptation is to fire away without really thinking about the images we’re capturing. This is partly because it costs nothing to take a photo these days, and partly because we feel that if we take enough shots we’re bound to stumble across the image we want to capture.
This is something that we've covered in depth of Photocritic before now, but it bears repeating. It is much better though to slow down and spend some time observing the subject. This isn’t always possible if you’re photographing a short-lived or unexpected event, but in most cases you do usually have time to consider your subject and assess it for its specific qualities. You can explore a variety of shooting angles, change your point of focus or depth of field, or wait for a change in the light, even shift your subject’s position or posture. You should learn to visualise the image you want to capture and actively seek out that image, rather than reacting to images you’ve shot in the hope that one of them fits the bill.