


Please go and vote, but please don't take photos in the polling station.

When you hear the term 'high-res' thrown about with such abandon when it comes to images for web use, have you ever stopped to think just how big or how high quality and image meant for the web needs to be?
There's an assumption that high-contrast images are more dynamic, more compelling, more inviting. Have a go at some low-contrast photography. You might surprise yourself with the results.
Balance doesn't mean symmetry; it means an internal consistency and tension within your photos. And it's a vital element of composition.
Great photos might be down to a little bit of luck, but most of that 'luck' you make yourself. Don't believe us? Read on...
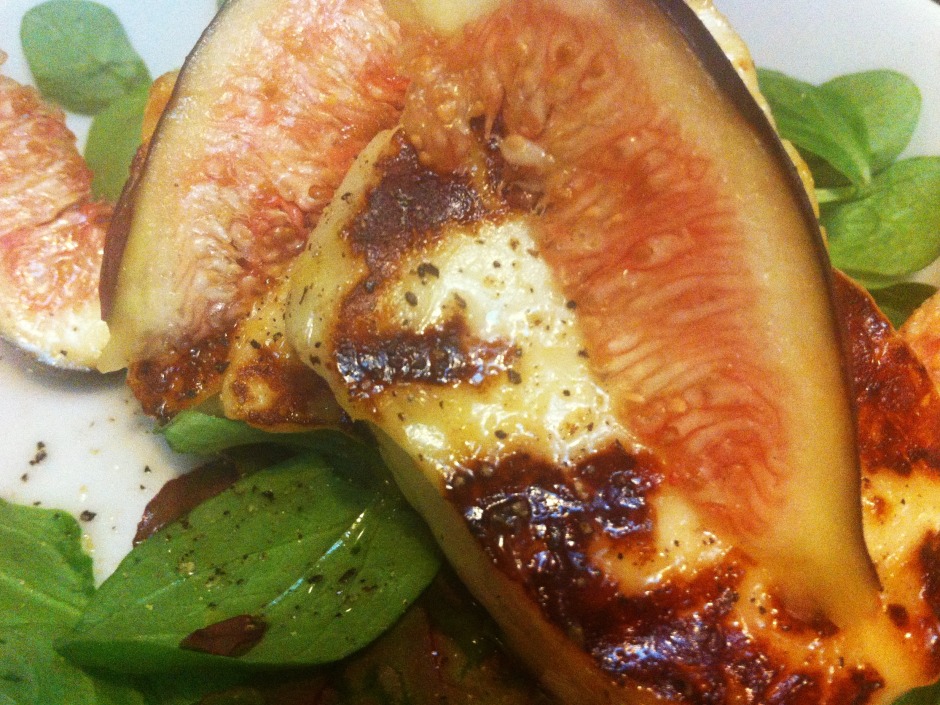
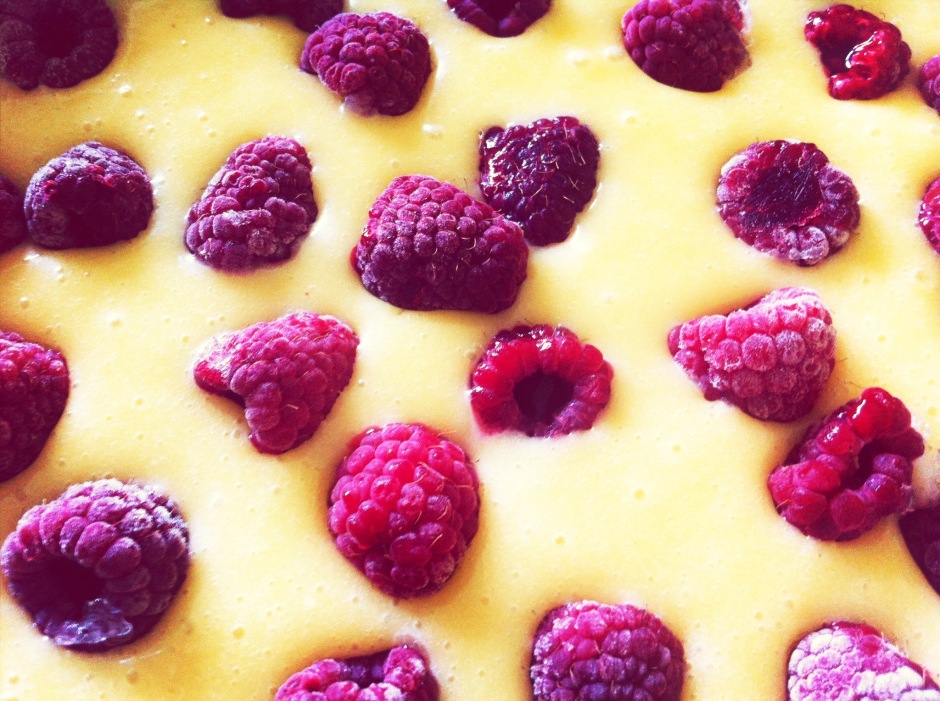
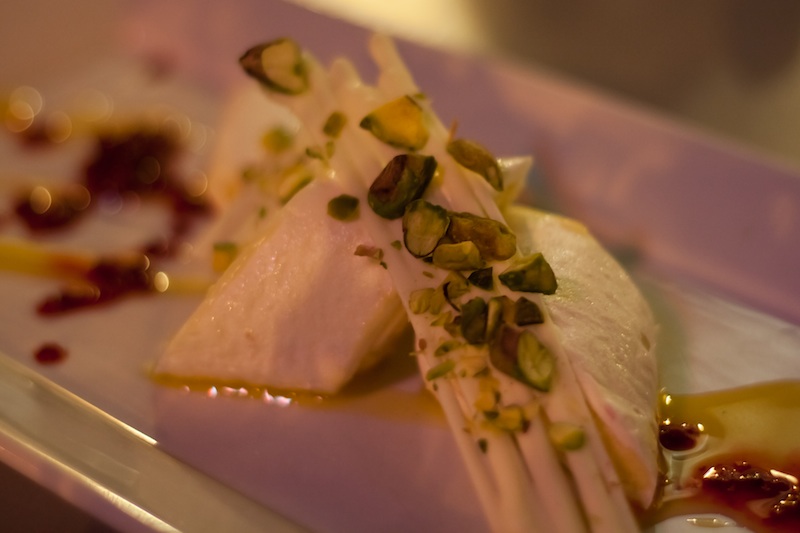
A bird has just tweeted in my ear that today is International Food Photography Day. We've already quite a few articles here on Photocritic that delve into the mystery of making brown gack look tasty and cold chicken appear hot. But seeing as most people aren't going to be pulling out their dSLRs in Le Gavroche or the French Laundry to take photos of their dinner (or at least, I hope not), we thought that we'd focus on smartphone food photography today, for when you don't have a controllable aperture or variable shutter speeds at your disposal.
We probably sound like a broken record here at Photocritic, urging people to get closer, but we really do mean it. And we definitely mean it for food photography. Lean in.

Use natural light, and lots of it, to photograph food. Avoid flash wherever possible, especially smartphone flash. It's rarely a good look.
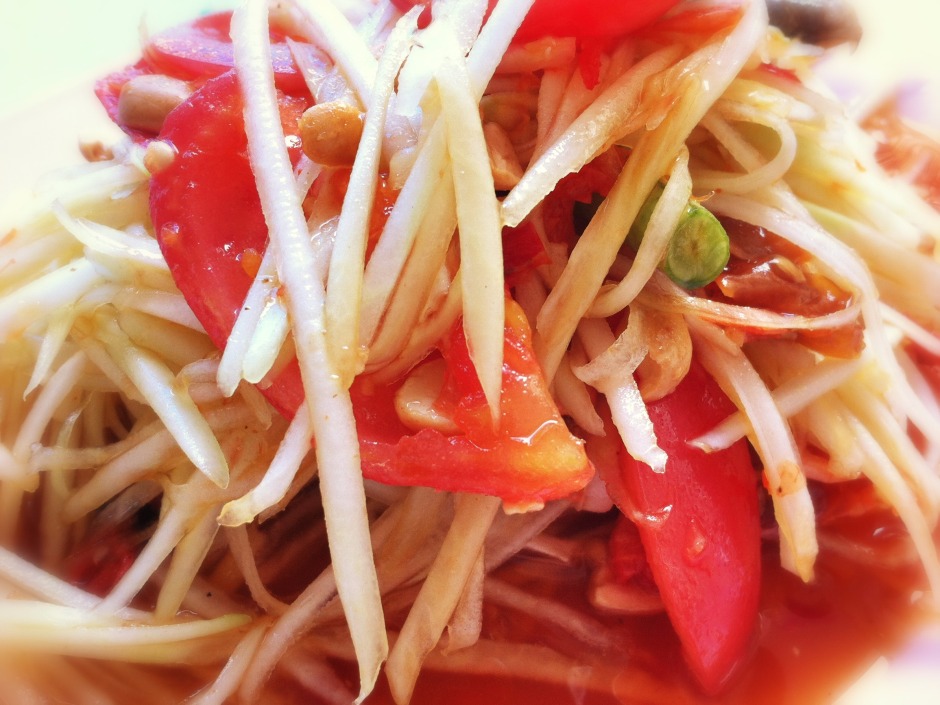
Experiment with different angles when it comes to food photography. Up high, down low, looking across your food. Give it a whirl!
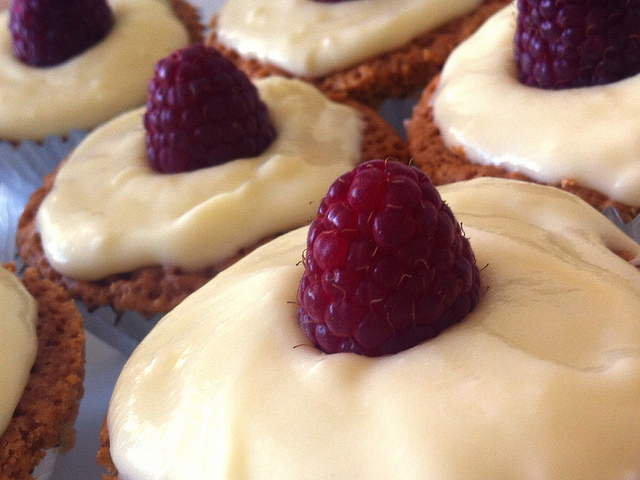
You really do not want clutter distracting from your food. So check for spills, crumbs, and cruet sets in the background. Think about using this tip in conjunction with getting closer and altering your angles for maximum impact.
Wobbly white balance can manage to make even the most delicious, fragrant, and beautiful dish look unappetising. Whites need to look white and not tinged with mouldy greens or unnatural blues. Fire-up Snapseed, load up your image, and push that 'Warmth' slider around until the colours look right.

As well as adjusting the white balance of your food photos, don't forget to give them a quick crop if they need it—especially to slice away anything extraneous or distracting in the background—and to increase the brightness and contrast a smidge. That will give your image a bolder and more appealing feel.
I don't tend to add filters to my food photos, but if that's your thing, Mayfair gives reliably good results in Instagram, I like Vanilla in EyeEm, and ColorVibe is good in Flickr. But it doesn't hurt to play around yourself!
It doesn't matter how tasty your chickpea curry actually is, making it look appealing can be very difficult without some serious styling. The colours are dull and the textures uninteresting. The best photos of food make you want to reach into the image and snatch the cherry off of the top of the cake. They tend to be bright and full of feeling. So be selective in what you photograph. Think about colour, texture, and pattern.

And now you can put your new-found skills to use by entering the Fujifilm and Pink Lady Snap the Rainbow competition!
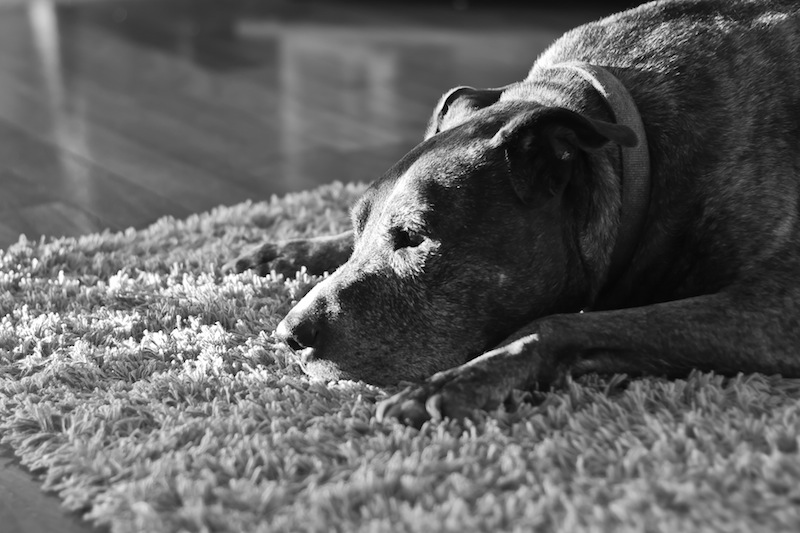
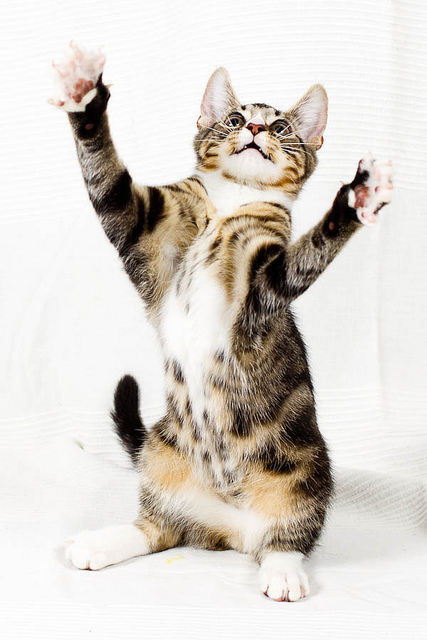
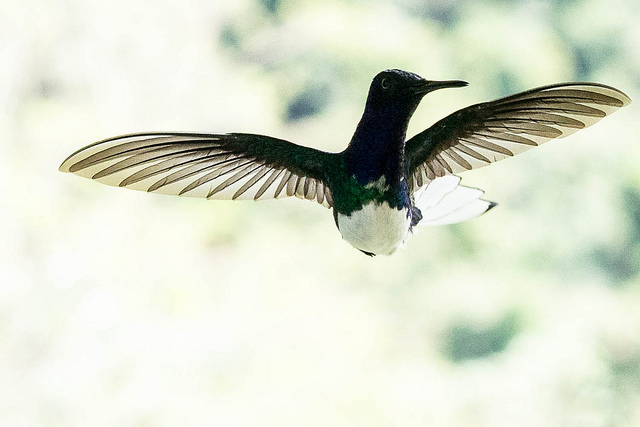
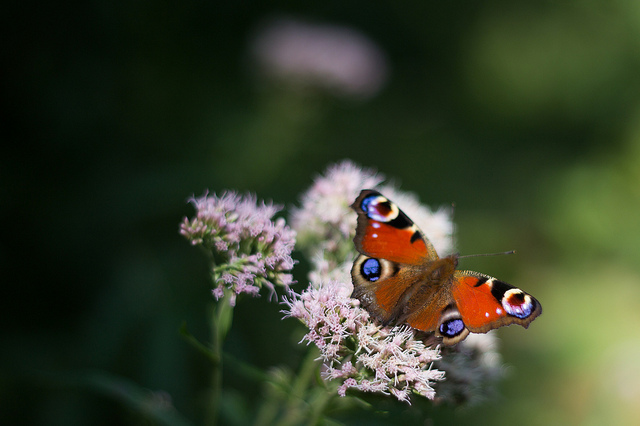
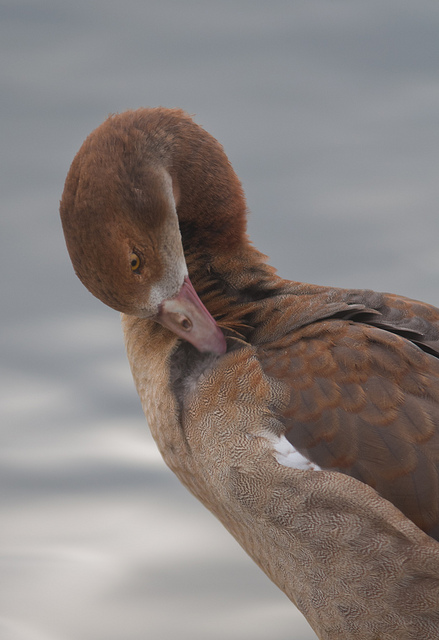
The number of photos of cats floating about the Intergoogles is testimony to how much we love photographing animals. But I bet we could all do it a bit better, whether they're our pets, cows on the closest farm, or gazelles in the wild. We've put together our top tips, dos and don't, and favourite recommendations for animal photography.
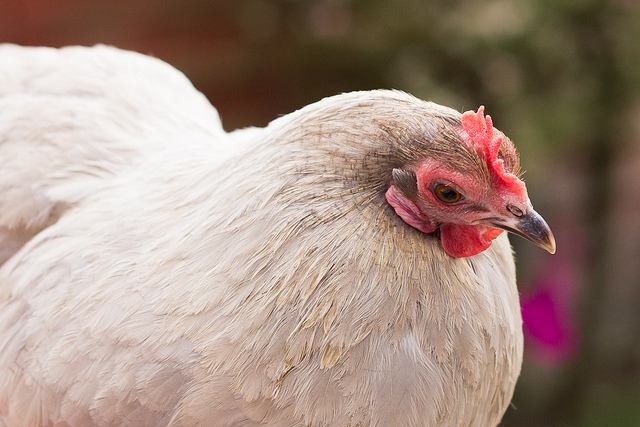
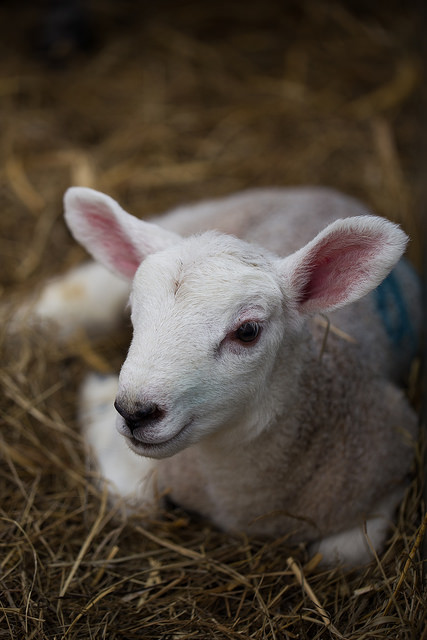
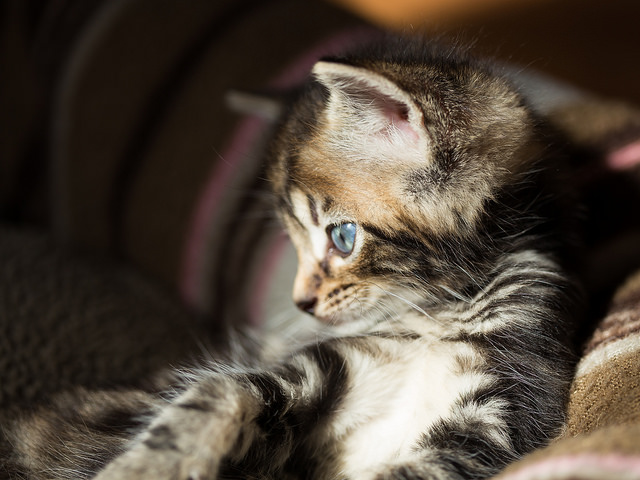
Photographing pets is distinctly similar to photographing children: get down to their level, gird yourself with patience, and be ready to move fast. Much like my favourite photos of my nieces and nephews, many of my favourite photos of animals have been captured sitting (or crouching, in the case of mucky straw) on the floor, allowing them to play about me and simply being ready to capture kittens, lambs, hens, dogs, and various assorted being cute or idiosyncratic.
The chances are that you'll be exhausted and maybe a bit dirty at the end of it, but you should have some good photos. There is, of course, a bit more to it than that.
When it comes to taking photos of animals, some things should be on the checklist every time.
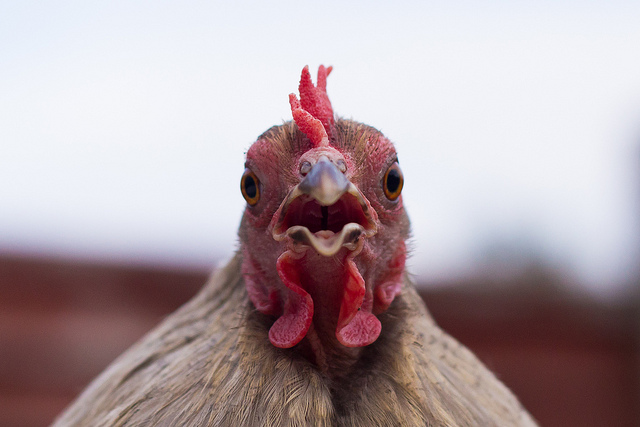
Get the eyes in focus - just like a portrait of a human, your viewers will be looking to make eye-contact with the subject, so get the eyes sharp.
Capture spirit - again, it's the same with humans, you need the photograph to convey the playfulness, the inquisitiveness, or the quirkiness of the animal.
The subject needs to be doing something - it doesn't matter if it's a dog asleep in a contrived position or a kitten chasing a toy, there needs to be something of interest happening in the shot.
Consider the background - you don't want clutter or a litter tray in the background of your photos, so pay attention to where you're taking them.
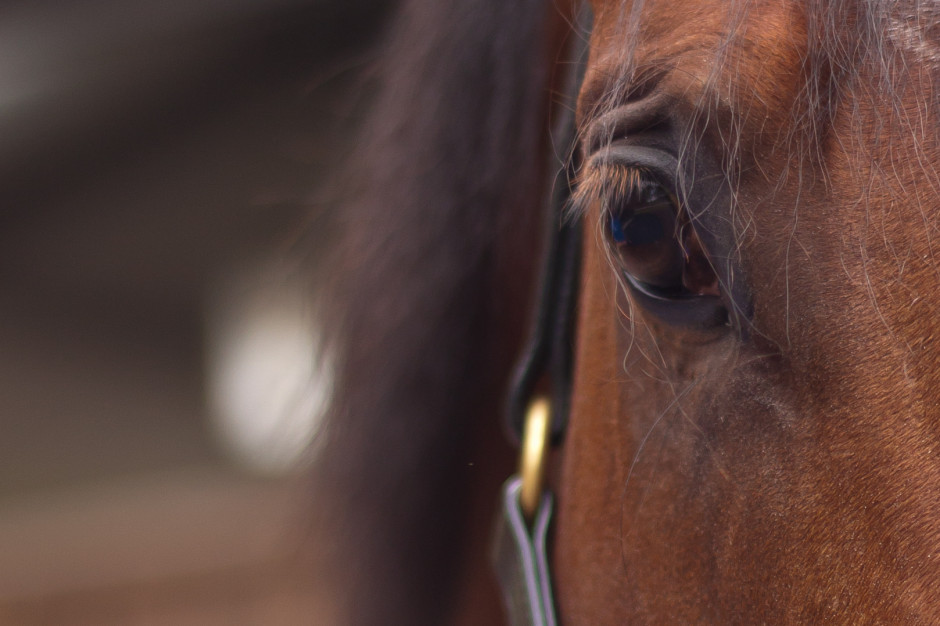
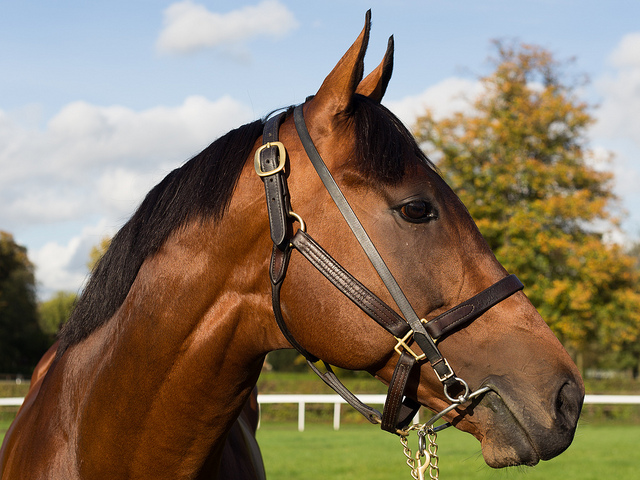
Be respectful - Don't do anything that hurts or distresses an animal for the sake of a photo. Don't pick up rabbits by their ears, provoke dogs, or yank horses' chiffneys or headcollars. Not only will the animal not like you for it, but it's unacceptable behaviour.
Depending on the type of photo you're trying to take, you will need to make some choices. There's no right or wrong to these points; they're up for consideration.
Flash - Some people say avoid it altogether, others say use it judiciously. I'd say for heavens sake don't startle a sleeping dog or potentially damage a very young animal's eyes with flash, but used properly, you can produce some cracking shots with artificial light.
Kit - I've photographed animals with all sorts of camera and lens combinations. Sometimes, it's been a case of grabbing what's closest, so my iPhone, to ensure that I didn't miss the moment. Then again, I've headed down to the yard armed with all manner of lenses and a dSLR for photographing horses. Remember the adage that the best camera is the one you have with you, but don't forget to think about what you're trying to achieve with your photos, from portraits to macros to action shots, and select your kit appropriately.
Use a fast shutter speed - Unless you're trying panning, do aim to keep your shutter speed as fast as possible to avoid motion blur, particularly if you're aiming to capture animals at play. Up the ISO if you need to; noise is easier to fix than blur.
Consider your angles and proximity - while it's advisable to get down to the same level as your subjects, do consider shooting from above and below, too. The key here is to consider what you're doing and the story you're telling, rather than reverting to the default of standing up to shoot.
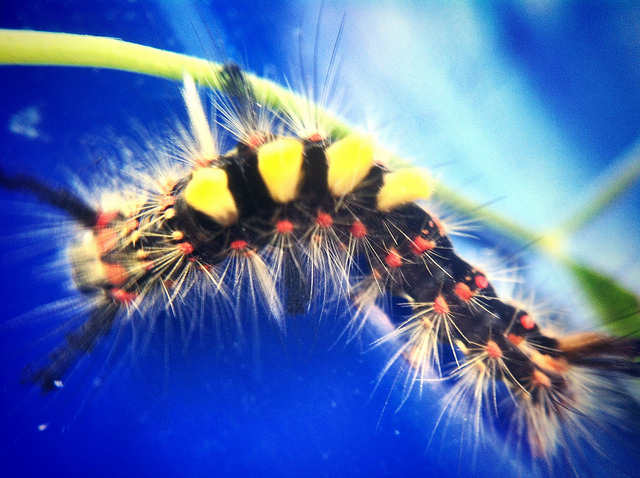
As well as the usual recommendation of getting closer, have you considered getting really close to your subject? Macro and abstract shots can work wonderfully to intrigue, inspire, and give a different perspective on your subject.
Grabbing their attention - I talk to dogs, use toys for cats, and make clip-clopping noises to encourage horses to prick their ears. If you know your pet, you'll know how to distract it or attract its attention. If the subject isn't your pet, talk to its owner.
Cats scratch, dogs bite, and horses kick. They're also sentient and can be unpredictable. Don't do anything to upset your subjects or that endangers you. It's common sense, really.
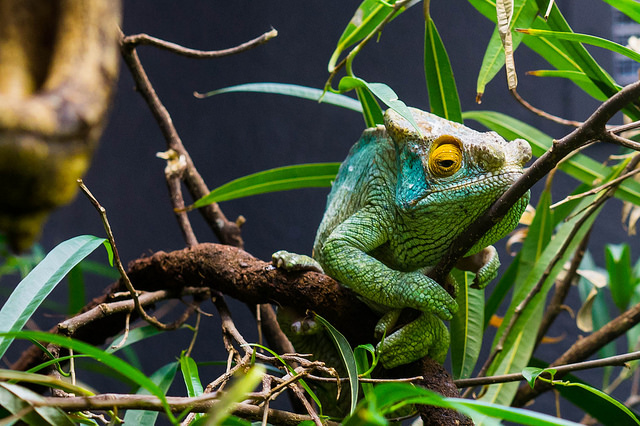
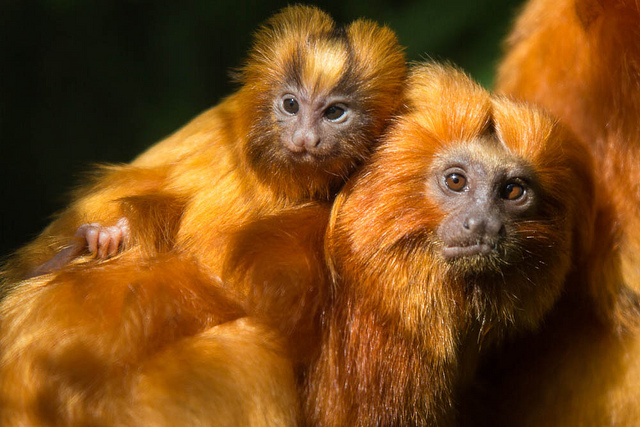
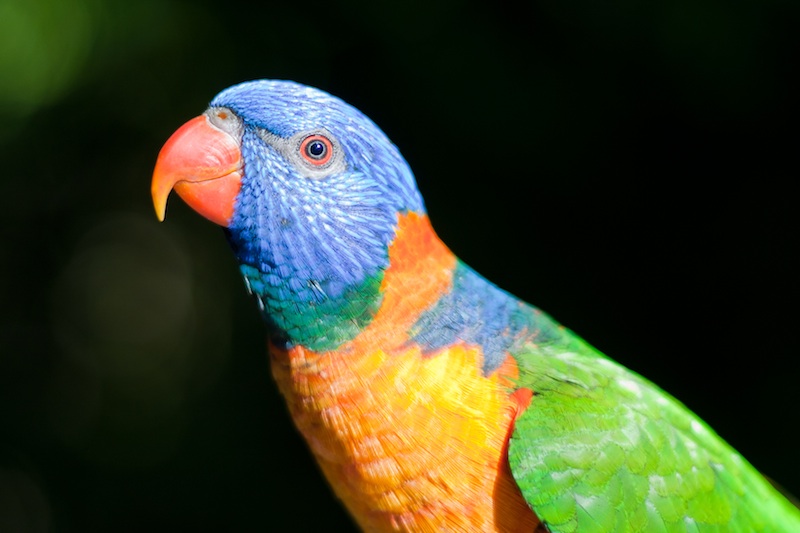
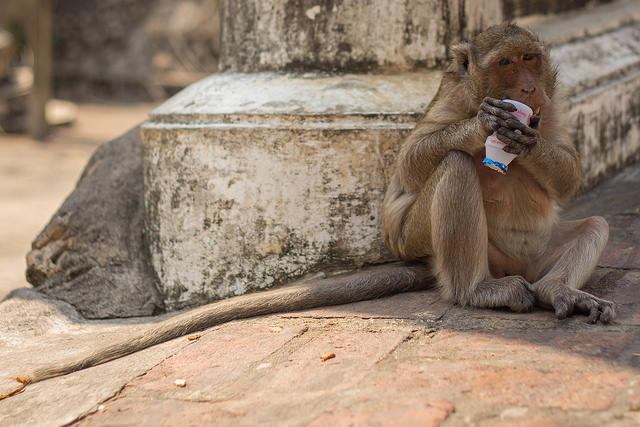
While photographing pets is similar to photographing children, you might notice some similarities between wildlife and sports photography. You're going to be out in the elements, watching for the perfect moment, and most likely with a big lens. However, wildlife photography isn't restricted to the African savannah. There are squirrels in the park, birds in the woods, spiders in their webs, and wild monkeys in the Thai temple complexes. You don't have to travel to exotic locations to take wonderful wildlife photos. And if you are fortunate enough to be going on safari, you can always get in some practice with deer at home.
Know your subject - If you want to make the most out of your subject, then you need to know what to expect from it. Where are you likely to find it? When is it active? When does it feed? What should and shouldn't you do around it? There's little point arriving in the Serengeti in June and expecting to see wildebeest, as by then they'll be on their way to the Masai Mara.
Know your kit - In order to be able to capture the wildlife images of your wildest dreams, you need to be intimately acquainted with your kit and understand its precise capabilities. How many extra stops does your image stabilisation really give you? What's the slowest speed at which you can hand-hold your camera? How high can you push your ISO before noise really becomes a problem? What's the optimal aperture for sharpness with your lenses? Do any of them have a proclivity to flare?
The better that you know your kit, the less time you'll have to spend fiddling and faffing and the more likely you are to make a crucial moment.
Use support - You might not necessarily want to use a tripod: it could be too cumbersome and too slow to move, but the chances are you'll need some kind of support for your camera when out in the field, particularly if you're using a long lens. Think about all of the options, from monopods to beanbags, and decide which one will work best for you.
Be prepared - This isn't just about ensuring that you have the right camera kit with you and to hand, but also the right personal kit. In addition to cameras, lenses, filters, supports, remote triggers, batteries, and memory cards, you need to be dressed appropriately for the conditions and with changes of clothes if necessary. If you're as much as a feast for mosquitoes as I am, you'll need suitable insect repellant. You need to consider food and drink and appropriate storage for it. Do you require permits or a guide? And don't forget your sunscreen.
Capture action - The same as with pets and domesticated animals, aim to photograph action. Or at least if an animal is doing nothing, it needs to be doing nothing in an interesting way, for example with a glorious sunrise behind it, or curled up asleep in an unlikely pose.
Wide and close - You might well be using a long lens to photograph wildlife just to get close enough to identify it, but don't restrict yourself to close-ups. Think about placing your subject in its environment and providing it with context. Primarily, this is important for story-telling, but if you have travelled a long way to experience something magical, you'll want to record that, too.
Conversely, abstract close-ups can make for very striking photos. Don't be afraid to experiment!
Consider the light - While it probably should go without saying to think carefully about the quality, quantity, and direction of light, it's worth repeating. You might well find that as well as providing the best light for photography, the golden hours are also when many animals are at their most active.
Be careful and enjoy - Just as with pet and domesticated animal photography, be careful and be respectful. Don't do anything to endanger yourself or your subjects. Remember to adhere to the required codes and to clean up after yourself.
Finally, remember to enjoy it. Absorb the atmosphere and don't be afraid to put down your camera, either. Sometimes the picture in your memory can be better than the one taken by your camera.
Good things come to those who wait, or at least good things come to those with the requisite degree of patience required to capture a scintillating long exposure shot. Not only do you land yourself with a fabulous photo, but for this competition, rewards also come in the form of five gift cards valued at £40 to spend in the Triggertrap shop! We're on the look-out for the five best long exposure shots produced by you lovely lot. That's not the royal or editorial 'we', by the way, but Haje, Tom, who's Triggertrap's Head of Photography, and me. We don't mind what kind of long exposure shot you try: from urban scenes to light painting to smoothed waterfalls. What we want to see is a longer-than-expected shutter speed being used to creative effect to tell a story. We want to see images that leave us giddy with admiration.

Flickr is providing the image-hosting power for the competition; all you need to do is share your photos—up to five per entrant—in the Patience is a virtue Flickr pool before British Summer Time ends. So that's 01:59 (BST) on 26 October 2014. Consider it preparation for longer nights if you're in the northern hemisphere. We'll do the rest, and hope to have the results by Guy Fawkes Night. (Or 5 November 2014.)
(Un)Usual rules apply: you need to own the copyright to the images you submit; you shouldn't have done anything icky to achieve them (like sell your granny); you keep the copyright but we (that being Photocritic and Triggertrap) will want to be able to display it in conjunction with the competition; the prizes are non-transferable and can't be redeemed for cash; you can't be associated with Photocritic or Triggertrap to enter; the judges' decision is final; entry is at your own risk (quite what might happen to you because you enter I'm not sure, it's not like we're cannibals threatening to eat you, but we can't be held responsible all the same); photos have to be submitted to the Flickr pool before the closing date of 01:59 (BST) on 26 October 2014; and it's our competition so if we need to change the way it operates or the rules or heaven forfend chuck you out, we can.
That's about that. But if you need any advice on long exposures, you might want to check out our articles on shutter speed, bulb mode, zoom bursting, and light painting. Good luck: we can't wait to see what you produce!
Keeping track of everything new that's announced at Photokina can feel like something of a labour of Sisyphus. So rather than cover every new product with an individual article and drive everyone to distraction, we've opted to summarise as many as we can in one place. This is Photokina 2014. Enjoy!
After what amounts to years of speculation, Canon has finally announced the EOS 7D mark II. The basic spec: APS-C, 20 megapixel sensor; ISO 100 to 16,000 but expandable to 51,200; dual DIGIC 6 processors; 65-point auto-focus; top shooting speed of 10 frames-per-second; and built-in GPS. All for $1,800, body-only.

Three new lenses have joined the line-up, too: an EF-S 24mm ƒ/2.8 STM for $149.00; an EF 24-105mm ƒ/4.0L IS STM for $599; and the EF 400mm ƒ/4.0L DO-IS II (USM) at $6,899.
There are also three new compact cameras. The premium G7X with its 1", 20 megapixel sensor and DIGIC 6 processor; top sensitivity of ISO 12,800; and a 24 to 100mm lens with a maximum aperture of ƒ/1.8 at its widest and ƒ/2.8 at the telephoto end, for $700. The SX60 superzoom with its 65× optical zoom for $550. And the N2, which, like the Powershot N, leaves me baffled.

Fujifilm announced an update to its much-loved X100-series; the X100T. This one comes with an improved hybrid viewfinder, enhanced controls, and faster shuttre speeds. All for $1,300, in either black or silver.

The X20 has been upgraded to the X30. The improvements to Fuji's point-and-shoot focus on a new viewfinder and a tilting 3" high-res LCD. You can order one for £600.

There were also two new lenses: the X-F 56mm ƒ/1.2 R APD (85mm quivalent in 35mm format) for $1,500. (APD is apodisation. It is designed to give even smoother bokeh than the normal XF56. Great for portrait work.) And the weather resistant 50-140mm ƒ/2.8 R LM OIS WR at £1,600.
And don't forget the graphite-look X-T1 for $1,500 body-only.
Roll-up, roll-up, get your suction cups from Joby! Adding to its range of twisty, bendy, go-anywhere camera support devices, Joby has unveiled two suction cups, designed to provide industrial-strength hold on all types of smooth, clean, and non-porous surfaces. One has a locking arm, that's best for use in vibration-prone situations, such as in cars or on board boats (£33). The other has a Gorilla-pod arm, a quick-twist, flexible option that's better for windows, walls, and inside cars (£25).
[gallery columns="2" ids="6976,6975"]
There's also the Pro Sling Strap, designed for dSLRs, to keep your camera close to your body but easy to pull up to your eye (£57); the GorillaPod Focus + Ballhead X is the strongest and largest GorillaPod to date (£140); and the Flash Clamp and Locking Arm, which helps to transform everyday objects into lighting assistants with the two articulating ball joints that let you position your flash at any angle (£35).
[gallery ids="6979,6978,6977"]
Leica announced a laundry list of new cameras at Photokina:
And a goodly selection of lenses, too. Leica enthusiasts couldn't have known which way to look first!
Nikon's big announcement was the D750: an FX-format camera with 24 megapixel sensor and EXPEED 4 processor, 51-point autofocus system, sensitivity ranging from ISO 100 to 12,800, a tilting LCD, built-in wi-fi, all crammed into a smaller-than-expected body. For $2,300, body-only.

There was also the new Nikkor AF-S 20mm ƒ/1.8G ED and the SB-500 Speedlight.
[gallery ids="6969,6968,6967"]
As well as announcing the E-PL7, Olympus brought out its E-M1 in silver (body-only for $1,400) and a new 40-150mm ƒ/2.8 lens for $1,500.
Panasonic came up with two new cameras and a new lens, together with the re-branded Leica cameras under the V-Lux and D-Lux badges.
[gallery ids="6966,6965,6964"]
The new LX100 camera is available for $900. It has a Micro Four Thirds sensor, a 4-75mm Leica DC lens (ƒ/1.7-2.8), and comes with an external flash. The GM5 mirror-less camera comes in black or red, with a 12-32mm lens, for $900.
And there's also the Panasonic G Vario 35-100mm ƒ/4.0-5.6 ASPH lens for G-series cameras, costing about $400.
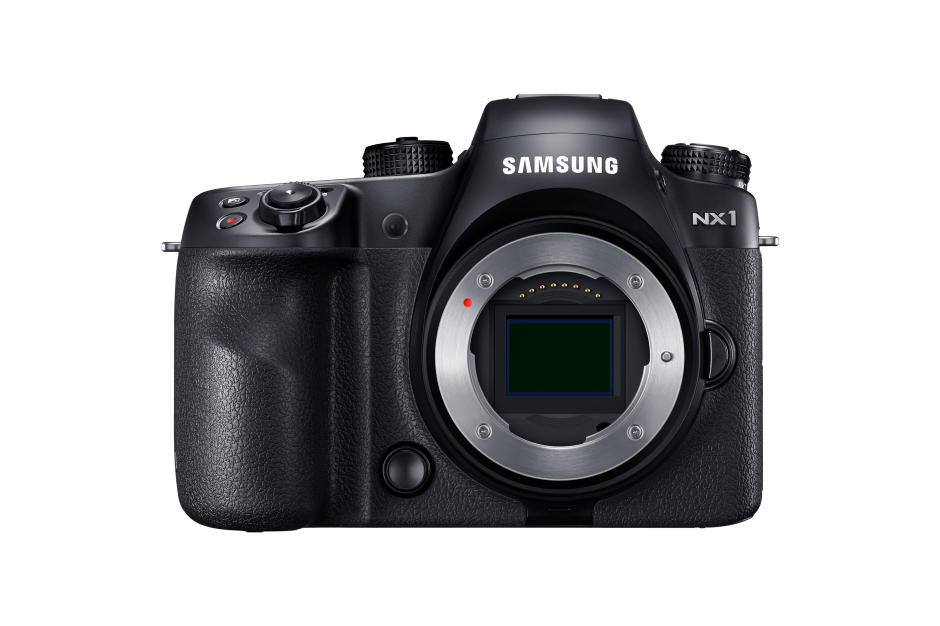
Samsung let loose a new camera, lens, grip, battery, and charger on the public in Köln. The camera is the 4K-video-enabled 28 megapixel NX1 for $1,500 body-only and the lens the 50-150mm S.
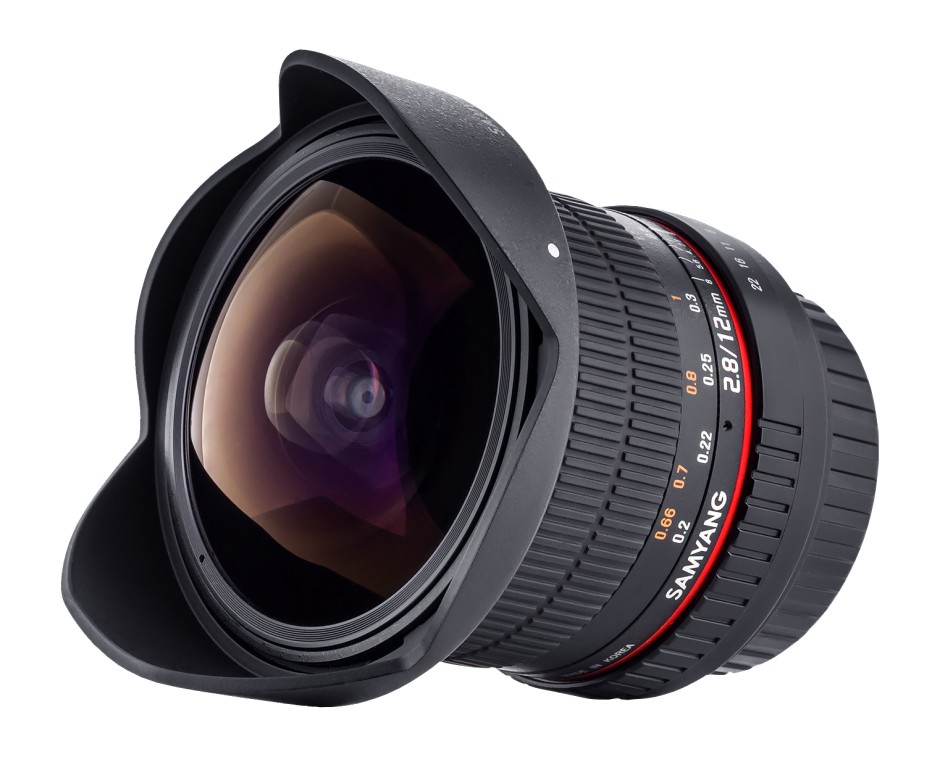
As well as the 50 mm T1.5 AS UMC cine lens, Samyang also announced its 12 mm ƒ/2.8 ED AS NCS fish-eye lens, which has been designed for full-frame cameras. We don't have a price or release date yet for it, but I am looking forward to seeing it.
Sigma announced its dp1 Quattro camera, with a Foveon direct image sensor that is similar to traditional colour film in that its multiple layers capture all of the information that visible light transmits. It also announced two different versions of the same lens: the 150-600mm F/5-6.3 DG OS HSM Sports and the 150-600mm F/5-6.3 DG OS HSM Contemporary. The sports version is, probably quite obviously aimed at sports and wildlife photographers. The contemporary label is more compact and portable.

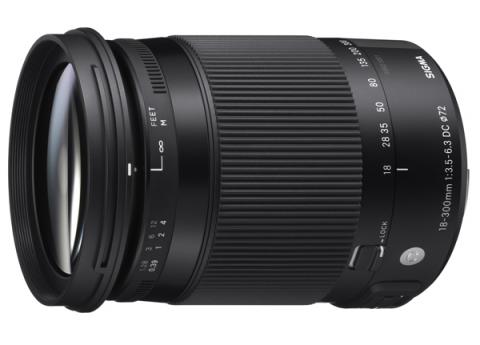
There was also the 18-300mm F/3.5-6.3 DC Macro OS HSM Contemporary lens.
Just before Photokina, Sony announced two new lens units, to attach to smartphones. These were the QX1 and QX30. During Photokina, a slew of camcorders, video cameras, and accessories were unveiled, too. The things that caught my eye was the flash unit, the HVL-F32M for $300.
When the press release for Ricoh's newest camera fell into my inbox yesterday, I felt overcome by a sense of deja-vu as I scanned down it. The specification for the Pentax Q-S1, a pocket-sized EVIL camera, seemed very familiar: 12 megapixel 1/1.7" CMOS sensor; ISO 12,800, 5 frames-per-second; DR II dust removal mechanism; and Eye-Fi wireless LAN SD memory card compatibility. Isn't that the Pentax Q7 in all but name? Looks-wise the Q-S1 didn't appear exactly ground-breaking either. That might sound contradictory for a camera that comes with five different body colours (black, gunmetal, pure white, champagne gold, bright silver) and eight grip colours (charcoal black, cream, carmine red, canary yellow, khaki green, royal blue, burgundy, pale pink), but Pentax is famed for its swap-shop approach and the design is making the retro-but-not overtures that feel almost inescapable right now. It has very similar dimensions to and weighs almost the same as the Q7.

Try as I might, I couldn't pin-point any significant differences, save for the physical appearance, between the Q7 and the Q-S1. The Q-S1 is supposed to have a slightly improved auto-focusing system and has updated filters, but that's about it. Improved autofocus is always appreciated and quite frankly I can take or leave filters and toys, but I'm still scratching my head. What's the point of the Q-S1?
If Ricoh is of the opinion that the Q-S1 is there to offer consumers more aesthetic options and choices, that's a grimly disappointing approach to selling cameras. I admit that I have been known to go weak at the knees owing to the sumptuous design of a camera on occasion, but I part with my money because of their guts and performance. Cameras are tools, not fashion accessories and what truly interests me are technological developments that make a difference. Dressing up the Q7 with its tiny sensor that suffers from noise issues won't make it a better camera.

I'm desperately hoping that camera buyers aren't so superficial that everything rests of the look of the box that lets in light and not how well it allows the photographer to control and manipulate that light, or how well it records that light. I can't be sure but I blinking well hope that isn't the case.
So Ricoh and the Pentax people who work there, if you're listening, I'm sure that you can do better than this. There's the Pentax 645D on your roll, after all. And people who buy cameras: it's about making beautiful things, how your magical picture-making box looks isn't all that important. Not in the grand scheme of things.
So, you're ready to do a photo shoot? No, seriously, are you really ready for your shoot?
A while ago, I was challenged with creating a pre-shoot checklist for photographers - I figured it'd be rude not to, so I gave it a whirl.
Best of all, if you want a handy, keep-in-your-pocket version of this checklist, it's printed on the back of my super-handy Photocritic Grey Cards. Spiffing.
You have a shiny new camera with interchangeable lenses, more knobs and dials than the TARDIS, and enough buttons to keep a three year old happy for hours. It's thrilling and exciting, and you cannot wait to get started. But where exactly do you start? How can you get off of the automatic mode and take control of all the picture-making marvel that your camera has to offer? You could always sign up for the Photocritic Photography School.
It's a year-long course, with a lesson and an assignment delivered to your email inbox every three weeks. Once you complete your assignment and share it in your class' pool, you'll receive some feedback on your endeavours. (We also encourage our students to comment on their classmates' work: the more thoughts the better!) It starts with some simple techniques to see an immediate improvement in your photos and moves through technical, creative, and practical exercises to see you taking better photos week on week. No pressure, and lots of fun!
Even better: if you sign up for the class that starts on 3 January, it's free! What are you waiting for? The sign-up form's here!
For a little while now I've been testing out the public beta version of Loom, an online photo library that is synchronised across my different devices. In all, I've been rather impressed by what I've seen and given it left public beta today and now anyone can sign up for a Loom account, it only seemed fair to share. With so many cloud storage options available, why would you want to sign up for Loom? From its developers' perspective: 'We’re making it quick and easy for you to access and manage your entire photo and video library on every device, without taking up local storage space.' The idea is that whatever device you used to take a photo and wherever it has been stored and developed initially, you can bring it into Loom's weave and have it accessible and identifiable wherever you are and whether you're on your iPhone or sitting at your Mac. Then you can share it, if you want, via email or message.
From a user's perspective, it does what the founders intended: makes it easy for you to look at all of your images in one place.

Install Loom on your iPhone and when you first log in you'll be asked if you want to transfer your entire camera roll to your Loom library. I clicked 'Yes'; it took a while, but it transfered the lot. Now, every time that I open Loom it copies my new images and videos over from my camera roll to Loom. By selecting the 'Nonstop upload' option in settings, it enables uploading even if you close the app. Useful when you need to shift large numbers of photos in one sitting.
If you install the Loom uploader on your Mac you can use it to hunt down the photos on your internal or external hard drive, be they JPEGs or Raw, and back them up to the cloud. The Loom team reckons that it can support over 130 different types of Raw file, but if you find one that won't trip the light fantastic, let them know and they'll try to fix it.
All of your images will appear in your timeline, but you also have the ability to file them according to whatever Byzantine or idiosyncratic method you prefer. If you delete a photo from your local drive or your phone, it'll still be there in Loom. This has allowed me to free up significant space on my iPhone, precisely what the Loom team intended. (Yes, the photos are backed up somewhere else, too!)

At present, Loom is iPhone-, iPad-, and Mac-only; however, there are plans to widen its access in due course. The team is very keen to hear what its users want from the service, too. As well as opening itself up to public subscriptions, which might generate it some income, it has also received $1.4 million in seed funding from sources that include Tencent, Google Ventures with MG Siegler, Great Oaks VC and angel investments including Will Smith (Overbrook Entertainment), and Damon Way (founder of DC Shoes).
Your first 5GB of storage comes free; after that there's a 50GB option that costs $39.99 for the year or you can pay $99.99 for a year of 250GB storage. You've nothing to lose by checking it out.
This is a guest post by Danny Groner, who is the manager of blogger partnerships and outreach at Shutterstock. Here in the northern hemisphere, autumn is upon us, which means that we've already started to see some of the red, orange, and yellow colours of the season crop up. Marketers and advertisers know how to appeal to our autumnal eye, sprinkling these bright colours everywhere possible. For photographers looking to cover the autumn season, that poses a challenge: How do you shoot these natural settings in new, innovative, and vibrant ways? Here are five suggestions for how to add some flavour to the autumn season:
Keep close to what is proven to work this time of year, but adapt your style to show these colours in another way. For instance, a row of houses, instead of forestry, might offer the same feelings of seasonal foliage without leaves piling up. It's about the season after all. Discover an urban forest beyond the trees.
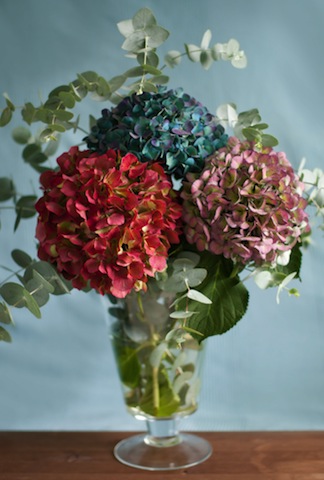
Flowers and plantlife may grow predominately outdoors, but that doesn't mean that you can't bring their vivacity inside. A well-placed bouquet, taken with the right light and proper angle, can give the same punch as inside its more natural setting. Moreover, solid colored walls can complement the flowers, adding a nice backdrop to your pictures.
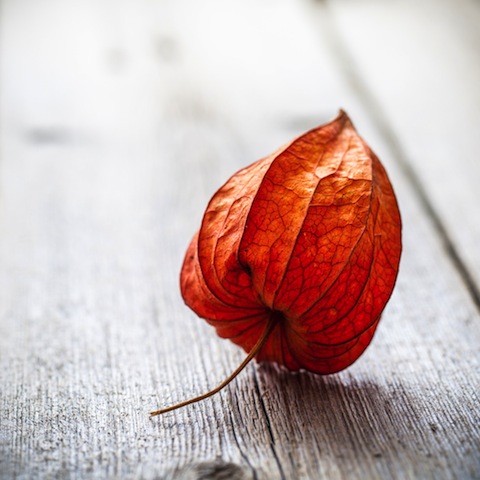
If you do decide to use leaves to help tell your story, you don't have to do it with so many. Sometimes, less is more. In this case, you can see more expression from a lone leaf than you may find inside of a pile of them. It's a living being, and focusing on one will help convey some emotion that can get lost in transit otherwise.
Your favourite colours can go further if you allow them to blend and dance. Inside pieces of artwork, there's more flexibility and movement than what is naturally created. Reds and oranges can look and feel remarkably louder when paired with some darker colors. Art and photography have a similar relationship worth exploring.
Nature has so much more to offer than the most traditional colours. Surprise your audience with some other colours, like purples, that show up this time of year but may take a little more digging. It's worth pursuing a shot through a slightly different lens. Even if you don't know what you're looking for as you trudge through piles of leaves, you'll recognise it when you see it. It may not look as familiar at first, but it'll surely be at peace with the season at hand.
Microstock megalith iStockphoto has announced that it's added another house to its stock photography village in the form of OJO Images. From today, all of OJO images 31,000 royalty-free files will be available exclusively through iStockphoto, which is in turn a part of Getty Images. They're expecting the number of files to increase to 45,000 by the end of October this year. Between its ever-expanding image archive and a new long-term pricing strategy, which prices half of its image library at half price, iStockphoto is claiming that acquiring content is now easier (and cheaper) than ever for those who need it. That's great for publications and companies, but not necessarily for photographers who sell their images as stock.
It isn't just iStockphoto that's owned by Getty; so are Jupiter Images, Thinkstock, Clipart.com, and Stock.XCHNG. As the centre of stock photography power gravitates closer and closer to Getty Images, we're drifting towards a situation that affords people who try to sell their images fewer options and fewer rights. The unpalatable Getty contract is one issue; so is the inability of smaller, more fairly priced stock houses competing against the image behemoth. Piled-high sold-cheap images from one of the biggest names in stock photography are easy for businesses in need of images to buy and use and harder for photographers to make a living by selling.
One man's tea is another man's poison, I suppose.
The Photocritic Photography Fundamentals magical mystery tour has reached 'l', for 'leading lines'. It's time to join these vital compositional tools in their seductive tango. Lines, they're important things. Train lines get you from A to B (occasionally via Z), cricketers are always looking to bowl good lines, and in photography they can make or break your images. Lines can be confrontational and restrictive, creating borders and boundaries, but they can also be alluring and sultry, drawing you into an image and not letting you go. These are 'leading lines' and they're powerful tools in your photographic arsenal.
There are, broadly speaking, four types of leading lines that you can introduce to your photos to give them depth and interest. There are both naturally occurring and man-made leading lines, and as a general rule, once you've seen one, you can't un-see it.
The first type of leading line is a path or roadway that creates a sense of depth in your photos. Parallel lines will naturally converge at a point owing to perspective, which means that any road will draw you into a photo and give you a sense of motion. These types of leading lines will make you feel as if you're going somewhere in your photo.
Next are leading lines that pull your eyes across the image and deposit you firmly at your subject. These lines don't have to be straight and they can be single or multiple, but they're just as effective as but more attractive than a neon sign flashing 'The subject is here!'
There are also lines that take you on a journey through an image, forming a narrative. These lines can be straight or curved as they lead you from one point to another.
Finally, look out for invisible lines that send the viewer from one point to another. If that sounds a bit elusive, think of people's eyelines. Humans are curious by nature and once we've made eye contact with someone, we'll automatically look to where she or he is looking, too. If your subject isn't looking directly at the camera, the viewer will follow her or his eyeline to see what's so interesting.
Roads and paths form obvious leading lines, but so do walls and fences, bridges and bricks. Nature's leading lines are formed from rivers, branches, stems, shorelines, and light and shadow. Lines don't have to be unbroken, but can be formed from several points, for example lamp posts or trees.
Once you start to use them, you realise what a powerful compositional feature they are, directing the eye, joining the dots, and completing the narrative.
I've just stumbled across a magical photographic triumvirate: DIY, getting kids involved in photography, and education. It's called the Bigshot Camera: a self-assembly camera that teaches whomsoever is building it, whether aged eight or 108, about key science concepts in the process. It's a rather tasty science and creativity sandwich.
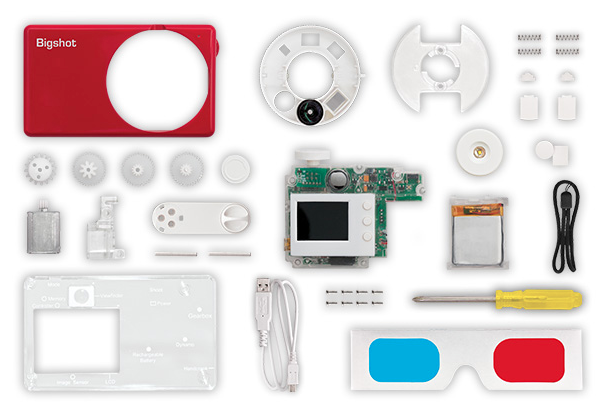
The camera has to be assembled in a specific order, but there are detailed instructions on the website to make sure that you get it right. Even more importantly, as you work through each stage you have the opportunity to learn about the science underpinning it, from optics to mechanics via electromagnetism and electronics, and back again. When it's complete, you should have a fully functional camera with a rotating wheel that houses normal, wide-angle, and 3D-capable lenses. If the battery dies, you can crank it back into life yourself.
One of the motivating factors behind Bigshot is learning by doing, and inspiring young people to get involved with science and engineering. It's the sort of project that a parent (or auntie) can work on with their child (or niece... I'm looking at you, Eva), but there's plenty of support for teachers who want to incorporate it into their teaching plans, too. Each camera costs about $90, but Bigshot has an extensive outreach programme, Bigshot for Good, that aims to bring the project to less privileged children, wherever they are.

From an idea that sprang to life in 2006, the Bigshot has been developed by Shree Nayar, a Professor of Computer Science at Columbia University. Along the way he has received research and design support from students led by Guru Krishnan and Brian Smith and funding support from a Google research award and an ONR Instrumentation Grant. Nayar founded Kimera, a social venture aimed at bringing the Bigshot to children and teachers the world over, in 2011. And from this month you can go ahead and order yourself one from the Bigshot website.
As for future plans, the Bigshot team is exploring two potential avenues: to continue to deepen the Bigshot camera experience by developing new features and enhancing the learning platform, or to develop other gadgets that lend themselves to the Bigshot concept of building, learning, and using.
The Bigshot website is well worth a wander: it's a veritable hive of knowledge and information, whether or not you want to buy a camera. Me? I'm totally in the queue for when they start shipping beyond North America!
This week's Photography Fundamentals issue looks at key. Key is an element of the photography canon that crosses over with other artistic disciplines, most notably music and painting. I'm the least musically-talented person known to man, but even I manage to spot the similarities.
When we talk about the 'key' of an image we're talking about the range of tones or brightness that it comprises. Primarily we use it when we're describing images as being either 'high-key' or 'low-key', which are at the extremes of the range of brightness—light or dark respectively—and the feelings that these images convey. However, 'high-key' and 'low-key' can also be used to describe lighting set-ups, not just a style of photo.
High-key images are light and bright, either with upbeat and positive connotations or with dream-like, ethereal qualities. They will be low on contrast with very few, if no, shadows. If you look at a high-key image's histogram, it will exist mostly in the right half of the graph, with just about all of its pixels pushed above middle-grey and into the near-whites and whites.
The intensity of colours begins to fade as brightness increases, which means that high-key images are frequently black and white. If they are in colour, they tend towards pastels in tone. Or they could be the classic white-on-white.
It's easy to think of high-images as being 'just over-exposed', but getting them right is a bit more complicated than simply setting some positive exposure compensation. To achieve a good high-key image you need to bathe your subject in even light and keep everything about the image on the pale side. Unless you have deliberately blown-out the background to get it bright white, and with the exception of specular highlights, there will still be detail across the image.
I like to think of high-key images as the photographic equivalent of reading Jane Austen, but you can pick your own literary metaphor. Music-wise, it'd be a song composed in the major key.
Low-key images evoke feelings that might be sombre or miserable, or even fearful or threatening. Like high-key images, they're low on contrast, but this time they are predominantly dark or black in tone and their histograms are clustered towards the left-hand side of the graph.
Anything that needs to be portrayed with a sense of impending doom is perfect low-key material. Just as high-key images aren't all about over-exposure, low-key images aren't focused on grisly under-exposure. There will still be detail in the shadows. If you don't want to be too purist about how your histograms look, having the odd bright area can strenghten the feel of a low-key image by re-inforcing just how dark the shadows are.
If you want a literary comparison, think gothic horror novels, or the minor-key for a musical equivalent.
Cinematically, high-key or low-key lighting means something quite specific. High-key lighting has a low key-light to fill-light ratio that produces evenly lit scenes that are practically shadow-free. Low-key lighting, on the other hand, has a high key-light to fill-light ratio (yes, it's counter-intuitve) that creates pools of light and harsh shadows.
ISO << Photography Fundamentals >> Leading lines
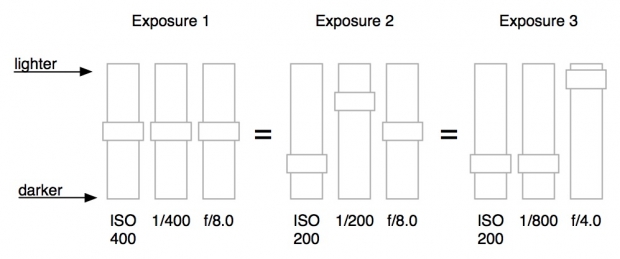
We know that exposure is controlled by the holy triumvirate of shutter speed, aperture, and ISO. You give with one and take with another until the light hitting your sensor is just right for the image that you want. We also know that whilst these guardians of our sensors have practical applications, they can be creative. Aperture has already been cross-examined in our Photography Fundamentals series; this week it's the turn of ISO.
Once upon a time, in days of old, when we shot on film and had to fend off dragons simultaneously, we also had to choose the ISO of our film when we bought it. 100? 200? 400? Huh? Now it's just a button on our cameras and we can change it every shot. But that doesn't mean that ISO is any less significant now than it was then. In fact, changes to ISO have been one of the major breakthroughs in modern photographic technology.
Back in those old film days, ISO referred to how sensitive a film was to light. Depending on the conditions that you thought you'd be shooting in primarily, you'd have to select the ISO of your film and be done with. (If you want to really geek out on ISO trivia, Haje has you covered.) Now you can push a button and see it increase from roughly 100 to anything as high as 102,400 (but that's extreme). That's a lot of numbers but they still mean the same thing: it's how sensitive your sensor is to light. (Or, technically, how much the signal from each pixel on your sensor is amplified.)

The higher the number, the greater the sensitivity to light.
The general rule is that the brighter the conditions, the lower you want your ISO to be. As conditions become dimmer, you can increase sensitivity to help you get a good exposure. However, even if it's a low-light situation, you still want your ISO to be as low as possible.
There's a trade-off, you see. As you increase sensitivity, you also increase the tendency towards digital noise, or the graininess you see in some photos. Now we do have a full Photography Fundamental on noise lined up for you but the low-down is that too much noise can make images look poor. It's best to avoid too much of it.
Whilst too much noise does give me a headache, I'm more than prepared to sacrifice a bit of image quality in order to secure my shot. Yes, I'll take a smidge of noise over motion blur almost any day. (Unless I really want motion blur, that is.)
Well, seeing as ISO forms part of the mighty triumvirate with aperture and shutter speed, you'll need to consider those in order to get the exposure that you desire. But do stick with the rule I mentioned earlier: as low as you can get away with.
It's really easy to leave your camera to automatically select the ISO for your shots, but it is a really useful tool. And the more control that you take over your own images, the better. Don't just concentrate on aperture and shutter speed.
Histograms << Photography Fundamentals >> Key
My brother has worn glasses full time for absolutely years, which has meant that I learned how to photograph him wearing them to avoid hideous green glare rather intuitively. I probably did have to think about it at some point, but I don't really remember and now I just seem to do it. That was until this week, when one of the students at Photocritic Photography School piped up and asked me what he should do when he has a portrait subject who wears glasses. For lots of reasons, the answer is never 'Ask your subject to remove them,' so what do you do?

The most obvious problem that glasses will present to you is that they reflect light. Instead of seeing straight through spectacles' lenses and into your subject's eyes, you'll have a unpleasant, usually green-tinged, reflection glaring back at you.
Going back to GCSE physics, we know that the angle of incidence (or the angle at which light will hit someone's glasses) is equal to the angle of reflection (or the angle at which the light will bounce back off the glasses). If light is coming in at an angle of 31° to the normal of your subject's glasses, it'll bounce off at 31° on the other side of the normal*. There's a helpful diagram here.
Consequently, if your light source is too close to your camera the light has a much greater chance of bouncing straight off your subject's spectacles and into your camera's lens. And if the light is coming from straight behind the camera and your subject is looking straight back at the camera, you haven't got a cat's chance in hell. But the upshot is: know where your light is coming from.
* The normal is an imaginary line running perpendicular to the plane of the glasses.
Minimising glare is easiest by one of three means:
By shifting your light source or yourself, you can alter either the angle of incidence, and therefore reflection, or take your camera out of the firing line. Sometimes, though, your light source can't be shifted (say, when it's the sun) and you moving might not be an option. Then it's down to your subject.
If your subject tilts her or his head downwards, just by a few degrees, not by much, it'll be sufficient to adjust the angle of the light and prevent a reflection bouncing back into the camera lens. Or she or he could turn fractionally away from the light source; not enough to wreak havoc with your shadows, but enough to prevent that horrible glare.

When you ask subjects to tilt their heads or change the angle of their shoulders, you might find that their spectacle frames begin to encroach into the view of eye. At this point it becomes a trade-off between reflection obfuscation and frame obfuscation. You need to decide where your tipping point is.
If you opt for more candid shots, you'll be able to capture your subjects looking away or looking down and doing it naturally but still without any nasty reflections.
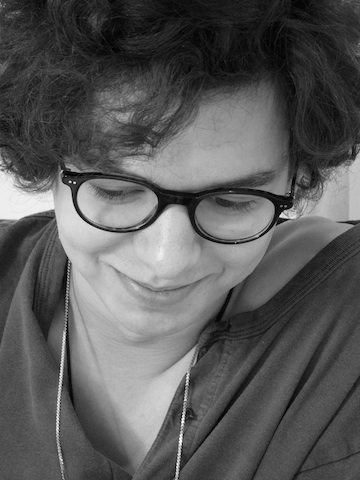
Sometimes, you just have say that the glare is there and it's better to have a photo with a reflection than no photo at all!
The chances are that you've heard of the golden hour (or magic hour, it's sometimes known as that, too), and you know that photos taken during this magical time slot are blessed with a sizzling, glowing quality that gives them a spectacular edge. But when exactly is it? And what makes it so special? This week's Photography Fundamentals is here to explain all!

First up, golden hour can last between 45 and 90 minutes, and it happens twice day, around sunrise and sunset. The closer that you are to the equator, the shorter the period it lasts. Yes, it does mean that at the Poles, at certain times of the year, the Golden Hour can last nearly all day, too. I suppose that the 'Golden 90 minutes to three hours, or sometimes even all day' doesn't sound quite so catchy, does it?
When the sun appears to be closest to the horizon, its lightwaves have to travel further than when they're overhead, as happens during the middle of the day. This softens and diffuses them, as they bounce around more and don't hit their subjects directly. You're left with gorgeous soft lighting, gentle, long shadows, and less chance of over-exposing your highlights.
Golden Hour light is typically much warmer in hue, too. The blue light waves are scattered further, leaving your subjects to pick up more of the red and orange tones, and bask in their warmth.

All of this means that just about any type of photography you can accomplish outdoors will benefit from the Golden Hour: portraits, landscapes, architectural, and street.
Portraits will take on gorgeous, even skin tones and there won't be any harsh shadows appearing beneath your subjects' eyes and nose, which is never really an attractive look, I'm sure that you'll agree.

Landscapes sizzle with soft light, unusual shadows, and saturated colours.
Buildings look as if they're glowing during the Golden Hour, especially stone ones. It appears that rather than reflect harsh midday light, they absorb the softer early morning or late afternoon rays.

You won't benefit from just the glowing stone of the Leaning Tower of Pisa if you capture it early in the morning, you'll avoid the crowds, too.
And somehow, during the Golden Hour, even the most insalubrious of streets can appear a touch more charming than they really are, whilst anyone or anything in them will be flattered by the sun's golden tones.
To help you go forth a shoot beautiful, radiant images, there's even a handy golden hour calculator.
Focal length << Photography Fundamentals >> Histogram
If you weren't able to catch the Datacolor and Triggertrap webinar on remote controlled photography yesterday, possibly because you were sleeping (in the Antipodes and Asia), having dinner (in Europe and Africa), or at work (in the Americas), then you need feel guilty or excluded no longer. The recording is now available for your perusal. You can stop and start it and rewind* it as often as you want. The webinar placed David Saffir and C. David Tobie on hand to share their knowledge and experience when it comes to remote controlled camera operation, from the the basics of shooting tethered to a computer to stop-motion. Why not take a peek?
* Does one still 'rewind' digital video? Clearly the word is a hang-over from the days of tape recordings. Hmm.
After 24 years, the UK's annual photography extravaganza, Focus on Imaging, is to be brought to a close. Mary Walker, who has organised the show since it inception, has decided that the 2013 event was to be the last, and it won't be sold. Walker commented: 'It's been an immensely rewarding job that has brought experiences and friendships that will always remain. I am certain that the time is right for the industry to perhaps find fresh opportunities and bring new ideas to photographers - maybe we're due a new revolution of some kind?'
You can read Mary walker's full statement here.
