macro

The Photocritic Holiday Gift Guide: presents for macro photographers

Mulled wine 
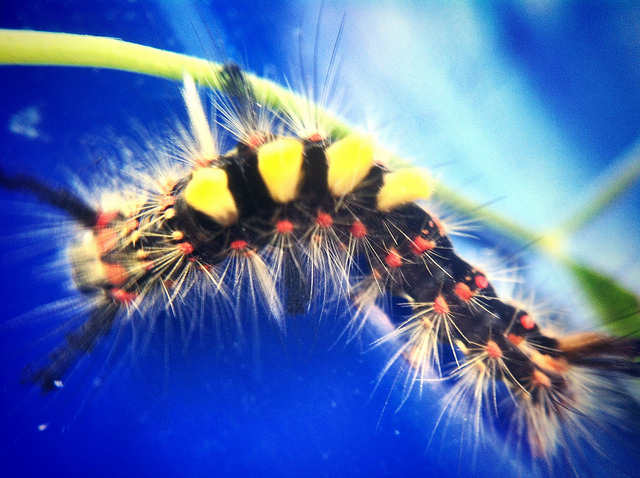
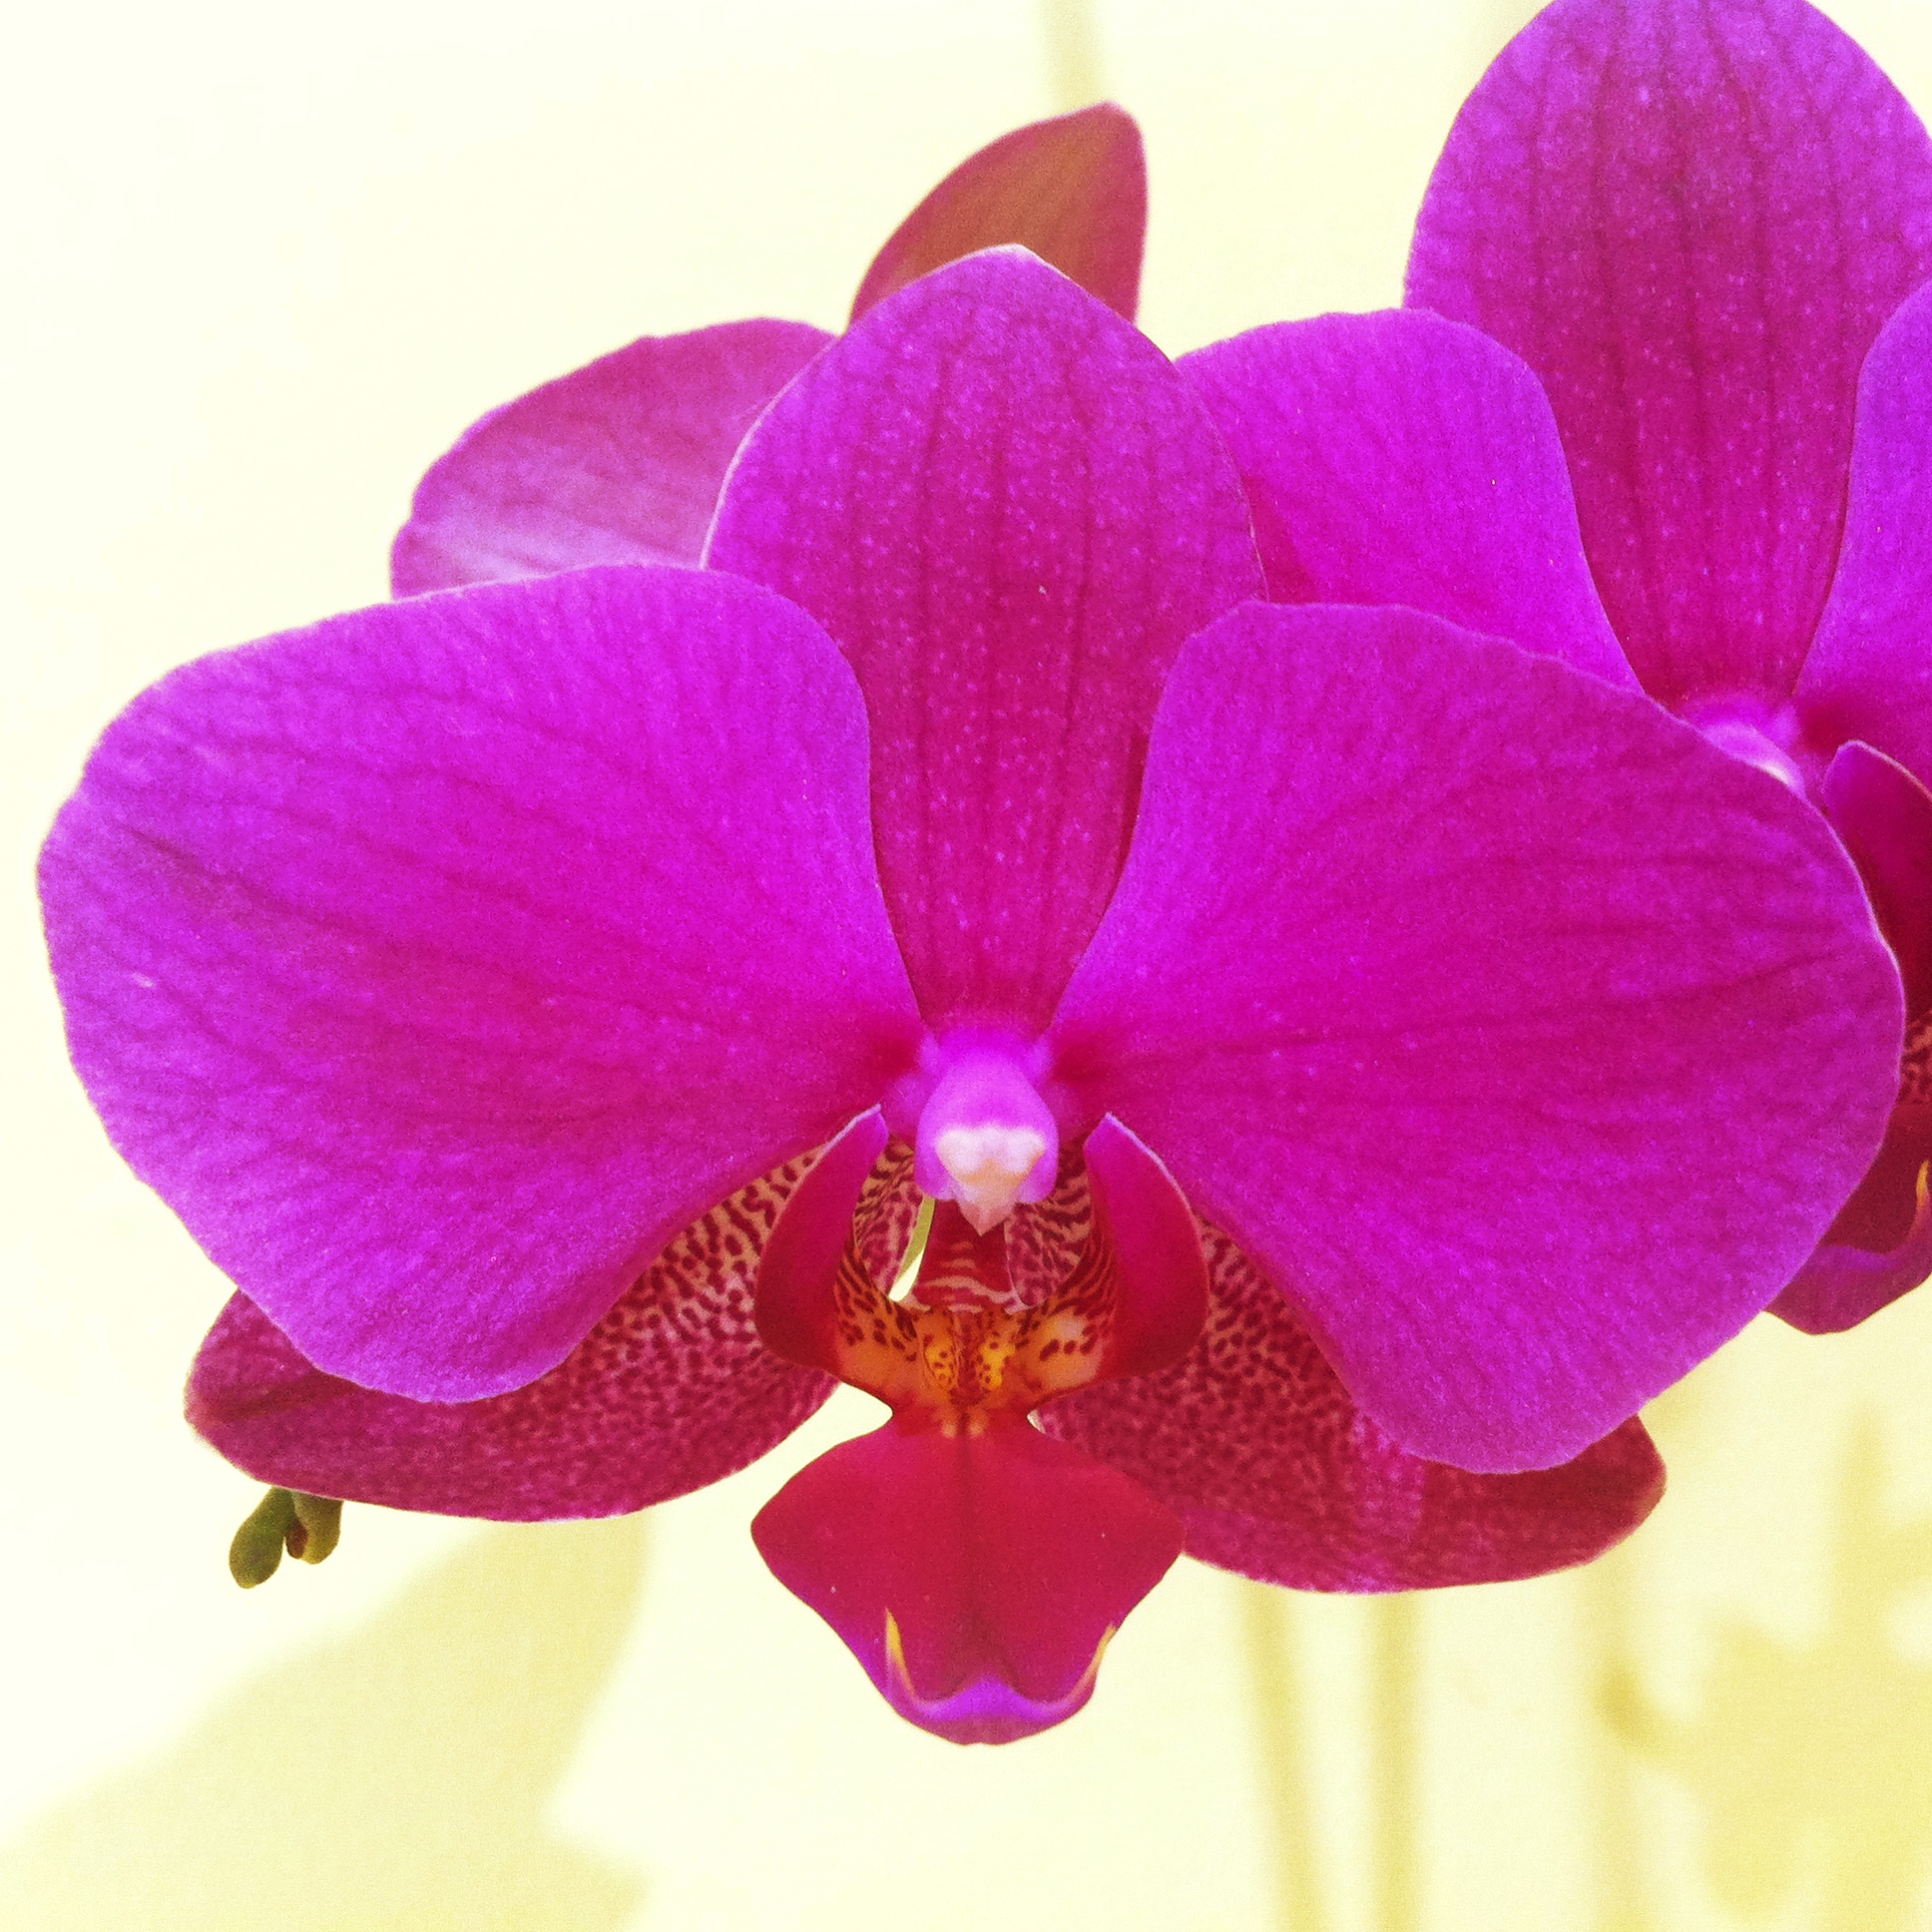
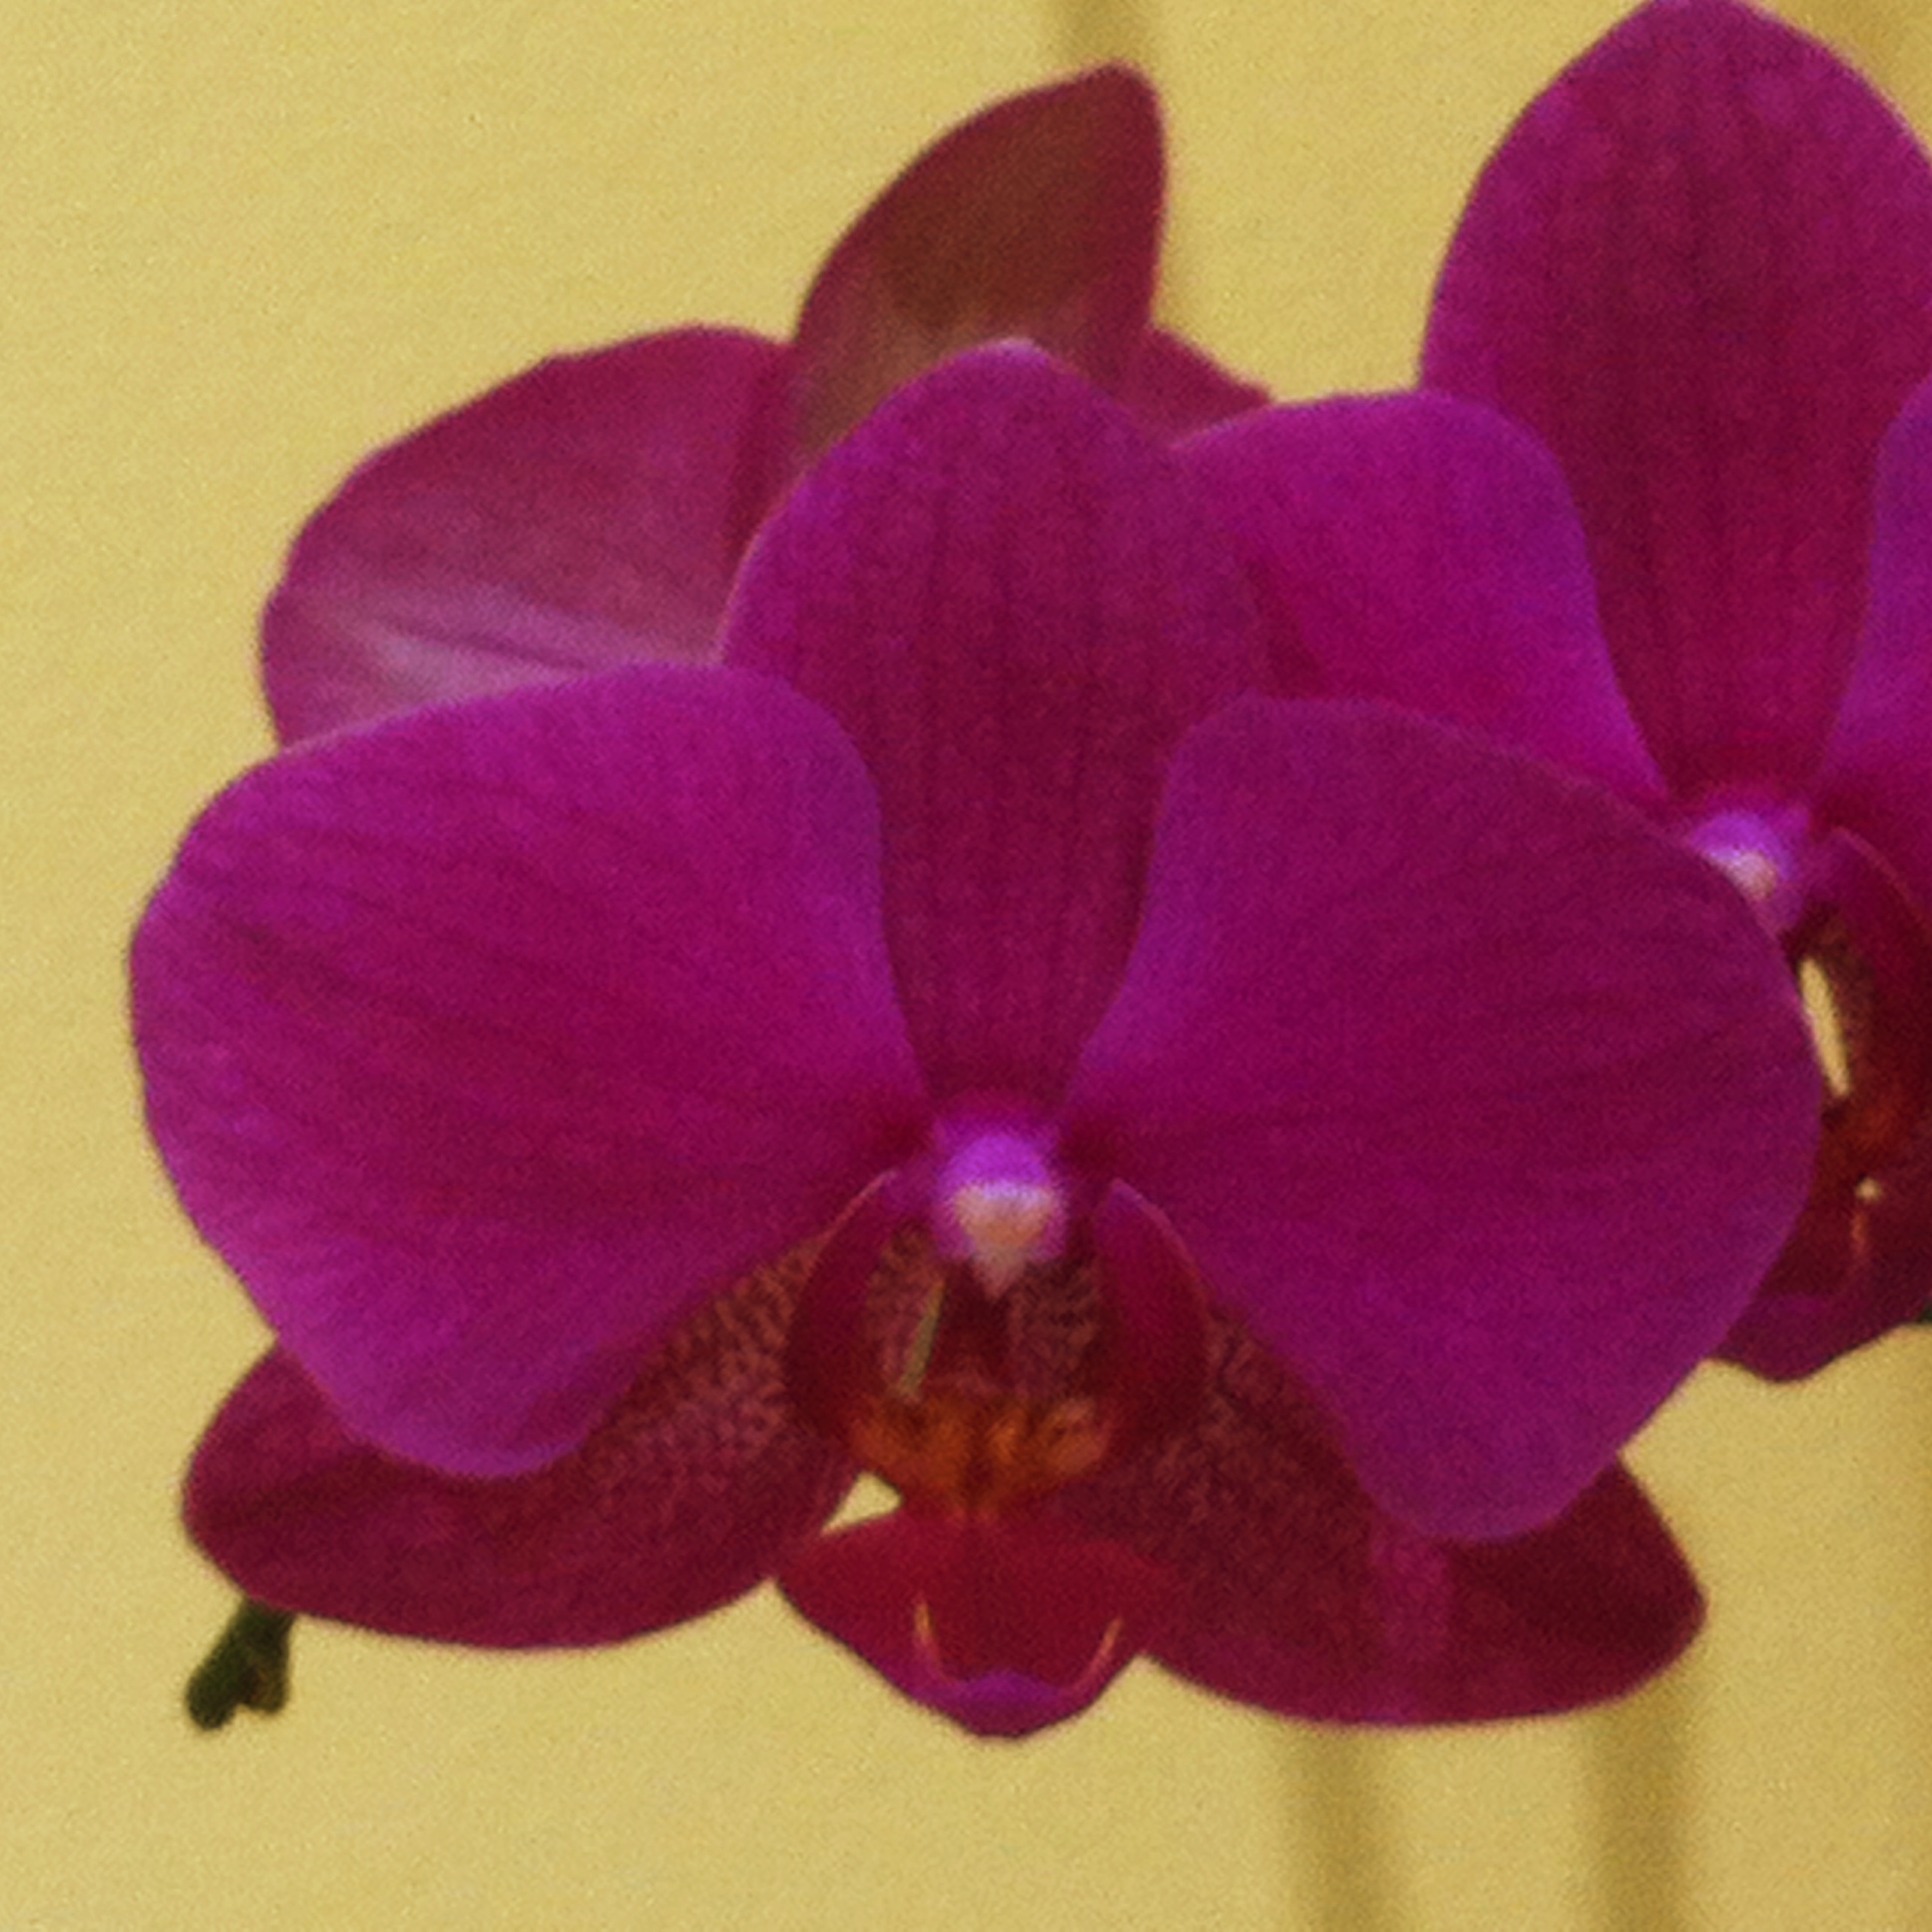
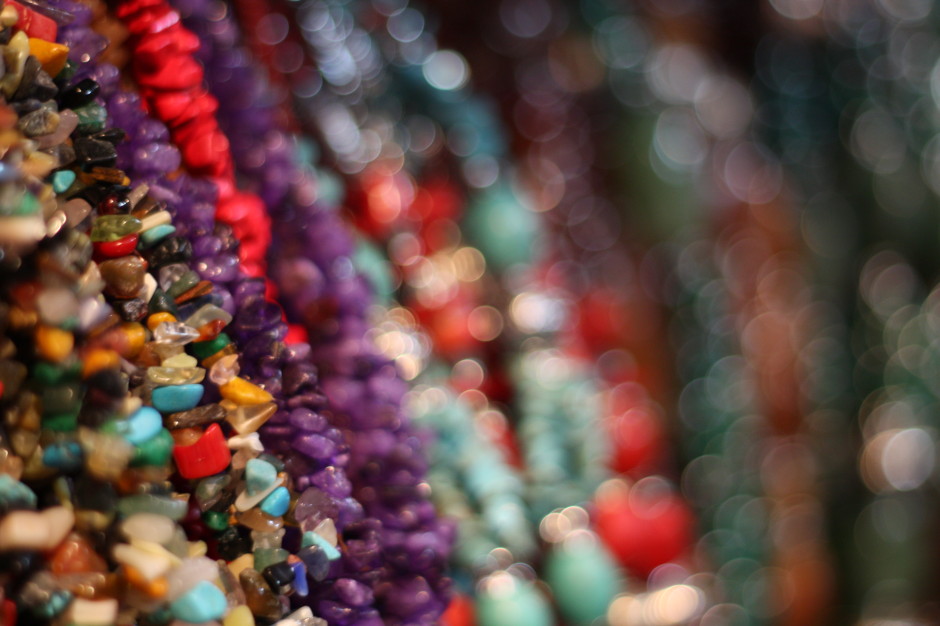
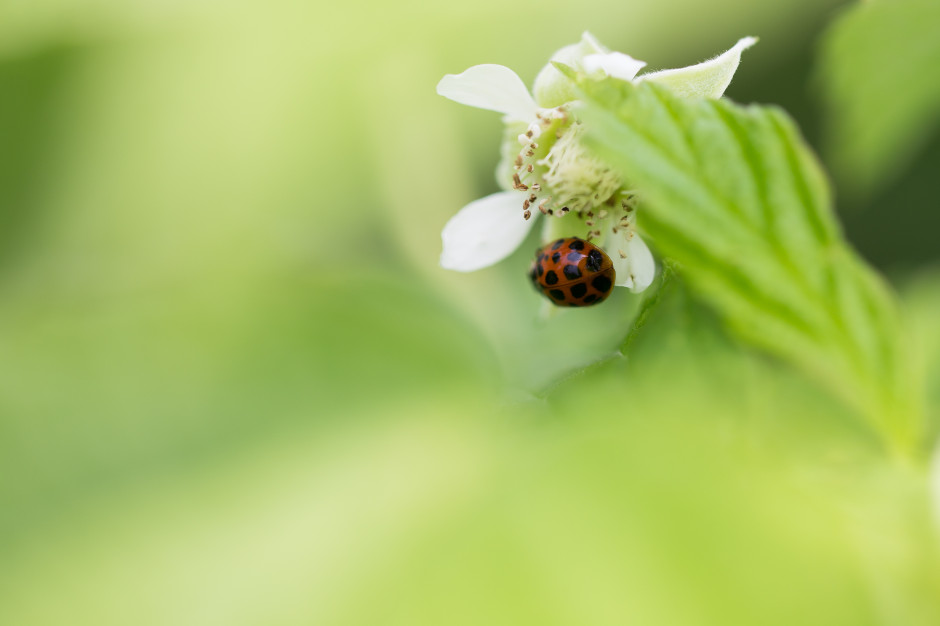
Day Two of the Photocritic Holiday Gift Guide takes us into the world of the the close-up, and macro photography. We've compiled a list of suggestions for people who might be starting out and want to give macro a try, or who've been at it a little while and might need some kit to help them along.
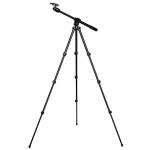
vnvs443d

Tripod

You might be wondering why anyone who already has a tripod might need a macro-specific version. It's not at all compulsory; however, for those photographers who are serious about their macro work, some tripods are preferable compared to others.

Something like a Velbon VS-443 D allows for an inverted centre column that brings the camera close to the ground, for example. Take a look here in the US and here in the UK.
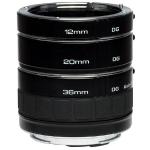
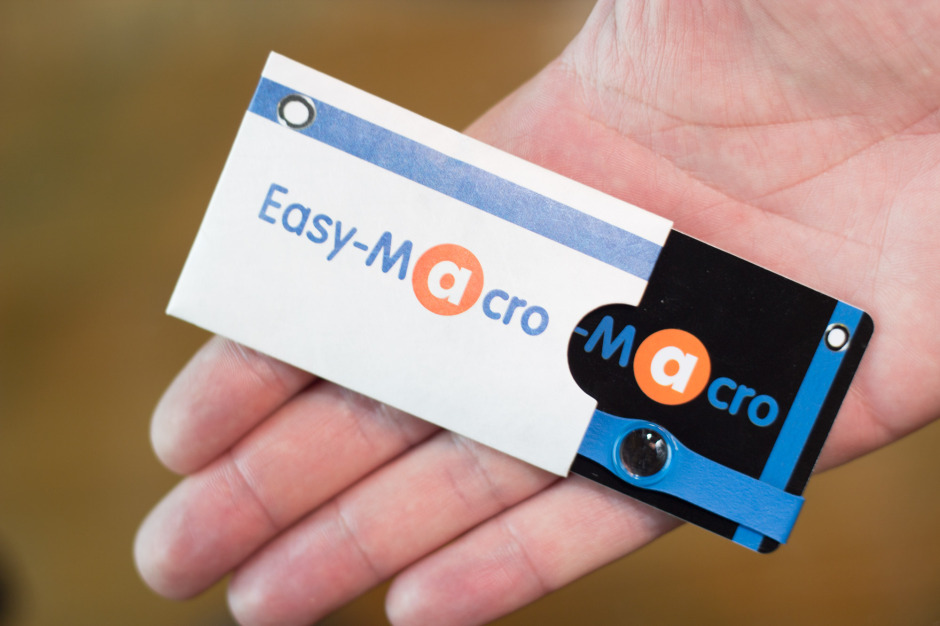
knaetsdnkaf

Extension tube

Instead of spending money on a dedicated macro lens, inserting an extension tube between camera and existing lens can have a similar effect. We understand that not everyone wants to have a go at making her or his own extension tube from a Pringles can, but thankfully commercially produced extension tubes are in abundance, manufactured by both the likes of Canon and Nikon as well as third parties.

You can pick them up in a variety of lengths and prices. Take a look.
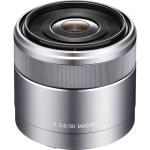
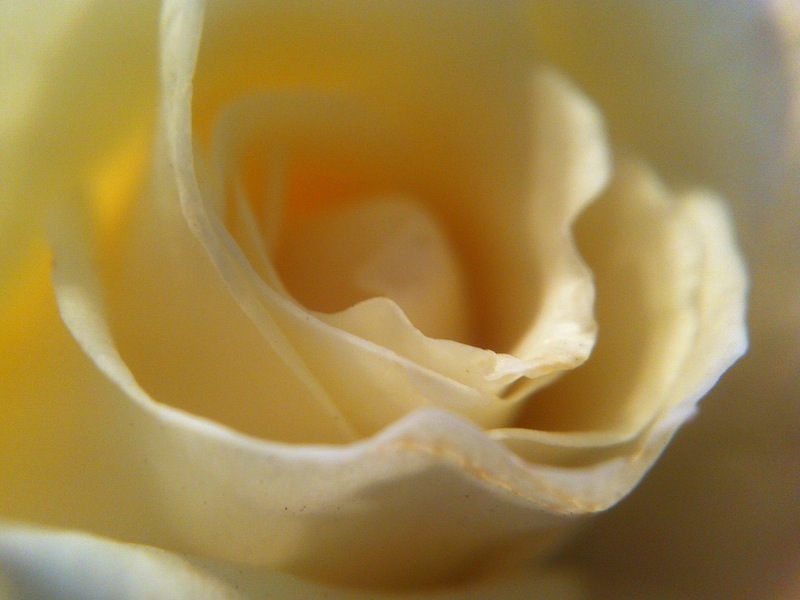
isosel30m35

Lens

For anyone who's particularly in love with macro photography, a dedicated macro lens will be high up on her or his wish-list. You can spend anything from a couple of hundred dollars to several thousand. Some are zoom; many are prime. They're produced by both camera and third-party manufacturers. They come both with and without image stabilisation.

I love my Canon 100mm ƒ/2.8L and wouldn't be without it, but if you've not quite that much spend, take a look at these options.
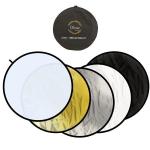
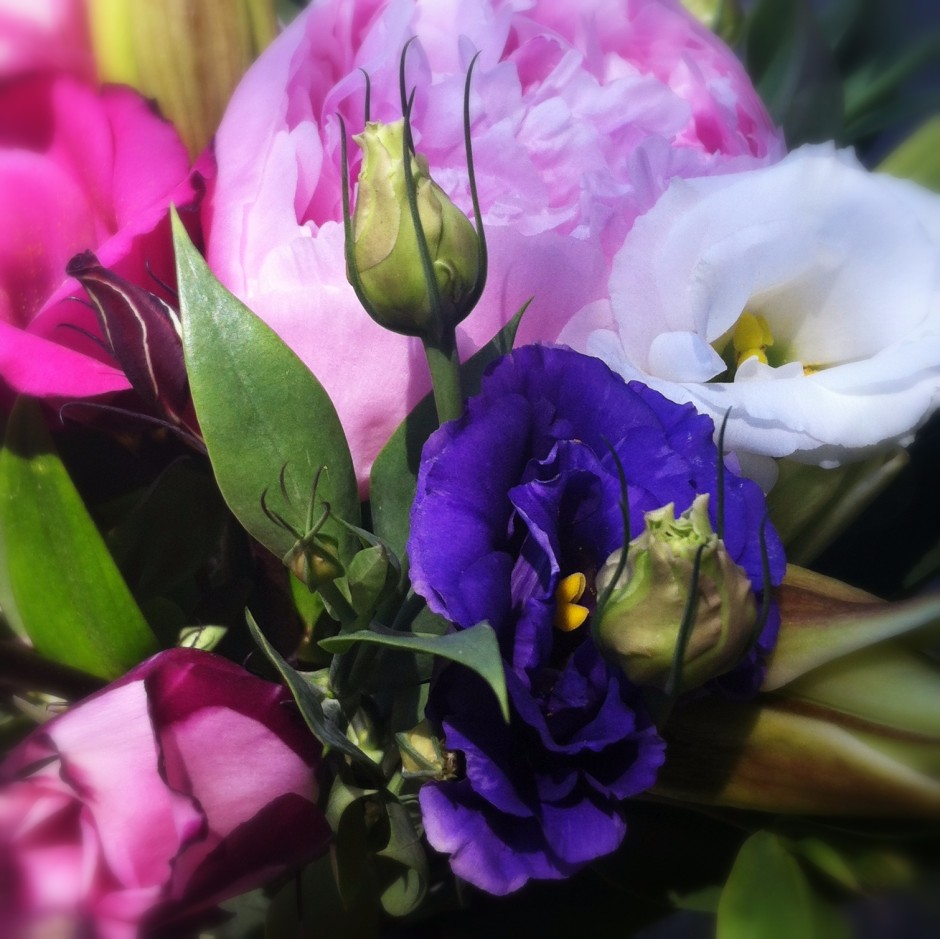
fppr5142

Reflector

All photography relies on light, but macro photography is especially light-hungry. To help manipulate and direct illumination precisely where it's needed, no macro photographer should be without a reflector. Reflectors come in a variety of sizes and colours, but we've picked out this 5-in-1 reflector that incluces gold, silver, white, and black surfaces as well as a diffuser to help evenly spread light across your subject, too.

In the US it's about $30; a similar reflector in the UK is about £30.
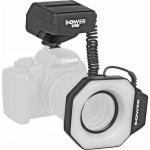
bowsfdrf

Ring flash

The shadowless light produced by ring flashes makes them ideal for macro photography. They're also relatively simple to use and start out with very reasonable prices, too, which makes them ideal for both beginners or as gifts.

Take a look at this Bower ring flash priced at $70 as a starting point.
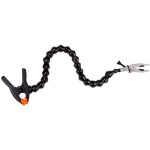
1553097

Plamp

One never seems to have sufficient hands when it comes to macro photography. Or flowers have an inconvenient habit of swaying in the breeze creating nothing but blurry images. This is where a plamp comes in handy. Attach one end to your tripod (or anything sturdy and reasonably close) and use the other to secure a plant stem, angle a reflector, or hold a backdrop in place.

Try Wimberley direct in the US to find out where you can buy a plamp, or they're about £40 in the UK.
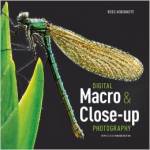
index

Book

Haje's excellent Macro Photography Workshop is now only available as an e-book. If you'd rather purchase one of the dead-tree variety, take a look at Digital Macro and Close-up Photography by Ross Hoddinott.


A gingerbread house kit

Tasty and great for macro photography!


Gifts for beginners < < Holiday Shopping with Photocritic > > Gifts for smartphone photographers


Going back for more with Easy-Macro's latest Kickstarter campaign

If at the beginning of last year you'd asked me if one of the best $15 that I'd spend in 2013 might've been on a macro lens attached to an elastic band to use in conjunction with your smartphone, I probably would have looked at you askance. It's not so much that it's a ridiculous idea; actually it's pretty sensible – portable, flexible, affordable. But would it be effective? It wouldn't slip, would it? And it would actually magnify the subject, wouldn't it? And would I really make use of it? It might only be $15, but if I never use it, then it's $15 wasted. In 2014, the answers to those questions—would it work, would I use it, and would it be $15 well-spent—are very definitely yes. I pledged $15 for an Easy-Macro band on Kickstarter and it works a treat. It lives in my wallet, I use it regularly, and I love the results. If I choose to upgrade my iPhone or switch to a different manufacturer, my Easy-Macro will remain compatible. Fabulous!

I don't have a caterpillar farm, but I did take it with my smartphone, because it's what I had to hand

There isn't just the review here on Photocritic, but I have lots of pretty close-up photos taken with my iPhone to show for it.

Portable, and compatible with smartphones up to 10 inches wide

And now due to popular demand, Easy-Macro is expanding its product line. Woohoo!

Photo 04-10-2014 15 41 24

In addition to the original 4× magnification band, a 2× and a 10× band are being put into production. Pledge $30 to the Easy-Macro Kickstarter campaign and you'll receive a triple pack of magnification bands if it successfully reaches its funding goal. You can then use them individually or stack them one on top of each other for some serious close-ups.

Smartphones galore!

All of the details are available on the Easy-Macro Kickstarter page.

Digital zoom: best avoided

Whenever I'm asked for quick tips for better smartphone photos, I usually proffer the same advice that I give to any other type of photographer: get closer and tuck your elbows into your body. But with smartphones (or indeed with some point-and-shoots) that first pointer in augmented with an admonishment to avoid digital zoom. So that's do get closer, but don't get closer using the capability that manufacturers have baked into their devices to accomplish it. Get closer, but nix the digi-zoom.

The truth is, digital zoom sucks. One day it might not, but right now it does. It sucks because digital zoom is nothing more than a glorified cropping tool. Whereas optical zoom relies on the physics of lenses to ensure that what you see appears larger or closer, digital zoom simply crops away the extraneous pixels and enlarges those remaining in the picture. While this might get you closer to your subject—and that's rule number one—it has an unfortunate effect on your images.

Get closer!
Get closer!

By enlarging the pixels that are on display, you've degraded your picture quality. You're spreading your information more thinly over the same surface area. It's the technological equivalent of spreading one teaspoon of jam over a slice of toast rather than two. Even if the processor is clever enough to use interpolation to enlarge the image, there's probably still some degradation.

Don't believe me? Have a look at these examples and tell me which is superior. I'll bet you a friendly pound that you prefer the image where I've got closer to my subject using my hands and my feet rather than the slider on my iPhone.

The first step in the art of getting closer is to do so physically: walk in, reach in, lean in. Getting optically closer is your next step. And if you're still not close enough, take the photo with what you've got and crop in after the fact. You'll still be spreading those pixels more thinly, but at least you'll have better control over the final image.

Get really close with an Easy-Macro band

And if you want to get really close, try an Easy-Macro band. It's $15 well spent.

Today's World Photo Day! What are you going to do to mark it?

Today is World Photo Day. If you're wondering how a 2009-invented celebration of the visual medium came to be on 19 August, it's because that's the day in 1839 when the French government announced that it had purchased the patent to the daguerreotype method and made it a gift 'free to the world'. Armed with that snippet of information, the pressing question is, what are you going to do to mark it? For anyone in need of a little inspiration, here are some Photocritic suggestions to mark World Photo Day.

1. Try something new

Photography is a learning curve. There's always something new to try or with which to experiment, so pick something you've not done before and give it a go.

Crazy-shallow depth-of-field with a macro lens

May we recommend, in no particular order and certainly far from exhaustive:

2. Go back to basics

The technological wonders that we can perform with our cameras today can sometimes obfuscate the simplicity of photography. It's painting with light. So why not go back to basics: pick up a pinhole camera and rediscover the perfection of capturing light in a box.

The ONDU pinhole in action

3. Have a print made

How many of your photos are hanging on your walls and how many are stuffed away on hard drives as binary files that never see the light of day? Do justice to your skills: pick your favourite image and have it printed to hang on your wall.

4. Set yourself a challenge

We can't all be good at everything. But we can try to improve. Which aspect of photography do you find challenging? What would you like to do better, but find a struggle? Maybe your landscapes come across as flat and dull? Perhaps your portraits fail to capture your subject's spirit? Is your food photography not exactly good enough to eat?

Decide on a point of focus and challenge yourself to improve over the course of the coming year. Read. Practise. Try. Maybe fail. Definitely try again. Keep a record of your experimentations. Come World Photo Day 2015, you can measure your progress.

5. Teach a child to take a photo

There's no better way to share your passion for something than to teach it to someone else. So why not help to develop the next generation of photographers by teaching them how to take photos. It doesn't have to be complicated or difficult, just the basics. We've even got a tutorial to help you.

Depth-of-field in greater detail

We're probably all familiar with the notion of aperture controlling the depth-of-field in our photos. By using a faster aperture, you create a shallower depth-of-field. To keep more of your image in focus, you need to use a smaller aperture. But there's a whole lot more to depth-of-field than adjusting your aperture to get more or less of the scene in focus.

'Acceptably sharp'

Let's start with setting out what we mean by depth-of-field. It's the range of distance in a photo that is considered to be 'acceptably sharp', or what we would regard as 'in focus'. Only the actual point of focus in a photograph is definitively sharp and 'in focus'; depth-of-field describes the zone of acceptable sharpness either side of it. A wider band of 'acceptable sharpness' running through an image equates to a greater depth-of-field. To introduce more blur into your photos you would want a shallower depth-of-field with a narrower band that's 'acceptably sharp'.

A shallow depth-of-field with a gradual fall-off

It's worth remembering that there's no sudden transtition from 'sharp' to 'unsharp': focus falls off gently on either side of the plane of focus, regardless of the aperture you use. It is fair to say, though, that larger apertures have a more rapid transition from in- to out-of-focus than larger apertures.

[gallery ids="6855,6856,6857"]

Controlling the depth-of-field in an image is achieved primarily by adjusting your aperture—a smaller aperture for a greater depth-of-field; a larger aperture for a shallower depth-of-field—however, there are other factors that affect it, too.

Focal length

You'll often hear people say that telephoto lenses have a shallower depth-of-field than wider angled lenses. This isn’t strictly true. It’s more accurate to say that because telephoto lenses are mostly used to magnify subjects, and the subject will then fill more of the frame relative to the background, the depth-of-field appears to be shallower.

200mm; ƒ/3.2

All the same, it's worth capitalising on the magnifying effect from telephoto lenses to pick out your subjects and surround them with blurred foregounds and backgrounds.

Subject-to-lens proximity

If you've ever practised macro photography, you'll appreciate how getting closer to your subject makes it harder to get it all sharp. The closer that you position your subject to your lens, the shallower your depth-of-field will be. Choose a subject further into the background and you'll find that the depth-of-field surrounding it is larger.

Crazy-shallow depth-of-field with a macro lens

Distribution of acceptable sharpness

Depending on the focal length you use, you will find that the depth-of-field isn't divided equally in front of and behind the plane of focus. Instead, the area of acceptable sharpness behind the point of focus is generally larger than that extending in front of the focal plane. As focal length increases, so too does the distribution of the depth-of-field in front of the subject.

When you shoot with a focal length of 15mm about two thirds of the depth-of-field will be behind the subject and one third in front of it. When you get to 400mm it's closer to a fifty-fifty divide.

Depth-of-field: not just about aperture.

Easy macro smartphone photography with Easy-Macro

Sometime in September last year I pledged a modest sum of money to Easy-Macro's Kickstarter project. I'd heard about Easy-Macro before then—a magnifying lens set into a rubber band that wraps around your smartphone and sits over its lens—but the new and improved 4× magnication factor in the Kickstarter-funded project made it seem like a great bet. Some 4,106 other people agreed with me and Easy-Macro surpassed its goal with plenty in hand. For me, the appeal of the Easy-Macro wasn't just that it was a fun addition to my smartphone, or that it was cheap, but that it meshed with the ideals of smartphone photography: discreet and easy. It sits my wallet and can be placed around any phone. I don't have to worry about it getting crushed or dropped in a bag and it won't become obsolete if I upgrade my device.

Easy Macro

All I needed was for it to be any good. Well, just before Christmas my bright blue band arrived and I'm happy to say that I've been having fun with it ever since.

Macro knitware

You use the Easy Macro just as would manually focus a lens set to infinity: by getting as close as you feasibly can to your subject and then moving your smartphone steadily backwards until your subject comes into sharp focus. It does require patience and a steady hand—remember, keep your elbows pushed into your sides to help stabilise yourself—but I've been pleased with the results so far.

Dried berries up close

Of course it is never going to compete with my 100mm macro on my Canon 6D, but it's not meant to. For a $15 gadget that I can keep in my wallet, what's not to like?

Beadwork

If you missed out on the Kickstarter campaign but are tempted by one, fear not, because you can pick up an Easy-Macro from the Easy-Macro website.