


Blur isn't always bad. We show you why, and how to manipulate it to your creative advantage.

When you hear the term 'high-res' thrown about with such abandon when it comes to images for web use, have you ever stopped to think just how big or how high quality and image meant for the web needs to be?
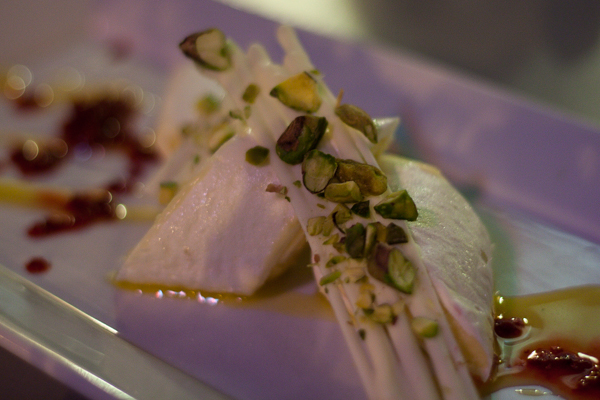
There's an assumption that high-contrast images are more dynamic, more compelling, more inviting. Have a go at some low-contrast photography. You might surprise yourself with the results.
Balance doesn't mean symmetry; it means an internal consistency and tension within your photos. And it's a vital element of composition.
Great photos might be down to a little bit of luck, but most of that 'luck' you make yourself. Don't believe us? Read on...
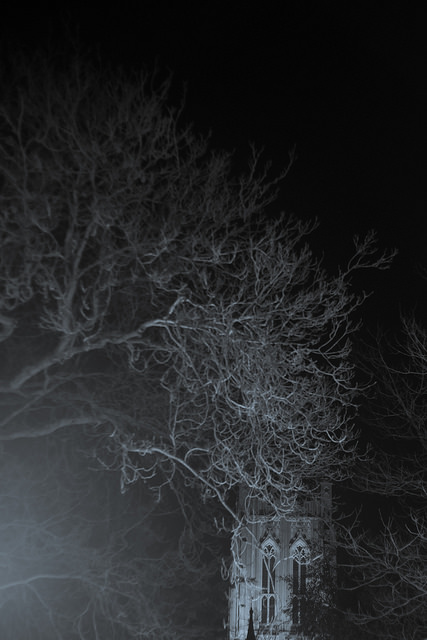
Here in the northern hemisphere, the shortest day is fast approaching and whether we like it or not, much of our photography will be of the low-light variety. We've put together some suggestions for coping as best you can when things are a little dim and the light with wish you wish to draw is a scarce commodity.
This might sound terribly obvious, but it's a fundamental of photography: look for the light in your scene and use it to your advantage. Use the light from streetlamps, from candles, from the moon to illuminate your subject—even be the subject—and create interesting shadows in your photos.

While a too-high ISO can be responsible for noisy, grainy photos, advancements in sensor technology mean that it's possible to push ISO much higher than was previously acceptable to get the shot you want. Remember: a little grain can be better than motion blur; if you shoot in Raw, images can be cleaned up; a black and white conversion can produce noise-negating miracles.
The wider the aperture you select, the more light you'll let onto the sensor and the faster shutter speed and lower ISO you'll be able to use. This will of course come with the caveat of a shallower depth-of-field, but that can be applied creatively.
A slower shutter speed will permit more light to reach the sensor, but it also has the potential to introduce motion blur if it isn't sufficiently fast to freeze the action in your scene, as well as camera shake if you're hand-holding your camera. Sometimes, however, motion blur contributes to the story that you wish to tell, so don't dismiss it entirely.
The general rule for hand-holding a camera is that you shouldn't do it if your shutter speed dips below the inverse of the focal length of the lens you're using. Thus, for a 50mm lens, you shouldn't attempt to hand-hold your camera using a shutter speed slower than about 1/60 second. If you find that you need to go slower, you might wish to bring out your tripod. Think about a remote shutter release, too.
If you adhere to matrix or multi-segment metering, your camera will attempt to adequately expose the entire scene. That might not be what you want if you're looking to play with light and shadow. For dramatically lit shots, switch to spot metering and meter from the illuminated area that you wish to be in focus. This will maintain dark shadows while correctly exposing the point-of-focus.

Spot-metering might not be appropriate for your scene, but at the same time, matrix or multi-segmented could render it over-exposed. If that's the case, try dialling in a stop or two of negative exposure compensation.
Auto-focus can struggle to hit its mark in low-light situations, in which case manual focus might render better results if you're both confident enough using it and the scene isn't changing so fast that you miss the photo opportunity. Should auto-focus be the better option, ensure that you're using one-shot auto-focus. Try, too, shining a light where you wish your camera to focus. The illumination will assist it in locking-on to the point-of-focus.
Whether it's reflection off of pale clothing, off of glass, polished metal, or liquid, or from a reflector, keep an eye out for reflected light and put it to use in your shots. That might be making reflections on water the focus of your photo, but it can also be bouncing back reflected light to illuminate shadows.

If you're not already shooting in Raw, switch now. Not only will help you to tidy up any noise in your shots, or even to adjust the exposure a little if necessary, but it will allow you to adjust the white balance of your photos more effectively. Accurately white balancing low-light shots can be tricky; the more flexibility that you have, the better.
How warm or cool is your light source? Or are you working with mixed light sources? If you're shooting by candle light, you can set the light temperature on your camera to more accurately render colours in your photos. For mixed-light sources, remember to white balance according to the light falling on your subject. If you're shooting in Raw, you might find that adjusting the white balance in post-processing will give you the most accurate result.

Finally, have fun with the darkness and put it to creative use. Let reflections dance or shadows draw you in to moody scenes. Low-light might force you to think for a moment, but remember that you often have longer than you think you do, and experimenting is half the fun.
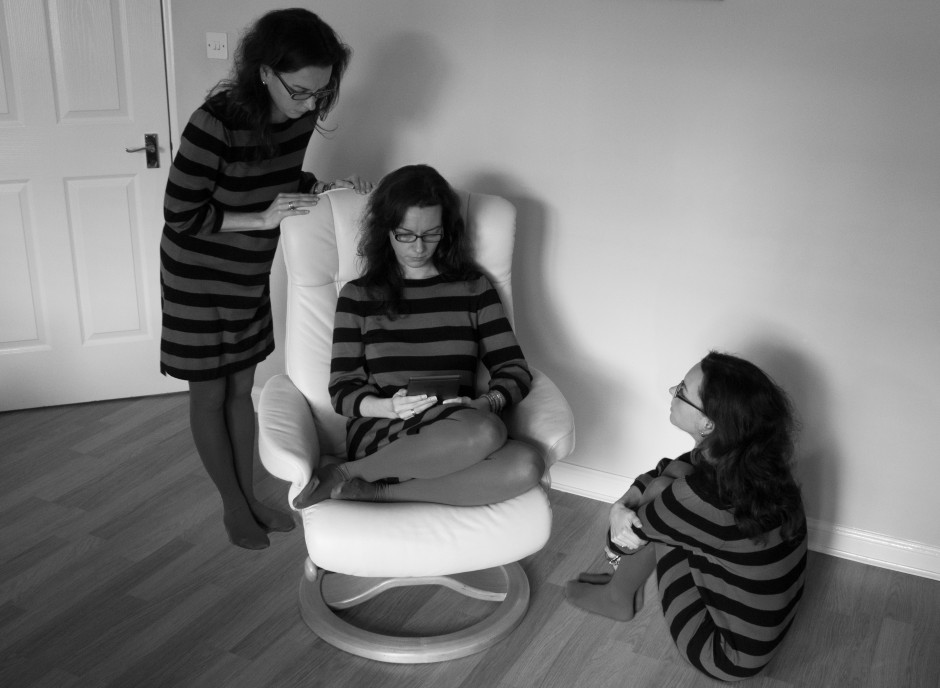
Multiplicity, or the art of creating images containing several yous, or anyone elses for that matter, isn’t a digital discovery. It’s something that people have been doing for decades: it's remarkably easy to achieve with film. You set up your shot and either you don’t wind on your film before re-exposing the frame with your subject positioned anew in the scene; or you wind on your film and then wind it back again in between shots. The important thing here is to slightly under-expose all of your shots in the sequence to ensure that your final image isn’t an over-exposed white mass.
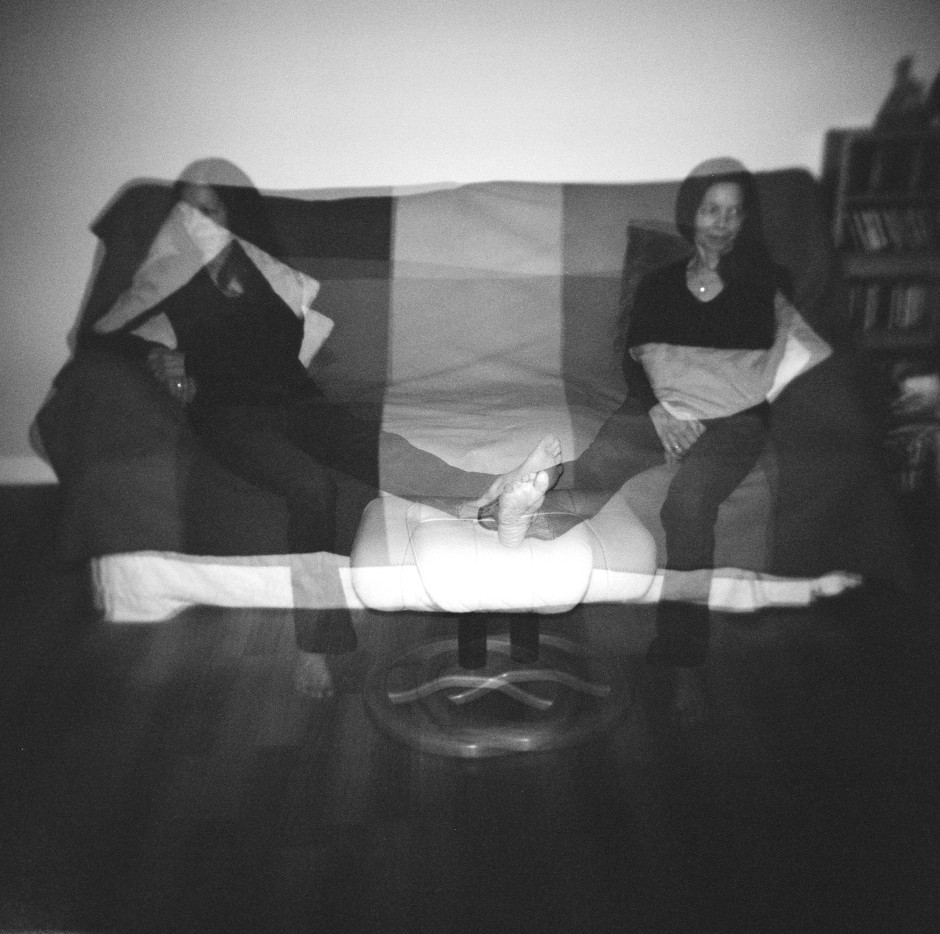
If you don't happen to have a Holga lying about (they're great for creating multiple exposures), you can do it with a digital camera, too. Depending on the camera you have, you've a few options for creating a multiplicitous image. Quite a few come with a multiple exposure setting now: you determine how many exposures you want to make and the camera will re-expose the same 'frame' in-camera and adjust your expose settings accordingly to ensure that you don't end up with a too-dark or too-light image. Marvellous... if you have a camera that can do that. If not, you'll need to make friends with Photoshop, or a Photoshop-esque editing package.
Before we go any further, it’s important to remind you that achieving a great final image relies on producing a good image in-camera first. It doesn’t matter how ginormous the barrage of editing you’re going to subject your photo to, it’s got to be good from the get-go. This is just the same for a multiplicity image as any other.
When you set out to create a multiplicitous image, your starting point is your concept. Think of the story that you're trying to tell and what you need to tell it. Having a clear plan makes it so much easier when you're shooting the images because—unless it's a distinct element of the story—you need consistency in your images: furniture can't move between shots, the light needs to be coming from the same direction, and you don't want to be flapping around.
When the scene's arranged, set your camera on a tripod, adjust it's exposure settings and focal point, and shoot a 'plate' image. This is a base photo, devoid of the story's characters, onto which you'll build your final creation.
Now you can shoot your series of images containing your subject in as many different positions as your composition merits. I've found it useful to go for more rather than fewer photos; it gives you more flexibility when you compile your final image.
[gallery ids="6703,6704,6705"]
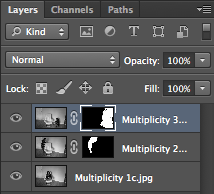
When you've shot your images, import those you think you might want to use into Photoshop using the Load Files in Stacks option (File>Scripts>Load Files in Stack), which should import your images so that they are perfectly layered one on top of the other.

Next apply a layer mask to each of the layers, barring the background image, which should be the ‘empty’ plate.
Using the eye icon on the Layers Palette, toggle off all of the layers from view except Layer 1. Now brush your subject, along with anything like indentations in the chair where she or he is sitting or shadows, out of the image. It's those small details which add credibility to the unbelievable, which is what makes them important to the final composition. And while it might seem counter-intuitive to brush your subject out of the image, it isn't really.
When you’ve disappeared your subject from the scene and you’re happy with the refinement of the edges, invert your selection by pressing Cmd+I on a Mac or Ctrl+I on a Windows machine. The subject will miraculously reappear and the superfluous background will disappear.
Do take care when you're areas where overlapping occurs, because it's here where your image will succeed or fail in its realism.
Repeat this process for each of the layers, toggling them on and off as necessary to decide on which placements you want to keep, and which you wish to discard. I’d recommend saving the image as a PSD file with all the layers intact, which will allow you to revisit it and re-edit as often as your Dr Jeckyll needs to meddle with your Mr Hyde.
When you've settled on a final version, delete the layers that you don't want, save it as a PSD file, and then flatten it and export it as a JPEG image. Ta-dah!
It's a truth universally acknowledged that the steadier you can keep your camera, the better your photos will be. Keeping your smartphone steady can be a bit tricky because it's small and light. Sure there are smartphone specialist supports, but there has to be a cheaper, lighter way that's in-keeping with the pocket-sized nature of smartphone photography, no? I'm not entirely sure why I decided that I needed to modify an emergency string tripod for use with a smartphone, but obviously I was channeling MacGyver somewhere, so I gave it a go. If you've never used an emergency string tripod, it's a loop of string secured to your camera to help keep it steady. You might've heard of it as a chainpod.
For my proof-of-concept smartphone stringpod, I used baling twine. It's not the ideal material because it's too coarse and too slippery against the phone's casing; however, we have an abundance of it and I just needed to prove my idea. A thinner string with a less shiny finish, like kitchen string, would be better.
Take a length of string that's at least double your height and tie together the ends to form a loop.
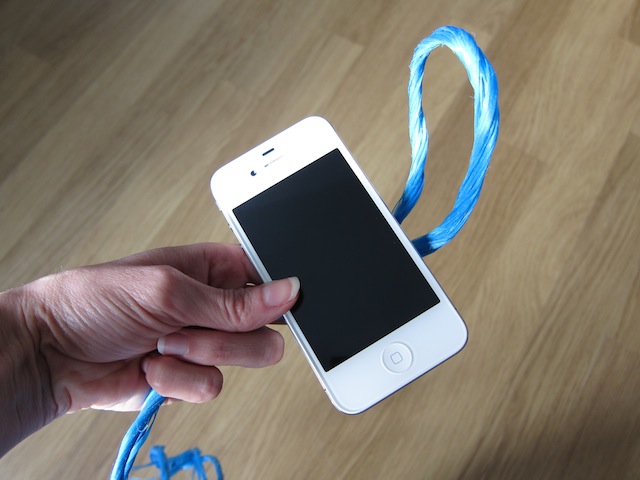
Use the loop to secure a girth hitch around your smartphone. Girth hitch: the technical name for a simple knot made with a loop. You can see better distructions here.
You should now have your string looped around your smartphone, and the rest of the loop hanging down from it.
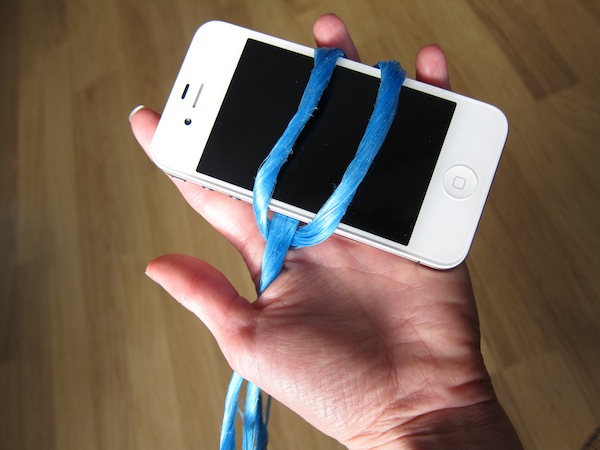
Place your foot (or feet) through the loop and pull your smartphone to taughten the string.

That should stabilise your smartphone on the vertical axis, meaning that you can concentrate on horizontal stability. You should have a better chance of taking wobble-less landscapes and shake-free selfies now.
If you need to shorten the loop, just put a twist in it and secure it with your feet on the twist. Also: don't forget to keep your elbows in when you're taking a photo, no flapping around like chicken, thank you!
How's that for a camera stabilisation device that costs pennies and fits in your pocket?
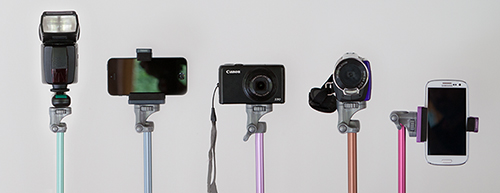
Just before Christmas the lovely guys at Lollipod sent me an ice blue version of their lightweight, compact, multi-functional support device to test. The Lollipod can't withstand anything that weighs more than 420g, but that makes it perfect for mobile phone photography and compact cameras, and it can be used a sound boom, too. I've given it a go with my Canon S95, which attaches to the Lollipod directly, and my iPhone 4, which attaches using Lollipod's additional spring-loaded adapter. (You can use a Joby Griptight, too.)

The Lollipod really is light. I took the liberty of plonking it on the kitchen scales and it weighed in around 275g, or 9oz. So much of the appeal of smartphone or compact camera photography is that it's convenient. You don't want heaps of weighty (and expensive) kit when your camera fits in your pocket. However, there are occasions when you want to be able to steady your picture-taking device, for example when you're taking night shots, or self-portraits. Schlepping around something designed to take a dSLR might be overkill, but the Lollipod isn't.

When it's fully retracted, the Lollipod isn't any more than 33cm (just over one foot) long. That's small enough to put in a daypack, a messenger bag, or even one of my larger handbags. Combined with its light weight, that makes the Lollipod supremely portable.
I was also impressed by the screw mechanism that secured your compact camera or the mobile adapter to the Lollipod. It's integrated into the Lollipod, so there's no ferreting around to find something to screw a plate into the camera or adapter, or even a plate to lose.

Extending and retracting the Lollipod is quick and easy. There are no locking mechanisms: everything just slides in and out. Despite my initial concerns that this could result in the Lollipod retracting into itself, that never happened. After all, neither my camera or phone were that heavy and you're not meant to put anything weighing more than 420g on a Lollipod.

Being so light means that the Lollipod isn't always as stable as it could be, especially when it's fully extended. Unless I set the self-timer on my compact camera it was quite difficult to capture an image without camera-shake. I had much more success with my iPhone, though. It is possible to weight down the Lollipod—you use the carrying case that comes with it, and something like a water bottle or handy rock—but I'd still be apprehensive about using it in windy weather. Without independently adjustable feet, it wouldn't be stable on uneven ground, either.
If you're accustomed to the flexibility of motion in a standard tripod head, you might feel restricted by the Lollipod's limited movement. It can only move through one axis, so you'll need to decide between setting your device so that you can switch between portrait and landscape, or so that you can tilt it. Tilting with a camera on the Lollipod wasn't a problem at all, but I didn't feel that my iPhone was sufficiently secure in its adapter for that.
When you're accustomed to a heavy-weight tripod with a head that moves in almost any direction imaginable, the Lollipod feels incredibly limited and restrictive. But that's comparing apples with oranges, really. The Lollipod has been designed as a lightweight, flexible support, and it fulfils that brief. If you need to stop your camera from shaking when taking photos in the dark, it'll do the job. If you want something to have a go at self-portraiture with your phone, it's great. If you need a lightweight and portable support for a small camera or smartphone, that's exactly what it is. Just don't try it out in a force nine gale.
Lollipods are available direct from Lollipod and cost £30.
Nice picture... shame about the blur. There are times when you expect to see some blur in a photo: panning shots, long exposures, and even in some short exposure photos when the subject is moving really fast (think the wheels on a Formula 1 car). But most of the time, we're looking for sharp photos without any evidence of fuzziness. In this photography fundamentals session, we're looking at vibration and camera shake, and how best to avoid it. Unfortunately, it's easy for the photography deities to conspire against us so that we end up with not-quite-sharp images. Often it's because our subjects move—about which there's little that you can do, especially if you're photographing children or animals—but frequently it's down to camera shake rather than motion blur. We might get the wobbles, we might need to use a slightly longer exposure to ensure that there's enough light on the subject and that means we can't hold the camera quite as still as it needs to be, or we might be using a lens that has a high magnification factor, in which case the slightest movement can show up as camera shake.
If you're not sure if a photo is exhibiting signs of camera shake or if you've just screwed up your focus, take a look at the nature of the blur. A plain old badly focused image will probably have at least one area in focus, but it won't be the right area. The blur will likely be quite smooth, too. A camera shaken photo, on the other hand, will be blurry all over, and the blur is probably sharp and jagged. You might have a double-exposure-like effect, with everything appearing twice in the frame. However it manifests itself, it isn't ideal.

Camera and lens manufacturers have made it easier for us to capture tack-sharp photos with the introduction of stablisation technology. You'll often hear manufacturers claiming that their vibration reduction or image stabilisation mechanisms can offer however many stops advantage, or let you shoot with a slower aperture or shutter speed than you could manage only hand-held without noticing any camera shake. Still, there's nothing like going back to basics and doing everything that you can to produce a blur-free photo.
First of all, you can take the technical approach and reconsider your exposure. If you can, use a faster shutter speed and compensate for it using a faster aperture and a faster ISO. If you're concerned about noise, remember that a smidge of noise is better than a blurry photo.
Second, brace yourself. If you're hand-holding your camera, keep your elbows in, against your chest. Don't stand there trying to stop traffic with your arms out at 90° to your body. If I had a penny for every person I'd told to keep their elbows in, I'd be a few pounds to the better by now. If you're using a long lens, make sure that you have one hand on the camera and the other supporting the lens. The combination of a long lens' weight and its magnification factor makes it a camera shake party.

Third, breathe right. Seriously. Inhaling or exhaling at the wrong moment can cause camera shake. Try not to inhale or exhale at the same time as you depress the shutter button. And while you're at it, depress the shutter button gently.
Four, use a stabilisation device. It doesn't matter if it's a tripod, a monopod, a brick wall, or a string tripod: get your camera stable. And trust me, the length of time for which you're capable of holding your camera steady is much shorter than you think it is.
Five, use a remote shutter release. We've already noted that breathing at the wrong moment and an over-zealous trigger-finger can lead to camera shake. If you're in a very sensitive situation, for example you're using a macro lens, using a remote shutter release eliminates your need to touch the camera and with it the inherent threat from your lungs and muscles.
That should help to keep your photos sharp.
Time-lapse << Photography Fundamentals >> White balance
For anyone who has been searching for a light-weight, multi-functional support device, the very thing might just have been announced today. It's called the Lollipod and it is designed to switch between acting as a tripod, monopod, boom, and lighting stand. The Lollipod weighs 320g, is 320mm when collapsed, can extend to a maximum of 1,130mm, and is capable of supporting a camera, flash, or smartphone up to 430g in weight. That means any point-and-shoot should be fine on it and you might get away with a Canon 100D, too. But chuck your camera (or strobe or whatever else) on a set of scales first to check.
It comes with a standard fit ball head, which means that you'll need to purchase an adapter to secure your smartphone. Lollipod will be introducing their own universal one sometime early next year. Until then, the team recommends the Joby JM1–1ww GripTight. There's also a stabilising kit for windy days and carrying bag for convenience.
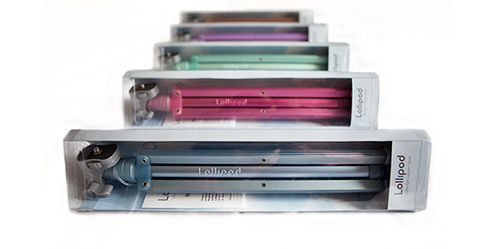
You can choose from gold, dark blue, light blue, hot pink, violet, and minty green and they're on sale at an introductory price of £29.99 (usually £34.99); €37 (usually €41.99); or $48 (usually $55.66), plus shipping. They're not, however, available in Australia, South East Asia, or France. All purchases are made direct from Lollipod.
Now, if only someone would develop a microphone-stand-come-tripod; ideal for all those photographer-musicians in the world.

It's November. Have you noticed an unsually high number of men sporting the fuzzy beginnings of a moustache? You have? Well, the chances are that they're doing it in aid of Movember: the campaign to raise awareness of and funds for research into prostate cancer. And the chances of a man being diagnosed with prostate cancer? About one in nine.
Prostate cancer is something with which film maker Philip Bloom has a far-too-personal relationship: his grandfather died from it and his uncle is fighting it. The likelihood of him developing it are scarily high. Every November, then, he sprouts a moustache and encourages people to donate to the Movember cause. Last year he raised £18,000 towards prostate cancer research; this year he'd like to do better, and this is where you get involved. Better still, you don't even have to grow a moustache.
He's tapped up members of the film making and photographic community the world over to contribute awesome prizes for his insane Movember Giveaway.
This giveaway comes in two parts. To be eligible for either half you must donate at least $20 to 'Team Bloom Tache' (and let Philip know by emailing him a copy of the receipt), but whilst one half needs just your charity, the other demands your creativity, too.
As Philip is a film maker, it's hardly surprising that one half of the giveaway involves making films. You've two options: a film that celebrates the moustache or a film that raises awareness of prostate cancer. Whichever you pick, there're super prizes up for grabs for the best film in either category, such as a Compass 12 tripod, thanks to Miller Tripods, or a rig of your choice from the team at Shape, or some goodies from Kessler Crane. Those are just a few examples.
Fun or serious, it doesn't matter, but the films should be short and tight–ideally no longer than two minutes in length–and need to be submitted to the Vimeo group before 20 November 2012.
And don't forget your $20 donation, either!
If you're not able to make a film, for whatever reason, you can put yourself into the draw to win all manner of wonderful prizes. All you need to do is donate $20 to Philip's Movember team and then email a copy of the receipt to the designated address. That will put you in with a shout to win a licence for Creative Suite 6 Premium Production, courtesy of Adobe; or a $1,000 voucher for Zacuto; or a Sony RX100 thanks to hireacamera.com; or a GoPro Hero2 and a bundle of accessories from GoPro or... or... or... The list of prizes is huge, and growing!
To keep an eye on the ever-growing list of prizes, to check out all the terms and conditions, and to make sure you send your donation receipts to the correct email address, check out the giveaway page on Philip's website.
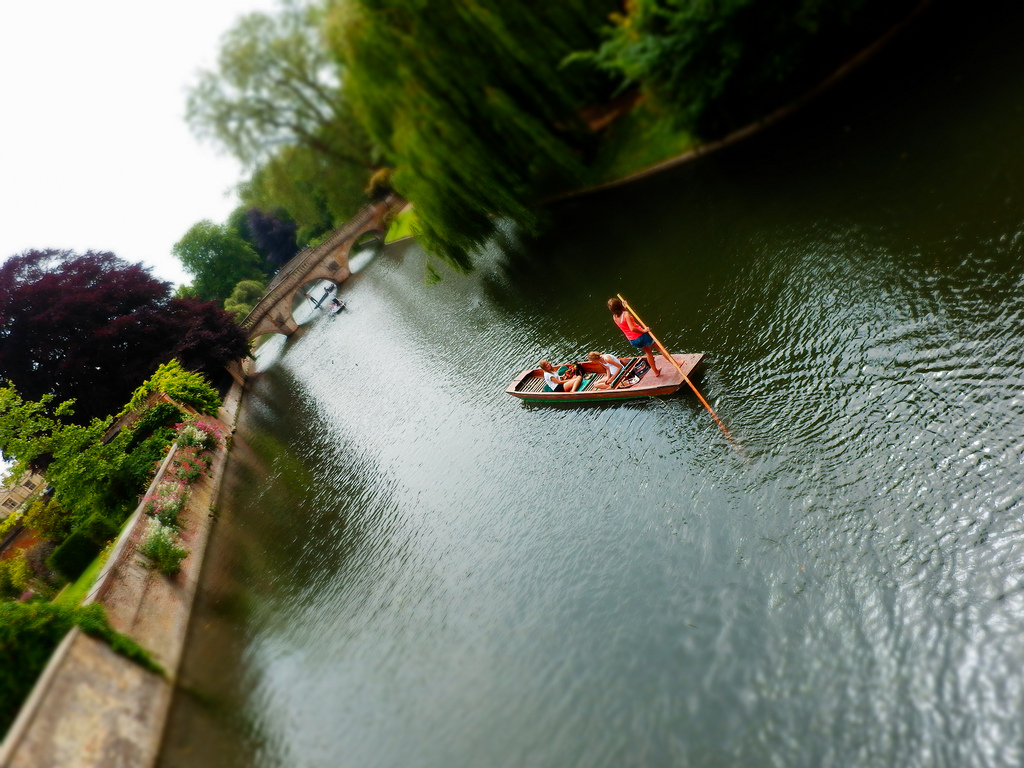
Horizons: they are very definitely meant to be level in our photos. Whenever I see a lop-sided horizon, it sets my teeth on edge. Nature intended that they be straight, at least as far as our eyes can see, and our inner ear knows this. A wonky horizon will likely make anyone looking at it feel uncomfortable, as their eyes will be telling them one thing and their feet another, but they won't necessarily be able to pin-point why. And you definitely don't want that.

They also seem to be something that I am perenially unable to get right when I take a photo. (Unless I'm using a tripod, of course, then you use a dinky spirit cube in your hot shoe.) I know that they need to be level, so I try my utmost to make them that way, but they always need tweaking. I don't know, maybe I stand funny, or something.
The fix, however, is easy. Whether you're using a free online editing service or have the mighty power of Lightroom or Aperture behind you, there're tools to straighten photos. I've picked two as examples - one free, the other paid-for and swanky - to give you an idea.
If you use Pixlr (Pixlr.com, possibly my new free online suite of choice, following the demise of Picnik), it's very simple. Upload your JPEG photo into Pixlr Express, select Adjustment, and then Rotate. Then all you need to do is use the slider to alter the angle of the image so that the horizon comes up straight. There's even a useful grid to help you get it right.

Use Lightroom 3 and you have three straighten options, all of which are found in the Crop panel on the right-hand side. The first is under the Crop tool, and you adjust the angle by eye, using a grid overlaid on the image to help you. The second uses the slider, allowing you to adjust the slant of the image by a precise number of degrees. The third is by far the easiest. Click on the Angle tool and then use it to draw on your image, following the line of the horizon. It'll correct the angle of the image to that line. Simple! (And it also works the same for vertical alignment, too, ensuring that buildings don't lean to the left, or whatever.)
Of course, if you want to deliberately set your skyline askew, there's nothing wrong with that and you can use these same tools to achieve that end. Just make sure that it's off-kilter enough that it's easily identifiable as deliberate. (And I'm reliably informed by one Haje Jan Kamps that a purposefully skewed horizon is called a 'Dutch Tilt'.)
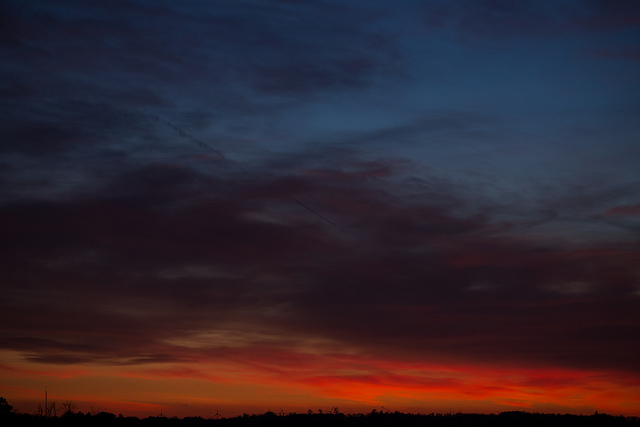
If you're now permanently unable to look at another picture without being able to spot the wonky skyline, I'm sorry. But you never have an excuse to be riding off into a crooked sunset again!

People have been obsessing over composition – and the theory and maths behind it – for thousands of years. Pythagoras discussed it, Ancient Greek architects used it, and Fibonacci sequenced it. But what does it actually mean for you and me when we take a photograph?
Essentially, the resulting rules of composition help us to create pictures that please the eye and are easy to understand. Composition can make or break a picture, but is so often overlooked. Let’s look at some of the main ideas people are using.
One of the oldest rules in of composition is known as the rule of thirds. It’s easiest to understand if you imagine a grid across your picture, splitting it into nine equal rectangles.
Basically, the rule says that placing your subject(s) on any of these lines will make for a better composition. Let’s look at some examples of the rule of thirds to help explain it:

The rule of thirds applies to landscapes...

...and to portraits
Roughly speaking, the horizon is placed on the bottom of the two horizontal lines (although it also works on the top) and lined up the subject with one of the verticals. You can also place extra emphasis on focal points of the picture by positioning them where the lines cross, such as the girl’s face in the second photo.
Maybe try imagining these lines next time you look through the viewfinder, and adjust your shot to see if it works better. It doesn’t have to be exact!
Almost the polar opposite of the rule of thirds, symmetry can change a photo from ordinary to extraordinary, especially when used in unexpected ways. Using symmetry in portraiture can be very unsettling, but also very effective! To get perfect symmetry in your photos, it’s probably easiest to use a tripod to frame the picture exactly as you want it to appear (and remember, a little ‘cheating’ in image editing software can also help you along the way).

Sharp Symmetry, by Scintt

Place of Contemplation, by Martin Gommel
Leading lines are exactly what they sound like – they cut through the image, drawing your eye down them and into the picture. These are often used in landscape and architectural photography, and a favourite technique for photos of roads and railings. Often used to great effect when leading to a vanishing point, and frequently combined with symmetry, this can also have very dramatic results. Again, a tripod will help give you set up your shot for the composition you want.

Airport Symmetry, by Doris Hausen
Vanishing Point, by Luigi Caterino
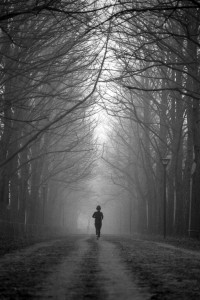
I’ve only scraped the surface of the different techniques used by photographers to give their pictures the composition they want. Try using elements in the composition to frame the subject (such as the trees in the picture with the runner), and maybe try different techniques on the same picture – it might be the easiest way to find the one that works.
The theory behind what makes a ‘good picture’ can certainly be off-putting for many. After all, isn’t a good photo about how it makes you feel rather than how perfect it is? Possibly. But understanding conventions helps us decide when to follow them, but also when to break them for dramatic effect. So go experiment with unusual crops, dead-centre subjects and skewed horizons – you might just discover something amazing!
All photos used in this article are used according to Creative Commons licences. If you have strong reservations against your photos appearing on Small Aperture, please contact us, and we’ll get them taken down. Please support the artists creating these photos by clicking on the photos to take a closer look at their work!