


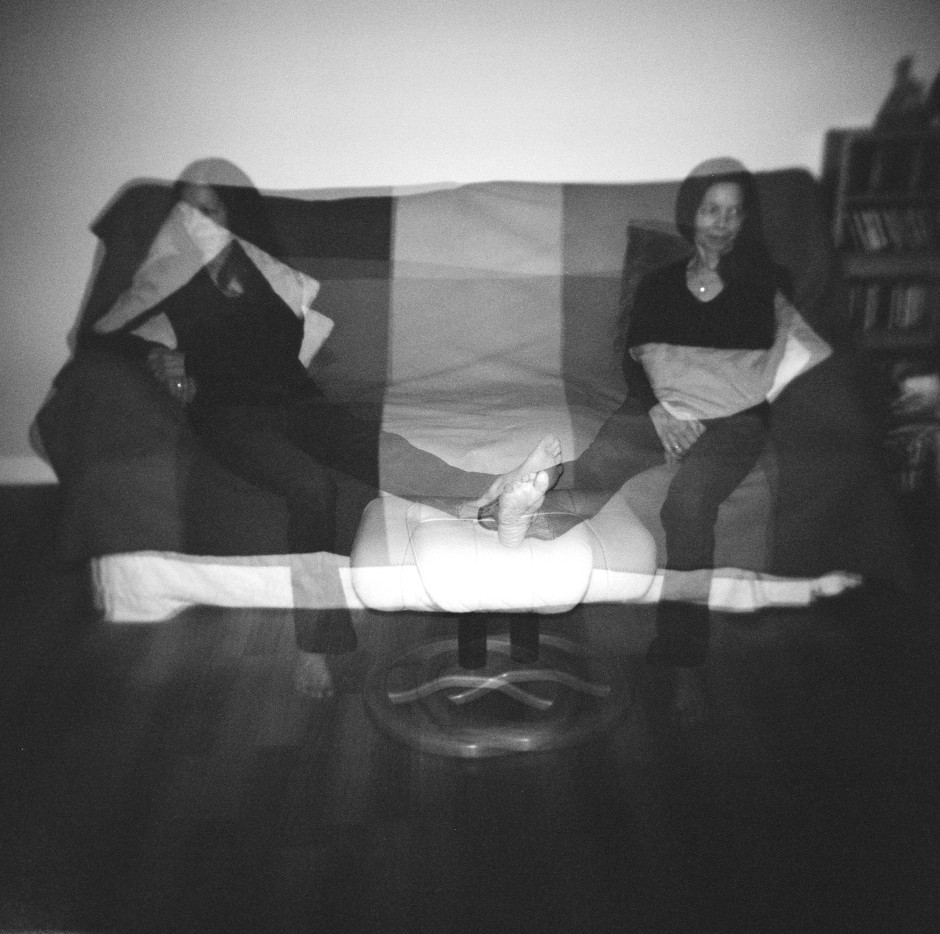
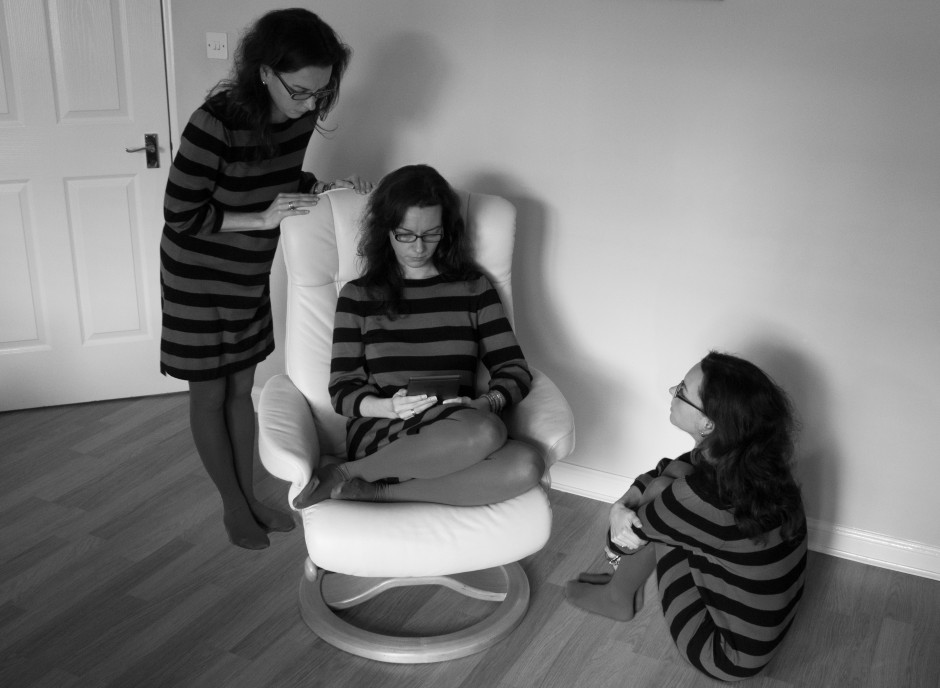
Multiplicity, or the art of creating images containing several yous, or anyone elses for that matter, isn’t a digital discovery. It’s something that people have been doing for decades: it's remarkably easy to achieve with film. You set up your shot and either you don’t wind on your film before re-exposing the frame with your subject positioned anew in the scene; or you wind on your film and then wind it back again in between shots. The important thing here is to slightly under-expose all of your shots in the sequence to ensure that your final image isn’t an over-exposed white mass.
If you don't happen to have a Holga lying about (they're great for creating multiple exposures), you can do it with a digital camera, too. Depending on the camera you have, you've a few options for creating a multiplicitous image. Quite a few come with a multiple exposure setting now: you determine how many exposures you want to make and the camera will re-expose the same 'frame' in-camera and adjust your expose settings accordingly to ensure that you don't end up with a too-dark or too-light image. Marvellous... if you have a camera that can do that. If not, you'll need to make friends with Photoshop, or a Photoshop-esque editing package.
Before we go any further, it’s important to remind you that achieving a great final image relies on producing a good image in-camera first. It doesn’t matter how ginormous the barrage of editing you’re going to subject your photo to, it’s got to be good from the get-go. This is just the same for a multiplicity image as any other.
When you set out to create a multiplicitous image, your starting point is your concept. Think of the story that you're trying to tell and what you need to tell it. Having a clear plan makes it so much easier when you're shooting the images because—unless it's a distinct element of the story—you need consistency in your images: furniture can't move between shots, the light needs to be coming from the same direction, and you don't want to be flapping around.
When the scene's arranged, set your camera on a tripod, adjust it's exposure settings and focal point, and shoot a 'plate' image. This is a base photo, devoid of the story's characters, onto which you'll build your final creation.
Now you can shoot your series of images containing your subject in as many different positions as your composition merits. I've found it useful to go for more rather than fewer photos; it gives you more flexibility when you compile your final image.
[gallery ids="6703,6704,6705"]
When you've shot your images, import those you think you might want to use into Photoshop using the Load Files in Stacks option (File>Scripts>Load Files in Stack), which should import your images so that they are perfectly layered one on top of the other.

Next apply a layer mask to each of the layers, barring the background image, which should be the ‘empty’ plate.
Using the eye icon on the Layers Palette, toggle off all of the layers from view except Layer 1. Now brush your subject, along with anything like indentations in the chair where she or he is sitting or shadows, out of the image. It's those small details which add credibility to the unbelievable, which is what makes them important to the final composition. And while it might seem counter-intuitive to brush your subject out of the image, it isn't really.
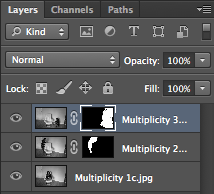
When you’ve disappeared your subject from the scene and you’re happy with the refinement of the edges, invert your selection by pressing Cmd+I on a Mac or Ctrl+I on a Windows machine. The subject will miraculously reappear and the superfluous background will disappear.
Do take care when you're areas where overlapping occurs, because it's here where your image will succeed or fail in its realism.
Repeat this process for each of the layers, toggling them on and off as necessary to decide on which placements you want to keep, and which you wish to discard. I’d recommend saving the image as a PSD file with all the layers intact, which will allow you to revisit it and re-edit as often as your Dr Jeckyll needs to meddle with your Mr Hyde.
When you've settled on a final version, delete the layers that you don't want, save it as a PSD file, and then flatten it and export it as a JPEG image. Ta-dah!