Equipment

Review: Photoristic HD iPad editing app

When I first downloaded Photoristic HD to have a go at some editing on an iPad, I was expecting an all-round editing package that would be great for my parents to use to make adjustments to their photos on their iPad. They use a point-and-shoot, record everything in JPEG, my mother has a proclivity to take wonky photos, and my father doesn't understand the concept of 'getting closer' no matter how much I try to impress it upon him. They need a simple but comprehensive editing app. Photoristic HD combines general editing functions (white balance, exposure, contrast, highlights, shadows, vibrance, saturation) with advanced colour adjustments and a barrel of filters. It can process images of upto 20 megapixel resolution, and saving and sharing is easy. It sounded promising. So much for my expectations. This was not an app that felt I could present to my parents to help them make their photos look better. It wouldn't meet their needs. But when I got past this disappointment, I realised that Photoristic HD offers something different for iPad editing and it might not be all that bad.

photo

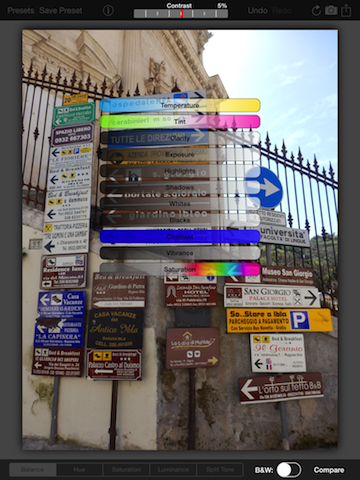
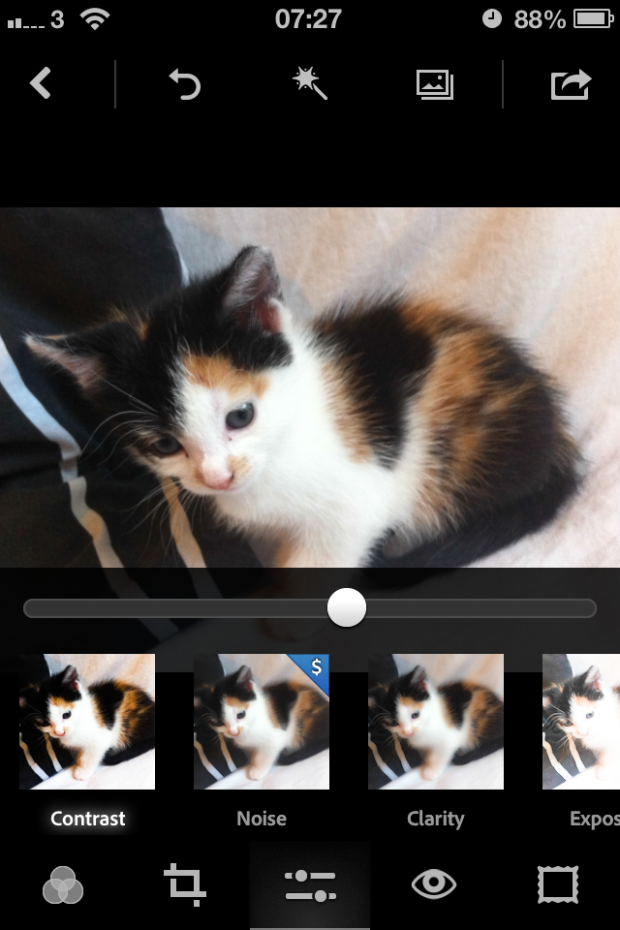
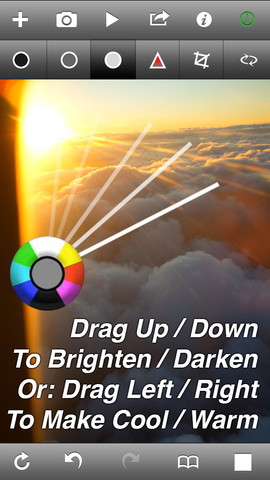
Photoristic is easy to use: you swipe left or right to adjust the values of whichever function you've selected, be it the like of contrast, shadows, or highlights underneath the balance tab, or one of the eight colours sitting beneath the hue, saturation, or luminance tabs. You can convert to black and white with the toggle of a button and you can apply one of a huge selection of filters—black and white options, selective colour choices, and colour filters—with two taps.

I'm not a frequent filter-fyer and I actually found many of Photoristic's too harsh or intense for my tastes. I wouldn't want to let my parents loose with these. All their photos would come out too brash, too sharp, too in-your-face. Photoristic does, however, let you save your own presets, which is moving well beyond the realm of my parents' use, but does present it in a different light.

The Polar Sun preset doesn't do it for me

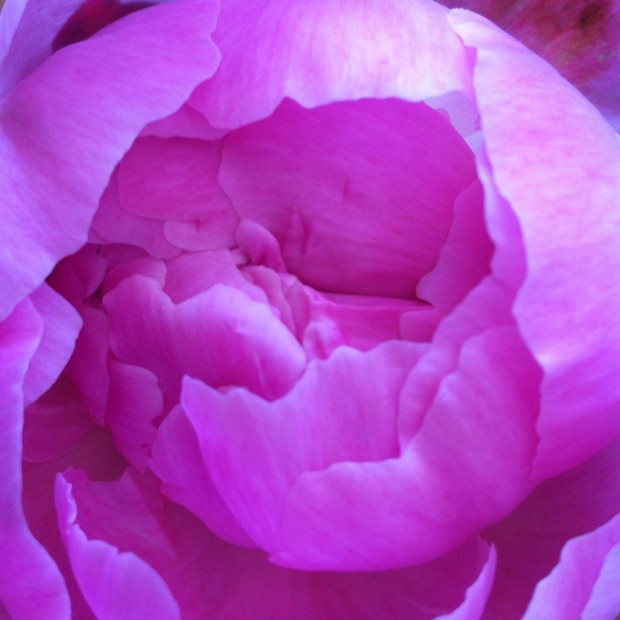
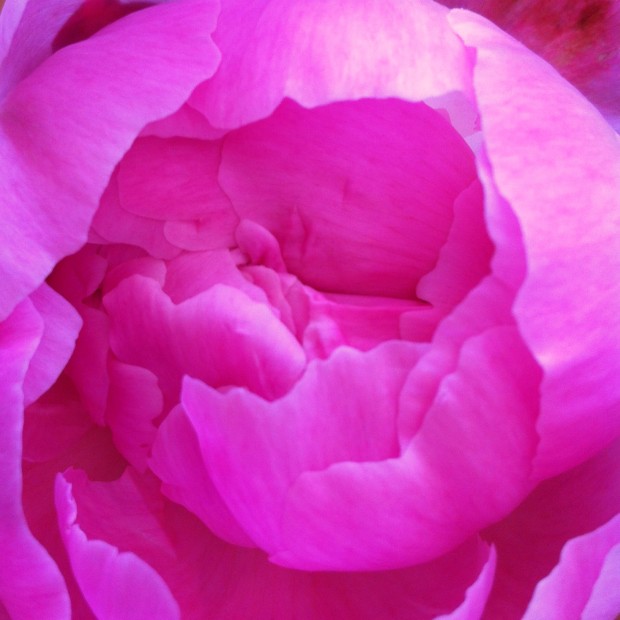
This gives you the chance to combine its split tone function, colour controls, and the adjustments in the balance tab to create your own effects. Now that I've taken a step back, I wouldn't hesitate to name Photoristic's fine colour control and ability to save presets as its most valuable feature. No, it isn't an all-round editing package; it's something else. I was able to create my own cross-processed effects or add a bit of golden hour magic to a photo taken nowhen near sunset or sunrise. And I was able to save these as presets to apply to any photo I process through the app.


Having fun with split toning

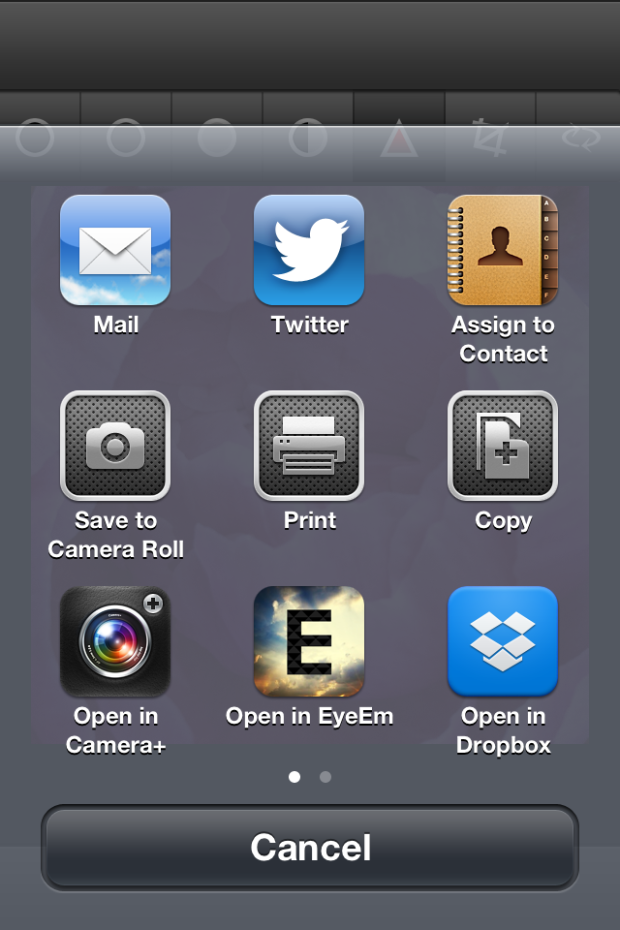
There are buttons that allow you to sequentially undo your previous edits or compare your current version to your original image. When you're content with your handiwork you can save your image to your photo library or Dropbox, email it onwards, send it to print, or share it to Facebook or Twitter.

Should you get a bit stuck, the help button is towards the top left corner.

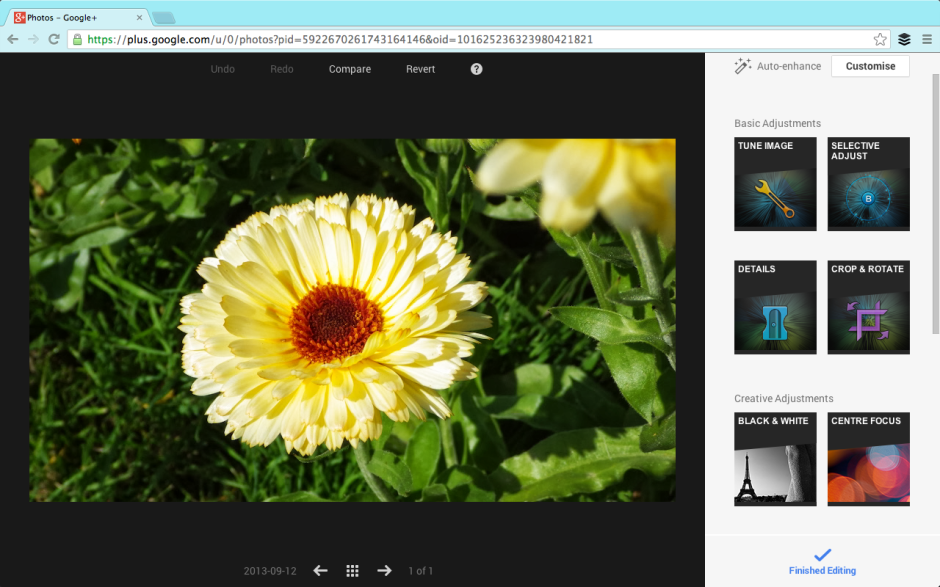
The most critical omission that prevents Photoristic from being a comprehensive editing package is a crop and rotate feature. With every photo that I put through the app I felt frustrated that I was unable to straighten it or slice off a few extraneous pixels. And my parents, with their skewed horizons and distant subjects, definitely need it. It's all very well being able to bring out the blue of a sky, tone down the red of someone's nail polish, or help negate a green cast, but crop and rotate is one of the basic functions that we rely on in an editing suite.

Standard edits are fine, but oh for the love of a crop function

I was so surprised by the omission that I emailed the developers to check that I hadn't missed it anywhere. They confirmed that there isn't a crop and rotate function yet, but it is expected in a future iteration.

When you realise that Photoristic isn't a basic editing app but instead offers more sophiscated controls to adjust colour and create your own filters for your photos, it takes on a different complexion. If you're looking for an iPad app to let you take control of your photos' colour effects and filters, then do consider downloading Photoristic. It's £2.99 in the UK and $4.99 in the US.

I shan't be showing my parents how to use it.

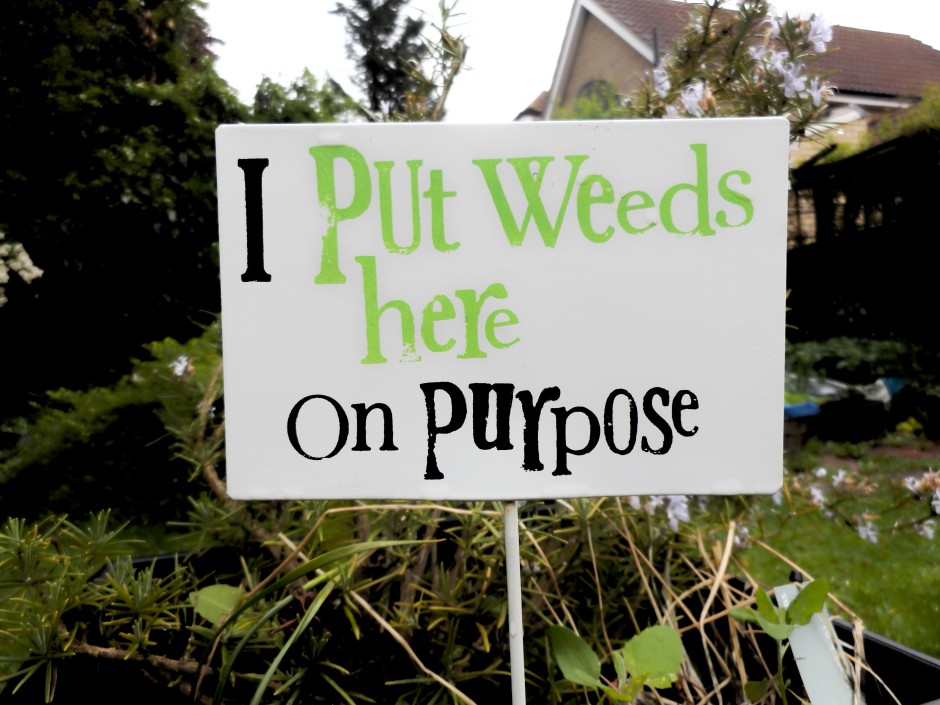
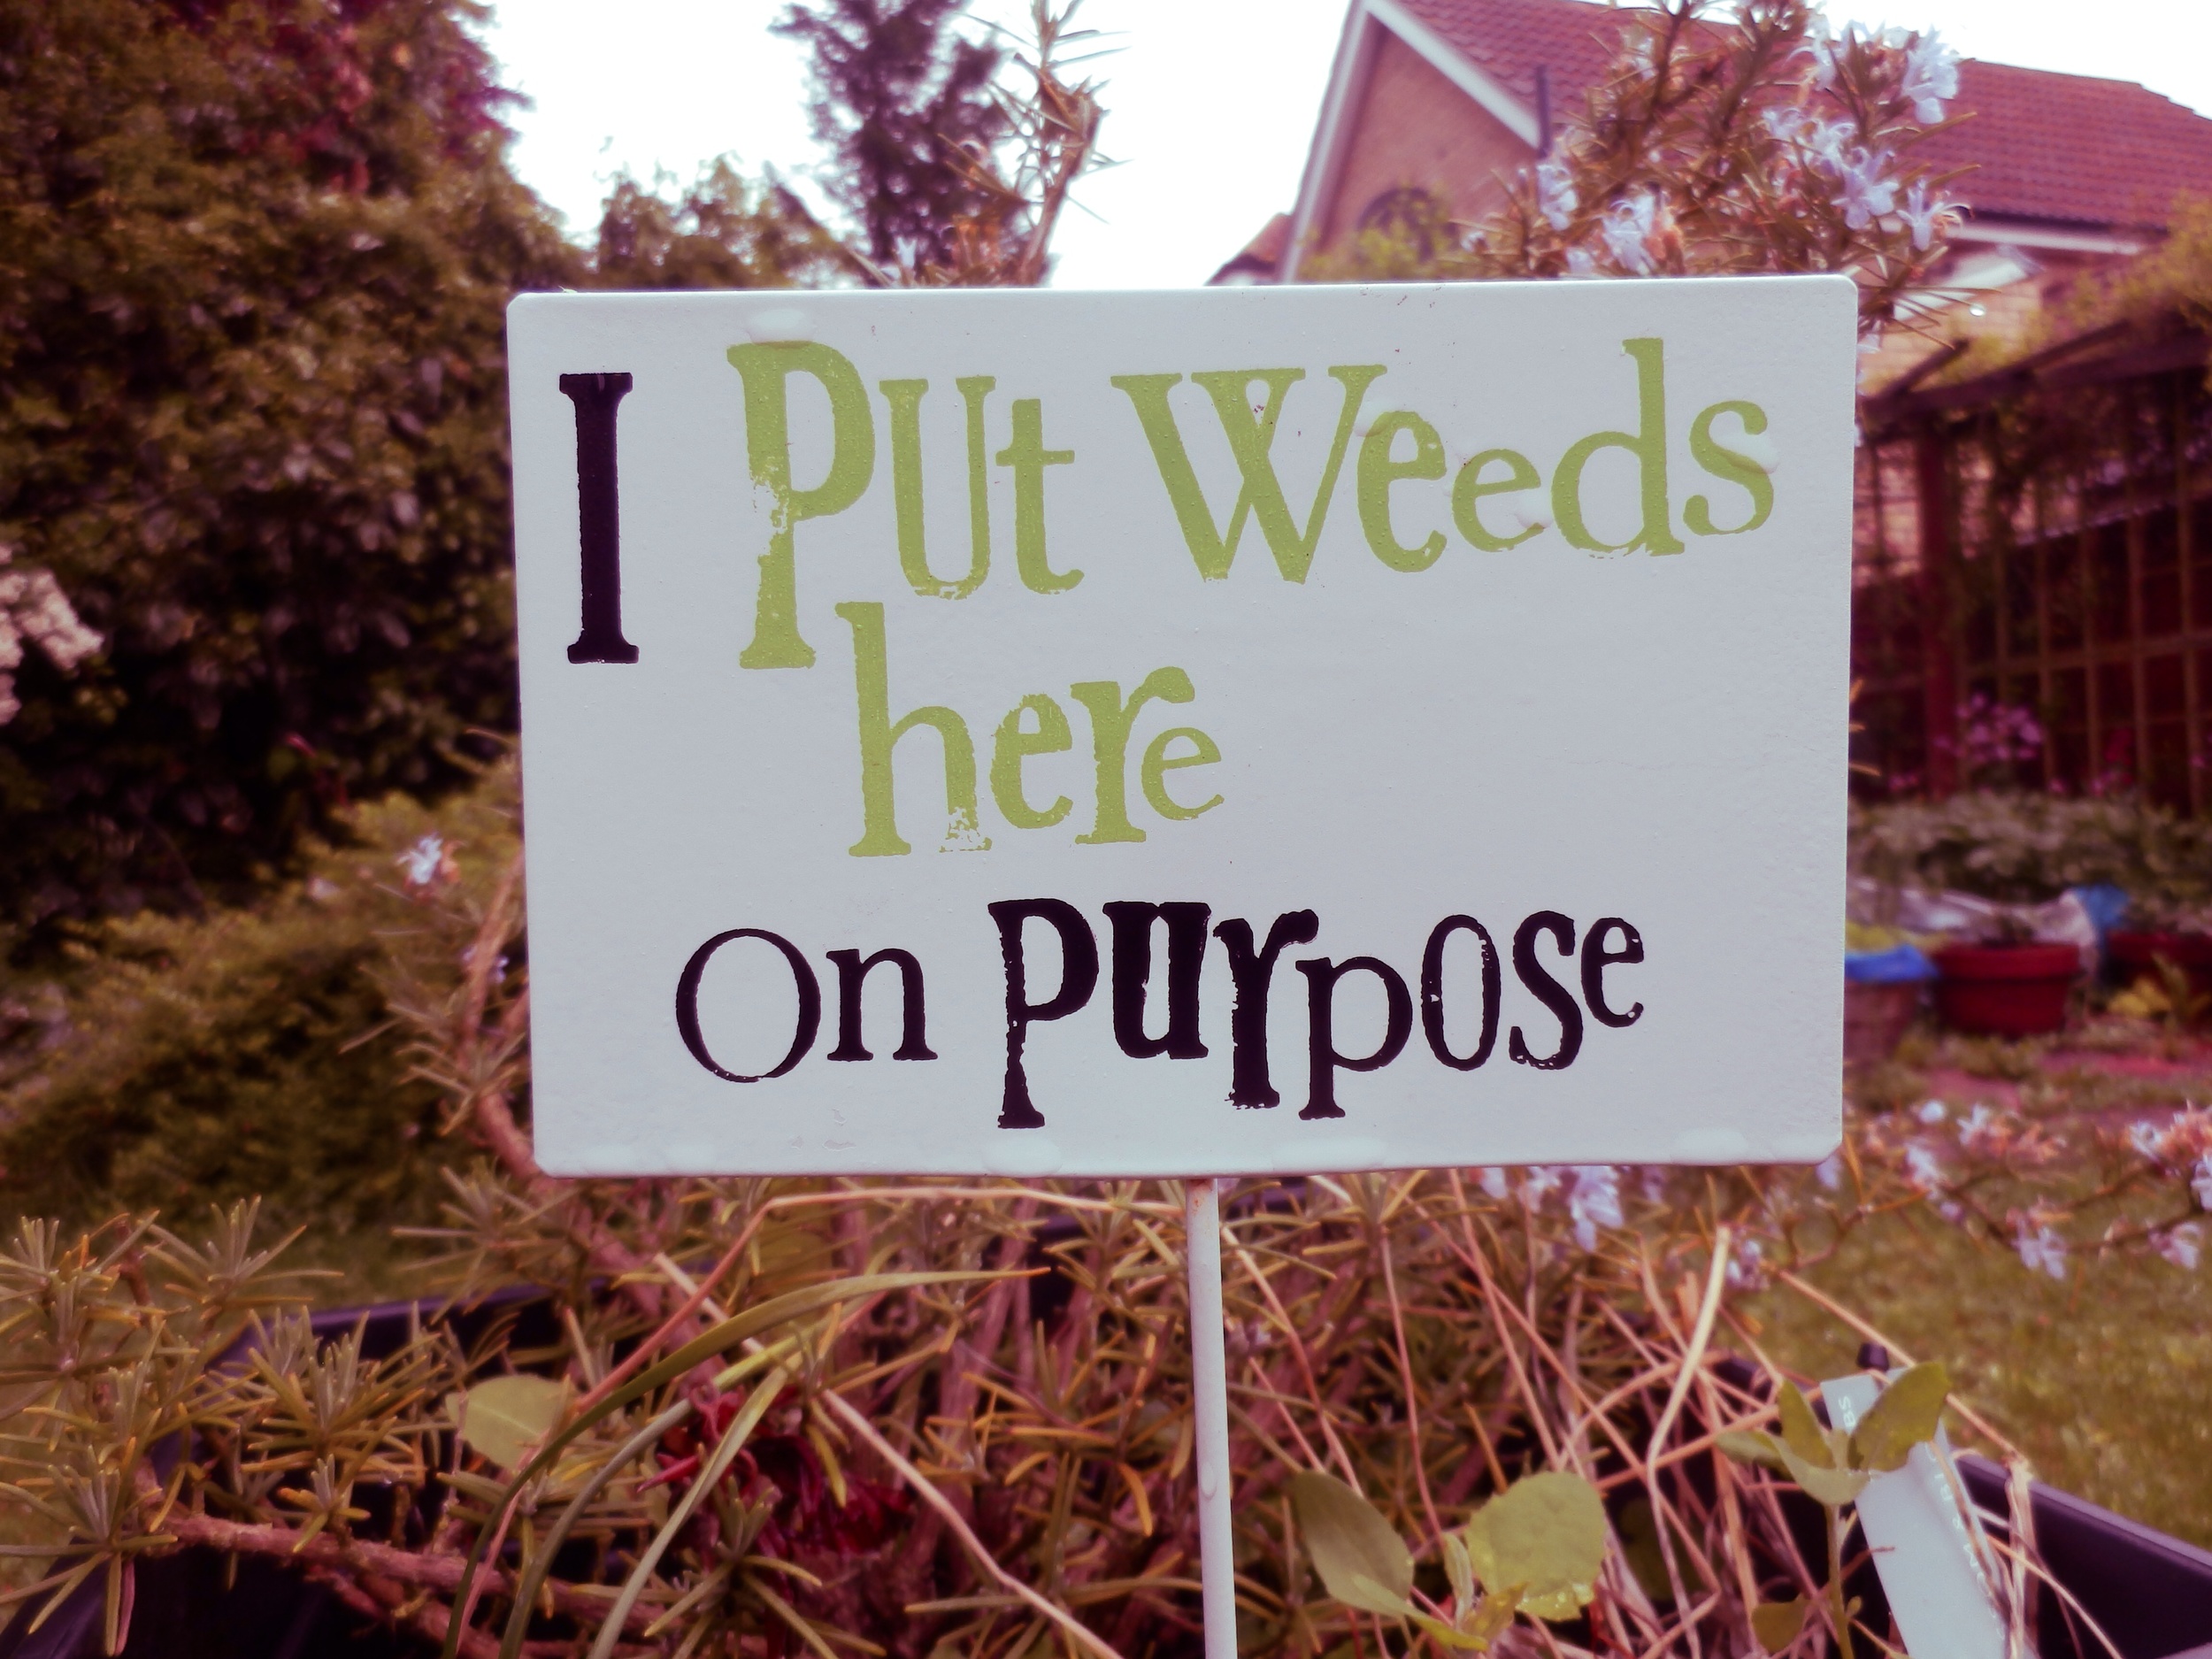
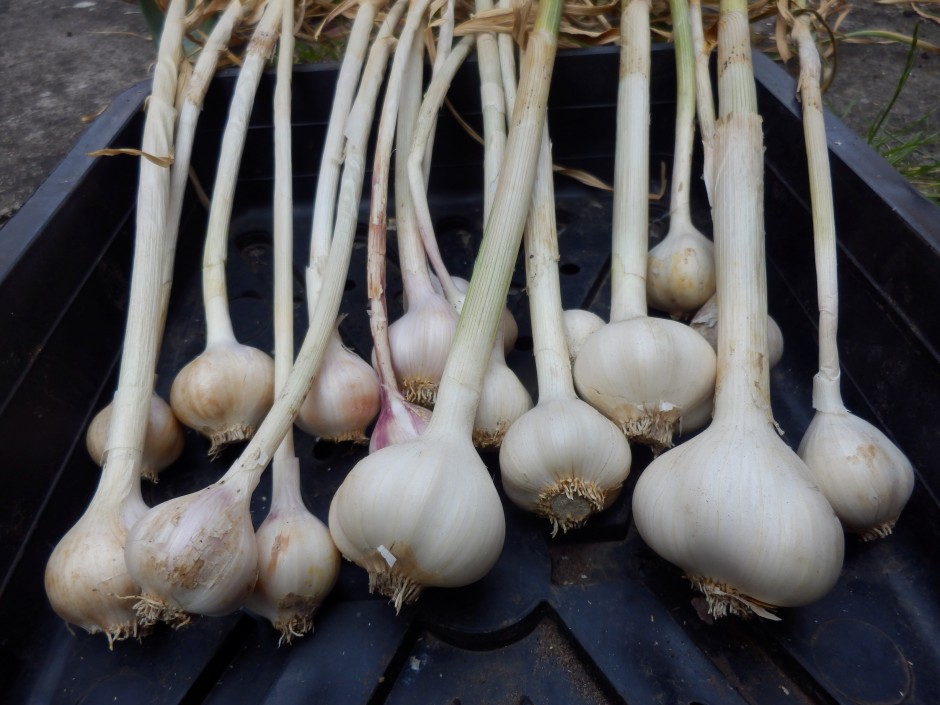
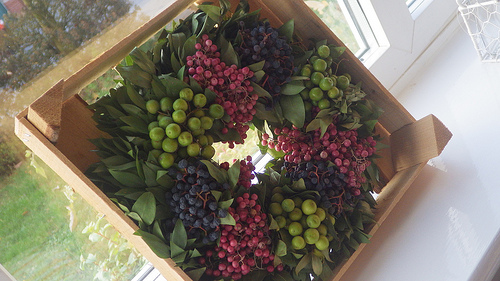
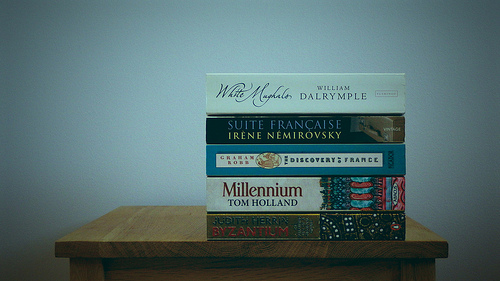
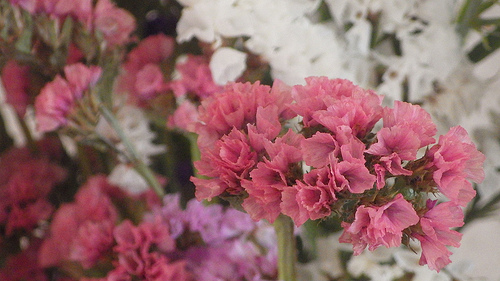
(All photos courtesy of my parents.)

Review: MacWet gloves

The clocks go back this weekend in the UK. This means that winter is approaching, along with its longer nights and colder weather. I'm digging out my hats, scarves, and gloves and this year a new pair of gloves will be joining my wardrobe. They're made by MacWet and it seems as if they might be suitable to wear while wielding a camera. MacWet gloves are typically worn by sportswomen and men, people such as jockeys and golfers who prefer to retain the functionality of their fingers despite the cold, but also need to be assured of grip. Dropped reins and flying golf clubs are far from fun. They come in two flavours: the lighter-weight Micromesh and the fleece-lined Climatec version for much colder days.

MacWet's lighter-weight Micromesh gloves

Thinking that photographers might benefit from warmer hands with the added bonus of un-dropped cameras, they sent me a Micromesh pair to try out. I suffer from terrible circulation so have a goodly selection of gloves for the colder months; for photography purposes I use a pair of fingerless woollen gloves with a mitten topping that gives me a modicum of warmth without jepordising my control over my camera. Despite my huge scepticism about the potential efficacy of the MacWet gloves, my fingerless mittens have now been relegated to recreational wear.

My first concern was that a begloved finger would be too cumbersome and clumsy to afford me accurate control over the buttons and dials on my camera. So far, I've not experienced any problems at all, but I have been using the lighter Micromesh version. The gloves come in sizes 6 to 12, and the size 7s I've been wearing have been snug. No, a layer of fabric is never going to allow you the tactile responsiveness of your bare skin, but I've not been disappointed.

Second, what about grip? No concerns at all. My camera hasn't slipped through my grasp and neither have any lenses when changing them, whether the gloves have been wet or dry. The heavier-weight Climatec gloves are both water resistant and windproof, but my hands haven't felt uncomfortable when I've doused the Micromesh version. When they get dirty, you can chuck them in the washing machine at 40°.

If you are of the glove-wearing persuasion, you might want to think about a pair of MacWet gloves. The Micromesh gloves are £28 a pair; the Climatec gloves are £30.

Review: Pentax WG-3 GPS

I spent a few weeks with Pentax's rugged 'adventure camera' with built in GPS, the WG-3 GPS. When this camera was released, I described it as cross between a toddler's teething ring and a training shoe in design. My opinion on its aesthetics hasn't changed, but what do I think of it as a picture taking machine? During testing it came out and about with me in every day life, went on a trip to Cambridge, and was subjected to 'general fiddling' at home.

Basic spec

The WG-3 GPS has a 16 megapixel CMOS sensor and a 4× optical zoom lens that has a maximum aperture of ƒ/2.0 at its widest angle packed into a body that can withstand water as deep as 14 metres, cold down to -10° Celsius, being dropped from two metres, and a crush force of 100kg. There's also GPS, a barometer, and an electronic compass.

wg3gps_green_001

As can probably be expected, it has more scene modes and digital filters than you've had hot dinners this year. This includes a digital microscope mode, complete with five LED lights surrounding the lens, to help capture the smallest of small subjects.

At the moment you can pick one up for £235 if you shop around.

Build and handling

It's a rugged camera. It's designed to be dropped, soaked, and frozen. When you hold it, you get the feeling that it's perfectly capable of withstanding these torments. I wasn't brave enough to drop it or stand on it, mostly because I was concerned that I might damage my wooden floors. Still, I took it in the shower with me to be assured of its waterproof sensibilities and I wasn't disappointed.

Photo 29-09-2013 13 20 39

However, it hasn't strayed far from the obsession of making any and all adventure compact cameras look as if they've been designed by kindergarten pupils using crayons. I'm also inclined to think that the ruggedisation has had something of a negative impact, too. On occasions I found it quite difficult to depress the shutter release button without making the entire camera judder. There went any semblance of focus I had. Of course, this could just be me being a weakling and others might not have encountered anything similar.

If you're accustomed to recent model Pentax cameras you would not find the menus very different and even if you're not a Pentax user, they aren't difficult or complicated. You'd pick them up relatively quickly. As well as the plethora of scene modes and digital filters lurking beneath the mode and menu buttons, there's also the Green button to which you can assign your most-used functions. I opted for white balance, ISO, focus, and exposure compensation.

Photo 30-09-2013 08 28 41

I was disappointed with the screen; I found it incredibly difficult to see in bright conditions, which makes me wonder how effective it would be when you're halfway up a mountain. I did appreciate the level indicator, however, as I have a prediliction to take wonky photos.

Images are recorded in 4:3 format at full 16 megapixel resolution, as well as 7, 5, and 3 megapixels. If you scale down to 12 megapixels you can choose between 16:9 and 1:1 formats. The 16:9 aspect ratio is also used for 5, 4, and 2 megapixel resolution images.

Performance

Slow autofocus is a problem that I've encountered with other Pentax cameras before now and unfortunately the WG-3 exhibited similar problems. It wasn't an issue in good light, but a hint of darkness leaves the auto-focus pecking around for its target, even with the assist beam. This was especially noticable when using the macro auto-focus or the digital microscope mode.

You have a choice of 28 different scene modes with the WG-3. They range from auto and programme through to underwater, surf and snow, and report, via landscape and food. In my opinion that's too many, especially when auto mode is intelligent enough to detect that the camera is photographing a flower and switch to flower mode, or a person and switch to portrait mode. A rugged camera would do well to provide auto and programme modes and then focus on the areas where it should be excelling: underwater and snow and bright conditions.

In the shower, underwater mode

I gave the underwater setting a whirl in the shower, although doesn't really have the same effect as being submerged. It is meant to saturate the colours to compensate for the loss of light beneath the water's surface. However, you can see just how much it does do that. With no snow in my vicinity, I tried photographing a bright white surface in strong sunlight. I felt that it still needed exposure compensation, which rather defeats the object of the mode. You have to hope that people using it in these situations aren't relying on the camera's judgement in its entirety.

My ISO tests revealed a camera that produced no or little noise at ISO 125 and 200, but with some degredation appearing at ISO 400. There was significant graininess at ISO 800 and by ISO 1,600 I would be disinclined to make use of it. Combined with its disappointing auto-focusing ability, this doesn't bode well. However, at its widest point the lens has bright ƒ/2.0 aperture, which isn't to be sneezed at.

ISO 800

I was impressed by the photos the camera turned out when it used the macro auto-focusing mode, but the digital miscroscope was a disappointment. Apart from taking an age to focus, the five LEDS blew-out the white bed linen and the white flowers I tried it on. The macro focusing mode was far more effective.

Linen microscope mode

The WG-3 GPS has eight white balance settings, including the auto mode that I found to be adequate. Occasionally it was a little too blue, but mostly it rendered colours accurately.

Auto white balance

I was pleasantly surprised by the HDR function and felt that it really did make a difference in very bright situations without looking fake and over-cooked.

Wreath in HDR mode

I didn't subject my test shot to every to every digital filter that the camera has to offer, but I did play with quite a few. It has everything that you'd expect, for example retro and toy camera, black and white and sepia, and miniature, as well as star burst and selective colour. You can see their effects over on my Flickr gallery.

Toy camera filter

Finally, I found the battery life very poor. It is supposed to manage 240 still shots on a full charge. I didn't manage anywhere near that.

The verdict

Despite it being a camera that I find ridiculously ugly and it having some shortcomings that I found disappointing, there was also plenty to like about the WG-3 GPS, for example its ƒ/2.0 lens. It does take good photos in good conditions and it has the means to overcome unfavourably bright conditions, too. There are a lot of adventure cameras out there to be bought and I wouldn't necessarily write off the WG-3. I just wish that Pentax had focused on making it a great compact camera, rather than one with lots of add-ons.

Macro mode

Would I buy it? To be honest, if I'm scaling a mountain or snorkelling, I'm more likely to be concentrating on staying upright or breathing than taking photos, but I would consider it if I felt that I were able to split my faculties sufficiently.

Would I recommend it? There are a lot of rugged cameras out there and the WG-3 GPS is good value for money. It's worth investigating.


More photos are on Flickr.

Sleek and smooth: it's Triggertrap Mobile 2.0

It's sleek, it's smooth, it's the new Triggertrap Mobile 2.0 that allows you to trigger your dSLR in 14 ways using your smartphone and a dongle. Want to record a timelapse—that is a sunset timelapse that makes use of bulb-ramping, or timewarped timelapse that has varied intervals between shots, or an HDR timelapse? Or trigger your camera using sound or vibration? How about create a distance-lapse? Maybe record star-trails? Fancy having a go at long-exposure HDR? And do it all wirelessly? Triggertrap has you covered. There's even a wireless flash adapter you can hook it up to for high-speed photography. Triggertrap-Mobile-20-iOS-Bang-Sensor

The new version is available for both iOS and Android devices and has a simplified design that's not just a pretty screen: switching between triggering modes is now easier. There were a few bugs in the old version that should now be squashed and Android users will be happy to hear that the app can now run in the background, even when the phone is locked, allowing you to timelapse away until your heart is content without fatally draining your battery.

The Triggertrap team is rather proud of version 2.0: 'We saw the opportunity to combine what we learned from the first generation app with the tips we received from our diehard fans to make Triggertrap what we always envisioned it could be,' said CEO and Triggertrap inventor Haje Jan Kamps. 'It certainly helps that our fans wear the pants around here and aren’t shy about letting us know what could be improved, and as a result, Triggertrap Mobile 2.0 is the best triggering solution you’ll find anywhere.'

If you don't already use Triggertrap, you can download the app for free from Apple's App Store or Google Play. It works with your device's internal camera or can be hooked up to supported dSLRs or flashguns using hardware available from the Triggertrap shop.

And if you'd rather watch a video, Triggertrap's made you one of those, too!

Adobe's Projects Napoleon and Mighty are go!

Abode mooted Projects Napoleon and Mighty at Adobe MAX in May this year. They were ideas explored by the Experience Design (XD) team: 'Mighty', a cloud pen, and Napoleon, a digital ruler. Today, they've brought them to life. Mighty, the cloud pen, was dreamed-up with a focus on the future of drawing. It's a pressure sensitive device to be used for drawing that's also connected to Adobe's Creative Cloud. This connection allows you pull up Kuler themes and create a 'cloud clipboard' so that you can save, access, and re-use things you've already drawn.

The design of Mighty was down to a team at industrial design firm Ammunition. They settled on a triangular grip with a twisted stem that's comfortable to hold and sits naturally in the hand.

Adobe Napoleon and Mighty

Napoleon is a digital ruler that was designed to bring back some of the feeling of drawing with analogue tools like the t-square and triangle. As Michael Gough, Adobe's VP of experience design puts it: 'There is something about the confidence of drawing a line aided by a physical device—the tactile feedback you get as you move the straightedge around—as well as the fluidity and accuracy of drawing that comes from interacting with physical objects.'

Adobe will teaming up with Adonit, 'an awesome band of makers with a shared belief in the power of creative devices paired with apps and services,' to bring Mighty and Napoleon to you in the first half of 2014.

What's that you say Adobe? You've updated Photoshop Express for iOS?

Amongst the bundle of app updates waiting for me this morning there was one from Adobe, for Photoshop Express. I noticed that the icon had altered, which suggested that it was a more significant update than a few bug fixes, and I wasn't wrong. There's a new look and feel to the app, as well as integration with Adobe Revel that allows you to store and share your images across the Cloud. I've already been having an explore. There are now 22 filters to choose from, ranging from a chilly 'Winter' effect, to a soft 'Dream' look, via the sepia-toned 'Memory' filter. I would say that the choice is overwhelming, but the filters take so long to process that I gave up trying to apply them and stuck with natural. The crop function provides the usual suspects of constraints and straighten, as well as the capability to rotate an image or to flip it along its horizontal or vertical axis.

Photo 13-09-2013 07 27 45

In the adjustments tab you're given control over contrast, clarity, exposure, highlights, shadows, temperature, tint, and vibrance. There's also a noise adjustment, but that's a paid-for feature. I found the adjustment controls on the previous version of Photoshop Express difficult to use, with features paired up beneath a tab and one of those controlled by a vertical swipe and the other by a horizontal swipe. It was far too easy to adjust one when you wanted to change the other. The new interface dispenses with the dual-adjustment system, each adjustment is made individually using a slider and some have an auto-adjustment feature. The new sliders are a definite improvement, but they could benefit from some refinement. There's no visual indication (for example a blue line) of how far away from the mid-point you've moved the slider apart from a pop-up numerical value and the mid-point itself isn't marked. Making alterations is, therefore, a little crude.

Just as the filters are slow to render, so are the adjustments. Changes don't happen in real-time as you move your finger along the slider, making it difficult to gauge your alterations. I'm sure that more practice will yield more accurate results, but when I'm already using an app that is responsive, it doesn't inspire me to make the switch to Photoshop Express.

As well as the auto-enhance button, there's a red eye removal option, and the choice of 20 different frames for your pictures. Again, they're very slow to render and they don't encourage me to try adding a frame to my images.

My initial impressions are of a very capable editing app, and to be fair you would expect nothing less from Adobe, that provides a welcome improvement to its interface and offers some very useful features (I'm especially taken by independent highlights and shadows adjustments). However, it is excruciatingly slow, which makes me hesitant to move away from my current favoured edited solutions. If Adobe were to do something about the app's pace, I might well be tempted. It is free, though, so take a look and see what you think.

Cookie the month-old kitten, looking adorable

That's Photoshop and Flickr who've both upped their antes in the past few weeks. Snapseed, I think it's your move.

(I've no idea what the Android update is like, or even if there is one. If anyone wants to share - please do!)

Google brings Snapseed to Google+

Earlier this year when Google shuttered the Snapseed for desktop app, it didn't exactly leave me heartbroken, but it did mean that I had one fewer cheap and reliable editing option that I could recommend to nascent photographers. (If they'd shuttered Snapseed for iOS, I might've gone into a raging frenzy, but thankfully that wasn't necessary.) Now, however, Snapseed is making a desktop come-back, provided that you use Google+ on Chrome. The 'Edit' button should be appearing on a G+ screen near you soon

Upload an image to Google+, select it, hit edit, and you're presented the opportunity to adjust it using Snapseed's tools. If you're already familiar with Snapseed for mobile, you'll be right at home. If you're not familiar with Snapseed, it is easy to get along with it and there's always the 'Revert' button for your edits get a little over-zealous.

All the usual Snapseed features are there

It is a rolling roll out, so if you don't see it yet, you should have it soon.

Headsup to Engadget

Compare and contrast: Apple's iPhone 5s and 5c cameras

Just in case you've not had quite enough of your fill of Apple news over the past day or so, here's a run-down of the camera spec for the new iPhone 5s and 5c.

iPhone 5s

iPhone 5s in gold

  • All-new 8 megapixel rear-facing camera - I've heard plenty of people bemoaning the fact that it's 'only 8 megapixels' but do you really need any more on a sensor that's about the size of my little fingernail?
  • Speaking of which, the size of the sensor has been increased - with luck that will help to improve low-light performance and noise levels
  • ƒ/2.2 aperture - a touch brighter than the ƒ/2.4 of old
  • The new processor in the A7 chip should help with faster auto-focusing, faster image capture (thanks-be), automatic image and video stabilisation, and increased dynamic range
  • True Tone flash - a flash with in excess of 1,000 variants in colour and intensity to help produce more natural colours
  • Burst mode - that's going to be reliant on the new faster image capture
  • 120 frames-per-second slow-motion video

iPhone 5c

iPhone 5c in blue

This camera is more akin to the iPhone 5's. It has an 8 megapixel sensor, but not the larger one of the 5s, and it is powered by the A6 chip so won't be as fast as the A7 version. It has an ƒ/2.4 lens, an LED flash, and no burst mode or slow-motion video.

And?

I'm not the kind of person to go out and upgrade my phone on the basis of its camera alone, especially not when you're looking at paying $199 for the 16GB 5s, $299 for the 32GB version, and $399 for the 64GB 5s (if you qualify). If you're an iPhone 4s owner, you're not looking at any major camera upgrade by hopping to the 5c, so it really isn't worth the $99 for the 16GB model or $199 for the 32GB model, again, if you 'qualify'. If you're in need of a whole new phone, however, it might be a different matter.

Case Logic SLRC-206-BLACK camera bag review

With lots of clever features, and great ergonomics, Case Logic pulls a surprise winner out of the hat. When you're thinking camera bags, Case Logic may not be the first brand that pops to mind, but my recent experiences with one of their very reasonably-priced photo backpacks might just be enough to change your mind.

The not-really-that-creatively-named SLRC-206-BLACK is a good-looking bag that has a load of features I haven't seen on any camera bags in the past. For one thing, their 'SLR Suspension' system is incredibly clever: There are two straps of velcro that stop the zippers from opening beyond a certain point. If you open the bag like that, only the top part of the main compartment is available, and it has a clever 'suspension system' which enables you to put your camera away and grab it again in a matter of seconds. The main compartment of the backpack also has oodles of re-configurable space for lenses and other accessories. As you might expect, the bag also has several front- and side pockets for keeping filters, lens caps, and any other equipment you may be lugging around.

At the side of the bag, it has a couple of incredibly sturdy nylon straps for strapping down a tripod or similar. These are the biggest and most flexible I've ever seen on a camera bag, too - an absolute winner.

At the back, there's a large laptop pocket that should fit most laptops - and best of all, it's secured with zippers that make me confident of its water-resistance prowess.

The final cleverness is the bottom of the bag - CaseLogic decided to envelope the bottom in a sturdy rubberised plastic, resulting in a base that is rock solid (even when loaded with only a heavy camera, it wouldn't topple over), and water-proof. Perfect for photographers on the go.

So is it all heaven and butterflies? Well, no. Personally, I'd have wished they had attached the shoulder straps to the other side of the zips, so you'd have to move the straps aside to access the laptop compartment. As it stands, the entire weight of your camera rests on a zip that is perhaps a little bit too good, so on one occasion it zipped itself open. Because the straps are attached to the 'loose' side, it means that if the zip opens, the entire laptop compartment is pulled open by the weight of your cameras and lenses, leaving it a big gaping rain-trap, with your laptop reaching for the heavens. It's a minor niggle, of course, but I was surprised that Case Logic had missed such a simple thing, when they were so incredibly careful with the design of the rest of the bag.

Anyway; As I mentioned in the beginning of the article, if there's one thing I've learned from this review, it's that Case Logic is worth a closer look; They have an extensive range range of camera bags and camera cases, and if the build quality (and price tag!) of this one is anything to go by, they may well be a force to be reckoned with.

The Camera Case

The SLR suspension system is really quite clever

Camera in its Special Place

Great lens storage compartment

Laptop case

Great waterproof bottom

What is a prime lens?

We've taken a jump over 'O' and landed directly on 'P' for the next part of the Photography Fundamentals series. Here, we'll be taking a look at prime lenses, what they are, and why you should have one. At least one. In fact, we reckon that until you've got a decent prime lens, you've not really lived, photographically speaking. Here's why.

Define prime

What's a prime lens? For once, it's a simple definition: it's a lens with a fixed focal length. They might be 35mm, 50mm, 85mm, 100mm, whatever, they just don't move. And yes, this can most definitely be a good thing.

A bit of history

Back in the infancy of photography, we never had anything but prime lenses. When you bought a camera body, you also had to buy a camera lens to go with it. A 50mm ƒ/1.8 was pretty much the slowest lens you could buy as a starter kit.

To this day, a 50mm ƒ/1.8 is the cheapest lens you can buy in the entire Canon EF lens arsenal. And if you don’t have one, you’re missing out.

Canon's 50mm ƒ/1.8 - a bargain at under £100

From your first prime, you move on. You might get a faster ‘normal’ prime, like a 50mm ƒ/1.4 or a ƒ/1.2 (or, if you’re intro your retro gear, the incredibly bright Canon 50mm ƒ/0.95. This lens is four times faster than the human eye, and is one of the fastest lenses in the world along with, for example, the lenses available for the Nikon 7 range finders in the early 1950s.)

If you’re into landscapes, a 28mm would be the natural choice. 85mm, 100mm, and 135mm prime lenses became the de facto standard for portrait photography all ’round the world.

Nikon's 85mm ƒ1.8

The first zoom lenses were patented in the early 1900s, and the first commercial production of zoom lenses for stills photography started in the early 1960s. All of a sudden, zoom lenses were all the rage.

Why would you limit yourself to a single focal length, when you can cover a whole range? So, manufacturers shrugged, and started creating zoom lenses.

What’s going on now?

Nowadays, all ‘kit lenses’ (lenses you get bundled with camera bundles) are consumer-grade zoom lenses. My dad recently got suckered into buying an 18-55mm and a 55-200mm lens (after I explicitly told him to buy a Canon 28-135 ƒ/3.5 Image Stabilised lens… Tssk, doesn’t the lad know I run a photography blog, or something?), for example, and he isn’t stupid. It’s just too tempting to get a wider zoom range, in the hope that the increased flexibility will get you the photos you need.

Tamron's 18-270mm offers a huge focal range, but is it as sharp as a prime lens?

The thing is, a zoom range is all good and well, but ultimately, it’s all about sharpness. Are your photos so crisp they jump out of the screen at you? If not, you’re probably doing something wrong. So what happens if I tell you that one of the sharpest lenses a consumer can buy is also the cheapest lens Canon makes? You’d be surprised, right? But it’s the truth. Time and time again, people are amazed when they review consumer-grade zooms against far cheaper prime lenses. But — as Tabaware explores — they aren’t even in the same league.

So why is this? Well, it’s damn simple, really… it’s far easier to mass produce a prime lens: Because it only has to be sharp at one focal length, the optics are a hell of a lot simpler. So they can concentrate on getting it to be really good, rather than just being good enough.

Why should I care?

It really depends, to be honest: What do you want out of your photography? If you are looking for convenience and holiday snaps, by all means, go for the first and best zoom lens. Hell, I've a few of them myself and love to use them, but still, there’s a certain feeling of zen about using prime lenses. They can be slightly limited, sure, but they’re also sharper than a surgeon’s scalpel, cheap as a bag of crisps, and they are just a better idea overall, especially as you are just learning about photography.

Peacock butterfly

So, if you’re in the market for a new camera, and the kit comes with some two-bit zoom lens, see if you can’t convince the salesperson to do you a deal. “So, you want to sell me this lens? How much does it normally cost? Interesting. I can see that you sell a 50mm ƒ/1.8 for less than that. Can you give me one of those instead?” Sure, money-wise, you’ll lose out. But your portfolio will thank you for it for years to come.

Are prime lenses really such a good idea?

Well, yes, I would argue so. I'm a frequent traveller and it isn't unusual for me to get on a plane with just my camera body, a 50mm ƒ/1.4, and Canon PowerShot S95.

Check out the gallery from one of my trips to Vietnam, or a bigger collection of my photos taken with the humble 50mm.

Convinced yet? Good. Head over to your favourite photographic retailer, and buy yourself a lovely little prime. Lazy? Okay then - Canon users, click here. Nikon users, click here. Pentax users, you can click here. Sony users, click here. And Olympus users, click here. You're welcome.

TL;DR

  • Prime lenses are lenses with fixed focal lengths
  • They are usually sharper than zoom lenses because they have fewer moving parts
  • And fewer moving parts also makes them cheaper to manufacture and less likely to suffer from a fault

Noise << Photography Fundamentals >> Quality versus quantity

Sony's A3000 is a big mirrorless camera

I'm trying my very hardest to get my head around this one. Sony's new A3000 is a mirrorless camera that's bigger than your common-or-garden EVIL camera, a bit smaller than a traditional dSLR, and roughly the same size as the Canon 100D. And it has been deliberately designed to be on the larger side. Sony A3000 with 18-55mm kit lens

This means that Sony has taken a class of camera that was developed with the specific intention of including almost all of the traditional SLR's best features barring the pentaprism and optical viewfinder, which were removed in order to make it smaller, and then made it larger but omitted the key bits of a camera's mechanism that draws people back to the SLR time and time and time again: the pentaprism and optical viewfinder. No. My logic here is failing me. Anyone?

The A3000 is an E-mount camera with a 20 megapixel APS-C sensor that has an ISO range of 100 to 16,000. There are 25 auto-focus points and it can manage 2.5 frames per second continuous shooting. That can be upped to 3.5 frames per second on switching to speed priority shooting mode.

Mode dial, hot shoe, general SLR-likeness, but no mirror

Full HD video can be shot with either 50i or 25p modes and it can be hooked up to stereo microphone. There's also the hotshoe for flashes and a range of filters and effects.

It has a few more megapixels of resolution than Sony's NEX-3N, but they're otherwise very similar cameras. Except that the A3000 is larger and it doesn't have a tiltable screen.

Price-wise it'll be in the region of £370 ($399) and available from September 2013.

Learning by doing with the Bigshot DIY camera

I've just stumbled across a magical photographic triumvirate: DIY, getting kids involved in photography, and education. It's called the Bigshot Camera: a self-assembly camera that teaches whomsoever is building it, whether aged eight or 108, about key science concepts in the process. It's a rather tasty science and creativity sandwich.

Bigshot in bits

The camera has to be assembled in a specific order, but there are detailed instructions on the website to make sure that you get it right. Even more importantly, as you work through each stage you have the opportunity to learn about the science underpinning it, from optics to mechanics via electromagnetism and electronics, and back again. When it's complete, you should have a fully functional camera with a rotating wheel that houses normal, wide-angle, and 3D-capable lenses. If the battery dies, you can crank it back into life yourself.

One of the motivating factors behind Bigshot is learning by doing, and inspiring young people to get involved with science and engineering. It's the sort of project that a parent (or auntie) can work on with their child (or niece... I'm looking at you, Eva), but there's plenty of support for teachers who want to incorporate it into their teaching plans, too. Each camera costs about $90, but Bigshot has an extensive outreach programme, Bigshot for Good, that aims to bring the project to less privileged children, wherever they are.

Bigshot assembled

From an idea that sprang to life in 2006, the Bigshot has been developed by Shree Nayar, a Professor of Computer Science at Columbia University. Along the way he has received research and design support from students led by Guru Krishnan and Brian Smith and funding support from a Google research award and an ONR Instrumentation Grant. Nayar founded Kimera, a social venture aimed at bringing the Bigshot to children and teachers the world over, in 2011. And from this month you can go ahead and order yourself one from the Bigshot website.

As for future plans, the Bigshot team is exploring two potential avenues: to continue to deepen the Bigshot camera experience by developing new features and enhancing the learning platform, or to develop other gadgets that lend themselves to the Bigshot concept of building, learning, and using.

The Bigshot website is well worth a wander: it's a veritable hive of knowledge and information, whether or not you want to buy a camera. Me? I'm totally in the queue for when they start shipping beyond North America!

Review: Think Tank's Streetwalker Pro camera bag

When Think Tank offered me the chance to spend some time schlepping around my gear in one of their bags to see how it (and I) fared, of course I said yes. Legions rave about their bags and I wanted to give one a go for myself. So I opted for a Streetwalker Pro (the name does have dodgy connotations, I know) and it and my photographic impedimenta have been inseperable since its arrival.

Feature-StreetWalker-Pro-15

The Streetwalker Pro is intended for use on the move—days out and expeditions when you'll want a goodly selection of gear—but not necessarily travel. There's no laptop compartment in the Streetwalker Pro; for one of those, you'll need to look to its slightly larger companion, the Streetwalker Pro Harddrive. When I say I goodly selection of gear, I really mean it. This bag is a veritable TARDIS. It comfortably holds a full-frame body, a 70-200mm, and between two and four other lenses. You can play divider Tetris and get flashes, cables, remote releases, and all sorts in there, too. It has more pockets than I know what to do with. There's a tripod carrying-system. And it comes with a waterproof cover. If I were to fill it completely, I'd probably not be able to pick it up.

Feature-StreetWalker-Pro-12

It's also a taller, narrower bag than your average camera bag. For little me, this is a huge boon. I often find myself waddling about beset by a bag that makes me twice as broad as I am normally, which screws with my spatial awareness, particularly when in crowded places. It's plenty comfortable with well-padded straps. The internal padding leaves your gear feeling secure and the build quality means that you don't fear the bag faling apart on you.

StreetWalker-Pro-9

As it's a day-out-taking-photos-bag, having somewhere to put a sweater would be useful, but there's that much space in the bag you could probably stuff it in and not worry too much. If some of the pockets expanded a little more, that would be useful. My biggest concern, however, was that I found I needed to set it down every time that I wanted to open it up, particularly if what I wanted was towards the bottom of the bag. Other people might not find this so problematic, but I'd appreciate some easy-access zips.

At $190, the Streetwalker Pro is a good bag, but it isn't perfect. My quest for the perfect camera bag continues!

Infinite iPhone colour manipulation with ColorTime

When it comes to smartphone photography my default editing app is Snapseed. It does just about everything that I want in an app that I use on a device with a screen that's the size of the palm of my hand and it's intuitve. Sometimes, however, I find myself looking for a bit more control, the ability to adjust shadows, highlights, and midtones independently, or a white balance correction that is more fine-tuned. I've found it. It's called ColorTime. mzl.ncemfpho.320x480-75

ColorTime allows you to select between shadows, mid-tones, highlights, and saturation, adjusting the intensity on a colourwheel. Dragging up adds white or brightens the image; swiping your finger downwards introduces darker tones; and then you can increase warmer tones by swiping to the right and cooler colours by swiping leftwards.

Furthermore, you can paint particular areas of your image to adjust the tones selectively, or choose between the centre or edges of the image.

A rather blue-tinged peony

There are of course many occasions when any of this is useful, but I've found it particularly helpful for correcting the white balance in my iPhone photos, which always seem to be far too blue, and for adding a golden hour-like glow. If that's all far too subtle and practical for you, it's possible to make near-infinite adjustments: you keep moving your finger upwards (or downwards, left, right, four o'clock, 11 o'clock, whatever) until you reach the edge of the screen, and then you start over again.

... made to look rather more pink with ColorTime

The independent shadow, mid-tone, and highlight functions, in combination with the colour wheel, means that you can add blue to the highlights but orange to the shadows. If you want.

If you decide that you don't like you last adjustment, you hit the back arrow and it revokes it; if you decide that you've screwed it all up and want to start over, select the revert button. Should you not be able to decide, you can toggle between the original image and your adjusted image to decide which works best. Or you could select the animate function and let ColorTime present you with a loop of optins.

There is a crop and rotate function, but I haven't found it that easy to use. It feels underdeveloped and doesn't give you the control that you'd expect when the rest of the app is so responsive. It's not a huge problem, but for the moment, I will continue to crop in Snapseed.

I've really enjoyed using ColorTime and it has provided me with some terrific results. However, it is a learning curve. None of the buttons is labelled and I have occasionally found myself mistakenly adjusting entirely the wrong thing, but thankfully there is that undo feature. And there's a guide that is relatively easy to access.

When you're done, you can save your fixed image to your camera roll, email it far and wide, tweet it, save it to your Dropbox, or choose from a few other options.

photo

ColorTime is £1.49 in the App Store. For anyone who does even a moderate amount of iPhone photography, I reckon it's worth it.

Blasting images into images with Light Blaster

mail_blast_header_250 
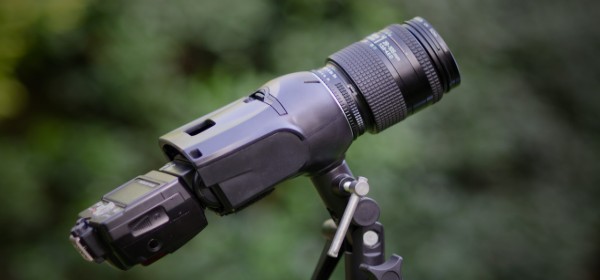
What do you get when you combine old 35mm slides, a speedlight, a lens, and the genius of the DIYPhotography hackers? You get the brand new Light Blaster: a strobe-based image projector that lets you transform your photos in a flash.

By inserting a 35mm slide into the Blaster and synching it up to your camera it'll project the slide's image wherever you direct it when you release your shutter. You can create textured backgrounds, send secret messages, or give people wings!

You'll need to provide a strobe (any commercial speedlight will do) and a lens to get things working, but if you don't have any old 35mm slides kicking around, or no way easy way of printing any yourself, the Light Blaster team has put together four collections of slides: backdrops, effects, wings, and a totally random selection. When they say totally random, they really do mean it. You have no idea what might turn up in that box.

light-blaster-07-500

As for the lens requirement, the Light Blaster is compatible with any EF or EF-S Canon lens out of the box. Only have Nikon lenses to hand? There's an adapter for those. By changing the lens attached to your Blaster, you can alter the expanse of your projection: shorter focal lengths create wider projections, longer focal lengths project your image into a more compact area.

After that, it's all down to your imagination! (Or you can check out what other people have been doing with it, for some inspiration.)

A Canon-mount Light Blaster costs $99; with a Nikon adapter, it's $116. A box of slides is $17. You can learn more and pick up yours from the Light Blaster website.

Triggertrap brings high speed photography zooming to a camera near you

If your attempts at capturing balloons bursting, glass shattering, or droplets forming a perfect corona have been less than successful until now, the team at Triggertrap—who love to find creative ways to let you trigger your camera—might just have a solution for you. Not only have they succeeded in making Triggertrap Mobile's triggering system upto 12 times faster (from 60 milliseconds to five milliseconds depending on your device), but they've released the Triggertrap Flash Adapter, too. Strawberry Cream Milk - Chris Martino

By combining a new Triggertrap Flash Adapter with a Triggertrap Mobile Dongle, an iOS device running Triggertrap for Mobile, and a hot shoe-compatible flash (there wouldn't be much flash photography going on without one), you should be capable of freezing motion, however fast it's happening.

Triggertrap Flash Adapter TT-FA1 Product Photo 03

Set yourself up in a darkened room with your camera on a long exposure, your camera and flash ready to trigger using one of Triggertrap's firing mechanisms, and whatever you're trying to capture at high speed, and off you go!

If you want to see the Flash Adapter in action, there's a video waiting for your perusal:

Introducing Triggertrap Flash Adapter from Triggertrap on Vimeo.

Or you could just head over to the Triggertrap store and order one. They're retailing at $29.95 - but remember that you'll need the mobile dongle and the app running on your smartphone, too.

Review: sending files freaking fast with Minbox

When it comes to online storage and collaborative working, I'm a huge fan of Dropbox. For just sending large files the two big names are WeTransfer and YouSendIt. But there's a new kid on the file transfer block that claims to be 'freaking fast'. It's Minbox, and I've been checking it out.

To be able to use Minbox you have to download the app; unlike WeTransfer, there's no send-from-web option. But unlike WeTransfer, the size of your files isn't limited to 2GB. In fact, they're not limited at all. You can send a file as large as you can manage before your internet connection konks out, for free. Minbox advertises itself as being 'freaking fast' and even with the cringingly slow connection that we suffer from at the Photocritic Outpost, the upload was on the speedy side when I tried it out with a bundle of high-res images.

You can upload files from the menu bar, or by right-clicking on a file

To send a file all you have to do is right-click on it and then choose between sharing it as a link or sending via the service. If you want to schedule when it will be sent your recipient, that's entirely possible. You can also opt to convert Raw image files to JPEGs and videos to Mp4 format.

Once you've sent a file, it resides in your Minbox collection for 30 days, after which it will self-destruct. Whether or not it'll do it with Mission Impossible-style smoke, I don't know as nothing I've shared yet has reached its expiration date. If you want to delete the file from your collection, you can do so by following the link from the viewed confirmation email.

Your collections

This is probably my second biggest bugbear with Minbox. At present, either waiting for the files to expire or following the email link are the only means of deleting them from your collection. You can't do it from the collection itself, despite being able to forward or share files from there. It feels a bit inefficient. The good news is that Michael Lawlor, who's Minbox's CTO, assures me that this will be rectified soon.

My biggest bugbear is that at present Minbox is app-based. There's no way I can access my collections from the web, which would allow me to manage and forward files from a computer other than my own. Again, this is on the developers' Big List and should be possible soon.

As a file recipient, you can preview your received file before downloading it and you can email it on or share a link to it from the preview page. Coming soon, you'll also be able to comment on it and share it to Twitter, Tumblr, or Facebook.

All of this is free. If the coders succeed in ironing out those usability kinks, I wouldn't hesitate to recommend it for transfering large files. Even with the kinks, it's an impressive service, if you have a Mac. Other operating systems are currently out of the Minbox, but if enough interest is expressed in providing for them, it's a possibility.

Coming soon there will be a Pro service that'll offer indefinite storage and scheduled expiration, amongst other things.

Minbox: it's one to watch.

Best thing about iOS 7? The camera is bloody fast.

We already took a quick peek at the new camera app in iOS 7, but then I was able to borrow an iPhone 5 running iOS 7 off a friend, to see what changes Apple may have been making to the camera. There are lots of little improvements, but the #1 thing that strikes me about it is how incredibly, incredibly fast it is. The camera in general was one of the things I disliked the most about iOS 6, but in the newest version of the operating system, Apple have completely knocked it out of the ballpark.

Gone is the skeuomorphic "shutter closing" animation that made the camera feel horribly laggy. In the new camera app, you can take photos as quickly as you can press the shutter button. No, seriously - if your subject is bright enough, and your thumb is fast enough, you can practically record video, that's how incredibly fast it is.

It's not just really quick at taking pictures, either - you can swipe from the lock screen to launch the camera, and the code boffins at Apple must have done some serious re-coding of the camera app: It launches in fractions of a second, and and you're immediately ready to take photos.

Let's take a closer look.

At the beginning of the video below, I'm just showing how easy it is to go straight to the camera (Drag from the bottom right of the screen). Then, I'm launching the camera, then going straight into taking a load of photos in rapid succession, followed by showing off the pictures I've just taken in the camera roll:

Really impressive stuff - and that doesn't even touch on any of the other improvements on the photography side of things.

Suffice to say that I think Apple have finally created some software that's worthy of the extremely capable cameras that are finding their ways into the iPhone 5 and new iPod Touch devices. Way to go, guys, and keep up the great work for photographers!

Fujifilm and Panasonic come together to create a thinner, more sensitive imaging chip

The development of the imaging chip has focused overwhelmingly on resolution, and the desire to cram more and more pixels onto smaller and smaller sensors. However, improvements to image quality can only come from so much increased resolution; the focus now needs to shift to improving dynamic range, sensitivity, and pixel accuracy. We've already seen the potential for a graphene sensor developed at the Nanyang Technological University, but camera manufacturers are also looking to improve sensor technology, too. To this end, Fujifilm and Panasonic have been collaborating on a thinner, more efficient sensor.

Between them, with Panasonic focused on boosting image quality with semi-conductor device technology and Fujifilm devoting its attentions to an organic photoelectric conversion layer (more on those in a moment), they have developed an organic CMOS sensor with higher dynamic range, increased sensitivity, and a wider incident angle. This should lead to better image quality from smaller sensors.

A conventional image sensor comprises a silicon photodiode to capture light, a metal interconnecting layer, a colour filter, and an on-chip micro-lens. Fujifilm has swapped the silicon photodiode for an organic photoelectric conversion layer. This is more sensitive than the silicon photodiode as well as significantly thinner.

Fig.1: A thinner light sensitive layer makes for a more efficient imaging chip

Panasonic's contribution has been to increase the ability of sensors to handle electronic signals, preventing highlight clipping and reducing noise. It estimates that these new sensors have a dynamic range of 88dB.

Fig. 2: Higher dynamic range and lower noise levels

Furthermore, between them Fujifilm and Panasonic have managed to increase the area of the sensor capable of harvesting light. They estimate this should boost sensitivity by 1.2 times compared to a conventional sensor, helping to capture images in lower light settings.

Fig. 3: A larger light-gathering area means increased sensitivity

Finally, by swapping the silicon photodiode for the organic photoelectric conversion layer and reducing its thickness, there's been an increase in the angles from which the sensor can detect light. Instead of an incidence of 30 to 40°, you're now looking at about 60°. You can see this illustrated in Figure 1. This should allow for for more faithful colour reproduction and possibly more flexibility when it comes to lens design.

If you're at the 2013 International Image Sensor Workshop to be held in Utah on 15 June, you'll be able to hear more about the technology. However, they are anticipating it will be used across the spectrum of imaging products, so I suspect we'll be hearing more in the future.

How exciting is the iOS 7 camera app?

Apple iOS 7 Whilst everyone else is arguing about whether the new flat design and Crayola coloured icons that comprise iOS 7 are genius or travesty, shall we take a look at what's been updated, reshuffled, and introduced camera-wise?

Taking on an iPhotos feel, photos are now automatically organised into 'moments'. It's a twee name for a fairly neat concept: images are sorted and labelled geographically and temporally using their metadata. This will let you search photos you've taken in one particular location by date. It's a more sophisticated digital version of having holiday albums sorted by year and place, with each photo captioned; you can see all the photos from one place organised by date, too.

Airdrop will allow you to drop an image into someone else's iPhone over the same wi-fi network. If we can Airdrop to other devices, for example a MacBook Air, that'd be neat.

Photo Stream already allowed you to share with your friends and for you to comment on their streams; now you can insert your photos into their shared streams, creating a collective album.

Moving between camera, video, panorama mode, and the square crop feature is managed by a swipe. Yes, you read that right, there's a square shooting mode built into the camera app, along with a range of filters. It feels like a dreadful disease that afflicts smartphones. With any luck, it's a childhood illness and everyone will grow out of it soon.

The conclusion? There's nothing revolutionary or even exceptionally exciting here. It feels more like a consolidation of features and in some respects even a game of catch up. That's not to say that sharing images via Airdrop isn't a welcome addition, it's just that it isn't setting alblaze the world of mobile photography.