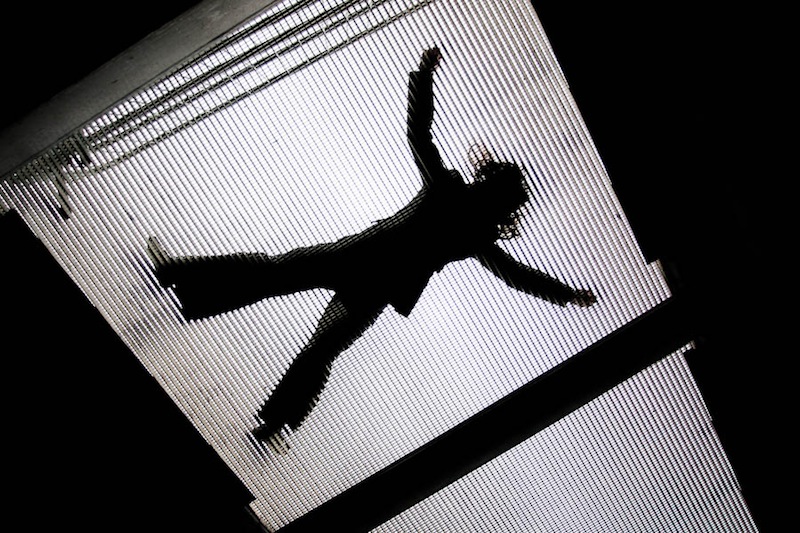
Photography projects don't have to be of the 365 variety. Far from it, in fact. We've put together eight ideas for projects to see you through 2015, and not one of them involves taking a self-portrait every day for a year.

When you hear the term 'high-res' thrown about with such abandon when it comes to images for web use, have you ever stopped to think just how big or how high quality and image meant for the web needs to be?
There's an assumption that high-contrast images are more dynamic, more compelling, more inviting. Have a go at some low-contrast photography. You might surprise yourself with the results.
Balance doesn't mean symmetry; it means an internal consistency and tension within your photos. And it's a vital element of composition.
Great photos might be down to a little bit of luck, but most of that 'luck' you make yourself. Don't believe us? Read on...
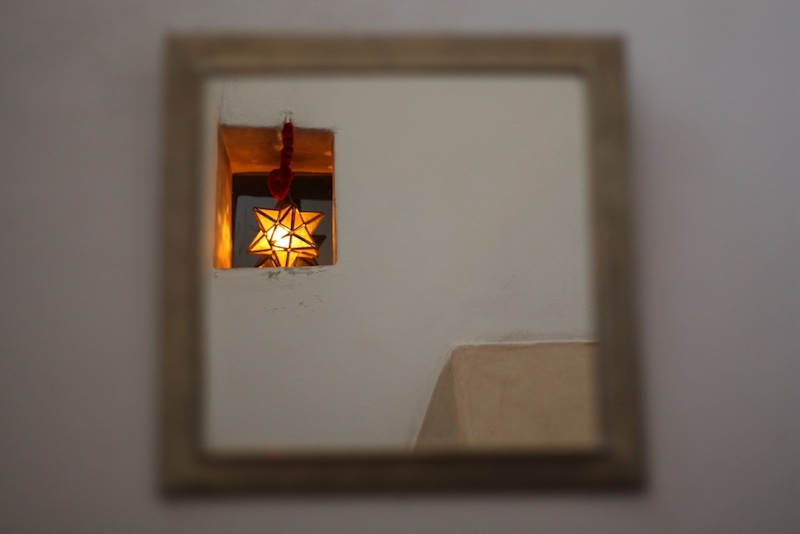
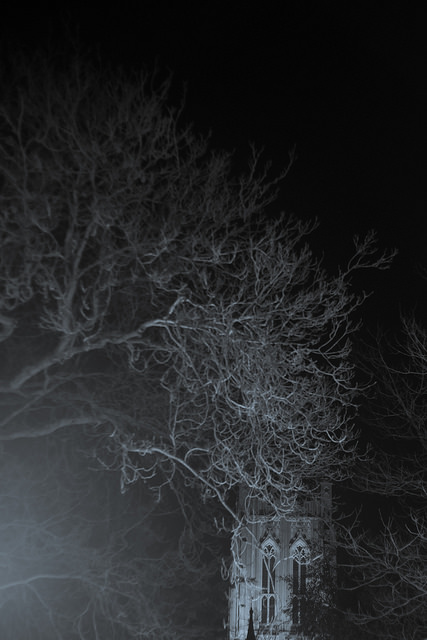
We put pictures—whether they're paintings or photos—into frames to help direct the viewer's eye. The frame is a boundary that directs the gaze: it ensures we know precisely where to look. As well as creating a border from a mounted frame and from the edges of a photo itself, it's also possible to bring focus to your subject and compositional strength and depth by using natural frames within your photos. Despite the name, a 'natural frame' doesn't have to be organic in origin, although trees, streams, and cave mouths do indeed create beautiful natural frames, rather the term describes a frame-within-the-frame. Look out for windows, doorways, and arches—in fact anything that bounces the eye back towards the subject—to act as a frame.
Primarily we appreciate images that include natural frames because they direct the eye straight to the photo's subject. As the eye travels towards the edges of the image—and especially if it contains lines that drag the gaze away from the subject—a frame helps to draw it back toward the focal point, just where you want it.
Second, they can bring a sense of perspective and three-dimensionality to an image, giving you the sense that you're looking through one layer of an image and on to another.
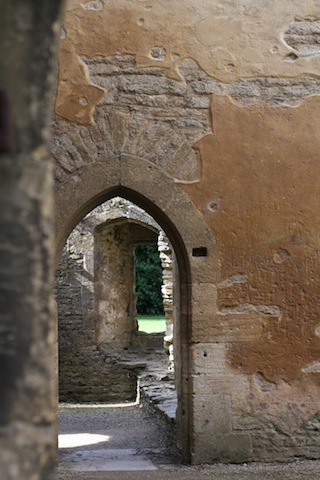
A frame can also give a sense of place or give context to your photos, for example, indoors versus outdoors or a modern area versus a historical one.
Finally, we find images that make use of natural frames attractive because it brings a sense of order to the image, in much the same way that triangles bring order to scenes with multiple subjects. They place limits on the scene and provide it with some boundaries.
Just because your scene has a terrific natural frame within it, it doesn't mean to say that you can ignore any other compositional theory. You still need to consider your use of lines, your subject placement, and the balance of the shot. Remember: combining these compositional techniques can help to elevate a good photo to a great one.
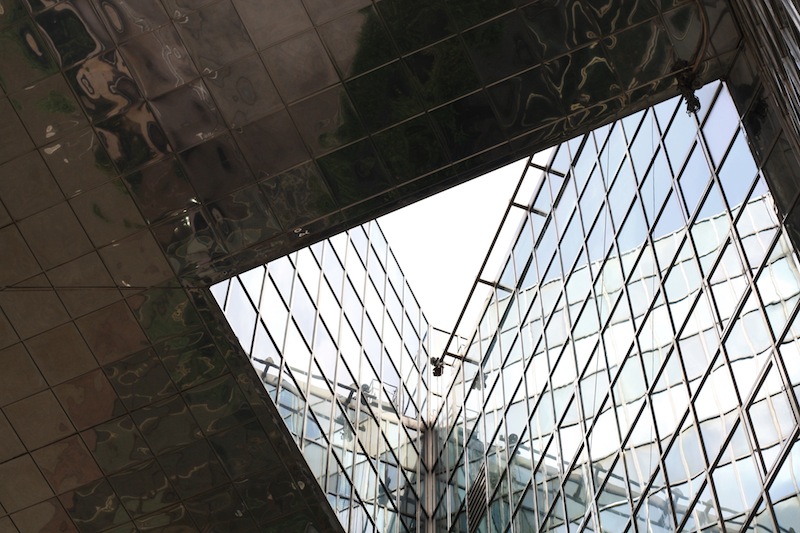
If you're planning on using a natural frame in your composition, consider if you want the frame itself to be sharp or blurred. If your subject and frame are at different distances, but you wish them both to be in focus, you'll need to use a relatively small aperture to achieve an adequate depth-of-field. Of course, having the frame in focus might prove a distraction and defeat its purpose, in which case using a larger aperture and isolating the subject using a shallow depth-of-field will work better.
If you're inside a cave or tunnel and using its natural form to provide a frame for a brightly lit sbject on its outside, you will have to meter accordingly. Spot-metering for the well-lit subject might be the easiest option. Alternatively you could dial in some negative exposure compensation should you prefer to stick with matrix (or evaluative) metering.

In order to capture the full dynamic range of such a scene, with its bright exterior and dark interior, you would need to shoot two differently metered images and combine them using post-processing software.
Using frames-within-a-frame is such an effective compositional tool that it's all too easy to get carried away with them and over-use them. One natural frame within a portfolio is clever; a dozen is cliché. Just because a potential natural frame exists doesn't mean it is the best way to compose the shot; it needs to bear some relationship to the main subject.
If you're not sure if a natural frame is appropriate for your photo, ask yourself: Does the frame add drama to the photo? Does it help to tell a story, add context, or give a sense of depth? Does the frame help to illustrate or enhance the focal point of the photo? If the answer is no to any of these, you might be better looking for an alternative composition.
It's been a week of updates to our image-sharing programmes on social media. First Facebook introduced an auto-enhance feature, which will apply the filters that its algorithms calculate are most appropriate for your photos. Then Instagram unveiled five new filters, its first in two years. Now it's the turn of EyeEm, which brings a gaggle of new filters, fine-grained control over their application, and a new feature called Open Edit. The theory behind Open Edit is that it lays bare the post-processing path that a photographer followed to create an image, from the original to the final version. Each crop, tweak, and nudge is set out in a timeline that's made visible to the rest of the EyeEm community. If you see something that you like, you can apply the same edits to your own photos with one tap.
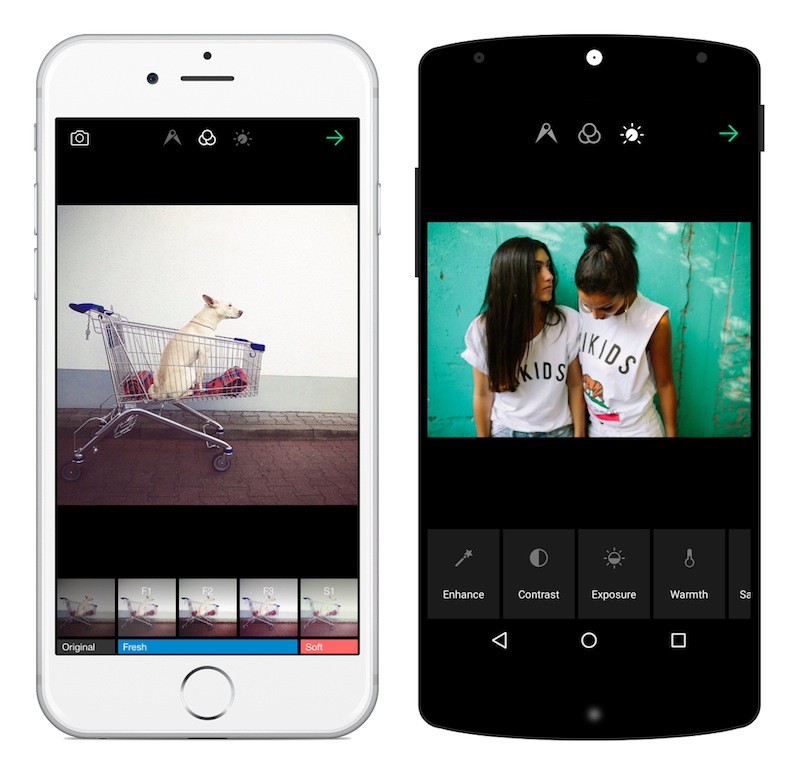
Right now, only certain photographers have the ability to open up their edits to the community, but it's something that will be rolled out to all members in time. The EyeEm team hopes that this open deconstruction of people's photos will lead to a more collaboratively minded community and one that can learn from each other and share their skills.
Can I see what EyeEm is trying to accomplish with Open Edit? Yes, definitely. Sometimes I do look at a photo and wonder precisely what sort of magic the photographer wove in order to create that particular effect. But at the same time, I'm not completely sold on it. The mystery and the secret behind someone else's photos are part of their appeal. Having the edits revealed to you can feel a little like the illusion of a magic trick being shattered when you know how it works. My curiosity means that I want to know, but the romantic in me appreciates the mystique.
From a teaching and learning perspective; I love EyeEm's enthusiasm to allow its users to share their knowledge. But I think that by going one step further, they could make this a much more valuable learning tool. How much people will actually learn from being able to see and apply other people's edits to their own photos will depend hugely on how much they're prepared to engage with the editing process and observe the kinds of impact each adjustment makes. Experimentation is such a valuable part of learning that just being able to apply someone else's workflow to your photos feels as if there's an important step in the process that's being skipped. It's not just about the what that you do to your photos, it's also about the why.

Bring a bit more dialogue to the experience—underpin the action with some explanation—and I think it could really work. Still, lots of people seem to be very excited by EyeEm 5.0, so perhaps I'm the one who's missing the trick here.
Let me know what you think.
You can download EyeEm 5.0 here.
In the run-up to the festive season, it's possible that people will be taking more photos than usual. Parties, pretty lights, and present-opening, afford ample opportunity to take photos and share them on social media. However, research recently commissioned by the online learning company lynda.com revealed some interesting facts about people's photo-taking habits. Aside from the fact that 64% of Brits now use smartphones or tablets to take photos, it would also seem that quite a few people are also too intimidated by the process, or by technology, to have a go themselves. Based on the figures that came out of the survey, we've put together five tips to help anyone who might feel a bit afraid of photography to start taking better photos without too much fuss.
60% of the people questioned spent fewer than 30 minutes learning how to use their cameras properly. Whether you use a smartphone, a point-and-shoot, or an interchangeable lens camera, read the manual. Or the destructions, as we call them. Understanding the capabilities of your picture-taking device will have a noticeable impact on what you can achieve with it.
Apparently, only about 45% of the sample made any attempt to improve the composition of their photos. Our top tip: get closer. And if you're working with a smartphone, get closer physically; don't rely on digital zoom.
Of those surveyed, 71% responded that they relied on the law of averages to return a decent photo. They work on the principle that if they take lots of shots, at least one should work out. Our advice? Slow down and think about what you're doing. What story are you trying to tell? A little contemplation should bring you better results than aerosol clicking.
Almost everyone who responded to the survey stated that they wanted to be able to make their photos look better, but the majority didn't feel that they have the skills to do so. While you can't turn a sow's ear into a silk purse, it is possible to make a few fundamental edits to a photo and elevate it from ordinary to much better looking.
There are three simple adjustments that you should make to every photo you take: to the crop, the colour, and the contrast. They're not time-consuming or complicated and can be accomplished with a basic editing package. You don't need to master Photoshop—or fork out for it—to make them.
As few as one-in-fifty of the survey group made use of any training to help them improve their photography. Seeing as the photographer is the most significant element in creating a great photo, doing a little learning will help enormously in the quest for better images. The good news is that by reading this, you've made a start. To help you even more, you can try a book or two or sign-up to any number of courses. There are hundreds, maybe even thousands out there. Obviously lynda.com, which commissioned the research would like you to look there, but may we suggest that you take a look at the Photocritic Photography School. It's free!
If you want to check out the findings from the survey, click and explore!
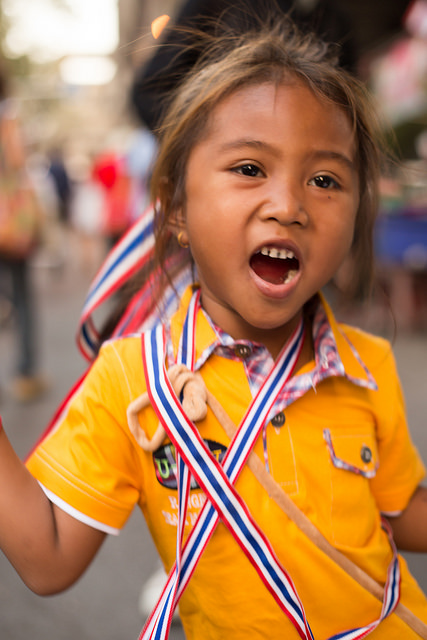
There's an adage which suggests that your life will be easier if you choose not to work with children or animals. Eh... I disagree. While photographing both children and animals can be highly demanding and occasionally somewhat frustrating, it's also wildly satisfying. Some of my favourite photos in my archive are of my nieces and nephews or of the animals that have galloped and jumped and hopped and tumbled and gallumphed and snoozed through my life. And I've had immense fun doing it. Seeing as the holidays are pretty much upon us, thereby increasing the chances that you might want or need to take photos of small people, now seems as good a time as any to present you with the Photocritic guide to photographing children. There are two crucial attributes to photographing children. First, patience. You will require it in bucket-loads. Second, you need to remember to think like a child. I doubt that you sprang fully-formed from your father's thigh, like Athene, so cast your mind back and try to remember what thrilled and bored you and interested and irritated you as a little one. By getting into their mindset, you'll give yourself heaps more opportunities to capture great photos of them.
With those two factors at the forefront of your mind, let's move on.
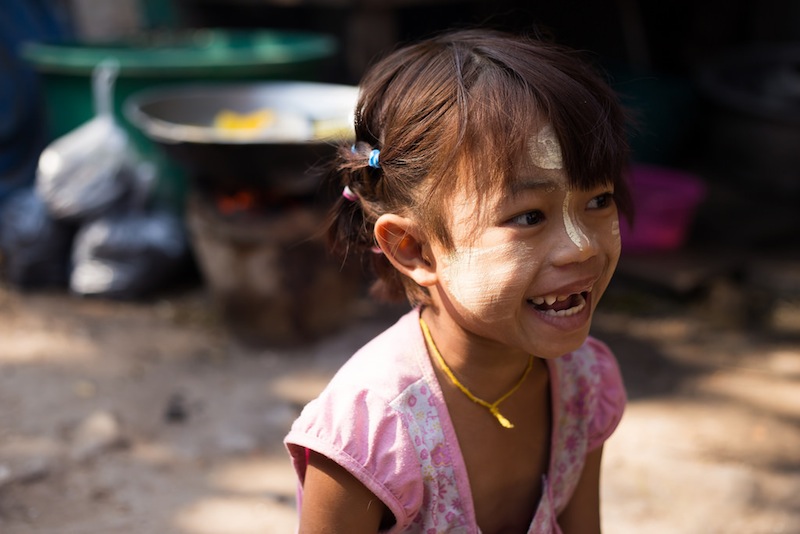
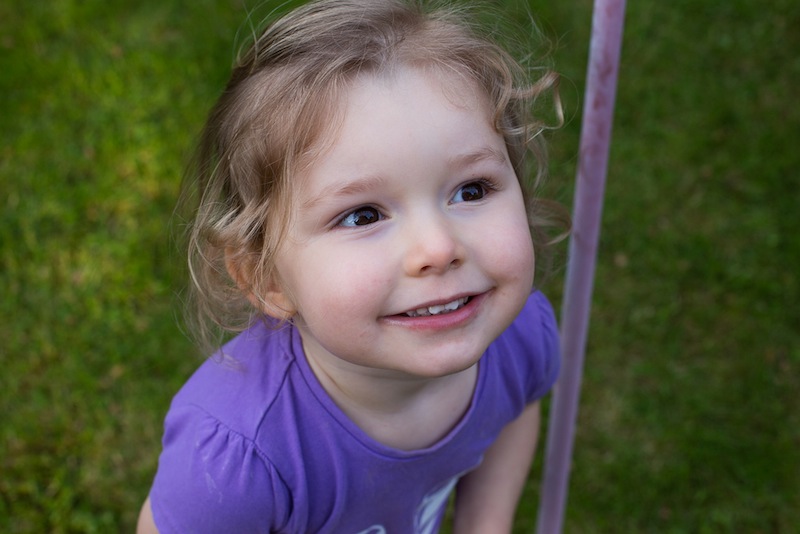
The best photos of children come when you get down to their level. Apart from it being so much easier for little people to relate to someone who's on their level, your photos won't take on an awkward, condescending air. Sure, every now and again photographing from above works a treat, but mostly it's about capturing life on their level. That means getting down on your knees or belly and seeing the world from your subject's-eye view.
If you want natural smiles and pictures of unhibited child-like joy, for heaven's sake do not attempt to pose a little one and elicit a grin with the power of 'cheese!' It might look terribly sophisticated to have them dressed in their party outfits and posing as if butter wouldn't melt in their mouths, but I doubt that's an accurate reflection of them or the most fun way they've ever spent 20 minutes.
Let them play.
If they're opening presents, you have plenty of opportunities for looks of concentration, puzzlement, wonder, and excitement flooding their faces.
They're going to be moving fast—children usually do—so unless you want motion blur in your photos, it means that your camera will need to be moving fast, too. Think about a fast shutter speed, a fast aperture, and a fast ISO if you need it.

With a large aperture you can let plenty of light onto the sensor, which will allow for a fast shutter speed, and it'll keep the background blurred, too. You might not necessarily want an out-of-focus background, but if it's cluttered or untidy, it will draw your viewer's eye to your subject.
As with any other portrait, the eyes need to be in focus when you're photographing children. It's the first place your viewer will look and if the eyes are out of focus, her or his interest will wander. Rather than using one-shot auto-focus, you might find that your purposes are best served by either continuous auto-focus or intelligent auto-focus to keep the subject sharp even when it's on the move.
When you're setting up a shoot, sure some studio lights might be a good idea to help get the photos that you want. But for those times when you're sitting on the floor surrounded by scraps of wrapping paper? They're probably not what you want. I'm not that fond of on-camera flash around babies and small people, either. It can be far too harsh and startling for them. Make the most of the light that you have, and bring out a reflector if you need one.
If you're not enjoying yourself, neither will the kids whom you are trying to photograph. And why should they? Smile, talk to them, take an interest in what they're doing. The more relaxed you are, the more relaxed they'll be, which makes things better for everyone.
Here in the northern hemisphere, the shortest day is fast approaching and whether we like it or not, much of our photography will be of the low-light variety. We've put together some suggestions for coping as best you can when things are a little dim and the light with wish you wish to draw is a scarce commodity.
This might sound terribly obvious, but it's a fundamental of photography: look for the light in your scene and use it to your advantage. Use the light from streetlamps, from candles, from the moon to illuminate your subject—even be the subject—and create interesting shadows in your photos.

While a too-high ISO can be responsible for noisy, grainy photos, advancements in sensor technology mean that it's possible to push ISO much higher than was previously acceptable to get the shot you want. Remember: a little grain can be better than motion blur; if you shoot in Raw, images can be cleaned up; a black and white conversion can produce noise-negating miracles.
The wider the aperture you select, the more light you'll let onto the sensor and the faster shutter speed and lower ISO you'll be able to use. This will of course come with the caveat of a shallower depth-of-field, but that can be applied creatively.
A slower shutter speed will permit more light to reach the sensor, but it also has the potential to introduce motion blur if it isn't sufficiently fast to freeze the action in your scene, as well as camera shake if you're hand-holding your camera. Sometimes, however, motion blur contributes to the story that you wish to tell, so don't dismiss it entirely.
The general rule for hand-holding a camera is that you shouldn't do it if your shutter speed dips below the inverse of the focal length of the lens you're using. Thus, for a 50mm lens, you shouldn't attempt to hand-hold your camera using a shutter speed slower than about 1/60 second. If you find that you need to go slower, you might wish to bring out your tripod. Think about a remote shutter release, too.
If you adhere to matrix or multi-segment metering, your camera will attempt to adequately expose the entire scene. That might not be what you want if you're looking to play with light and shadow. For dramatically lit shots, switch to spot metering and meter from the illuminated area that you wish to be in focus. This will maintain dark shadows while correctly exposing the point-of-focus.
Spot-metering might not be appropriate for your scene, but at the same time, matrix or multi-segmented could render it over-exposed. If that's the case, try dialling in a stop or two of negative exposure compensation.
Auto-focus can struggle to hit its mark in low-light situations, in which case manual focus might render better results if you're both confident enough using it and the scene isn't changing so fast that you miss the photo opportunity. Should auto-focus be the better option, ensure that you're using one-shot auto-focus. Try, too, shining a light where you wish your camera to focus. The illumination will assist it in locking-on to the point-of-focus.
Whether it's reflection off of pale clothing, off of glass, polished metal, or liquid, or from a reflector, keep an eye out for reflected light and put it to use in your shots. That might be making reflections on water the focus of your photo, but it can also be bouncing back reflected light to illuminate shadows.
If you're not already shooting in Raw, switch now. Not only will help you to tidy up any noise in your shots, or even to adjust the exposure a little if necessary, but it will allow you to adjust the white balance of your photos more effectively. Accurately white balancing low-light shots can be tricky; the more flexibility that you have, the better.
How warm or cool is your light source? Or are you working with mixed light sources? If you're shooting by candle light, you can set the light temperature on your camera to more accurately render colours in your photos. For mixed-light sources, remember to white balance according to the light falling on your subject. If you're shooting in Raw, you might find that adjusting the white balance in post-processing will give you the most accurate result.
Finally, have fun with the darkness and put it to creative use. Let reflections dance or shadows draw you in to moody scenes. Low-light might force you to think for a moment, but remember that you often have longer than you think you do, and experimenting is half the fun.
The end of term is drawing nigh and primary schools across the country are preparing to roll out their annual festive act featuring a miserable Mary, a startled Joseph, three kings, a flock of shepherds, a mega-flock of sheep, and likely a rendition of that well-known Christmas classic, 'Let it Go'. If you're a proud parent, doting aunt or uncle, or adoring grandparent and want to capture the event on camera, what's the best way of going about it?
First of all, if anyone tries to tell you that you're prohibited from photographing the nativity play because of data protection tell them that they're wrong. The Information Commissioner's Office has stated quite clearly that family members wanting to photograph or video their children's (or grandchildren's, nieces', nephews' &c) school plays in no way violate data protection regulations, provided that it is for personal use. So ner! (Insert sticky-out tongue here.)
Individual schools might have tighter regulations relating to photographing their pupils, especially if any of them are looked-after children—that's young people who are in the care of their local authorities, and most likely are being fostered, are in care, or are in the process of being adopted—whose identities need to be protected. If photos of them made their way onto social media sites, it could lead to difficult, or even nasty, situations. Please do bear that in mind.
If you're really intent on getting the best photos of the show, ask the school if you can drop by for the dress rehearsal. Everything should run just as it would for the real thing, but the children won't feel under pressure from a huge audience and you should be at liberty to move about to get into the best positions without disturbing any other spectators. It also means that you get two bites of the mince pie: one to photograph it, and another to enjoy it and swell with pride like a Christmas pudding in a steamer.
Of course, the school might not want the dress rehearsal descending into the production's semi-official photo-shoot or it might not be convenient for you to attend. In which case, you'll need to make sure that you're at the real thing in time to get the best seat. Ideally you want to be close to the front, but make sure you consider your fellow audience-members. They're just as invested in this production as you are and will not appreciate their enjoyment of the show being obscured by you and your kit wriggling, fidgeting, and readjusting.
The best camera is the one that you have with you. If you've only a smartphone or a point-and-shoot, so be it. The important thing to remember is to turn off the flash. First, it likely won't have a discernible impact on the shot; second, it will distract the Angel Gabriel. If you can, bump up the ISO to give you the best chance of getting a blur-free image. It might be as noisy as Hark the Herald Angels Sing, but grain beats blur.
For anyone with an interchangeable lens camera, I'd advise selecting one lens and sticking with it if you're photographing the real thing. You don't want to be changing lens mid-performance. It will disturb the audience and possibly the cast, and you might well miss something crucial in the process. You have more latitude at the dress rehearsal, though.
Ideally, you want something fast, with a focal range to enable wide-angle and zoomed-in shots, and image stabilisation to help defy blur. We're not all blessed with these sorts of lenses, so select the fastest glass you have. You're going to need all the light you can get.
The two key points for performance photography have already been mentioned: turn off the flash and set the ISO as high as you reasonably can. You should be shooting in Raw anyway, but if you're not, go make the change the now. Skin tones under stage lights will thank you for it.
Plays and shows are fast-moving things: you're going to need a fast shutter speed coupled with a fast aperture to capture anything that isn't as fluffy as a sheep. Around 1/100 second should freeze action, but if you want to capture the blur of dancers spinning, you can always slow it down!
Switch your auto-focusing mode from one-shot auto-focus to something that can help you capture moving subjects; either Continuous/Servo or Intelligent/Automatic auto-focus should help you.
When it comes to metering, you might find that if you want to capture illuminated faces, switching to spot metering will give you the best chance of doing so. Just remember to meter what's in the light: if you accidentally meter off the dark backdrop, you'll end up with a ridiculously over-exposed image. For anyone with a smartphone, tap your focus box onto your subject's face: it'll meter better and do its best to get the subject sharp.
It's already been mentioned, but it's so important, we'll re-state it: don't distract the cast and don't disturb or obstruct the view of anyone else in the audience. You need to be as discreet as possible. Keep your elbows in and noise to a minimum. And for heaven's sake, don't stand up.
If you can, try to take a photo of every person on stage, and those who've worked behind the scenes, too. You don't want anyone feeling left out. And in contravention of our general guidance, take lots of photos. It's the best way to ensure that you capture the action because things happen so fast.
Don't forget to keep an eye out for things that are happening away from the main action, too. Small children get bored, pull faces, and do cute and funny things. These are always worth capturing if you spot them.
Finally: enjoy it. Don't become so focused on taking photos that you miss your daughter's big line or your son's solo. They're meant to be the stars of the show and the centre of your attention, not your photos!
Tell the truth, how often do you print any of your photos? And how often do you go to have a selection of your images printed only to be deterred by the prospect of having to upload them to a print company's website, which always seems to be a slow process, and then prevaricate about their sizes and formats? If the answer to the first question is 'not very often' and if the answer to the second question is 'more often than I'd like', then photo print service Printhug has an IFTTT-based solution to transfer images from digital to print with the minimum of fuss.
Should you have not heard of IFTTT, it's an automation programme that allows you to write 'recipes' to connect various apps and services in your digital life (IFTTT calls them 'channels') in order to do things. All recipes are based on the statement 'If this, then that.' If you do something on one channel, this prompts an action in another channel. If I publish a new article here on Photocritic, a tweet is posted on Twitter linking to it.

With Printhug, you extrapolate the IFTTT theory to 'If I post an image to Instagram and tag it #printhug, then Printhug will print it.' You can substitute 'Instagram' for 'Facebook' if you prefer. Or have the images that you upload to a particular Dropbox folder sent to print without any fuss.
Print orders can be aggregated from several different sources, for example Instagram, Flickr, and Facebook, and a minimum order can be set, too, ensuring that you accumulate a viable number of prints before they're mailed to you.
Square photos are automatically printed in 4×4" format (49¢ each), while you've a choice of 6×4" (49¢), 7×5" (89¢), and 10×8" ($3.49) rectangular prints.
Printhug ships to USA, Australia, Canada, France, Germany, Ireland, Italy, Mexico, New Zealand, Spain, and the United Kingdom. How much it'll cost will depend on how much you order.
Want to give it a go? Head over to the Printhug website to learn more and sign up. Or take a look at the Printhug channel on IFTTT.
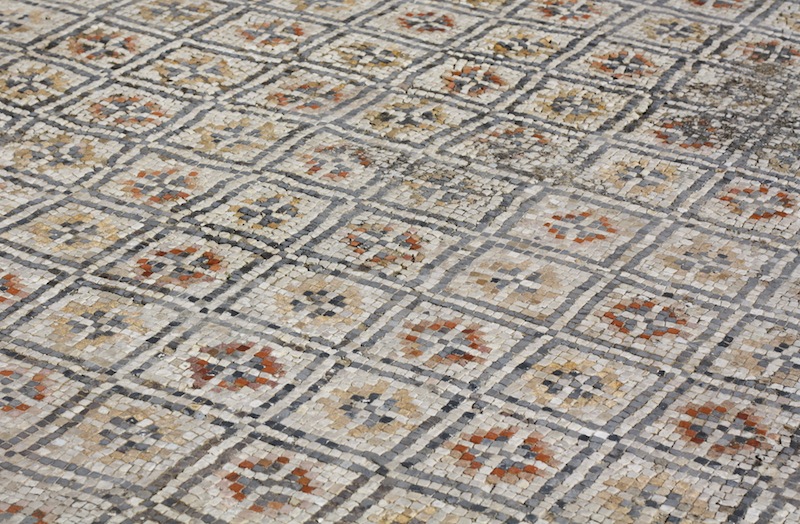
Pattern. Repetition. When you hear these words, what springs to mind? Maybe a print dress or possibly wallpaper for the former, and likely a sense of ennui for the latter? The words themselves do not necessarily evoke any sense of excitement or anticipation. The prospect of shepherd's pie for supper, every night, for the rest of your life is certainly not the kind of repetition that sets the mouth watering. But the senses are, actually, rather fond of both pattern and repetition. The ear appreciates rhyme, assonance, and alliteration. The eye favours rhythm, flow, and stability, too. By introducing them to your compositions, you have the opportunity to create appealing, compelling images.
The act of deliberately watching out for patterns to photograph might feel a little, or even a lot, contrived, but once you start you might find it a little difficult to stop. Patterns present themselves both organically and synthetically, from flower petals and fruit peels to tyre-treads and architectural work.
Get in close or shoot from far away; come down low or climb up high and you can pick out patterns wherever you are.
By isolating a pattern from its background, it's possible to imbue it with a sense of the infinite. With no evident beginning or end, for all the viewer knows the pattern extends interminably. Creating this sort of indefinite image is relatively easy: identify a pattern and get in close using either a telephoto or macro lens. By adjusting the aperture of your lens, you can choose a shallow depth of field with the pattern blurring into infinity, or one that's sharper across the frame.
Spot a break in a pattern, make it the focus of your image, and you have a great photo. Look for the red apple in the pile of green, the solitary shoe facing in the wrong direction on the shoe stall at the market, or the silk scarf in the row of woollen ones. Wherever there is an aberrance in a flow, there is a photo.
If you've decided to fill your frame with a single colour, or variations on a particular colour, you might find that it's patterns that give the photo interest.

You'll often find that the constituent parts of the pattern create the compositional imperative for your photo: lines will point in a particular direction and dictate frame orientation or an aberration in a row will set a natural point of focus.
What you need to do is use these indicators to create tension and balance in the frame. Try setting the point of focus off-centre—think of the rule of thirds—and angling lines on the diagonal to prevent them from presenting as flat or confrontational.
Most important is to be certain of what you are trying to convey in your photo—from the feeling of the infinite, the odd one out, to the sense of consistency—to design the strongest image possible.
Remember: pattern and repetition does not have to be boring.
Black Friday with its crazed rush for the shops and silly deals on sales is upon us. I've rounded up the best of the offers and listed the places that have sales happening. I'll add to it as I'm notified of any more. Take a look and see if you can grab a bargain!

Adorama has an astonishing number of offers running over the Black Friday weekend. These include Canon 6D bundles going for $1,519 and 70D bundles for $1,149; the Pentax K-5 IIs for $469.95; and Sigma 70-200mm lenses for $1,099.
There's a whole lot more, though, so do check out the deals page.
You can claim 20% off your Instagrammed marshmallows by using the code FALALABOOMF when you place your order.
You can claim 30% off your Fracture orders, using the code BF2014 at the checkout.
Buy iStabilizer's flexible tripod, mount, & 360 degree lens for $29.95.
Buy a special edition Lensbaby Spark for $99.99, rather than $129.99. Or purchase the Composer Pro kit for $599.95 instead of $749.95.
Buy a Lollipod and get a universal phone adapter (worth £9.99) for free.
Buy an Olloclip 4-in-1 lens and pick up either a 3-in-1 macro system or a telephoto lens (even both, if you want) at a reduced price.
Photobox is offering 50% off of all prints and posters. You'll need the code BLACKFRIDAY, and you'll need to order before midnight in the UK.
Photojojo has reduced the prices on a welter of its products, including lens mugs, battery buddies, and iPhone telephoto lenses.
Buy a Triggertrap mobile kit and a flash adapter in the Triggertrap shop and get 20% off your order. You'll need the code HIGHSPEEDFRIDAY to benefit.
Here in the UK Wilkinson Cameras have a large selection of cameras, lenses, tripods, flashes, and bags available at discounted prices.
You can't go wrong giving a book as a gift. Here's a round-up of our favourite publications this year (and two from last year), which would fit the bill for any photographer.
As much as we'd love to tell you to go out and buy all of our books because they're amazing and beautiful, that might be verging of self-promotion over-dose. Instead we've each picked out one of our books that we believe makes a great present.
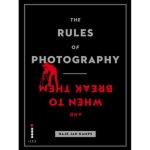 Haje has selected his The Rules of Photography and When to Break Them. We're both fervent believers in the notion of knowing the rules so that you can break them properly, and this book teaches you precisely that, from why horizons need to be level and how to tilt them successfully, to embracing the grain from high ISOs.
The Rules of Photography and When to Break Them is available for £17.99 as a dual print copy and e-book bundle.
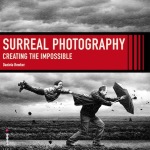 I've chosen Surreal Photography: Creating the Impossible, a whimsical trail through in-camera and post-processing manipulation to produce images that combine reality with the farthest recesses of your imagination.
Right now, Surreal Photography: Creating the Impossible is on sale at the bargain price of £9.99 for a print and e-book bundle.
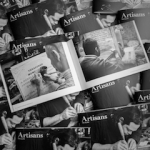
If you'd like to give a gift that will raise some much-needed money for a deserving cause as well as bringing pleasure to its recipient, do take a look at Tim Allen's photo book, Artisans. It explores the work of the violin-restoration, boat-building, stonemasonry, stained glass, and smithing professions in gorgeous black and white photos, while the proceeds go to the National Ankylosing Spondylitis Society.
Recommended donations are £10. Details of how to order a copy (and more on the book itself) from Tim Allen's website.
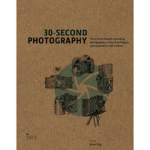
Take the 50 most important aspects of photography, explain them using 300 words and one picture each and you have the wonderful 30 Second Photography, by Brian Dilg. It's a perfect book for any photographer: novice or highly-experienced.
30 Second Photography is available for £14.99 in the UK and $19 in the US.
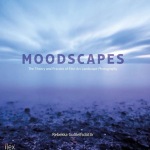
Moodscapes is landscape photography ramped upto 11 with beauty and wonder. You could just flip through it awestruck by the images, but Rebekka Guðleifsdóttir also shows you how to accomplish these gorgeous photos yourself.
Buy Moodscapes as a print and e-book bundle for £19.99.
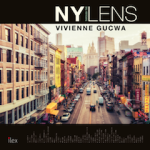
If New York is a street photographer's dream, then Vivienne Gucwa's collection of images taken in, around, and about the city is a dream of that dream. Explore Gucwa's city with her, through her words and through her pictures.
NY Through the Lens costs £20 for a print and e-book bundle.
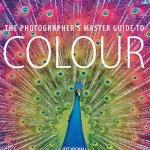
We teach ourselves about exposure, about composition, about post-processing. How much do we know about colour? Enlighten yourself, and elevate the impact of your images, with Jeff Wignall's impressive The Photographer's Master Guide to Colour.
The Photographer's Master Guide to Colour is available as a print and e-book bundle for £17.99.

In autumn last year, we featured Eleanor Macnair's marvellous project, Photographs Rendered in Play-Doh: her Tumblr project recording the recreations of famous photos she fashions from Play-Doh, a pint glass, and a plastic spoon in her living room. Now it comes in a book.
Photographs Rendered in Play-Doh costs £20.
Street photography books are ten-a-penny. Enter ‘street photography’ into Amazon and the search will return 30 pages of results. When you find a compelling and practical but inspirational book on the topic, you take notice. The Street Photographer's Manual deserves a look.
The Street Photographer's Manual is available from Amazon UK and Amazon US for £15 and $22 respectively.
Gifts for photographers, big and small < < Holiday Shopping with Photocritic > > Gifts for beginners
If your photographer-loved-one is no longer a beginner; if there's nothing in the macro, high-speed, or landscape lists to light their studios; and if smartphone photography isn't her or his bag, we've another list of suggestions of gifts that might just fit the bill. Starting at £10, we hope we can help you find the perfect present for the photographer in your life.
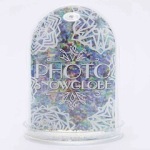
It's as cheesy as a French fromagerie, but at £10 and with space for two photos of your choice, I could barely resist this snowglobe from Urban Outfitters.
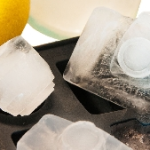
We have ice cube trays in a variety of shapes, from fish to stars. There's no reason why we wouldn't add some photography-themed trays to the mix. One tray from Enlight Photo costs £10.

Click and Blossom have some photography-themed t-shirts for women and men, boys and girls starting at $25. I'd be happy adding quite a few of them to my wardrobe. Or you could choose from one of their cushions or bags.
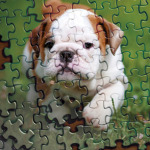
Puzzles Print will provide a 1,000-piece jigsaw with one of your images on it for £30. A 15-piece puzzle for a little person is £22, with a welter of sizes in between the two. There are magnetic options and collages, too.
If you're in the US, USAPhotoPuzzles offers a similar service.
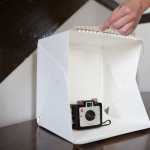
The Foldio is a pop-up studio, made in miniature. The walls are white and there's a row of built-in LEDs to cast light on your subject. From as flat as a pancake it takes minutes to erect, held together with magnets.
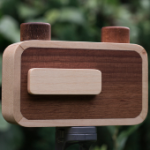
Light and a box &mash; pinhole photography is photography at its most simple, and most enlightening. I fell in love with ONDU's hand-crafted wooden pinhole cameras earlier this year. Everyone should go back to the basics of the medium every now and again; this is perfect.
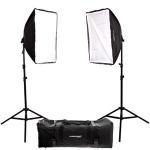
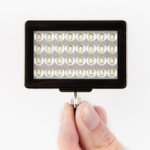
It's not fancy with flash, but for anyone wanting to start with artificial lighting, a basic set-up with some continuous lights and soft-boxes is a good place to start. Like this one for $135, or this for £150.
If you need something cheaper, this one is coming in at $55.
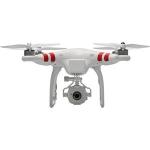
It seems impossible to move amongst a photography or tech blog or news site without stumbling across, or being swooped upon, by a remote-controlled aircraft carrying a camera. You can get started with aerial photography for $500 with a DJI Phantom FC40. Or you could spend as much as $3,000 for the new DJI Inspire 1 with its 4K camera.
Gifts for landscape photographers < < Holiday Shopping with Photocritic > > Books for photographers
It's Day Five of the Photocritic Holiday Gift Guide. This means landscapes. We have suggestions for budding landscape photographers and a few treats for more hardened souls.
Landscape photography and wide-angle lenses go together like strawberries and cream. While I've taken great pleasure using a Sigma 17-35mm ƒ/2.8-4.0, it's now out of production. However, the Tamron 10-24mm ƒ/3.5-4.5 is regarded as a great value-for money option that comes in a range of mounts. You can of course spend a whole lot more, or choose a prime instead of a zoom lens, but that's a good starting point.
Tamron 10-24mm ƒ/3.5-4.5 for Canon | Nikon | Pentax | Sony
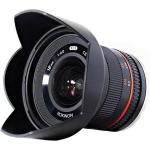
Photographers with mirror-less cameras might want to consider the Samyang/Rokinon 12mm ƒ/2.0, which is cracking value for money and is available for plenty of different cameras.
Samyang/Rokinon 12mm ƒ/2.0 for Canon M | Fujifilm X | Micro 4/3 | Samsung NX | Sony E
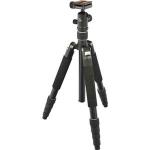
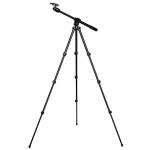
Tripods suitable for landscape photography are awkwardly demanding. They need to be portable: doubtless you will be schlepping it and yourself up hill and down dale in search of shots. But simultaneously, they need to be sturdy and able to withstand wind, maybe rain, and uneven terrain.
We've picked out the Giottos Vitruvian at $200 for its height, weight, and strength. For something a little cheaper there's the Slik Pro 700DX.
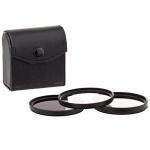
Securing vivid colours and correctly exposed landscape photos often relies on the judicious application of a filter across a lens: maybe a neutral density filter, perhaps a polarising filter. Filters need to be the right size for the lens and they come in various grades, for example you can choose between one and 12 stops—with everything in between—for a neutral density filter.
A filter kit containing a UV, polarising, and neutral density filter is a good place to start. We've picked out two, at different price points, which should fit on the Tamron lens we've suggested. But do double-check!
There's the Vivitar kit at just over $16 and the $48 Pro-Optic kit.
If you like trying things that are brand new and shiny, take a look at the filters just released by VU and Mefoto.
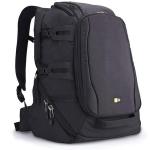
You need a bag that's easy to schelp about all day. It needs to be weatherproof. You should be able to attach a tripod with the minimum of fuss. And of course your kit should fit snugly. We think that the CaseLogic DSB-103 (can't they think of memorable names?) is great value at a little under $70. It's a backpack; it has a detachable waterproof cover; tripod storage shouldn't interfere with bag access; and it'll fit a camera and four lenses.
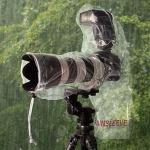
It's all very well your camera bag being waterproof and you looking fit to go to sea in a Force 5 gale, but if your camera isn't protected from the elements, then your landscape photography expedition will be a fruitless endeavour. Or possibly a very expensive one if your camera suffers from water damage. Pick up a rainhood. They don't cost $10 and they'll let you take photos in the most inclement of conditions.
You have erected your tripod and ensured that it's stable on uneven terrain. You have composed your shot with a perfectly positioned horizon and delectably enticing leading lines. You have carefully calculated your exposure to capture the light and the intensity of the colours. And then you go an ruin it all by depressing the shutter button and introducing a fraction of camera-shake into the shot.
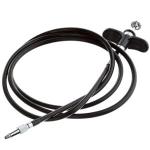
Use a remote release. Please.
You can pick up a Triggertrap mobile kit from £22. That affords a vast array of possibilities for camera-triggering. A basic remote release is about $10.
There are so many smaller accessories that I could have included in this list which make the life of a landscape photographer easier and more pleasant, the article would have run to the length of a post-graduate degree-level essay. I've opted for a torch, however.
(Okay, seeing as you asked, the leading contenders for this entry included a pocket knife, gaffer tape, and a bubble level.)
I loathe cold feet. They make me incontrovertibly miserable. They can also be a curse of landscape photography. Buy your landscape photographer loved one some warm, waterproof socks and you will win yourself many favours. Head to your nearest outdoor shop to see what they've got on offer.
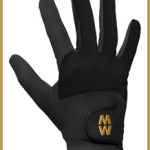
A good pair of gloves goes a long way, too. I love MacWet gloves: warm, waterproof, but they don't compromise on grip.
You might also want to consider hats, scarves, jackets, and trousers. Even boots. Or for the warmer months: sunscreen and insect repellant.
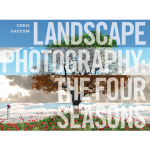
For inspiration, look no further than Ansel Adams. But to improve your technique, I rather like Chris Gatcum's Landscape Photography: the Four Seasons.
For those moments when an energy boost is required.
Gifts for high-speed photographers < < Holiday Shopping with Photocritic > > Gifts for photographers, big and small
Some of the most fun that you can have in the dark with your clothes still on is high-speed photography. Capture balloons going splat and china being smashed with a little help from a flash and some relatively inexpensive kit. For ayone who's looking to have a go, we've compiled a list of the essentials, from kit to subject-matter!
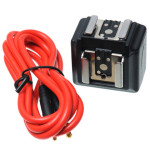
High speed photography is nothing without flash. For anyone who's intent on capturing popping balloons, smashing plates, and exploding sweeties, they're going to need some manually controlled fire power. However, take one look at the range of external light sources that can be hooked up to a camera and it's enough to leave you running for a darkened cave. TTL, guide numbers, sync speeds, remote triggering: there's a lot to take in.
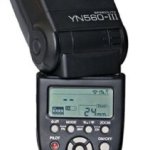
You can spend a lot or a little on external flashes. The Yongnuo YN560 III sells for about £50 here in the UK or $70 in the US and is compatible with Canon, Nikon, Olympus, and Pentax cameras. There are other third-party makes to consider, for example Phottix, or you could look for a manufacturer-specific flash.
Don't forget to order a stand and mount for the light, too.
High-speed photography relies on hyper-fast flash to ensure the perfect exposure. For that, it's best to use a specialist flash adapter, which allows you to trigger the flash directly, rather than relying on your camera's triggering mechanism, which can take an eon in high-speed photography terms.
Triggertrap produces a flash adapter, priced £20, to use in conjunction with its mobile dongles, TT v1, and the forthcoming Ada.
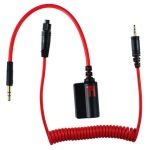
If you decide to use the Triggertrap flash adapter, then you'll need a Triggertrap mobile kit to activate the flash using its sound trigger (or maybe one of its other sensors). Even if you don't go down the Triggertrap flash adapter route, having a Triggertrap to help you fire your camera, whether in blub mode or using one of its sensors, is mighty helpful for high-speed photography.
Triggertrap mobile kits start at £23. Don't forget to download the free app, too.
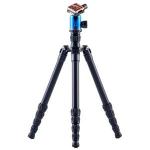
Heavens, we must sound like tripod bores, but a tripod is essential for high-speed photography work. High-speed photography means working in the dark, so look for something that's sturdy, just in case it's accidentally knocked. Have a look at Dave, from 3 Legged Thing.

Purveyors of high-speed photography will be in need of high-speed subjects. Pick up some packets of balloons to be used for popping—water-filled or otherwise—and capturing the moment they go bang!
These water balloons are bio-degradable, and coming in a pack of 100, are relatively cheap at $3.99. In the UK, these ones are £1.99.

Rootle around at jumble sales and in charity shops for chipped plates, cracked bowls, and ugly mugs that can be smashed with hammers or shattered by bullets without worrying that you're blowing the family's inheritance. You might want to pick up a hammer and a pair of safety goggle, too. Just in case.
Perfect for smashing, and then you get to eat it.
Gifts for smartphone photographers < < Holiday Shopping with Photocritic > > Gifts for landscape photographers
 It's Day Three of the Photocritic Holiday Gift Guide and we've switched from interchangeable lens cameras to smartphone photography. In-keeping with our previous (and indeed future) lists, it's a mixture of practical and fun. There should be something here for anyone who ventures out with their smartphone, whether an addict or an occasional shooter!
I'm a huge fan of the Easy-Macro band. It's a cheap, portable, and flexible (quite literally) macro photography accessory for your smartphone. It costs $15, it can live in your wallet, and whether you use an iPhone 6 or a Samsung Galaxy, it'll fit on your phone and provides 4× magnification for your photos. It's easy to use and delivers great results. What's not to like?

We featured Fotobit frames here on Photocritic earlier this year, when it was archive-deep in a Kickstarter campaign. Funding goal reached, Fotobit has gone into full-scale production and you can pick up a set of three inter-locking frames for $45 or nine for $99. Choose your photos, snap together the frames in whichever layout you want, and hang them on your wall.

If you want to flaunt your support for Instagram on your sleeve, or thereabouts, Photojojo has some cute lapel pins for $12. If you're a Pinterest or Photoshop supporter, they offer those, too. But, you know, this is the smartphone photographers' gift guide, so keep that one on the quiet side.

If you want to create selectively focused images optically, rather than digitally, take a look at the Lensbaby LM-10. It costs around $70, requires a free-to-download app, and is currently compatible with iPhone 4S, 5, 5C, and 5S and Android devices running Jellybean 4.1 to Kitkat 4.4.
Improvements have been made to smartphone flash since their first glaring white days, but it's still far from perfect. Subjects are startled, appear washed out, and the colour rendition leaves a little to be desired. So why not introduce some off-phone flash? Like the Pocket Spotlight. It's another Photojojo item, costing $30.

Earlier this year I had great fun trying out the palm-sized Projecteo. You select nine images from your Instagram account, they're printed onto a mini slide wheel and despatched to you with a baby projector. For $35. With world-wide shipping.
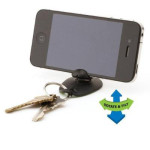
I succeeded in losing my Tiltpod, or at least temporarily misplacing it, when we moved earlier this year. It was very frustrating. Right now Tiltpods are only compatible with iPhones 4, 4S, 5, and 5S, but I believe Gomite is working on a 6-sized product. The 4/4S version costs $15; the 5/5S case costs $30.

Yes, we know that we're biased, but if we can't publicise our own books here, where can we? And Social Photography is a particularly pretty book full of lovely images, fantastic tips, and useful knowledge when it comes to taking, and sharing, smartphone photos.
Gifts for macro photographers < < Holiday Shopping with Photocritic > > Gifts for high-speed photographers
 Day Two of the Photocritic Holiday Gift Guide takes us into the world of the the close-up, and macro photography. We've compiled a list of suggestions for people who might be starting out and want to give macro a try, or who've been at it a little while and might need some kit to help them along.
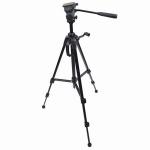
You might be wondering why anyone who already has a tripod might need a macro-specific version. It's not at all compulsory; however, for those photographers who are serious about their macro work, some tripods are preferable compared to others.
Something like a Velbon VS-443 D allows for an inverted centre column that brings the camera close to the ground, for example. Take a look here in the US and here in the UK.
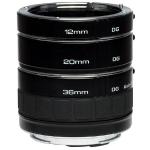
Instead of spending money on a dedicated macro lens, inserting an extension tube between camera and existing lens can have a similar effect. We understand that not everyone wants to have a go at making her or his own extension tube from a Pringles can, but thankfully commercially produced extension tubes are in abundance, manufactured by both the likes of Canon and Nikon as well as third parties.
You can pick them up in a variety of lengths and prices. Take a look.
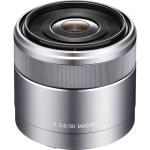
For anyone who's particularly in love with macro photography, a dedicated macro lens will be high up on her or his wish-list. You can spend anything from a couple of hundred dollars to several thousand. Some are zoom; many are prime. They're produced by both camera and third-party manufacturers. They come both with and without image stabilisation.
I love my Canon 100mm ƒ/2.8L and wouldn't be without it, but if you've not quite that much spend, take a look at these options.
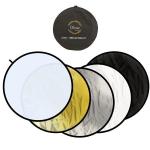
All photography relies on light, but macro photography is especially light-hungry. To help manipulate and direct illumination precisely where it's needed, no macro photographer should be without a reflector. Reflectors come in a variety of sizes and colours, but we've picked out this 5-in-1 reflector that incluces gold, silver, white, and black surfaces as well as a diffuser to help evenly spread light across your subject, too.
In the US it's about $30; a similar reflector in the UK is about £30.
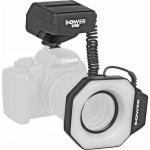
The shadowless light produced by ring flashes makes them ideal for macro photography. They're also relatively simple to use and start out with very reasonable prices, too, which makes them ideal for both beginners or as gifts.
Take a look at this Bower ring flash priced at $70 as a starting point.
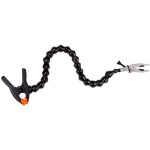
One never seems to have sufficient hands when it comes to macro photography. Or flowers have an inconvenient habit of swaying in the breeze creating nothing but blurry images. This is where a plamp comes in handy. Attach one end to your tripod (or anything sturdy and reasonably close) and use the other to secure a plant stem, angle a reflector, or hold a backdrop in place.
Try Wimberley direct in the US to find out where you can buy a plamp, or they're about £40 in the UK.
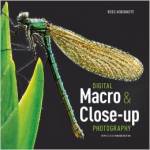
Haje's excellent Macro Photography Workshop is now only available as an e-book. If you'd rather purchase one of the dead-tree variety, take a look at Digital Macro and Close-up Photography by Ross Hoddinott.
Tasty and great for macro photography!
Gifts for beginners < < Holiday Shopping with Photocritic > > Gifts for smartphone photographers
We have received our first Christmas card here in the Bowker household. We're putting its early appearance down to a combination of my aunt's ruthless efficiency and her desire to ensure it made it from the Antipodes before, rather than after, Christmas. Despite the fact that I try my hardest to push Christmas from my mind until my birthday, which is at the beginning of December, has passed (Chanukah often falls over my birthday; it has a pass-card), it's probably about the right time to unveil this year's Photocritic Holiday Gift Guide.

We've put together seven bundles of suggestions for all types of photographers, ranging in price and practicality. We're kicking things off with ideas for beginner photographers. Assuming that they're set up with a camera, any of these items should be on a newbie's wish-list.
No photographer should be without a tripod. I happen to have more than one. And a monopod. But a beginner doesn't need such an extensive collection. Just the one will do, and the Manfrotto G-2015 is excellent value for money at $30.
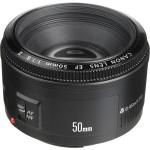
The first lens I acquired for my first dSLR was a 50mm ƒ/1.8. That camera has long gone, but the lens remains in my camera bag. It's battered and bruised, but still my go-to lens. I wouldn't be without it, and neither should anyone with a camera.
Their affordability and ready availability, as well their photographic adeptness, makes them great gifts.

Yes, it's terribly mundane, but it's also terribly useful. Don't let anyone out without a lens cleaning kit. You can pick up this nifty one, which includes a brush, blower, and microfibre cloth, for a little over $10.
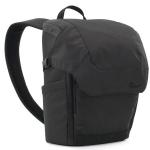
My camera bag criteria are extensive and demanding, but high up the list is for it not to look like a camera bag. Apart from having an obsession with bags that's marginally milder than my obsession with shoes, I'm in no way inclined to mark out the contents of my bag as being a desirable target for nefarious types. For a versatile, not-too-obviously-a-camera-bag-camera-bag, we'd recommend the Lowepro Urban Photo Sling 250. Right now, they're also cracking value for money, at about $45 in the US and £37 in the UK.
For something much more discreet, and definitely aimed at a mirror-less camera, have a look at the Cosyspeed system. Haje recently gave one a run for its money with very positive results.

Twenty-plus megapixel images have a habit of eating up computer hard drive capacity as Team Photocritic does ice cream. Storing them on an external hard drive (or two or three for security purposes) is a far more practical solution. A portable terabyte of storage might not excite anyone, but the recipient will be grateful for it. If not immediately.
You should be able to pick up something in the $65 or £50 region.

When you're shooting in JPEG, an all-singing and all-dancing editing suite might not seem a necesity. But it soon becomes one when you make the switch to Raw. And if you've a Raw-capable camera, why wouldn't you? It gives you unprecedented control over the appearance of your images. While I'm no fan of Adobe's Creative Cloud, it is still possible to purchase a stand-alone copy of Lightroom. And I do love me some Lightroom.
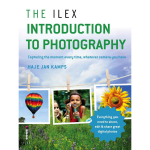
Once you have the bare bones of a kit, the most important investment you can make to improve your photography is in yourself. That comprises books, courses, and time spent practising and evaluating your skills. We know we're biased, but we do believe that Haje's Ilex Introduction to Photography is a fabulous starting point.
Because why ever not?
In the beginning < < Holiday Shopping with Photocritic > > Gifts for macro enthusiasts