Congratulations on your gorgeous new camera! There are four things that you can start doing straight away to take better photos. Are you ready?

When you hear the term 'high-res' thrown about with such abandon when it comes to images for web use, have you ever stopped to think just how big or how high quality and image meant for the web needs to be?
There's an assumption that high-contrast images are more dynamic, more compelling, more inviting. Have a go at some low-contrast photography. You might surprise yourself with the results.
Balance doesn't mean symmetry; it means an internal consistency and tension within your photos. And it's a vital element of composition.
Great photos might be down to a little bit of luck, but most of that 'luck' you make yourself. Don't believe us? Read on...
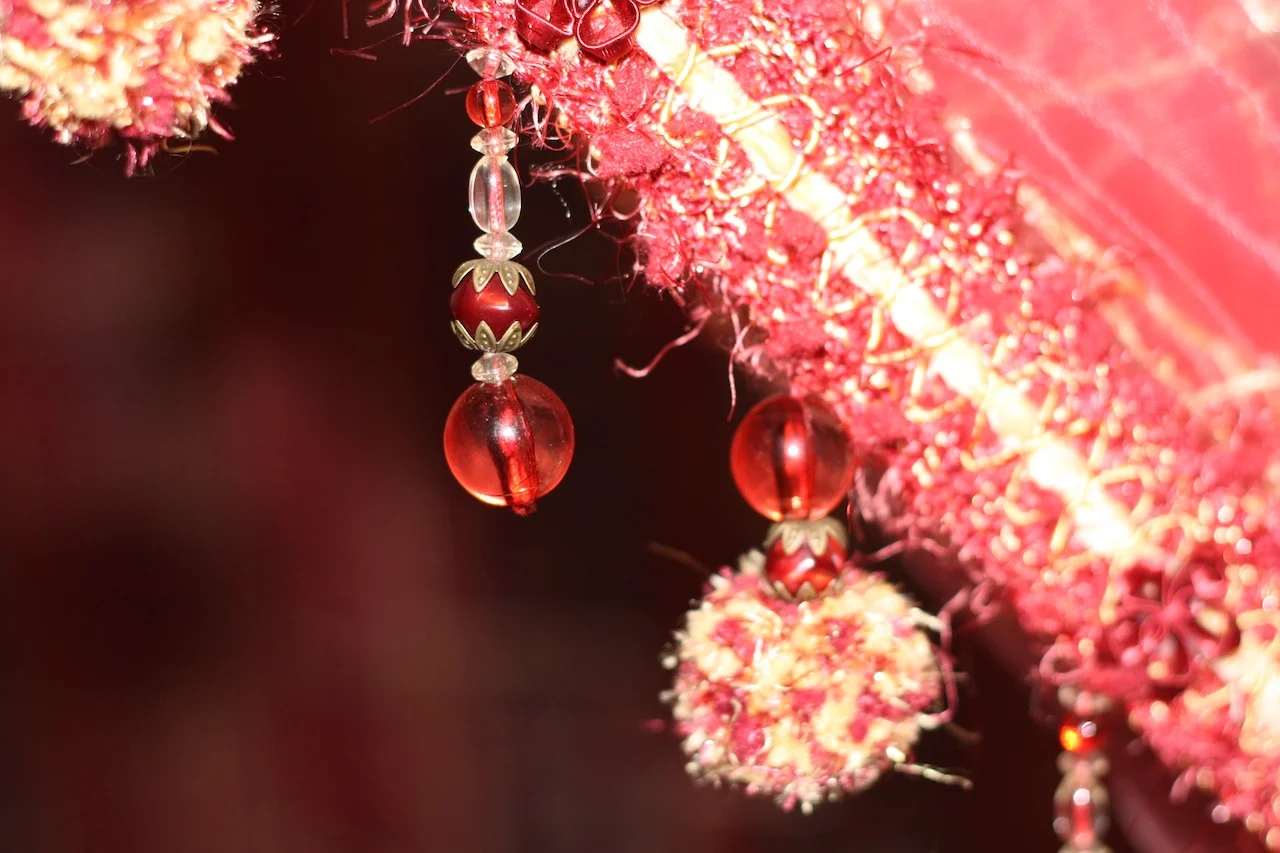
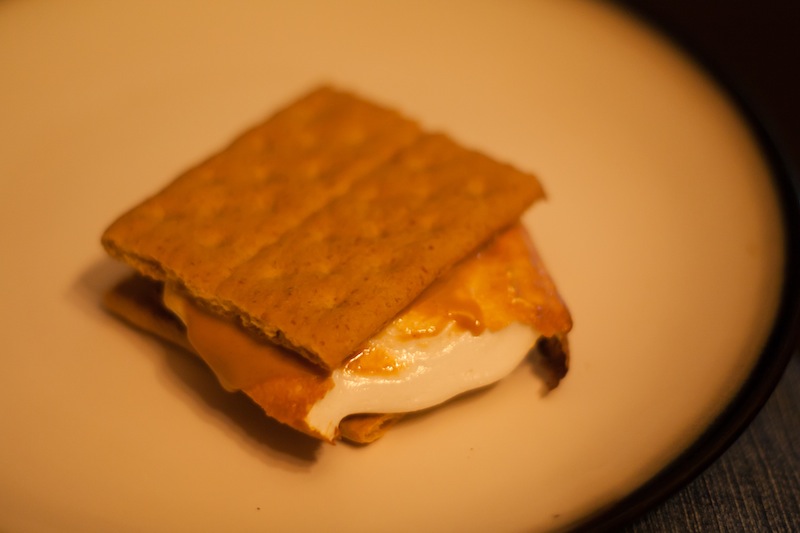
If you've ever noticed how beautiful lights can look when they are out of focus, you'll probably already have realised that we're about to enter the high season of everything that's awesome in the field of bokeh-liciousness. That's right - Christmas lights are pretty much the holy grail for gorgeous out of focus light effects. But how do you create the effect?
One of the most important things you're going to need to capture good bokeh, is that you need some great out-of-focus areas to begin with. So: Grab your lens that has the widest aperture (so, the smallest f-stop number). If you've got a prime lens, that's probably your best bet, but it's also possible to use a long zoom lens.
If you're shooting with a zoom lens, you'll want to zoom in, and focus on something close to you to get the maximum depth of field effect you're looking for in this particular case.

The next step is aperture. If I'm shooting exclusively for depth of field, I'll be shooting in Aperture Priority. Start in the biggest aperture you have (the smallest number, remember? If that doesn't make sense, quickly brush up on your skills with our Why is the F-stop scale so weird article).
Don't blindly go for the largest aperture though - it's a good starting point, but I often find that on some of my lenses, that means the foreground is a bit much - experiment to find the best settings!

A big blurry mess can be abstract and interesting, but let's be honest: It isn't storytelling, which - as we know - is one of the most important things about photography. So: In addition to the beautiful blurry mess, you also need to think about what the story is that you're trying to convey. If it's Christmas, it shouldn't be hard - get baubles, presents, kids, or food into the photo as well, and you're probably half-way there.

The world of bokeh is lots of fun - so keep that lens stopped wide open and start pointing it at light sources. Busy cities, gorgeous christmas trees, and even the TV can be a great source of beauty. Have fun, explore, and do share some of your best results in the comments!
Finally, don't forget that bokeh isn't just for the background - if you're feeling brave and adventurous, switch things around and get your background in focus instead - like in this great example from Mikko.
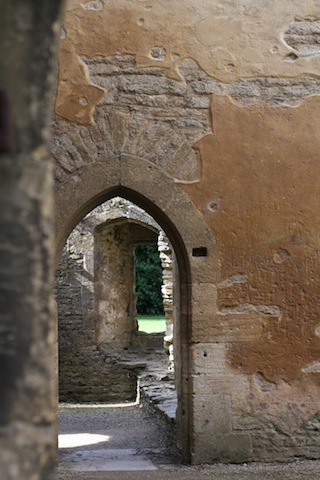
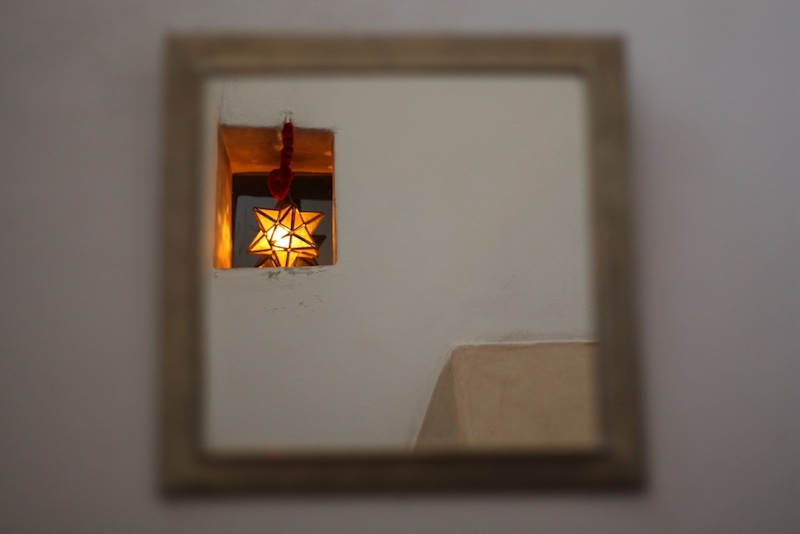
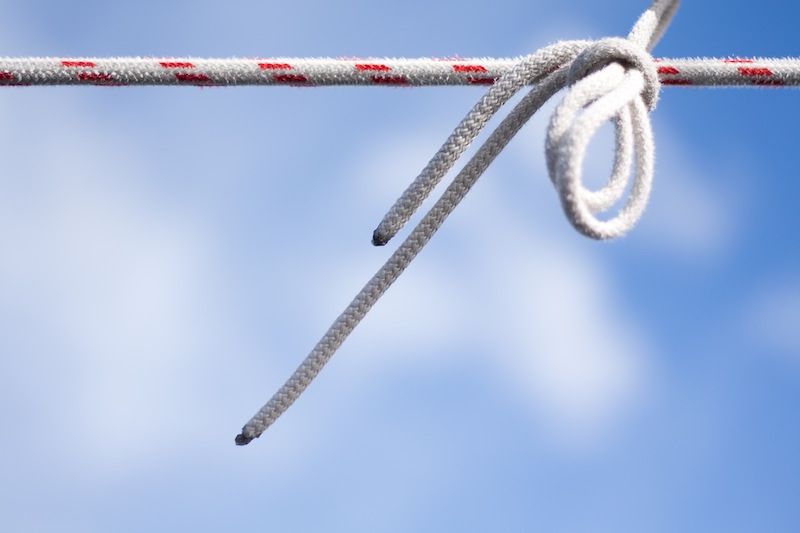
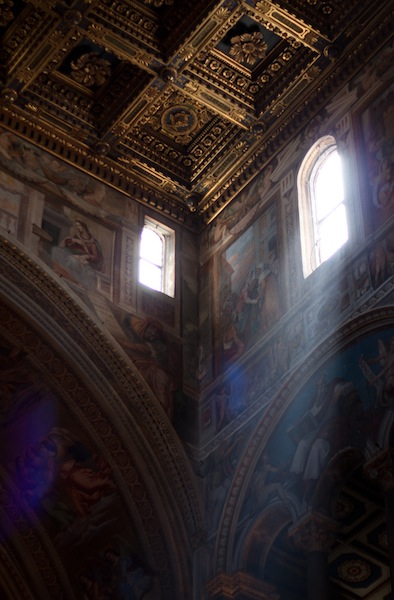
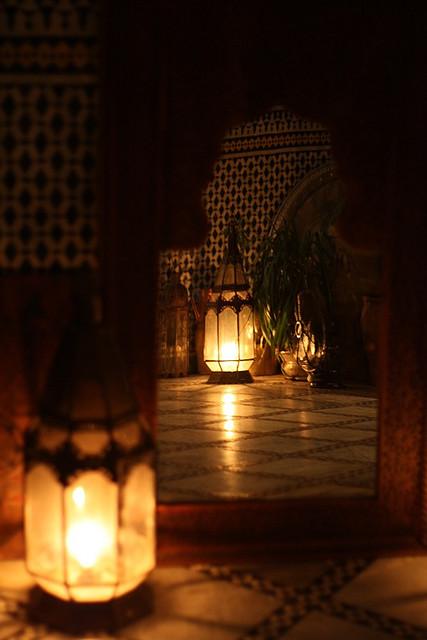
We put pictures—whether they're paintings or photos—into frames to help direct the viewer's eye. The frame is a boundary that directs the gaze: it ensures we know precisely where to look. As well as creating a border from a mounted frame and from the edges of a photo itself, it's also possible to bring focus to your subject and compositional strength and depth by using natural frames within your photos. Despite the name, a 'natural frame' doesn't have to be organic in origin, although trees, streams, and cave mouths do indeed create beautiful natural frames, rather the term describes a frame-within-the-frame. Look out for windows, doorways, and arches—in fact anything that bounces the eye back towards the subject—to act as a frame.
Primarily we appreciate images that include natural frames because they direct the eye straight to the photo's subject. As the eye travels towards the edges of the image—and especially if it contains lines that drag the gaze away from the subject—a frame helps to draw it back toward the focal point, just where you want it.
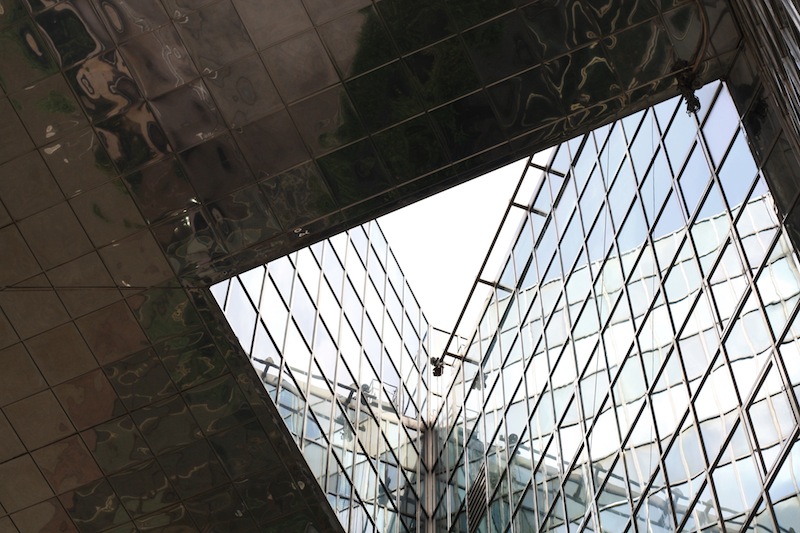
Second, they can bring a sense of perspective and three-dimensionality to an image, giving you the sense that you're looking through one layer of an image and on to another.
A frame can also give a sense of place or give context to your photos, for example, indoors versus outdoors or a modern area versus a historical one.
Finally, we find images that make use of natural frames attractive because it brings a sense of order to the image, in much the same way that triangles bring order to scenes with multiple subjects. They place limits on the scene and provide it with some boundaries.
Just because your scene has a terrific natural frame within it, it doesn't mean to say that you can ignore any other compositional theory. You still need to consider your use of lines, your subject placement, and the balance of the shot. Remember: combining these compositional techniques can help to elevate a good photo to a great one.
If you're planning on using a natural frame in your composition, consider if you want the frame itself to be sharp or blurred. If your subject and frame are at different distances, but you wish them both to be in focus, you'll need to use a relatively small aperture to achieve an adequate depth-of-field. Of course, having the frame in focus might prove a distraction and defeat its purpose, in which case using a larger aperture and isolating the subject using a shallow depth-of-field will work better.
If you're inside a cave or tunnel and using its natural form to provide a frame for a brightly lit sbject on its outside, you will have to meter accordingly. Spot-metering for the well-lit subject might be the easiest option. Alternatively you could dial in some negative exposure compensation should you prefer to stick with matrix (or evaluative) metering.

In order to capture the full dynamic range of such a scene, with its bright exterior and dark interior, you would need to shoot two differently metered images and combine them using post-processing software.
Using frames-within-a-frame is such an effective compositional tool that it's all too easy to get carried away with them and over-use them. One natural frame within a portfolio is clever; a dozen is cliché. Just because a potential natural frame exists doesn't mean it is the best way to compose the shot; it needs to bear some relationship to the main subject.
If you're not sure if a natural frame is appropriate for your photo, ask yourself: Does the frame add drama to the photo? Does it help to tell a story, add context, or give a sense of depth? Does the frame help to illustrate or enhance the focal point of the photo? If the answer is no to any of these, you might be better looking for an alternative composition.
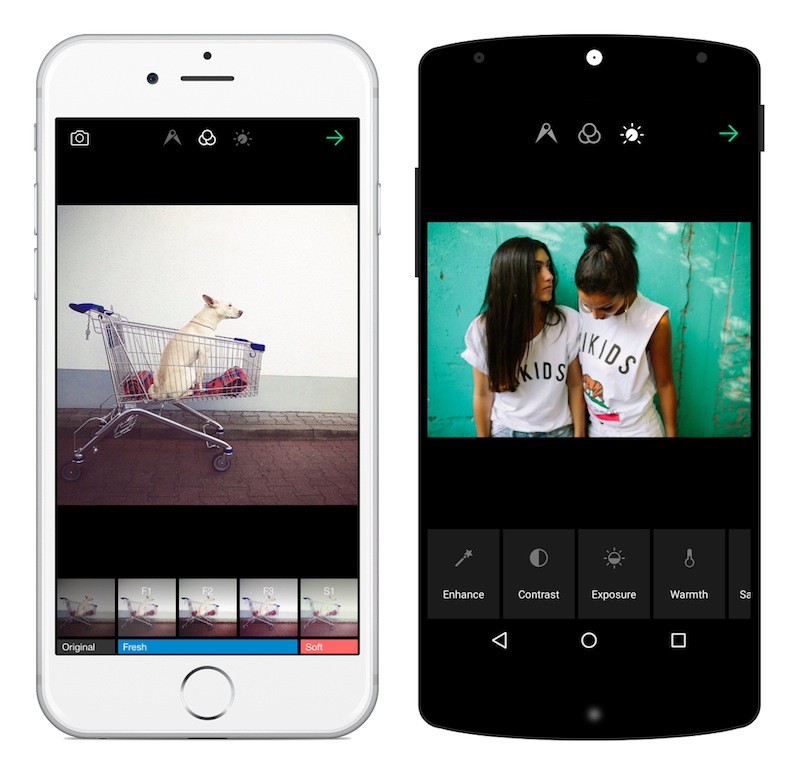
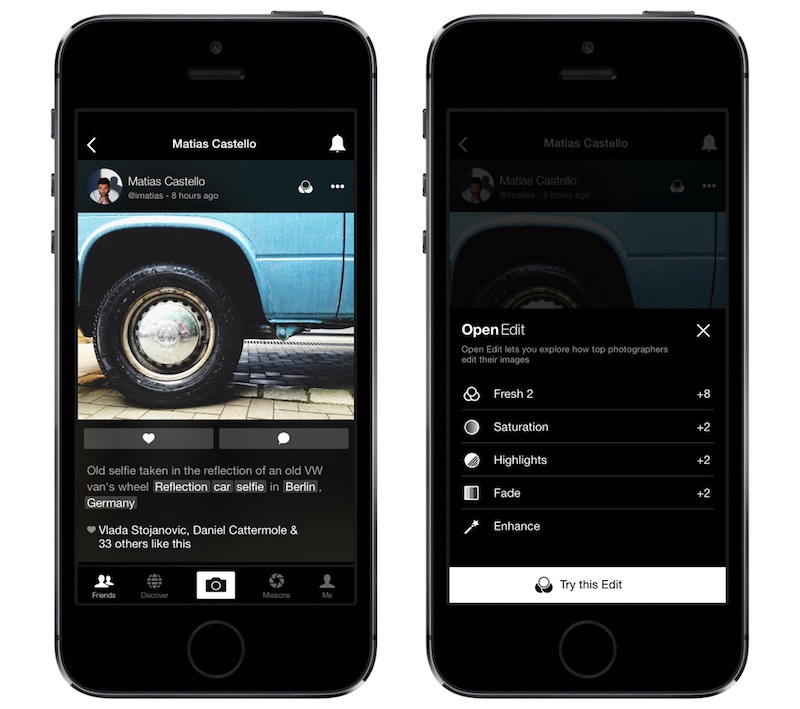
It's been a week of updates to our image-sharing programmes on social media. First Facebook introduced an auto-enhance feature, which will apply the filters that its algorithms calculate are most appropriate for your photos. Then Instagram unveiled five new filters, its first in two years. Now it's the turn of EyeEm, which brings a gaggle of new filters, fine-grained control over their application, and a new feature called Open Edit. The theory behind Open Edit is that it lays bare the post-processing path that a photographer followed to create an image, from the original to the final version. Each crop, tweak, and nudge is set out in a timeline that's made visible to the rest of the EyeEm community. If you see something that you like, you can apply the same edits to your own photos with one tap.
Right now, only certain photographers have the ability to open up their edits to the community, but it's something that will be rolled out to all members in time. The EyeEm team hopes that this open deconstruction of people's photos will lead to a more collaboratively minded community and one that can learn from each other and share their skills.
Can I see what EyeEm is trying to accomplish with Open Edit? Yes, definitely. Sometimes I do look at a photo and wonder precisely what sort of magic the photographer wove in order to create that particular effect. But at the same time, I'm not completely sold on it. The mystery and the secret behind someone else's photos are part of their appeal. Having the edits revealed to you can feel a little like the illusion of a magic trick being shattered when you know how it works. My curiosity means that I want to know, but the romantic in me appreciates the mystique.
From a teaching and learning perspective; I love EyeEm's enthusiasm to allow its users to share their knowledge. But I think that by going one step further, they could make this a much more valuable learning tool. How much people will actually learn from being able to see and apply other people's edits to their own photos will depend hugely on how much they're prepared to engage with the editing process and observe the kinds of impact each adjustment makes. Experimentation is such a valuable part of learning that just being able to apply someone else's workflow to your photos feels as if there's an important step in the process that's being skipped. It's not just about the what that you do to your photos, it's also about the why.
Bring a bit more dialogue to the experience—underpin the action with some explanation—and I think it could really work. Still, lots of people seem to be very excited by EyeEm 5.0, so perhaps I'm the one who's missing the trick here.
Let me know what you think.
You can download EyeEm 5.0 here.
In the run-up to the festive season, it's possible that people will be taking more photos than usual. Parties, pretty lights, and present-opening, afford ample opportunity to take photos and share them on social media. However, research recently commissioned by the online learning company lynda.com revealed some interesting facts about people's photo-taking habits. Aside from the fact that 64% of Brits now use smartphones or tablets to take photos, it would also seem that quite a few people are also too intimidated by the process, or by technology, to have a go themselves. Based on the figures that came out of the survey, we've put together five tips to help anyone who might feel a bit afraid of photography to start taking better photos without too much fuss.
60% of the people questioned spent fewer than 30 minutes learning how to use their cameras properly. Whether you use a smartphone, a point-and-shoot, or an interchangeable lens camera, read the manual. Or the destructions, as we call them. Understanding the capabilities of your picture-taking device will have a noticeable impact on what you can achieve with it.
Apparently, only about 45% of the sample made any attempt to improve the composition of their photos. Our top tip: get closer. And if you're working with a smartphone, get closer physically; don't rely on digital zoom.
Of those surveyed, 71% responded that they relied on the law of averages to return a decent photo. They work on the principle that if they take lots of shots, at least one should work out. Our advice? Slow down and think about what you're doing. What story are you trying to tell? A little contemplation should bring you better results than aerosol clicking.
Almost everyone who responded to the survey stated that they wanted to be able to make their photos look better, but the majority didn't feel that they have the skills to do so. While you can't turn a sow's ear into a silk purse, it is possible to make a few fundamental edits to a photo and elevate it from ordinary to much better looking.
There are three simple adjustments that you should make to every photo you take: to the crop, the colour, and the contrast. They're not time-consuming or complicated and can be accomplished with a basic editing package. You don't need to master Photoshop—or fork out for it—to make them.
As few as one-in-fifty of the survey group made use of any training to help them improve their photography. Seeing as the photographer is the most significant element in creating a great photo, doing a little learning will help enormously in the quest for better images. The good news is that by reading this, you've made a start. To help you even more, you can try a book or two or sign-up to any number of courses. There are hundreds, maybe even thousands out there. Obviously lynda.com, which commissioned the research would like you to look there, but may we suggest that you take a look at the Photocritic Photography School. It's free!
If you want to check out the findings from the survey, click and explore!
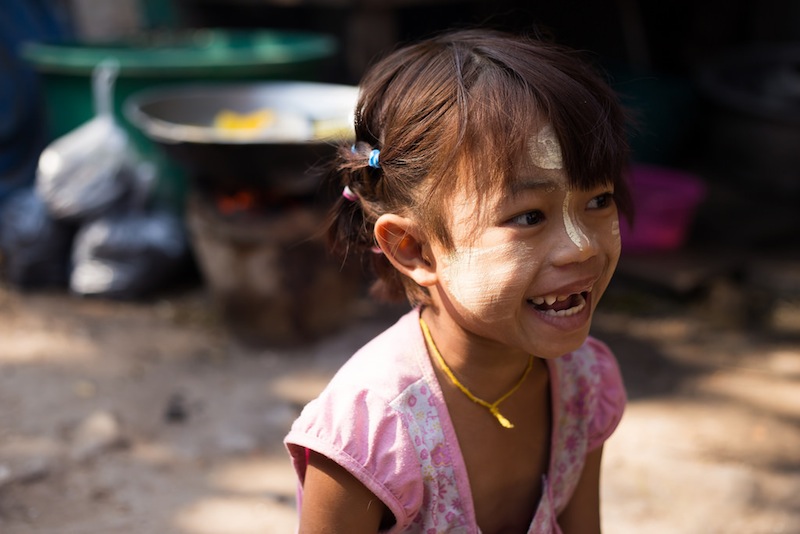
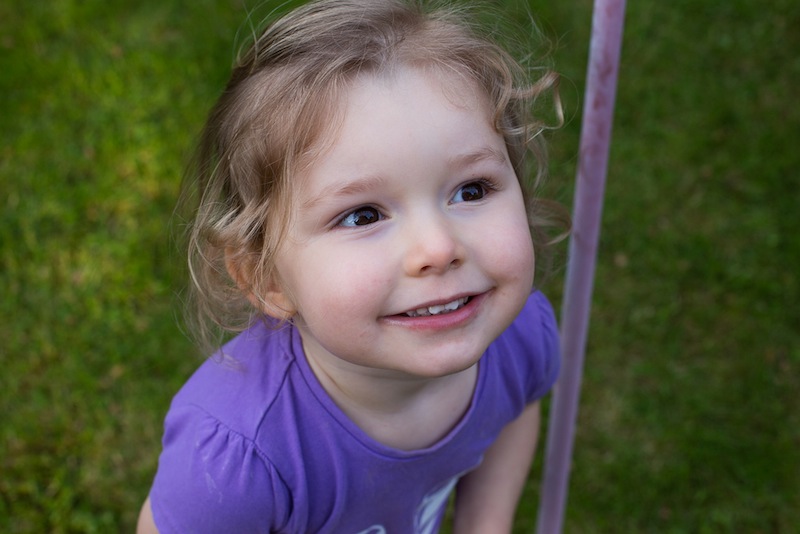
There's an adage which suggests that your life will be easier if you choose not to work with children or animals. Eh... I disagree. While photographing both children and animals can be highly demanding and occasionally somewhat frustrating, it's also wildly satisfying. Some of my favourite photos in my archive are of my nieces and nephews or of the animals that have galloped and jumped and hopped and tumbled and gallumphed and snoozed through my life. And I've had immense fun doing it. Seeing as the holidays are pretty much upon us, thereby increasing the chances that you might want or need to take photos of small people, now seems as good a time as any to present you with the Photocritic guide to photographing children. There are two crucial attributes to photographing children. First, patience. You will require it in bucket-loads. Second, you need to remember to think like a child. I doubt that you sprang fully-formed from your father's thigh, like Athene, so cast your mind back and try to remember what thrilled and bored you and interested and irritated you as a little one. By getting into their mindset, you'll give yourself heaps more opportunities to capture great photos of them.
With those two factors at the forefront of your mind, let's move on.
The best photos of children come when you get down to their level. Apart from it being so much easier for little people to relate to someone who's on their level, your photos won't take on an awkward, condescending air. Sure, every now and again photographing from above works a treat, but mostly it's about capturing life on their level. That means getting down on your knees or belly and seeing the world from your subject's-eye view.
If you want natural smiles and pictures of unhibited child-like joy, for heaven's sake do not attempt to pose a little one and elicit a grin with the power of 'cheese!' It might look terribly sophisticated to have them dressed in their party outfits and posing as if butter wouldn't melt in their mouths, but I doubt that's an accurate reflection of them or the most fun way they've ever spent 20 minutes.
Let them play.
If they're opening presents, you have plenty of opportunities for looks of concentration, puzzlement, wonder, and excitement flooding their faces.
They're going to be moving fast—children usually do—so unless you want motion blur in your photos, it means that your camera will need to be moving fast, too. Think about a fast shutter speed, a fast aperture, and a fast ISO if you need it.

With a large aperture you can let plenty of light onto the sensor, which will allow for a fast shutter speed, and it'll keep the background blurred, too. You might not necessarily want an out-of-focus background, but if it's cluttered or untidy, it will draw your viewer's eye to your subject.
As with any other portrait, the eyes need to be in focus when you're photographing children. It's the first place your viewer will look and if the eyes are out of focus, her or his interest will wander. Rather than using one-shot auto-focus, you might find that your purposes are best served by either continuous auto-focus or intelligent auto-focus to keep the subject sharp even when it's on the move.
When you're setting up a shoot, sure some studio lights might be a good idea to help get the photos that you want. But for those times when you're sitting on the floor surrounded by scraps of wrapping paper? They're probably not what you want. I'm not that fond of on-camera flash around babies and small people, either. It can be far too harsh and startling for them. Make the most of the light that you have, and bring out a reflector if you need one.
If you're not enjoying yourself, neither will the kids whom you are trying to photograph. And why should they? Smile, talk to them, take an interest in what they're doing. The more relaxed you are, the more relaxed they'll be, which makes things better for everyone.
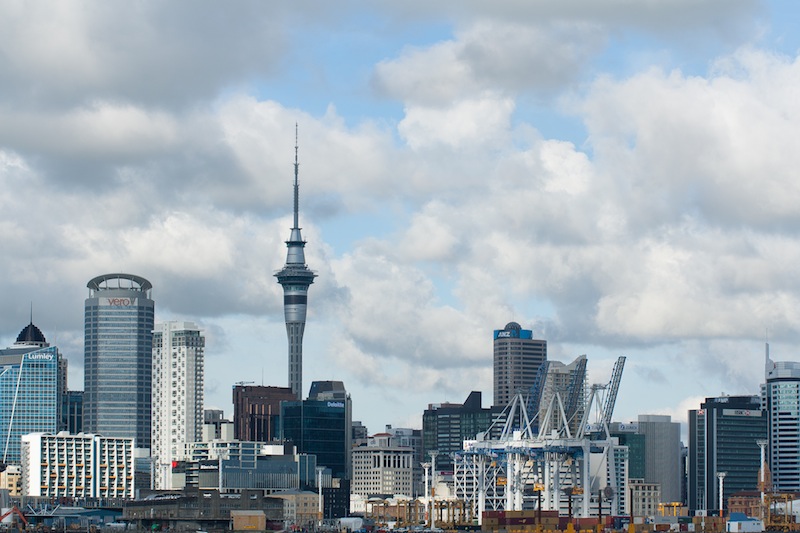
What happens when you take 40 time-lapse photographers, and you give them a mission: Create a love story to London? Well, my team over at Triggertrap decided to try and find out. With incredible success, I might add.
Under the expert guidance of professional timelapse photographer Chad Gordon Higgins and award-winning urban photographer Nicholas Goodden, the gang of eager photographers set out across the city to capture London from their own perspective.
By the end of the day the team of photographers had created clips shot from a whole range of London’s landmarks, from Tower Bridge to Camden Market, Oxford Circus to the Thames Barrier, and even gained access to the BBC Newsroom in full swing. The LapseLondon photographers managed to cover a huge variety of London views and experiences, highlighting the amazing and diverse city it is.
The 80 clips were assembled from well over 35,000 individual photographs, representing a total of over 40 hours spent timelapsing across the capital - all in a single day. The final video is an ode to London, showing the beauty of one random day in December in London through the eyes of 40 photographers.
The Story of LapseLondon from Triggertrap on Vimeo.
LapseLondon from Triggertrap on Vimeo.
Question: How deep can you really take the GoPro camera underwater (the box says 60m)? The way this works, is that any piece of equipment is 'rated' to a particular pressure. In the case of the GoPro Hero 3 underwater case, it will be rated to 7 atmospheres, which works out to 60 metres in freshwater and around 58 metres in salt water.
This is similar to bridges: They'll have a sign saying "Maximum 3 tons" or similar. This doesn't mean that if you are driving a truck that weighs 3 tons, but a kitten sits in your passenger seat, that the bridge will collapse.
There will be variations in each individual casings, too. Some underwater cases will happily go to 80 metres, others might make it to 90 metres, but some might fail at 68 metres. So, in order to keep your equipment safe, stay above 60 metres
For most people, all of this is moot, however, as a GoPro really isn't the right equipment for dives that deep. I'm a Divemaster, and I've dived extensively, both with and without photographic equipment -- and I don't think I've ever taken a half-decent photo at depths deeper than 30 metres or so. The light doesn't penetrate that deep, for one thing, but 40 metres is actually the maximum depth you can safely dive on air (see Recreational diving) -- so if you want to go deeper than 40, you're looking at becoming a 'technical diver' (see Technical diving), which is a different kettle of fish altogether.
Realistically with a camera without additional lighting, like the GoPro Hero 3, you'll probably only get good footage at depths down to about six metres, and usable footage down to about 15.
In the comments of this article (originally published in 2013), a series of divers started posting how deep they've taken the GoPro stock housings, and I was in for a surprise! Have a look at the comments below, but some of the data points are here:
Please do keep the comments coming!
I’m often asked about how much people charge for photography, and then frequently in the context of wedding photography. Honest truth? I don’t really know, but the persistent feeling out there is that wedding photography is really, really expensive. This is, in fact, true – it ain’t cheap to get your wedding photographed – but have you ever thought about why that might be? I decided to find out, and spoke to Randolph Quan, a London-based wedding photograher.
So, without further ado - In Randolph’s own words…
Spring is in full bloom here in the UK, so the hectic summer wedding season is about to arrive. Lately I’ve been getting a lot of couples asking me why wedding photography prices are so expensive. While it may seem like wedding photographers live an amazing life by charging through the roof for a day of work, it’s hardly the case.
It goes without saying that weddings are a costly affair. From the venue to the caterer to the wedding favors, the tab just keeps getting higher, and it often seems that wedding photographers are charging a large chunk of that tab. But have you ever though why wedding photography prices are so high? It’s because of the associated costs of being a wedding photographer.
Being a good photographer is an expensive investment. Sure, you can find cheap wedding photographers out there, but they’re cheap because they’ve possible cut corners on equipment, and insurance. Or they’re just plain stupid (you hired cheap and stupid?) So let’s take a look at what goes into a photographer’s overhead that adds up to the final cost of your wedding photographer.
1. Labour costs. This one is pretty standard across all industries. A photographer’s work doesn’t end when your wedding does. After the 5-10 hours they’ve put in working (on a Saturday, no less) at your nuptials, the photographer spends hours and hours editing your images so you get a wide array of perfect photographs by which to remember your day. Its not uncommon to work a full 3-4 days editing a wedding. Their time is even more valuable when you factor in the limited number of weekends in a year there are for a photographer to work.
2. Staff salaries. If you book a photographer that comes with assistants or second photographers, your cost is going to be higher. In return for getting more images from various places on your day, your photographer is going to have the pay those assistants.
3. Equipment. The pieces of equipment a photographer carries around is not your typical point-and-shoot. High-end lenses and bodies average around £1500 each. Photographers also carry back-up equipment in case their primary equipment fails, which adds to the cost of the wedding photography prices. In case your photographer is living in the Jurassic period and hasn’t switched over to digital (there are a few out there, somewhere), you also have to factor in the cost of film. Good wedding photographers easily can bring over £10,000 worth of equipment to shoot your wedding. Add in the prices of computers and editing programs like photoshop ( you did buy it right?) and costs begin to skyrocket. Luckily, its not always necessary in the UK to own a car so let’s not go there.
4. Insurance. Because cameras and equipment cost so much, photographers are smart to insure them. Just in case your drunk (who your mom insisted on inviting) cousin Jimmy decides he wants to spray champagne all over the wedding photographer’s equipment for a joke.
5. Web site. In this day and age, a photographer has to market himself with a very high-tech, professional Web site, which can cost a lot to design and maintain if the photographer doesn’t have web design skills. Its not unreasonable to spend over £5000 a year on website updates, and online marketing such as the sponsored links on Google.
6. Advertising. In that same vein, photographers also have to spend money on other types of advertising such as ads in the newspaper, business cards and brochures.
7. Photo extras. If you knew how much albums cost you’d have a heart attack. Albums are extraordinarily expensive and are often added into the wedding photography prices. Don’t forget the time it takes to design them as well.
8. Education. The more educated a photographer is, the better techniques and specializations will be used while shooting a wedding. As everything else, that education comes at a cost through instructors, college degrees, extra classes and seminars, etc. Intangibles such as expertise aren’t easy to measure monetarily, although we try!
So while you may be asking, “why does photographer X cost so much more than photographer Y?” the answer might be simple: Photographer X has spent more money developing his or her business into a full-fledged photography service, which ends up costing more money than an inexperienced photographer who moonlights part time on the weekend.
….And those Porsches we drive up to your wedding in just don’t pay for themselves now do they? :-)
Randolph Quan is a London reportage wedding photographer. You can follow Randolph on Twitter and Flickr or contact him via his website if you’d like to get a quote to get him to photograph your wedding.
All images are courtesy of Randolph. This article was originally published in 2009, but was then fully updated and revamped in December 2014
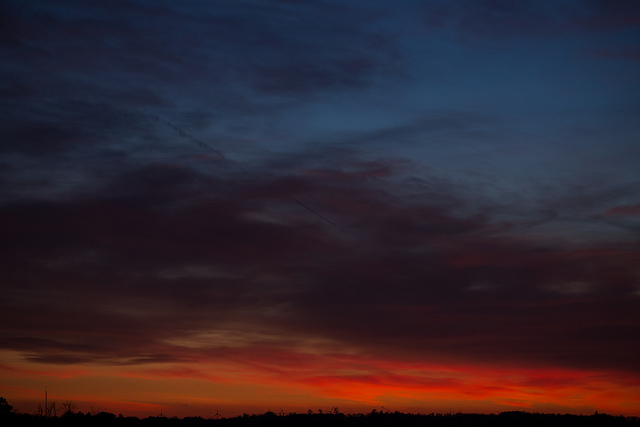
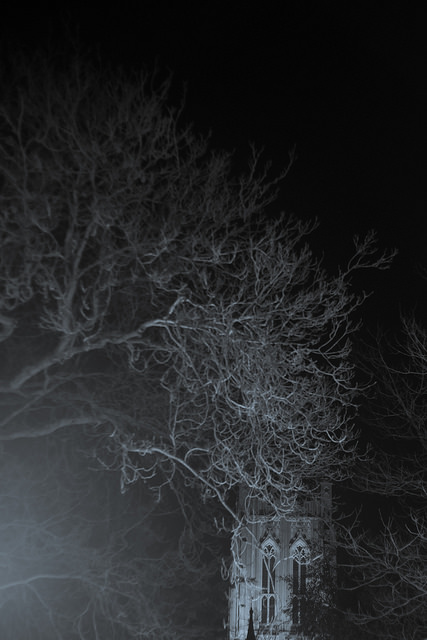
Here in the northern hemisphere, the shortest day is fast approaching and whether we like it or not, much of our photography will be of the low-light variety. We've put together some suggestions for coping as best you can when things are a little dim and the light with wish you wish to draw is a scarce commodity.
This might sound terribly obvious, but it's a fundamental of photography: look for the light in your scene and use it to your advantage. Use the light from streetlamps, from candles, from the moon to illuminate your subject—even be the subject—and create interesting shadows in your photos.

While a too-high ISO can be responsible for noisy, grainy photos, advancements in sensor technology mean that it's possible to push ISO much higher than was previously acceptable to get the shot you want. Remember: a little grain can be better than motion blur; if you shoot in Raw, images can be cleaned up; a black and white conversion can produce noise-negating miracles.
The wider the aperture you select, the more light you'll let onto the sensor and the faster shutter speed and lower ISO you'll be able to use. This will of course come with the caveat of a shallower depth-of-field, but that can be applied creatively.
A slower shutter speed will permit more light to reach the sensor, but it also has the potential to introduce motion blur if it isn't sufficiently fast to freeze the action in your scene, as well as camera shake if you're hand-holding your camera. Sometimes, however, motion blur contributes to the story that you wish to tell, so don't dismiss it entirely.
The general rule for hand-holding a camera is that you shouldn't do it if your shutter speed dips below the inverse of the focal length of the lens you're using. Thus, for a 50mm lens, you shouldn't attempt to hand-hold your camera using a shutter speed slower than about 1/60 second. If you find that you need to go slower, you might wish to bring out your tripod. Think about a remote shutter release, too.
If you adhere to matrix or multi-segment metering, your camera will attempt to adequately expose the entire scene. That might not be what you want if you're looking to play with light and shadow. For dramatically lit shots, switch to spot metering and meter from the illuminated area that you wish to be in focus. This will maintain dark shadows while correctly exposing the point-of-focus.
Spot-metering might not be appropriate for your scene, but at the same time, matrix or multi-segmented could render it over-exposed. If that's the case, try dialling in a stop or two of negative exposure compensation.
Auto-focus can struggle to hit its mark in low-light situations, in which case manual focus might render better results if you're both confident enough using it and the scene isn't changing so fast that you miss the photo opportunity. Should auto-focus be the better option, ensure that you're using one-shot auto-focus. Try, too, shining a light where you wish your camera to focus. The illumination will assist it in locking-on to the point-of-focus.
Whether it's reflection off of pale clothing, off of glass, polished metal, or liquid, or from a reflector, keep an eye out for reflected light and put it to use in your shots. That might be making reflections on water the focus of your photo, but it can also be bouncing back reflected light to illuminate shadows.
If you're not already shooting in Raw, switch now. Not only will help you to tidy up any noise in your shots, or even to adjust the exposure a little if necessary, but it will allow you to adjust the white balance of your photos more effectively. Accurately white balancing low-light shots can be tricky; the more flexibility that you have, the better.
How warm or cool is your light source? Or are you working with mixed light sources? If you're shooting by candle light, you can set the light temperature on your camera to more accurately render colours in your photos. For mixed-light sources, remember to white balance according to the light falling on your subject. If you're shooting in Raw, you might find that adjusting the white balance in post-processing will give you the most accurate result.
Finally, have fun with the darkness and put it to creative use. Let reflections dance or shadows draw you in to moody scenes. Low-light might force you to think for a moment, but remember that you often have longer than you think you do, and experimenting is half the fun.
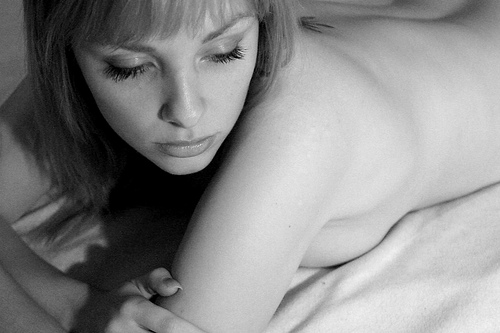
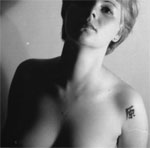
As your photographic interests progress, you are likely to try and take photos of somebody in the nude – It’s a very honest and challenging artform, which allows for a level of intimacy far beyond your regular portraiture. Of course, with the modern world’s paranoia about nudity, it’s not easy to know where to begin, so I’ve written a guide which I hope will come in handy to everyone, and give some insight into the hows and whys.
Needless to say, the photos behind the cut may not be entirely safe for work, but rest assured they are all relatively tasteful.
The problem with the definition is that people seem to attribute different things to nude. The most important part of an nude photo is that the person(s) in the picture is naked – and that this nakedness has a purpose.
 See Tina Nude II bigger on my Flickr stream.
This is probably going to be your biggest problem. It is difficult to take good nude self portraits, so you will have to find a model. A wife or girlfriend (or husband / boyfriend) might be able to help you out, but the problem here is that you are likely to know this body well already. One of the few exceptions to this Petter Hegre (see the links section below), who has taken an extensive (and very intimate) nude series of his wife – titled “my wife”
My point is that it would be better to take shots of somebody you have never seen naked before. That way, the picture taking process will be as much as an exploration for you (the photographer) as for the viewer
Finding a model can be difficult, especially if you do not have a photo studio or a professional business card (Neither those mean anything, as even people owning both can be psychos, but it helps when talking people into nude modelling). You could, of course, call a professional modelling agency, and offer to do a few nude shoots for new models who need a portfolio, but this is not likely to be cheap. Alternatively, using a online modeling agency such as OneModelPlace, you could find amateur models in your area.
When choosing a model, take somebody who has features that intrigue you. Don’t fall in the trap of picking somebody with a supermodel body – it removes much of the challenge. Instead, you want somebody who is different than average (making somebody who is not automatically associated with “pretty” look gorgeous is a lot more of a challenge than taking pictures of head-turners). A few pounds too much or too little is great.
 When working with nude photography – no matter how much time you spend getting the pictures to look nice, and hiding away everything you would prefer not to show – the models will be moving, and everything will show, to put it that way. What you want to do is to find a reasonably secluded spot to take the pictures. A photo studio is ideal, but outdoors or on location somewhere makes for great pictures.
Make sure that the temperature wherever the pictures will be taken is good though, because remember; Somebody will be naked, and being cold definitely does not help to make people relax!
Before you take the pictures, you will have to have thought about what you will want to do. Make some sketches, or have the model go through some poses with clothing on, to get some ideas as to where the shoot is going. Let the model have some ideas or set a theme to get going (a big black leather couch and a pale model or vice-versa can be very exciting)
When taking the pictures, take lots of pictures. This goes for any style of photographs, but particularly nude photography. If you believe you got a shot right – take two more just to make sure.
This also means that you will run out of film fast. Great. That means you can take frequent breaks while you load new film. Have a chat, take it easy, have a glass of wine (if the model is nervous, this can help LOTS)
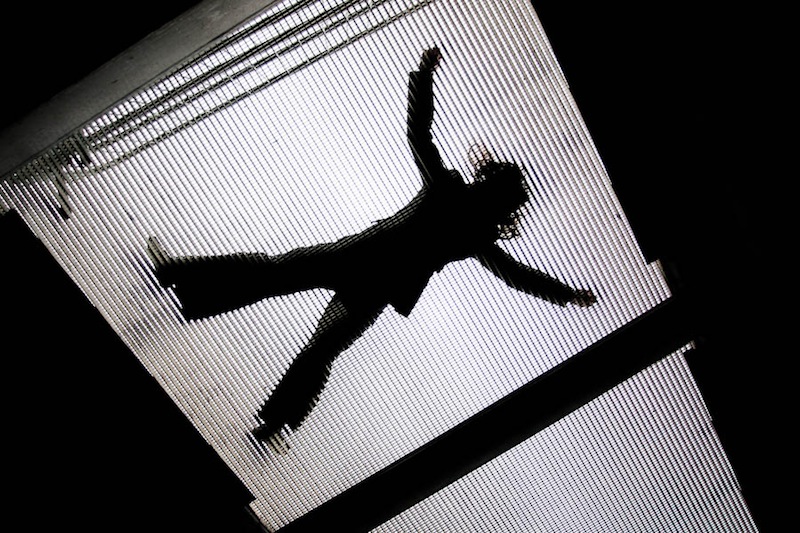
 Try new stuff. Combine strange things. Have you seen the picture of Atlas? Recreate this with a big beach ball, or a TV receiver set or something. Use candles as light sources. Take black and white or colour shots (whatever you normally don’t). Use an overhead projector or a slide projector to project shapes onto your model.
Philip Greenspun has an excellent guide to nude photography on Photo.net, complete with lots of examples, practical tips, and interesting pointers. Not to be missed!
About.com has invited Peter Marshall to do A Beginners Guide to Nude Photography, which has a series of articles about nude photos, and how to go about photographing them
 See Tina Nude I bigger on my Flickr stream.
Bodyscapes is a project by Allan Teger: set of photographs where bodies are seen as landscapes. Very clever, very sexy, but not rude.
Petter Hegre is a Norwegian photographer who specialises in nudes. In recent years he's strayed from the subtle to straight-up pornography, but one thing you can't take away from him: The man's got a great eye for a photo, and it's some of the classiest porn around. Is that a weird thing to say? Well, have a look and judge for yourself.
The Art Nudes blog has a daily update of an artistic nude photo – most of them are of world-class standard – sometimes provocative, sometimes a bit strange, but always of very good quality... And they've been going for the best part of 10 years, so there's plenty of content to get through.
Flickr is of course another source of nude photos – the “Tasteful nudes” pool is a great port of call for inspiration, mostly photos taken by amateur models, but a lot of it is rather good... Although it's not always the best moderated collection of photos. Nudes, yes, but 'tasteful' - not always.
A history of nude photography in the inter-war era.
And, of course, my own article 45 inspirational nude photographs
Good luck, and if any of my readers have galleries of tasteful nudes – please do post a comment, I’d love to feature your site!
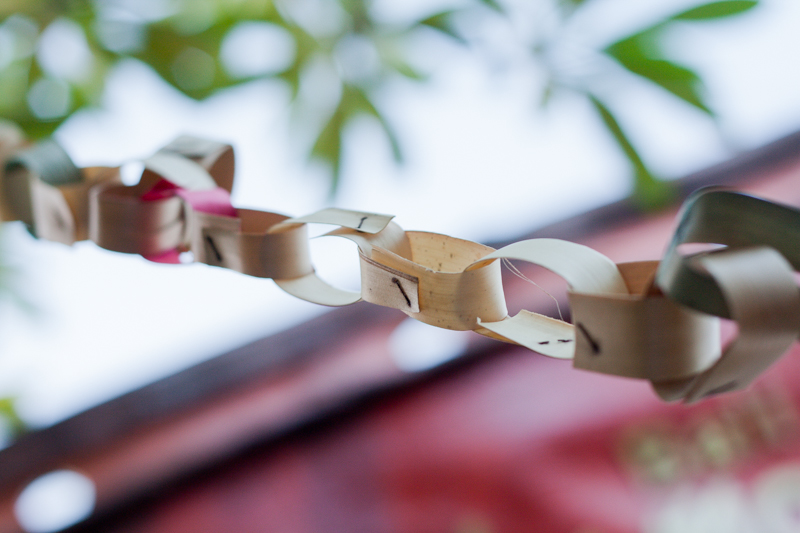
The end of term is drawing nigh and primary schools across the country are preparing to roll out their annual festive act featuring a miserable Mary, a startled Joseph, three kings, a flock of shepherds, a mega-flock of sheep, and likely a rendition of that well-known Christmas classic, 'Let it Go'. If you're a proud parent, doting aunt or uncle, or adoring grandparent and want to capture the event on camera, what's the best way of going about it?
First of all, if anyone tries to tell you that you're prohibited from photographing the nativity play because of data protection tell them that they're wrong. The Information Commissioner's Office has stated quite clearly that family members wanting to photograph or video their children's (or grandchildren's, nieces', nephews' &c) school plays in no way violate data protection regulations, provided that it is for personal use. So ner! (Insert sticky-out tongue here.)
Individual schools might have tighter regulations relating to photographing their pupils, especially if any of them are looked-after children—that's young people who are in the care of their local authorities, and most likely are being fostered, are in care, or are in the process of being adopted—whose identities need to be protected. If photos of them made their way onto social media sites, it could lead to difficult, or even nasty, situations. Please do bear that in mind.
If you're really intent on getting the best photos of the show, ask the school if you can drop by for the dress rehearsal. Everything should run just as it would for the real thing, but the children won't feel under pressure from a huge audience and you should be at liberty to move about to get into the best positions without disturbing any other spectators. It also means that you get two bites of the mince pie: one to photograph it, and another to enjoy it and swell with pride like a Christmas pudding in a steamer.
Of course, the school might not want the dress rehearsal descending into the production's semi-official photo-shoot or it might not be convenient for you to attend. In which case, you'll need to make sure that you're at the real thing in time to get the best seat. Ideally you want to be close to the front, but make sure you consider your fellow audience-members. They're just as invested in this production as you are and will not appreciate their enjoyment of the show being obscured by you and your kit wriggling, fidgeting, and readjusting.
The best camera is the one that you have with you. If you've only a smartphone or a point-and-shoot, so be it. The important thing to remember is to turn off the flash. First, it likely won't have a discernible impact on the shot; second, it will distract the Angel Gabriel. If you can, bump up the ISO to give you the best chance of getting a blur-free image. It might be as noisy as Hark the Herald Angels Sing, but grain beats blur.
For anyone with an interchangeable lens camera, I'd advise selecting one lens and sticking with it if you're photographing the real thing. You don't want to be changing lens mid-performance. It will disturb the audience and possibly the cast, and you might well miss something crucial in the process. You have more latitude at the dress rehearsal, though.
Ideally, you want something fast, with a focal range to enable wide-angle and zoomed-in shots, and image stabilisation to help defy blur. We're not all blessed with these sorts of lenses, so select the fastest glass you have. You're going to need all the light you can get.
The two key points for performance photography have already been mentioned: turn off the flash and set the ISO as high as you reasonably can. You should be shooting in Raw anyway, but if you're not, go make the change the now. Skin tones under stage lights will thank you for it.
Plays and shows are fast-moving things: you're going to need a fast shutter speed coupled with a fast aperture to capture anything that isn't as fluffy as a sheep. Around 1/100 second should freeze action, but if you want to capture the blur of dancers spinning, you can always slow it down!
Switch your auto-focusing mode from one-shot auto-focus to something that can help you capture moving subjects; either Continuous/Servo or Intelligent/Automatic auto-focus should help you.
When it comes to metering, you might find that if you want to capture illuminated faces, switching to spot metering will give you the best chance of doing so. Just remember to meter what's in the light: if you accidentally meter off the dark backdrop, you'll end up with a ridiculously over-exposed image. For anyone with a smartphone, tap your focus box onto your subject's face: it'll meter better and do its best to get the subject sharp.
It's already been mentioned, but it's so important, we'll re-state it: don't distract the cast and don't disturb or obstruct the view of anyone else in the audience. You need to be as discreet as possible. Keep your elbows in and noise to a minimum. And for heaven's sake, don't stand up.
If you can, try to take a photo of every person on stage, and those who've worked behind the scenes, too. You don't want anyone feeling left out. And in contravention of our general guidance, take lots of photos. It's the best way to ensure that you capture the action because things happen so fast.
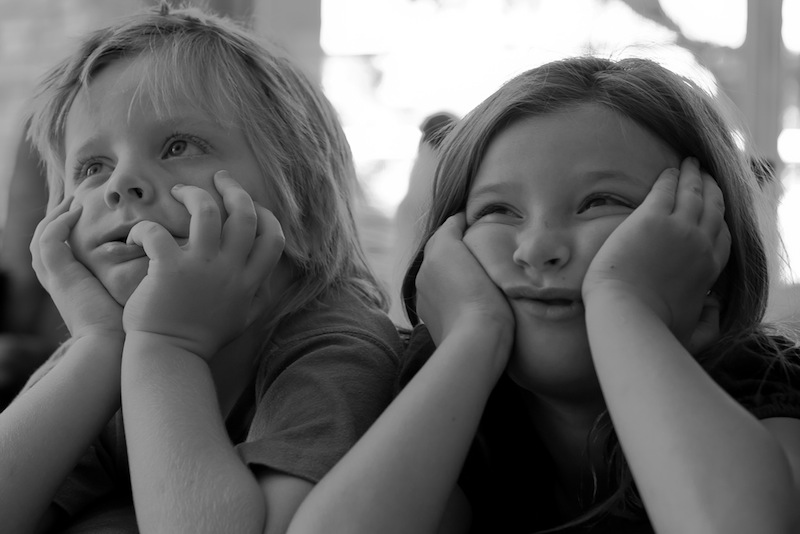
Don't forget to keep an eye out for things that are happening away from the main action, too. Small children get bored, pull faces, and do cute and funny things. These are always worth capturing if you spot them.
Finally: enjoy it. Don't become so focused on taking photos that you miss your daughter's big line or your son's solo. They're meant to be the stars of the show and the centre of your attention, not your photos!
You are into taking photos, obviously – so what do you do with them? Many of you probably make online galleries, or you create prints to hang on your walls – or perhaps you even sell prints to others. Eventually, as photography progresses from a mild interest via passionate hobby and into the realms of what could be seen as a professional career, you are going to have to create a portfolio of your images, to show to prospective clients.
Heck, even if you have no clients, you will still want to make a portfolio. Imagine how great it’ll be to show the grandkids!
So, you are a photographer, and you want to make a portfolio. I have had to do this a few times, and I have fucked up a few times, so I learned all of this the harshest way possible. Ah well – on with the show
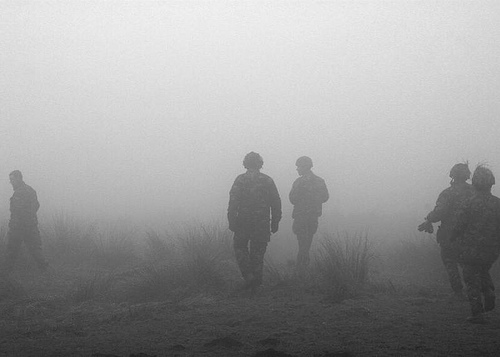 Into the Mist (Territorial Army III) by Photocritic.org, on Flickr
If you want to show your pictures in a gallery, you will need to make a selection of images around a theme of some sort. If you just run around and snap pictures, you will have to scrutinize them, to find out what they really are about. If there is no connection whatsoever between them, you might want to consider not making a portfolio, and rather concentrate on taking more pictures.
Why is a theme important? Well, although single pictures can be interesting, galleries tend to be interested in offering its visitors with a journey. Pick an emotion, and explore it visually, or perhaps a situation or a place. As long as there is some kind of “red thread” tying your images into a whole, you’ll be all right.
Make sure that the images are in a logical order – either cronological, or through mood development. Be prepared that you will probably have to talk the person you are presenting your portfolio to through all the pictures, so if you have some kind of story prepared, all the better. If you decide to mix colour prints and black and white prints, you’d better have a very good explanation as to why.
A good selection of images is 10-20. If you have several themes, make different portfolios, and present them separately.
This type of portfolio is the photographic equivalent of a “Best Of…” album.
Image libraries are the other extreme – here, it is okay to have a large batch of single, non-interconnected images, as this is not what the target audience is looking for. What they are looking for, however, is genericicity and perfection. The more generic the image is, the bigger the chance somebody will use it, as it is adaptable for many different situations.
If your image has a flaw, ditch it. If your image is only slightly out of focus, ditch it. If your image has brand names or visible logos in it, chances are it is worthless in connection with image libraries. If you do not have model releases for the people in your images, get rid of the pictures.
In short: Make sure you only show your very best images. It is better to pitch 3 perfect pictures than 15 good ones, but that don’t stand out from the mass. You should aim for 7-15 great pictures, however.
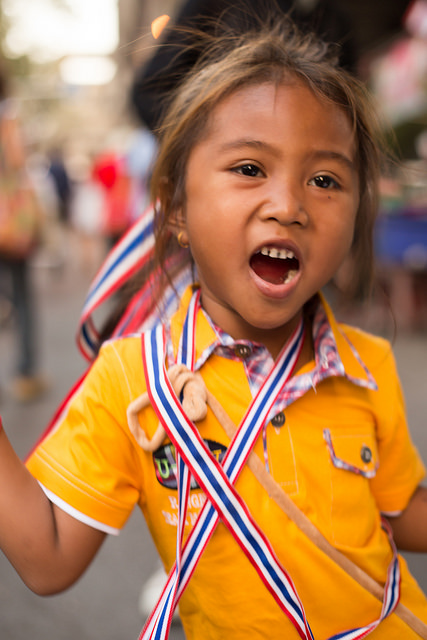
 Strongly emotive photos can help your portfolio shine
If you are making a commercial portfolio, be prepared to make it focussed. You might need to change your portfolio around depending on who you are pitching it to. If you are pitching fashion work, make sure you have 5-6 pictures from each series you have done, to show that you can consistently take good pictures. If you are doing product photography, make sure that you do the same: Same product from various angles etc.
If you try to pitch your general skills as a photographer, make sure that you make several portfolios. One for portraiture, one for nature, one for product photography, etc. That way, the person reviewing your portfolio can mentally prepare for something else. Also, it allows you to show only the portfolios that are relevant for the job you are doing.
If you have gotten pictures in print (especially viable if you are planning to do freelance news photography), include both prints and newspaper clippings – side by side on adjecent pages is good.
This is what people ask about most: How do you present your portfolio?
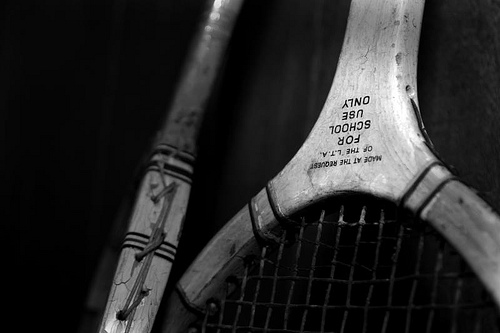 For School Use Only by Photocritic.org, on Flickr
First of all, make sure that your prints are of the best quality possible. This means that they should be of a decent size (approximate A4 / letter size is an ideal tradeoff between presentability and portability)
As for the actual presentation of the portfolio, the answer is difficult to offer. Although a nice leather folder with high-quality plastic inlays to keep your images in offers a good initial impact, it may not be ideal, as the plastic may introduce sheen and / or reflections on the images, making them difficult to see.
In the past, I have seen portfolios that are presented as pictures mounted on cardboard, even loose pictures in a rolodex-style folder. You could consider getting a mini- easel that you can place the images on individually. That allows you and the reviewer to take a few steps away from the images – an especially good bonus if that is how the images are meant to be seen.
Creativity is a big bonus – if you manage to come up with a good way to present your portfolio effectively, it probably means you are doing the right thing. Don’t fall for the temptation to show your images on a computer screen or data projector, however, unless this is how they are meant to be presented. If you only have slides, there is no way around showing it on a slide projector, but if there is any way you won’t have to bring and / or arrange a projector, it is better.
Oh, and it is all in the attitude. Go in there, be sure of yourself, talk, talk, talk, and don’t for a second let up that you had even slightly considered the possibility of them not liking your images. You’d be amazed what difference it makes.
Good luck!
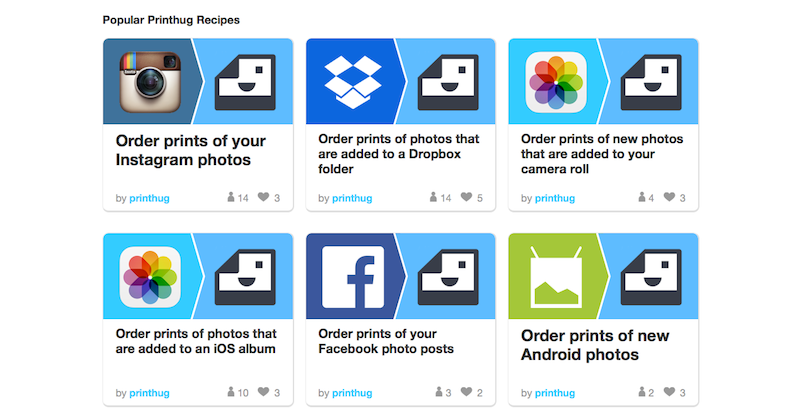
Tell the truth, how often do you print any of your photos? And how often do you go to have a selection of your images printed only to be deterred by the prospect of having to upload them to a print company's website, which always seems to be a slow process, and then prevaricate about their sizes and formats? If the answer to the first question is 'not very often' and if the answer to the second question is 'more often than I'd like', then photo print service Printhug has an IFTTT-based solution to transfer images from digital to print with the minimum of fuss.
Should you have not heard of IFTTT, it's an automation programme that allows you to write 'recipes' to connect various apps and services in your digital life (IFTTT calls them 'channels') in order to do things. All recipes are based on the statement 'If this, then that.' If you do something on one channel, this prompts an action in another channel. If I publish a new article here on Photocritic, a tweet is posted on Twitter linking to it.

With Printhug, you extrapolate the IFTTT theory to 'If I post an image to Instagram and tag it #printhug, then Printhug will print it.' You can substitute 'Instagram' for 'Facebook' if you prefer. Or have the images that you upload to a particular Dropbox folder sent to print without any fuss.
Print orders can be aggregated from several different sources, for example Instagram, Flickr, and Facebook, and a minimum order can be set, too, ensuring that you accumulate a viable number of prints before they're mailed to you.
Square photos are automatically printed in 4×4" format (49¢ each), while you've a choice of 6×4" (49¢), 7×5" (89¢), and 10×8" ($3.49) rectangular prints.
Printhug ships to USA, Australia, Canada, France, Germany, Ireland, Italy, Mexico, New Zealand, Spain, and the United Kingdom. How much it'll cost will depend on how much you order.
Want to give it a go? Head over to the Printhug website to learn more and sign up. Or take a look at the Printhug channel on IFTTT.
Pattern. Repetition. When you hear these words, what springs to mind? Maybe a print dress or possibly wallpaper for the former, and likely a sense of ennui for the latter? The words themselves do not necessarily evoke any sense of excitement or anticipation. The prospect of shepherd's pie for supper, every night, for the rest of your life is certainly not the kind of repetition that sets the mouth watering. But the senses are, actually, rather fond of both pattern and repetition. The ear appreciates rhyme, assonance, and alliteration. The eye favours rhythm, flow, and stability, too. By introducing them to your compositions, you have the opportunity to create appealing, compelling images.
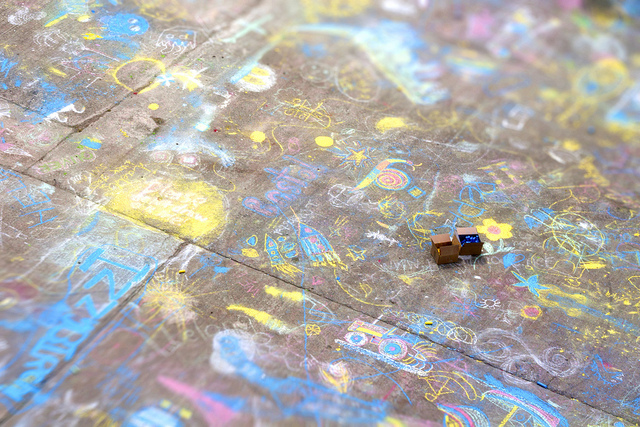
The act of deliberately watching out for patterns to photograph might feel a little, or even a lot, contrived, but once you start you might find it a little difficult to stop. Patterns present themselves both organically and synthetically, from flower petals and fruit peels to tyre-treads and architectural work.
Get in close or shoot from far away; come down low or climb up high and you can pick out patterns wherever you are.
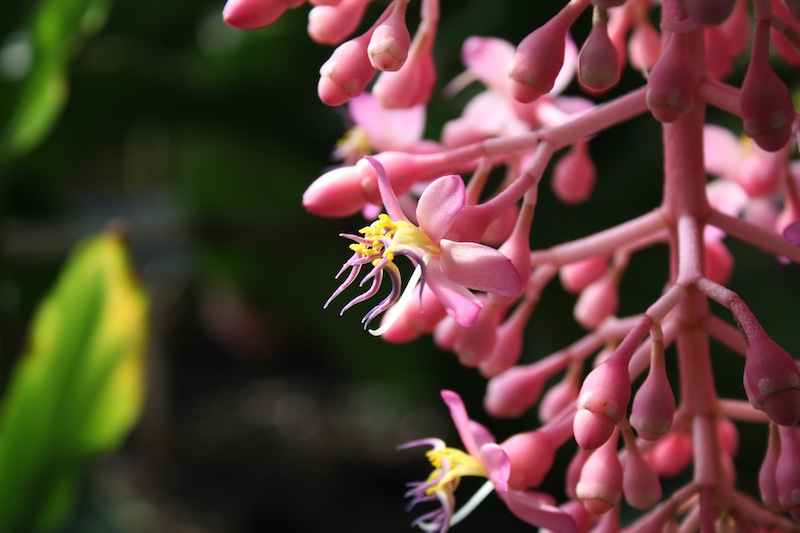
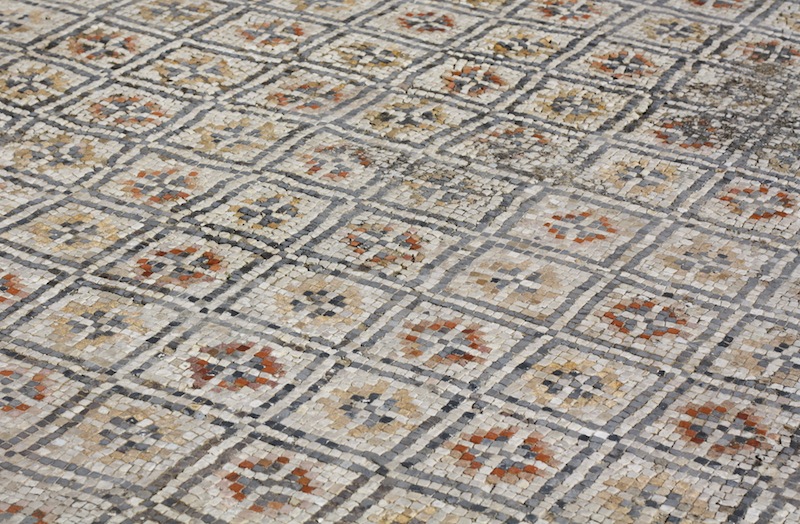
By isolating a pattern from its background, it's possible to imbue it with a sense of the infinite. With no evident beginning or end, for all the viewer knows the pattern extends interminably. Creating this sort of indefinite image is relatively easy: identify a pattern and get in close using either a telephoto or macro lens. By adjusting the aperture of your lens, you can choose a shallow depth of field with the pattern blurring into infinity, or one that's sharper across the frame.
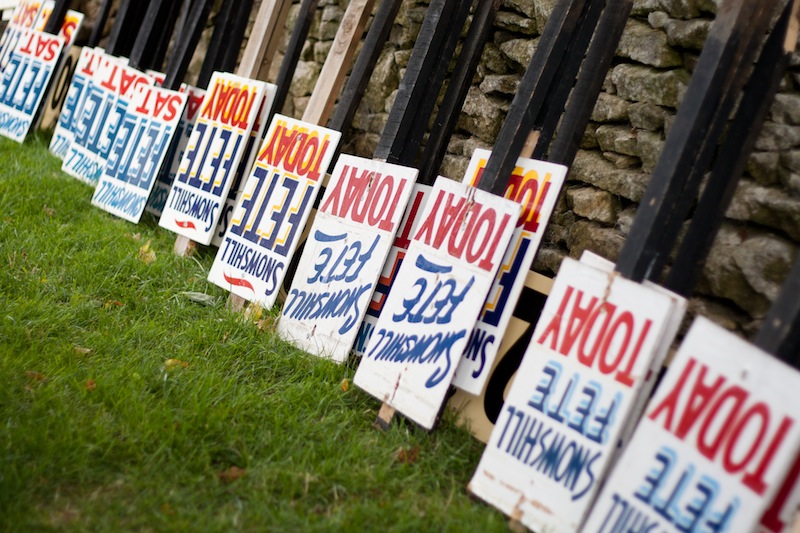
Spot a break in a pattern, make it the focus of your image, and you have a great photo. Look for the red apple in the pile of green, the solitary shoe facing in the wrong direction on the shoe stall at the market, or the silk scarf in the row of woollen ones. Wherever there is an aberrance in a flow, there is a photo.
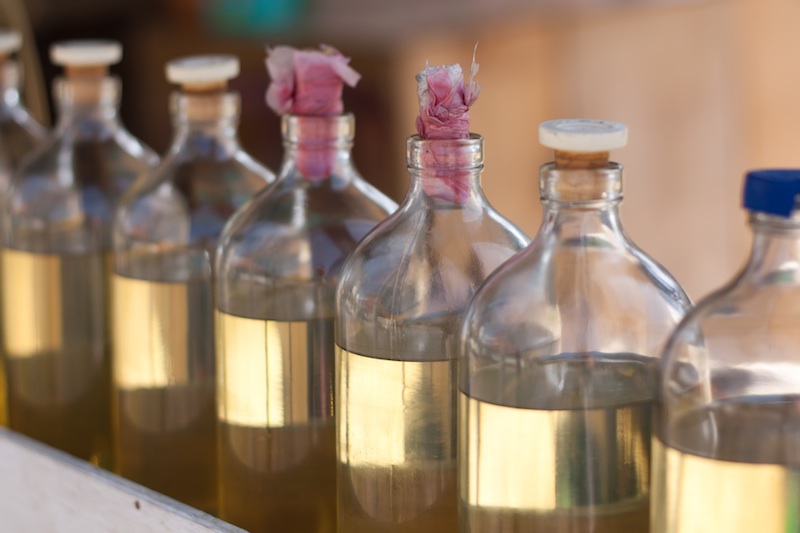
If you've decided to fill your frame with a single colour, or variations on a particular colour, you might find that it's patterns that give the photo interest.

You'll often find that the constituent parts of the pattern create the compositional imperative for your photo: lines will point in a particular direction and dictate frame orientation or an aberration in a row will set a natural point of focus.
What you need to do is use these indicators to create tension and balance in the frame. Try setting the point of focus off-centre—think of the rule of thirds—and angling lines on the diagonal to prevent them from presenting as flat or confrontational.
Most important is to be certain of what you are trying to convey in your photo—from the feeling of the infinite, the odd one out, to the sense of consistency—to design the strongest image possible.
Remember: pattern and repetition does not have to be boring.