


A nudibranch (colourful sea slugs!)
Life, as most of us are all-too-well aware, can be rather surprising and unpredictable at times. A great example of this was exactly two months ago, when my girlfriend and I left Bangkok to go to Koh Tao - a tiny island in the bay of Thailand - to go do our Open Water dive certification.
Long story short - it's two months, nearly 70 dives, and a whole lot of exams later, we're still on Koh Tao, and I am about to complete my PADI Divemaster certification. Needless to say, I sort of fell for this diving malarkey.
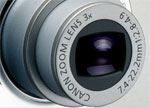
So, what is a poor photographer to do, when you rock up on a little island that doesn't do internet deliveries, and only has a limited number of camera shops? You try your damndest to get the best photos you can with the equipment you have available. In my case, I had a beautiful Canon PowerShot S95, but no underwater housing...
The local shop did have a curious little creature, though: An 'universal' camera housing for compact cameras, made by a company I'd never heard of: SeaShell.

How it works
I was rather sceptical at first... Was I really going to put my several-hundred-dollar highly cherished camera at risk by shoving it into an 'universal' camera body? I decided that yes, it would be worth a shot, so I bought the housing for 6,800 Thai Baht (Around £140 / US$225).
The first thing I did was to close the housing and take it to 18 meters for about 15 minutes. It turns out it was as water proof as I had dared hope for... So it was time to put my camera inside.
The SeaShell SS-1 only has two buttons, and both are at the top. It allows you to control a power button and the shutter, only. It sounds very limiting, but it turns out that, just to snap some snapshots under water, it's all you need. This two-button limitation is also the reason why about 25% of cameras don't work in the housing: If the power button is a slider, or is placed too far away from the shutter release button, the camera housing's little rods can't move it (or reach it).
Setting up the housing
Before you can use the housing, you have to set it up. That sounds like it should be easy, but the manual is next to completely bloody useless, and instead I resorted to trial and error. The SS-1 comes with a metric boatload of little rubber feet of different thicknesses. You have to use 12 different rubber feet (2 at the front of the camera, 2 on each side) to attempt to make your camera fit snugly inside the camera housing.

Next, you need to adjust the buttons so the camera housing's buttons align with the buttons on your camera, by using a tiny little wrench and a nut to move the button pistons left, right, and front and back. It all seems just a little bit fragile, and fiddly to set up, but - as we'll see in just a minute, it does actually work pretty well.
In use
In underwater photography, you're taking photos in a medium that's 800 times more dense than air, and that robs your subjects of their color. Reds start disappearing at about 5 meters, and are all but gone a few meters deeper - depending on how turbid the water is etc. As such, you want to get as close as possible to your subject, to ensure there the light has to travel as little as possible before it hits your camera's sensor.

Imagine, for example, that you are 5 meters down, and 2 meters away from your subject - suddenly, light has to travel 7 meters before you can capture it, and your reds are just about gone.
Having to get really close is the main reason why this housing works pretty well: You won't have access to your zoom buttons, but who cares: The Canon Powershot S95 has better apertures when zoomed fully out anyway - so you may as well leave it zoomed out, and get close.
Of course, since you'll be spending most of your time under half a meter from the things you're trying to photograph, you have to be a pretty good diver. It's bad practice to touch the corals and wildlife, so perfect buoyancy control and good control underwater in general is an absolute must - but then that's true for any underwater photography.
The biggest downfall with the SS-1 in combination with the Canon S95, is that the S95 has a flash that pops up, but the housing is too small for the flash to have enough space to do so. This means that you're limited to natural light photography, which turned out to be a blessing and a curse.
It's a lot harder to get photos that look 'correct' without using a flash, but I ended up writing a camera profile for Lightroom that matches the Canon S95's underwater profile, and the fact that the S95 shoots in RAW helped hugely - I was able to recover the reds even from relatively deep depths (12-16 meters), where the human eye can't see them, but the camera somehow managed to record the colors anyway.
Compared with an official housing
I met someone here on the island who had a S95 as well, and he had the original Canon underwater housing for the camera. Whilst I was envious of his additional control and the ability to use flash, it did look as if my photos were as good as his - and in some cases better.
Verdict
I'll be honest with you - the Canon WP-DC38 (the official underwater camera housing) doesn't cost that much more than the SeaShell SS-1 (list price is $240, you should be able to find them much cheaper - on Amazon, they're currently going for $180), and if I had the choice of one or the other, I would have put down the extra cash to buy the official housing.
On the other hand, the SS-1 can be reconfigured to fit any number of digital compacts, and whereas the official housing would be useless with another camera, the SS-1 would probably still fit, and you can keep snapping pictures.
The truth of the matter is that there was no way the official housing was going to be available on a little island like Koh Tao. Realistically, the choice wasn't between an official housing and the SS-1, but between the SS-1, and not being able to take any photos at all. Seen from that point of view, I'm pretty happy I bought the SS-1. It kept my camera safe under water, and the quality of the pictures I was able to capture
Do you enjoy a smattering of random photography links? Well, squire, I welcome thee to join me on Twitter - Follow @Photocritic
© Kamps Consulting Ltd. This article is licenced for use on Pixiq only. Please do not reproduce wholly or in part without a license. More info.


 Wow, that’s a really nice picture. It’s a shame about that big spot on her chin though. And she won’t thank you for that bit of hair she has on her lip there. Y’know, I think her hair is a slightly darker shade of red than that OH GOD IT’S WRONG IT’S ALL WRONG.


 Sure, there are always groups of people who will perennially have an insatiable hunger for more processor cores, more memory, and more storage space; serious gamers, video editors, and scientists spring to mind – but even for the power-users (I do count myself as one), we’re starting to hit a plateau where it’s perfectly okay to own a 3-year-old computer. Which just messes with my brain; when I first started getting into computers, the second you bought one, it was out of date. I remember the first time I plonked down a serious amount of money on a new computer (before then, I’d always had hand-me-downs or I’d bought second-hand computers) – it was a Dell, which had a Pentium III, 600 Mhz. I’m telling you, it was the cream-of-the-crop, one of the fastest computers you could buy. It had a whopping 1GB of memory, too, which was insanely expensive, and made it incredibly fast indeed. Six months later, I found myself upgrading several of its components, and six months after that, again. And again. And again.

 The first thing you’re going to need is a camera body cap.
 Now, to prepare the camera body cap, I used some coarse sanding paper to take the logo off, then some finer sanding paper to get the coarseness down a little. There’s no good reason for doing this, other than that it’s a little easier to work with a flat surface than one with the logo of your camera embossed on the front.
 Now, you’ll have to forgive me for the blurriness of this illustration image – it’s tricky to hold a drill and a camera cap and a camera to take the photo all at the same time.
 Anyway, you end up with a body cap with a hole in it. Finish the hole by sandpapering down the rough edges both on the front and the back of the body cap, and remember to sandpaper the inside a little bit too – if for no other reason than to get a prettier finish.
 Next up, we’re going to create the pinhole itself. There’s tons of way of doing this, but I’m a big fan on using whatever you have to hand. You need a material which is soft enough to work with efficiently, but it needs to be firm enough to be at least a little bit durable.
 Drinks cans and tea light are made of soft aluminium, so you should be able to cut them with a pair of kitchen scissors without any problem. Beware that the edges may be very sharp, though, and you don’t want blood everywhere, so be careful.
 With a very sharp implement (like a safety pin or similar), push gently into the aluminium. It helps if you have a soft-ish surface like a writing pad (that’s why all the photos are taken on lined paper. Well, that, and laziness). You want to push and turn the needle so you can only just barely see a hole.
 When you think you’ve had a pretty good stab (haha, see what I did there) at making your first pinhole, hold it up to the light. If you can see that it isn’t perfectly round, discard your piece of metal and try again. It should look roughly like it does in the photo. Of course, the size of the pinhole is very important as well, but for now, we just want to make images appear, so this is a pretty good start.
 Now, you’re going to want to mount the pinhole to the centre of your body cap. Measure the centre carefully (or just take a wild guess, it’s up to you, really. I’m firmly in the guessing camp on this one), and simply tape the strip to your body cap. Also, I wish to apologise for the blurriness of this photo – you’d have thought I was capable of taking a sharp macro photo by now, but I guess that’s not the case. I blame my camera, the light, and London Transport Police because obviously, it couldn’t possibly have anything to do with me just rushing things a little bit in my excitement.
 Next, use a sharpie (or whatever black permanent marker you might have handy at the time), and black out the front and back of the visual metal. I’m not sure if this is actually good for anything, but it makes me feel better thinking that I’ve at least tried to reduce the refractions on my aperture ever so slightly. That, and it makes the lens cap look more home-made, which is always a bonus.
 After the previous step, you’ve actually finished everything you need to do to create a pinhole photograph! I decided to add an extra step, which is to add an additional white cover to the front of the pinhole body cap (because, obviously, if it’s a DIY project you have to add such adornments. And also, it’s a marvelous excuse for me to post a photograph of myself on my own blog), but that’s just me.
 With all the equipment finally put together in a half-way meaningful fashion, I figured it was time to start shooting some photographs…


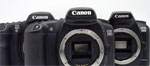
 Throughout my photographic history, I’ve had a lot of different cameras. I started with a Canon A-1 SLR (which I still have!), and then went through a series of exciting cameras. I had a Canon RS, which used to be the fastest camera Canon ever made. I had a Canon EOS 1Nhs, which was pretty damn quick as well. Then I went digital, and had a D60, 10D, 20D, 300D, and now I’m on a 30D. Why such a quick succession? Well, I used to work as a photographer, and cameras get used a lot. They get bumped into things, they get dropped, and the shutter mechanism gets slack after taking tens of thousands of photos. Also, I’m a gadgets nut, and I love playing with a new camera. Sure, there are no massive differences between the D60, 10D, 20D and 30D, but for every upgrade, there was a little bit more speed, a few new toys, and they just got better and better.
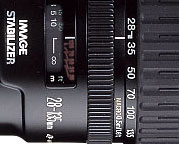 The first lens I bought for my kit was the 28-105 f/3.5 zoom from Canon. It is a decent lens, but in retrospect, I regretted buying it. I quickly replaced it with the 28-135 f/3.5 image stabilized lens. When I go travelling and have to pick a single lens, is the lens that gets to go on adventure with me. It’s wide enough to be useful for most landscape stuff, and zooms in far enough to be good for portraiture, wildlife, and all that. It’s also a macro lens, and it works surprisingly well at taking photos up close, too. It’s not a cheap lens, and it’s not all that sharp either, but it has a special place in my heart nonetheless…
 The next lens I bought was a 70-200 f/2.8 EX APO lens from Sigma. It’s bloody expensive, but it’s also one of the best lenses I own. Because it stays at f/2.8 throughout its zoom range (in general, zoom lenses that have the same aperture throughout their zoom range are of better quality for reasons that are slightly beyond this write-up, I’ll do that one as a separate article some day), you get a long lens that’s perfect for concert photography. Which, incidentally, is why I bought it. (more about concert photography
  Other stuff in my kit bag is the Lensbaby lens, which I’ve fallen completely in love with (as explained

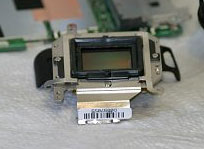 This one falls in the “if you are planning to do this, you have to hate your SLR” category. If you enjoyed our earlier tip about IR photography, you will probably have noticed that many cameras – especially DSLR cameras – have IR filters built into the body. Obviously, that means that you can’t use it for IR photography. Unless you remove the filter, that is…
I wouldn’t dare do it to my own camera, but if you have a destructive streak (or very steady hands), you could follow the instructions posted on
This one falls in the “if you are planning to do this, you have to hate your SLR” category. If you enjoyed our earlier tip about IR photography, you will probably have noticed that many cameras – especially DSLR cameras – have IR filters built into the body. Obviously, that means that you can’t use it for IR photography. Unless you remove the filter, that is…
I wouldn’t dare do it to my own camera, but if you have a destructive streak (or very steady hands), you could follow the instructions posted on