


 Wow, that’s a really nice picture. It’s a shame about that big spot on her chin though. And she won’t thank you for that bit of hair she has on her lip there. Y’know, I think her hair is a slightly darker shade of red than that OH GOD IT’S WRONG IT’S ALL WRONG.
Now I admit, you can end up getting a bit OCD about image editing (see first paragraph). While this is true, take a portrait of anyone you know who is even the slightest bit vain and your vision of keeping them “just as they are”, complete with dark circles under the eyes from working late and that bit of spinach in the teeth from tonight’s dinner, might not be met with the standing ovation you were expecting.
Wouldn’t it be nice to be able to just tidy up those minor niggles that pop into your pictures sometimes? Wouldn’t it be nice to be able to do it without sacrificing central heating and eating nothing but rice and “no frills” tinned tomatoes for a month, just to save up enough money?
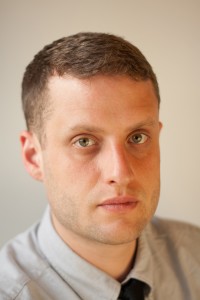
Well read on, budding image makers, for I have tried and tested four different lower-price solutions for you. (Cos, well, we’ve already looked at the free ones.) As a portraiture photographer first and foremost, I decided to take the same, straight out of camera, unedited image and try to get the most out of it using these four different packages:
- Corel Paintshop Pro X3 – £79.00
- Nikon Capture NX2 – £113.61
- Portrait Professional – £69.95
- Adobe Photoshop Elements 8 – £77.46
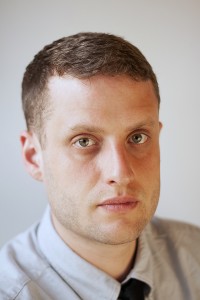
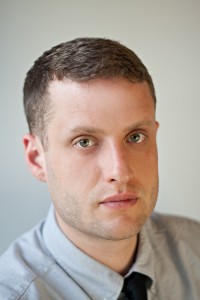
I’ll be testing each one using the same four criteria: exposure tweaking / editing, retouching and sharpening, black and white conversion, and toys and fun filters. Here’s the image I’ll be using:
Corel Paintshop Pro X3
Upon first loading up, Corel had a fairly easy and clear layout, arranged logically. It’s essentially an organiser and image editor in one. After a bit of fiddling, I worked out how to bring up my image and start messing with it in the editor.
Exposure tweaking/editing
I adjusted the colour balance to make the image cooler, then used curves to alter the shadows, midtones and highlights. I have to say, there was little subtlety in the changes in tone and exposure. Another thing I noticed was that there isn’t instant feedback to the changes you make in the preview pane — it takes a good second, as if it were the victim of satellite delay on a news programme. It might be my poor brain being a useless, pickled mess but by that time I’d pretty much forgotten what my image looked like before the tweak.

Corel with sharpening
Retouching and sharpening
I used the clone brush to even out the skin tones, bringing the opacity down to even out skin tones and remove bags from under the eyes. This was fairly effective, but again not as subtle as I would have liked. There is a “makeover” tool which is fairly effective for removing individual spots and blemishes.
When sharpening, the high pass sharpen wasn’t too bad, but left the picture a bit grainy. The unsharp mask (which is often used for a slightly more dramatic sharpen) was nowhere near as subtle as I’d have liked it to be, and bringing the slider up to any remotely significant amount was creating a weird ring around the iris; I’m quite sure that “weird ring around my irises” isn’t the first thing my clients ask for in their portraits.
Toys and fun filters
Your usual array of brush stroke effects and the like here but something I hadn’t seen before was quite a cool little feature called Time Machine. This runs you through a few different classic image making methods, from the Daguerrotype images of 1840 to a classic cross-processed look. And they don’t look half bad, to be fair. Plus there’s a paragraph explaining how each photographic method worked at the time, so you get a little history lesson, too!

Ooh, with toys!

Corel using even more toys!
You may have noticed that I didn’t include a black and white conversion section for Corel. That’s because there is a “black and white film” effect hidden away in the filters section, which oddly gives a much greater degree of control over black and white conversion than the other option on offer, which was a simple remove colour option. I found I made a better conversion using the black and white film filter.
Corel does black and white
Summary
A good variety of tools available for image editing, but not enough power and subtlety in the tools themselves. A bit like borrowing an old toolbox from your grandad ñ lots of stuff in there, but most of it isn’t worth using.
Portrait Professional
I will be putting all of the categories together for this one, as they all sort of happen at the same time. Plus, there are no fun toys or filters to speak of, nor are there any black and white conversion options, apart from sliding the saturation to 0. This piece of software is a little different from the others in that it is designed specifically for portrait images.
After loading up my JPEG image, I had to define where the eyes, nose, edges of the face, chin, sense of humour, likes, dislikes, opinion on Jedward all are in the subject’s face (some of those aren’t true, I’ll leave you to work out which they are), to create what can only be described as what might pass for a death mask in the TRON universe:
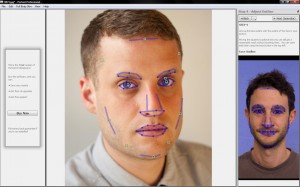
Portrait Professional
You are then taken to the editing suite, where everything is a slider. It felt a bit like create-a-character mode in a computer game, as I was able to adjust the shape of his mush in several ways, using a slider. None of them looked particularly natural, though.
The other sliders all deal with skin smoothness, wrinkle removal, spots and blotches, dark shadows under eyes and so on. Essentially, this program appears to be a piece of “quick fix” software to make portraits looks good. However, I’m really not sure who this software is aimed at – to professionally retouch an image requires a careful, complex level of attention, skill and patience, working on individual areas of the face for a significant period of time. There are no shortcuts, and this software can only do so much towards improving an image before the face you started with begins to look plastic and unreal.
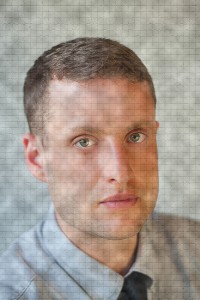
Interestingly, I was also unable to save the image in the trial version. I decided to delve closer by zooming into the image and started to realise why they might not want us to save the image – the amount of detail lost when using the various sliders make the retouch job look amateurish.
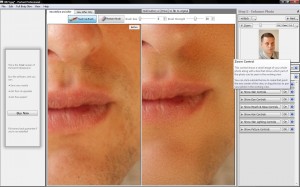
Portrait Professional not doing such a great job
It looked like I had taken a wire wool scouring pad dipped in hydrochloric acid, held my subject down, and proceeded to scour his face until it was featureless and sterile. Actually, maybe that would save me time after the shoot in retouching – anyone fancy a free portrait session? No?
Like anything in life, there are no “quick fixes”. I personally would avoid this particular piece of software. If you’re serious about using photo editing software to get more out of your pics, there are much better programs out there for similar prices.
Nikon Capture NX2
What I immediately liked about NX2 was the fact that it didn’t take very long at all to load ñ it popped up on my screen and was ready and waiting without any fuss. I chose my photo and I was into the editing suite in seconds. There was a very clear and uncluttered layout and it almost felt like I had used it before. Each adjustment you made to the photo would be recorded as a “step”, so that could return to a step should you find it needed adjusting later on, which is a nice, non-destructive way of editing.
Exposure tweaking/editing
Editing exposure was very simple and effective. All was done from a simple “adjust” menu. The results were displayed very quickly, more quickly than in PaintShop Pro, which made it easier to make finer adjustments to the image. I was also impressed with the amount of fine control there was to be had over the exposure and other settings. As before, I used curves to edit the shadows, mids and lights and then altered the colour temperature to make the image cooler.
NX2 with sharpening
Retouching and sharpening
The auto retouch brush did a good job of removing blemishes without blurring the skin.Unfortunately, there was no clone brush I could use to smooth out skin tones. Looking in help, they suggested using a gaussian blur to smooth out skin tones. Unfortunately, this just gives you a picture of a dude with a blurry face. I used this in combination with the selection brush (works like a photoshop mask) in order to localise the blur to desired areas of the skin. Not the best solution, but it did help a little with skin tones and blemishes.
I used the same sharpening methods (high pass sharpen and an unsharp mask). There was a better fine level of control here than with Paintshop Pro but not as good as I’d have liked.

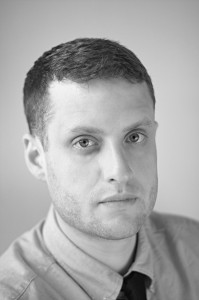
Black and white with NX2
Black and white conversion
There was a dedicated black and white conversion button, the sliders offering a good level of control again, although I felt the options were a little too simple. All in all, though, it was possible to get a good black and white conversion.
Toys and fun filters
None. Zip. Nuttin’. NX2 seems to be pushing itself as a very serious digital darkroom type thing, and you are very silly for wanting silly effects. Silly Billy.
Summary
To conclude, NX2 feels a bit like a beginner’s Adobe Lightroom, in a good way. It offers a decent level of fine control and immediate feedback. Both of these factors are very important when tweaking an image to get it just so. It’s a great place to start when learning how to get more out of your images. A few sessions learning with this program would definitely benefit your shots but at £113, are things getting a bit pricey?
Adobe Photoshop Elements 8
First Impressions
You knew it was coming, how could we not include Adobe? Photoshop Elements 8 (or PSE8 as I’ll call it from this point) is what you imagine it would be a sort of simplified, stripped down version of Photoshop. However, you are still able to make full use of a wide variety of tools and the layout was as clear and user-friendly as you would expect.
Exposure tweaking/editing
Retouched and sharpened with Elements 8
I initially loaded up my RAW file which loaded up Adobe camera RAW, a sort of pre-import tool that allows you to mess with colour balance, exposure etc before loading it up into the editing suite proper. There’s no mistaking the difference in the subtlety of changes you can make here, with instant feedback on how it’s looking.
Retouching and sharpening
Retouching was simple and effective. I used the clone stamp on various settings both to even out the skin tones and remove blemishes. Although there is a dedicated spot removal tool, I would recommend doing it manually with the clone stamp. No real complaints here. As before, I ran both a high pass filter and an unsharp mask on the image. Both were the most effective of all the packages. There really doesn’t seem to be any better software for portrait retouching and sharpening at this price.

Elements does black and white
Black and white conversion
As with its bigger brother, Elements has a dedicated convert to black and white tool. It’s slightly simplified but essentially very similar to the “full” version. It has some presets you can meddle with to see how different mixes harbour different results.
Toys and fun filters
An extensive range of fun toys and filters to mess with your photos, from various sketch / brush effects to turning your image into a mosaic and adding clouds (for when you need that clouds-over-a-mosaic look). In case you were wondering, here is that much sought-after look:
And Elements has toys, too!
Summary
To conclude, PSE8 has everything you need to start practicing enhancing and getting more from your images. The price is on a par with the other packages on offer here and it will give you a chance to see whether you really need the bigger, more feature packed full version, for a fraction of the price.
And the winner is…
It was probably something of a foregone conclusion, but it seems that PSE8 has it, at least it does for me. Nikon Capture NX2 does a valiant job of providing an alternative to Adobe Lightroom at a slightly cheaper price, but not much cheaper than Lightroom 2, so I’m not sure it’s particularly worth dropping your pennies on, especially at over £100. In addition, I feel you can do most of what NX2 offers in Photoshop Elements 8.
And because I should probably warn you, it’s worth mentioning a program I downloaded the trial of which was going for around £25, called Pixbuilder. It was essentially MSPaint with (very bad) layers and curves options thrown in. If you’re wondering “how cheap is too cheap for my image editing software?”, the answer is “that cheap”.