Haje Jan Kamps

Commissioning a website


I’ve been creating websites since around 1996 or so. When I got started, Netscape Navigator Gold was the, er, gold standard for creating web pages – it even came with a HTML WYSIWYG editor built-in. Cutting edge stuff. Oh how things have changed.

Throughout my web-life, I’ve seen quite a few different sides of websites: I’ve designed some (badly). I’ve programmed a few. I’ve been the editor of some major sites; I’ve specced and project managed the build of a load of very high-end sites, including one for a national broadcaster and one for a mobile phone company you may have heard of.

I’ve worked in SEO. I’ve contributed to open-source projects. I became a certified Scrum product owner, and embraced agile project management… etc. I guess, since I’ve done all these different roles at some time, what I’m trying to say is that I’ve started to figure out how it all hangs together.

So, what follows is a ridiculously comprehensive guide to how you can work with various agencies to get a great web-site built for you or your company.

Why you need a website

img_2664_edit_edit.jpg

There are plethora reasons for why you might want a website. Your competitors might have one, perhaps you wish to make information easily available to your customers, or you may be considering selling your goods or services on the internet.

While it can be cheap and easy to just fling something out on the internet and see what happens, it is worth considering what your hopes and aspirations are for your site.

Attract new customers

Attracting new customers is a logical reason for a website. If you sell widgets, you want your customers to find you when they type ‘Widgets’ into a search engine. You want to impress them with your site, and ultimately, you want these potential customers to convert into actual money-spending customers.

A good web site can be a phenomenal sales tool: It can help you stand out from the competition with the unique selling points of your products and services. If your product is better than that of your competitor – make a big deal out of it. Is it cheaper? Your website is your PA system shout your bargain prices from the virtual rooftops!

Marketing to existing customers

Of course, it’s not just about convincing new customers about how awesome you are: your existing customers will also benefit from you having a website.

With existing customers, you have a few benefits already. For one thing, they know your brand and they trust the service you deliver. They will want to stay up to date on what your company is up to, and how your new products and services can make their lives easier. Your site can explain why the new versions of your new products are better than the old ones, and hopefully cause the orders to come rolling in.

Enhance your reputation

Websites are great repositories of information, and you can leverage this to help improve your reputation. You can be quite public about how great your customer service is, for example, by running customer support forums.

Even if the customer relations part of your business is classified due to sensitive clients (or you might simply decide it’s not in your interest to have everything publicly available), it is possible to distill questions that are repeatedly asked to your customer service team into a Frequently Asked Questions (FAQ) document.

Imagine the delight of a customer who runs into a problem, Googles it in an effort to find a solution, and ends up on your own website, with a complete and thorough solution to their problem!

Such a scenario is a phenomenal user experience, which sticks in the mind of your customers. It wouldn’t be the first time that a negative product experience (they did need to search for help, after all) was turned into a very positive one because of a well made website. People realise that things go wrong some times, and truth is, some times you end up with a better image of a company which screwed up but made things right quickly and efficiently, than a company which didn’t make any mistakes in the first place!

The Virtual Pamphlet

There are many ways people can end up on your website, but all traffic has one thing in common: They are there for a reason, to complete an action of some description.

They might wish to find a mailing address for your company so they can send you a crate of wine after a job well done (Hey, we can’t but hope, right?), maybe they want to buy something you’re selling, or they could be searching for instructions about how to use or care for a product you’ve made or sold.

Your whole website is a representation of all these things: Helping your customers in the best way possible. But it’s important to remember that you can get more explicit, too – if you need your website to be a sales tool, make it work hard for you. Get your visitors interested, convince them that what you’re selling is what they are looking for, and spur them into action.

A font of information

Back in the day, if you needed any information about a business, you’d have to find the yellow pages, find their number and call them. You would be forwarded through a hellish maze of automated telephone machinery, before you finally get to speak to someone, just to ask a very simple question. We’ve come a long way, haven’t we?

These days, websites have taken over a lot of the basic information distribution. Where is the coffee bar? Their website will have a map. When is the film you want to watch on at your local cinema? Check out their website for film listings. What are the opening hours of the library down the road? Website. The most recent shareholders report, that press release which was sent out last week, and the mailing address for the eastern district office? Website, website, website.

A good website can save you a lot of time (and, therefore, money). Instead of having to put resources into answering simple questions over the phone, let your site do the heavy lifting. Of course, if you want this to be possible, your site has to be easy to navigate and make it intuitive to find the kind of information you are looking for. That’s where a good web design agency comes in.

Creating a good website

1c9a2946.jpg

So, by now you probably have a pretty good idea of the kind of things you want your website to accomplish. You might be thinking of ways it can help you save money, things it can do to help you make more money, and so on. You’ll have noted that we have used the phrase ‘good website’ above a few times… So what, exactly, makes a good website?

Content is King

Often, it is easy to get distracted right at the beginning building a new website. It is easy to get lost in the pretty colours and nifty features we can / will / should add to a new site. It’s crucial to remember one thing: None of that is as important as the content you will have available on your site.

It is often said that people aren’t prepared to visit a pretty site without content – but they are willing to suffer a horribly designed and poorly presented website to get to good content.

The lesson to take away from this is that you have to think about your content as much – if not more – than you think about how the site looks and works. If you are using videos, make sure they are well-produced, short, and to the point. Get a copywriter involved to make sure your written content is as hard-hitting and clear as it can be.

For every piece of content you decide to put on your website, think ‘How does this benefit our users’ and ‘how can we make this content better?’

Finally, remember that your website is like a chain of information, and your site visitors might enter your site at any point. That slightly ugly page with the profile of your CEO, which is hidden away somewhere in the depths of your site, and that you were meaning to update ages ago? That might be the first page a visitor sees if they Google for some obscure term – immediately giving them a negative impression of your site and your company.

The web is all about sharing – so endeavour to do some. Write blog posts or news stories when something exciting happens at your company. Share your victories, celebrate your triumphs, and encourage your staff to write interesting pieces about aspects of what you are working on.

By consistently providing relevant, interesting information, you gain a lot of benefits: In addition to becoming a de facto go-to place for information in your field, you will attract inbound links from relevant sites. In time, this should be a cornerstone in your Search Engine Optimisation (SEO) strategy in the long run. Don’t worry; we’ll talk about SEO later on in this guide.

Understand your medium

In order to create a good and efficient website, you have to understand your audience, the internet, and how the two of them connect.

Internet users are incredibly fickle: They won’t start by reading your headline, then your introduction, then the body of your text, like they might read a newspaper or a magazine.

Internet users tend to flick from one thing to another. They won’t scroll down to read more, they won’t read instructions on how to use your website, and they won’t be guided.

Web users are getting clever, and they have one ace up their sleeves: If your site doesn’t give them what they want, there is probably anything between a dozen and a million other sites offering exactly the same information. you have to make the content on your site count. Your text has to be engaging, short, and to the point. Unnecessary content will quite simply not be read: At best, it will be ignored and at worst, it might encourage users to abandon your website completely.

Another trap many people fall into is to include all sorts of gadgets on a website just because it is possible. Complicated Flash menus can look nice, and flashy address lists can be cool; but what is the added value to the people visiting the site?

§Skip the bells and whistles – instead, put more energy into helping your visitors find the information or perform the actions they want to complete on your website as smoothly and elegantly as possible. As soon as a visitor feels as if you’re wasting their time, they probably won’t be back.

Look at the bigger picture

When you’re in building-a-website mode, it’s very easy to forget that there are more things out there than just your website. The site is important, no doubt about that, but ultimately, it’s merely a smaller part of your overall marketing strategy.

Just to take an example: In your company, does everyone’s e-mail signature promote the website? Does your website promote your newsletter? Does your newsletter remind your readers of your hottest sales offers? Does your product documentation reference your website? Do your business cards add value to the overall mix? Do you send out sales letters? If so, do they integrate well with the rest of your marketing? Are your advertising efforts as efficient as they can be?

Everything your business does should sing part of the same symphony: Advertising, website, other marketing efforts, customer support, even the products or services themselves. If you have a colour scheme, it should be reflected everywhere. If you have a logo, use it all the time.

Your marketing message should be completely saturating all communication channels you have with your (potential) customers. In short: think about the bigger picture, and figure out how your website is part of this.

Blogging

1c9a2920.jpg

There is a subtle difference between having a news site, and running a good blog on your site. The distinction is further muddled by the fact that many news websites currently run on blog platforms like WordPress or Movable Type, and some blogs aren’t really blogs at all.

So, just to get the distinction right; if you are running a site with stories about what you’re doing at your company, without linking much to other sites, then you’re probably running news on your site. That’s perfectly fine, and can be an efficient tool, but the internet has moved on from there.

The word ‘blog’ came from ‘web log’ and started originally as just that: A ‘blogger’ would surf the internet, and discover new articles and sites. As they did, they gave their opinion on the site, news story, or event, sprinkled with links containing more information.

Good bloggers often serve as hubs of information, comparing different sources, analysing how the sources’ angles or opinions differ, and pick apart poorly-written or badly researched pieces about a specific topic on the ‘net.

Cornering the market with a blog

Blogging can be extremely valuable to your company from a business point of view, especially if your industry doesn’t have a go-to news source.

Say, for example, that you’re the manufacturer of a very specific type of hinge used in car doors. This hinge is better than that on all other car doors in the world: Your customers are car manufacturers. Your competitors are other hinge manufacturers. People who repair cars (or super-geeky drivers) might also be interested in what you might have to say.

There won’t be too many blogs out there specifically about car door hinges, which is a good thing: when you start it, you have an opportunity to corner the whole market. Get a good writer involved, and start writing.

What are you doing differently? Perhaps you can write comparatively about various alloys you’ve used in door hinges. Maybe you can show some of the experiments you did that went wrong, and how you can learn from them. You can keep your readers up to date with cutting-edge news, musings on the future of technology, or perhaps some historical articles, about how things were done 50, 25, or even 5 years ago…

Sounds lame, right? But trust me: You stand far better chances at getting an in-depth, loyal following on your company blog by writing about something very specific, than about whole cars.

Sure, more people are interested in whole cars, but there are sites out there with a huge writing staff, lots of marketing money, and plenty of other resources. By picking your target audience carefully, you can be the biggest fish in a tiny pond – speaking directly to your potential customers (the 200 or so people in the world who are interested in car door hinges), instead of people who might be interested (the billions of people who drive cars), but who ultimately aren’t going to spend as much as a penny with your company directly.

Of course, you’ll have to be careful so you don’t give away too much information – you don’t want to leak your carefully guarded industrial secrets to your biggest competitors, but on the flip-side, you have to be a little bit brave as well. If appropriate, you can consider to link to your competitors when they do something impressive, for example.

How does your blog help your business?

The internet is absolutely huge: Chances are that if you are doing something, then there are people out there who are interested in the same thing as you. These people have friends who are also interested in the same thing.

By blogging authoritatively about things your readers are passionate about, you’re inviting all sorts of positive behaviour: People might comment on your blog post with great ideas for new posts, improvements to current posts, and maybe even suggestions for improvements to your products.

Even if suggestions from your readers aren’t directly related, you’ll often find that crazy ideas from the hive-mind that is the internet have a core of a good idea in them – if something seems like a good idea, send it on to the product development team, and see what happens. If it’s rubbish, you may have wasted 10 minutes of their time. If it turns out to be a stroke of genius, you might have made your company a lot of money – just by monitoring the comments on your blog!

There are many other advantages, too: Good articles attract links from around the internet. When we see something we agree with, we’ll post it on Facebook. We’ll share it on our own blogs, or forward it to relevant news sites for potential inclusion. All these inbound links have a great side-effect in addition to the extra traffic: When search engines see that big, important websites are linking to your site, they realise that your site has grown in importance. That means that your site will rank better in the search engines

Finally, blogging is a way of promoting good press. Are people saying good things about you? Tell the world in your blog. Are you doing something awesome? Spread the word. Are you excited about something as a company? Here’s your zero-cost platform for making everybody know about it. The journalists covering your industry will definitely be reading your blog – and with a bit of clever PR and a good relationship with the relevant publications, it’s a great way of getting the positive press you’re hoping for!

Considering a microsite

20120515_00478.jpg

A microsite does exactly what it says: It’s a small, self-contained site. The purpose of a microsite is to create a site that has a specific goal, rather than just a set of pages that are part of a bigger site.

Creating a microsite has a few advantages: It doesn’t have to plug into your main content management system (CMS) and it can be designed quite differently than your main site. This means that if you need an ad-hoc site for an event or similar, it can be quicker to develop a microsite than to try and integrate the new (and potentially temporary) section into your main site.

Microsites for specific marketing goals

Imagine you’re a motorcycle manufacturer who makes two different types of motorbikes, for example: One is a large, Harley Davidson-style chopper, and the other is a smaller, race-focussed sports bike. You could try to fit them both into the same website, but the former would probably look best when photographed and surrounded by open highways and canyons, whilst the latter would be more at home leaned over going around the corner of a race track.

Using micro-sites gives you an opportunity: you could building a main site for your company, and then a couple of micro-sites to cover your motorcycle models would be easier: you could stay on brand and encourage your designers to create a perfect design for the respective bike types and the customers likely to buy them, instead of making a half-way compromise. In addition, it would make launching additional models (or removing outgoing models) much easier!

The great thing about using a microsite is that you can separate your customers easier, which enables more specific marketing messages, without having to worry about customers getting ‘lost’ in parts of the site which are less likely to be of interest to them.

Planning and contracts

20120514_00206.jpg

Before you go anywhere near a coloured pen or a line of code, you’ll have to do a spot of planning.

Launch Timelines

It’s worth considering the time frame of the launch: Does the site have to launch to coincide with a particular event or product launch? Would it be acceptable if the site was delivered late? If not, then you need to ensure that delivery timeframes and deadlines are specified in the contract(s) you have with your suppliers.

Bear in mind that time will not be treated as a critical factor by the law unless it is specified as such in your agreement. Ensure it’s black on white. If it’s particularly vital that the site is live on time, it is worth considering adding penalty clauses to the contract(s), to further incentivise the timely delivery of your site.

Standards and constraints

As part of your planning, you should also tackle some big questions that might help you later on.

These ‘big questions’ are often known as ‘constraints’ – they are over-arching rules that every page on your site has to conform to.

Examples of constraints could be what do you want your URLs and TITLE tags to, for example. This particular example which will come in very handy when it comes to marketing (like SEO – Search Engine Optimisation) later on. If it is defined as part of your planning, it’s easy to get it implemented as part of the project. Changing the URL and directory structure of your site just before launch might be possible, but it won’t be cheap!

At this point, you also need to set some standards: Which web standards are your developers and designers working to? How is the code structure going to work? To which level do you require compliance with accessibility legislation, like the Disability Discrimination Act? Should the site be accessible to colour-blind people? If so, to what level, and how will it be tested at the end? How will traffic to your site be tracked? If you are using Google Analytics or similar, how should it be implemented?

Remember to get all the constraints and standards written into your contracts – that way, there can be no confusion about what your expectations are, and if your designers or developers fail to deliver the site conforming to the agreed standards, you can send them back to the drawing board to get the work re-done or amended.

Support and hosting

Support doesn’t really come into it until the site is launched – but it is something that needs to be agreed and be ready well before the time comes.

The same goes with hosting: Do you need one server, or more? What levels of traffic are you expecting? Are you willing to accept any downtime, or do you need a more robust and redundant system in place?

Ensure that all the support and hosting questions are resolved early on – nothing is more frustrating than having a site ready to go, but no hosting platform ready to launch on!

Content management System

Another thing you need to think about is whether you want to use a Content Management System (CMS).

Sites that are updated only very infrequently might not need a CMS. In some situations, it is easier to simply re-upload certain pages when they need to be updated. On the other hand, this does demand a technician with CSS, HTML, and some design skills to be at hand whenever you want to make a change to the site, and might mean that you would have to contact your web design company to make even minor adjustments to the site.

Most modern sites use a CMS, to make it easier to update content. The difference is that instead of uploading new files, you log into the CMS, and make changes there. Depending on the CMS and its configuration, you may be able to create new sections, pages, news articles, and edit the front page from the CMS, in a much more user-friendly way than editing the HTML code of your site manually.

Many CMSes are created so they are as easy to use as your online email service (like Hotmail or Google Mail): You simply click ‘new’ to create a new page or news article, and to edit one, you would click on it and type away.

Many CMSes have dynamic functionality that goes far beyond what is possible with uploaded ‘static files’. You might be able to set a press release to get published at a specific time, for example, or your site might be able to keep track of the stock levels of your products, so people aren’t able to buy more of a certain product when you are sold out.

Keeping data safe and secure

20120228_img_0896.jpg

The Internet can be a nasty place, and accidents do happen, unfortunately. You can never plan for all eventualities, but you can try, of course!

Security

Up front, it is worth thinking about how secure your site needs to be. If you only want a simple page showing the opening times of your nightclub, you probably don’t need to worry too much about security – although it would be good if nobody could hack into the site to change your opening hours or, much worse, distribute viruses or similar.

If you are storing data about people (names, addresses, etc), you immediately need to be more careful with security. How do you store this data? Who has access to it? How easily would a hacker be able to break in to download this information, or how difficult would it be to intercept it in transit?

Of course, if you are going to take payments via the internet, that raises the stakes even further. People would be (rightfully) upset if their e-mail address was leaked to a group of spammers, but the severity of the situation grows a lot as soon as credit card or bank details are involved.

If you’re planning to take payments, it’s worth involving a security consultant early on, to discuss what an acceptable level of security would be. Does your user data need to be encrypted? Does your site need to use HTTPS and a security certificate?

Is your data sensitive enough that you should worry about more than just external risks? What about potential disgruntled employees? How much access to sensitive data would an intern or work experience student have on your systems?

You may also consider whether you need to log all changes made to the site, multi-level access control (so some site users can read, edit, or delete only some bits of content, for example).

As a rule of thumb, more secure is more expensive from a development point of view – and if the risks are high enough, you may want to look into additional insurance as well, in case something does go wrong!

Backups

Even if nobody gets access to your data and tries to hack or steal it, remember that you need to protect it from mishaps. Hard drives break some times, data centres can go down, or there might be a bug in your software which causes it to corrupt or damage the data in some way.

Everyone who has lost a Word document at some point knows the importance of saving your data and taking regular back-ups, but this is even more important for business-critical data that might be stored on your web server.

There are myriad ways of doing backups in a web context, and everybody’s requirements will be different. Our best advice is to work with your web host or development company to create a good backup plan which is redundant, backs up often, and is easy to restore.

Considering Open Source software

20120122_img_6692.jpg

Open source software is ‘free’ software that offers some unique challenges and opportunities. Some open source projects are extremely active, secure, and well-developed, others are not quite as robust.

Using an open source software package as the basis for your own web site might save you a tremendous amount of time. After all, why should you waste your time and money creating a new blogging platform when there are half a dozen great ones to choose from?

Using open source can be a lucrative shortcut to your ideal site, but if you need to make customisations, remember that the way this is done is important. Some open source software works using ‘plug-ins’, which means that the core software can be updated without affecting your customisations. This is useful, because that means you get the full benefit from the open source community: Bug- and security fixes can be added to your site whenever they are released, keeping your site safer.

Some argue that open source poses a risk in itself: because the source code is available, in theory, hackers can look at the source code to find vulnerabilities and use it to attack your site. On the bright side, these kinds of bugs and weaknesses are often fixed very quickly on active open source projects – this is why it is extremely important to keep your site updated with the most recent software.

Special considerations when using open source

Not all open source software is completely free; some is only free for personal use, for example, and if you want to make money off your website, it could fall in another category. Your web development company should be able to advise you, but you should certainly obtain a guarantee from your developers that the software licences have been properly complied with.

In addition, the use of open source software increases the importance of including clauses in the contract related to the provision of support: Who is responsible for keeping the software up to date? Who fixes bugs when new ones are discovered?

Building the website

20120117_img_3347.jpg

The kids who live down the street from you are probably able to build a website. When you’re aiming for professionalism and more advanced build, however, it’s quite important to keep in mind that different people have quite different skills – and they all need to do different things.

A website usually starts with a goal – or a series of goals. The website for a shop, for example, might have “Helping customers find information about the shop”, “Increasing footfall to the shop” and “selling things online” as goals. To reach these goals, you need to jump through a series of hoops, which usually involves a series of different people.

If you are building a very complicated site, you might need to get an information architect involved, to find out which types of data you are storing, how they need to interact, etc. Most sites don’t need this step, and jump straight to…

Functional design

The design step. Now, it’s crucial to understand that we’re not talking about the ‘pretty pictures’ yet in this case. The graphical part of the site comes later.

The first design step is ‘functional design’ – basically, which part of the site is meant to do what? What happens when you search on the site? What happens if you subscribe to a newsletter? Which benefits does a logged-in user have, compared to an anonymous user? All of these things are addressed at the ‘functional design’ stage of a build. This should include things like what goes on each page, and should also outline the ‘business logic’ behind each step a user can make.

Let’s use the example of a shop, for example: Do you want to list your products alphabetically, by type, by price, or by some other order? If you want categories, are these defined up front, or are they changeable later on?

All of these choices are extremely important, and need to be considered up front. If you decide in the beginning of your project, for example, that all products are always ordered alphabetically, and later decide that your users should be able to order them by price, you might get a nasty surprise, because the site might not be coded with this in mind. So: As far as possible, think of all the functionality up front.

It is often a good idea to get some advice from an SEO agency or consultant as part of the functional design as well: some of the things search engines are very finicky about can be very tricky to fix late on in a project!

There are a few possible ways to deliver a functional design – usually, you would expect wireframes and a functional specification as outcomes of this step.

User testing!

Now that your functional design is well on its way, it is worth thinking about getting the site user-tested.

This can seem quite abstract, because we haven’t created any designs yet, but it is possible to talk your user through your wireframes. The idea is to take a small sample of your users through a user journey.

Set them a task: buying a hammer from the shop, for example, and ask them how they would go about it.

You’ll find that some of your users would reach for the search bar. Others might start browsing the ‘hardware’ section. But then, there might be someone else who wants to do something in a different way, or who gets stuck, because want to put ‘Claw hammer’ in the search box. Your shop doesn’t sell claw hammers, but what should happen when someone searches for something that doesn’t exist? Should you just tell them ‘no results found’, or should your site make a guess, and show a list of all hammers you have available?

These are the kind of things that even the best-prepared teams forget about from time to time, and a good group of user testers can give great recommendations to your site. If they find something major (say, 80% of your users want to search for ‘hammer’, but you don’t have a search function for your shop), you may have to go back to the Functional design to solve these problems.

Testing can seem like a step that is easily skipped, but the worst nightmares of website builds happen when you realise a problem too late: Then, you have to re-do a lot of work, which can cost a small fortune.

In general, for testing, the rule is ‘test early, test often’. It is better to spend a little bit of extra money on over-testing your site with actual users, than discovering the day before launch that there’s a huge flaw in your structure.

If you can afford it, spend a bit of money on testing, certainly after functional design, and again before the designs are fully polished. It’s incredible how frequently you’ll hear a test user say ‘Hey, but wouldn’t it be easier if…’

Develop the site

The outcome of the two previous steps is that we know exactly what the site is going to do, and which pages we need. The next logical step is to start developing.

Development is usually done by a separate team of specialists: developers. These are people who can write program code which makes your website do things: Output dynamic pages, process and store data, etc.

Some times, you might be best off with a simple off-the-shelf solution like a blog or similar, in which case the ‘development’ phase is practically nonexistent.

In other cases, you might want an existing software package adjusted with additional functionality, you might want some of the functionality changed for some reason, or you may decide to get the web site written completely from scratch.

Web forms, downloads, online shops, commenting forms, online help, forums… All of these things need to be coded (or at least implemented) by developers.

During development, the developers will make sure that the functionality of the site matches your functional design and the spec. Ideally, at the end of development, all the functionality of the site should be in place, but it won’t look very good yet, because it hasn’t yet received the beautiful design.

That is done by another team again, however…

Web design

There are many types of designers out there – Graphical designers tend to create printed designs, like posters, magazines, etc. Product designers design everything you see around you – the monitor you are reading this on, the computer it is connected to, down to the little switches and buttons you have in your car.

For your website, you’ll want a web designer – these are specialists in making web sites work well and function beautifully.

Design is a very subjective thing, and getting the look and feel of the site right is important, but it is much less important than you would imagine: As we’ve said before, people are willing to suffer a horribly designed site to get at good content and functionality. There’s no point in having a beautiful site that doesn’t work, or that doesn’t have good content.

Think of the web design as a thin layer of paint on top of all the things that happen ‘under the bonnet. It is often much easier to change a colour – or even the complete layout of a site – than it is to change significant things about the functionality of the site.

For huge projects, it might be a good idea to do a series of ‘concept designs’ – well-polished versions of a few key pages on your site. That way, you can decide whether the designers are moving in the right direction, or if you’d rather they did something different.

These concept designs can also be shown to your board of directors (if your organisation has one), your friends, and other people around your organisation. Getting feedback at this stage is very useful, because the concept designs are relatively simple to change.

It is often a good idea to user-test at the web-design step as well – Get some of your target users together, and get them to give feedback. Is the text easy to read? Do the colours look good? Do the users ‘feel’ as if they have a deeper understanding of the brand and what you are doing with your site?

Once you’ve agreed on the concept designs, it’s time to do the detail designs of all the pages required on the site.

Design implementation

Once the designers have done their bit, they hand it back over to a team of developers.

The people who did the development of the functional spec are often known as ‘back-end developers’; they do the heavy lifting in getting the site to do what you want it to. This time around, you might find that you need a different team of coders: The front-end developers.

As you might be aware, there are lots of different web browsers (like Firefox and Internet Explorer) out there, and your site has to work well in most of the browsers your target audience is likely to use. This is a specialised field of development that is quite different from the work the back-end guys did for you before.

Implementing design often takes a significant amount of time – and if you want changes done after this is completed, you’re often talking about a significant investment. This is why it’s a good idea to try to get the ‘look and feel’ of the site nailed down firmly before the design implementation phase.

User acceptance testing

An oft-overlooked phase of development is UAT – or User Acceptance Testing. This is done by the client (that’s you!) to ensure that the website you have had developed now is actually the website you were expecting.

If things on your brand new site don’t look like the detailed designs, if your site search doesn’t work, if users are unable to create an account, or if a particular page looks wonky in the Safari browser on a Mac, you’ve got a challenge on your hands. Often, this would mean that the project needs to be sent back to the relevant designers or developers to get fixed.

At this step, you will also want to re-visit the standards you set in the beginning of the project. Is everything compliant with relevant laws, like the Disability Discrimination Act? Do all pages validate to the design- and development standards you specified?

Content

Now that you have a shiny new site, it’s right back to the point we made in the start of this guide: Content. Before you launch the site, you need to add content to it (also known as ‘populating’ your site).

If you’ve got a shop, you may need to add pictures, descriptions, prices, and stock levels etc. If you’re running a news site, you’ll need to consider how many articles you want at launch, etc. Do remember, though: The content is more important than the design and more important than the functionality.

Get the content wrong, and your site isn’t going to work. That sounds pretty scary, right? The great news is that great content is automatically also good for SEO: Good articles tend to attract links, people send the pages to their friends, and you connect better with your visitors, too – it’s much easier to create good content and get people excited about it, than to try to put a marketing sheen on content which is rubbish.

Let’s get it out there!

20111229_img_0043.jpg

Launch strategy

The day of the launch, what happens? Are you just going to flick a switch? What happens to your old site? If you already have a site out there, it’s important to not alienate your current users in the process.

Both from a usability point of view and from an SEO point of view, you’ll want your old URLs redirecting to your new pages as well as possible. In addition, these redirects need to be the correct type of redirects (specifically, 301: Moved Permanently redirects are preferable).

Marketing

Now that you’re ready to get your site out there, you need to think about how you’re going to launch it. Are you going to just release it and see what happens, or are you operating a PR drive? Will you be doing advertising? Are you going to start an SEO push to get your site ranking better in the search engines as soon as possible?

Online marketing is a big, complicated mish-mash of many specialist fields. We’ve already mentioned SEO, but there is also Search Engine Marketing (SEM), which covers the paid-for advertising, like the contextual advertising that comes up when you search for something in, say, Google.

In addition, you might want to do a social marketing push to get ‘buzz’ around your site on Twitter, Digg, Reddit, Del.icio.us, Facebook, MySpace, and all the other social networking sites which your target audience might interact with. You may also wish to attempt a ‘viral’ campaign, which is related to all of these, but is a different set of specialists again.

In conclusion

Creating a website isn’t easy, and there are many pitfalls – our top advice would be to find a design and development company which isn’t afraid to give you advice, when they think they have a better solution than the one you have in mind.

Every day, millions of pounds are made on-line, and it’s time that you saw some of that money: Follow this guide, and you’ll be well on your way.

Good luck!

How the iPhone copes with only having a f/2.8 aperture


If you ask any photographer whether they would be willing to take photos with a fixed focal length lens, many would say 'yes'. Prime lenses are as old as photography itself, and there are many excellent reasons to embrace them. Ask the same photographer if they'd be happen to work with a fixed-aperture lens, however, and you wouldn't get many good responses.

And yet, this is the reality of taking photos with an iPhone 4: It doesn't matter how bright or dark your scene is, you're stuck with a f/2.8 aperture lens. This is a problem if you want to use the iPhone with an external flash (not that you could anyway - here is why) - but how does the iPhone cope with extremely bright situations?

The lower limits

As you (probably) know, an exposure is controlled by 3 factors: ISO, Aperture and shutter speed. If aperture is fixed, you have to deal with any lighting situations with the other two. In low light, the iPhone will ramp up the ISO.

In fact, if I press my iPhone against a dark surface and take a photo, the camera reveals its limits:

photo_2_2.jpg

This incredibly boring photo reveals the limits of the iPhone's camera: It won't use slower shutter speeds than 1/15th of a second, and it won't go beyond ISO 1,000:

screen_shot_2012_08_16_at_150955.jpg

The upper limits

Similarly, it's easy to test the iPhone's upper limits, by pointing the camera at a ridiculously bright light source. The sun will do. This photo:

photo_2.jpg

... Reveals the other set of extremes:

screen_shot_2012_08_16_at_151109.jpg

... Which is that whilst the iPhone is still stuck at f/2.8, the maximum shutter speed is an incredible 1/30,000th of a second.

Putting these two figures together (about 4 EV steps of ISO and another 11 EV steps of shutter speed) reveals the exposure range available to an iPhone  photographer: an impressive 15 stops of difference from the lowest light to the brightest lighting situations.

Of course, this is nothing compared to the extreme shutter speed, aperture, and ISO ranges of modern SLR cameras, but hey - it's not bad for a device you keep in your pocket at all times!

Using an external flash with your iPhone

Since we launched the Triggertrap Mobile, we've added lots of awesome extra functionality to the iPhone camera - and given our customers the world's most powerful application for triggering their SLR cameras. One question that keeps coming up again time and time again, however, is if there's a way of using the iPhone's built-in camera with an external strobe. screen_shot_2012_08_16_at_150216.jpg


To answer this question, we need to understand a few things about how cameras work. The iPhone - and especially the iPhone 4S - is an extremely capable camera. But it is not perfect: The biggest problem with it is that it uses a rolling shutter.

The iPhone's camera and how it works

What this means is that instead of reading the whole photo at the same time (as you would do with a film-based SLR camera, for example), the camera effectively 'scans' the photo from top to bottom, one row at the time. This process is very fast, but it's not instantaneous.

The other problem with the camera on the iPhone, is that there's no way of influencing its settings; you can focus and take a light metering from a particular point, but that's it: You cannot chose a shutter speed or ISO, and the aperture is fixed at f/2.8. It can't be changed even if Apple gave you a software slider to adjust it: This is a physical limitation of the iPhone's camera.

There are other phones that get around this by implementing much better photo cameras, complete with shutters, apertures, focus mechanisms, and even built-in xenon flashes - but not the iPhone.

How a flash works

A flash, however, is a very different piece of kit; to ensure the correct amount of power output, the flash charges its capacitors, and then dumps a high voltage through a flash tube. The amount of light coming out of the flash tube is directly proportional to the amount of power it dumps through the flash tube - a lot of power means a lot of light.

Advanced flashes even have light-meters built in, where they are able to 'turn off' the flash after microseconds worth of light, for precise light level control. This is a small part of how E-TTL flash metering works with the flash power output to get perfect exposure.

All flashes have the 'one flash only' approach, except so-called 'high sync speed' flashes. Instead of using a single flash, these flashes can synchronise with shutters at speeds of up to 1/16,000th of a second (that's not a typo- but it is absolutely incredible, from a technology point of view). I've written a separate article about high-speed flash sync, if you're curious.

So, can you use an external strobe to take a photo with the iPhone?

In a word, no.

In many words: There are several problems with getting the flash to sync with your iPhone:

The first problem we would have to overcome is to find a way of syncing the flash with the iPhone. The challenge there is that we don't actually have any way of doing that. Remember that a 'normal' shutter speed for the iPhone will be in the region of 1/15th of a second to 1/30,000th of a second (or, at least, that is what the EXIF data of your files reports when you take a photo directly into the sun) or so.

The only indications the iPhone gives that it is taking a photo is the flash (which goes on for about 300 milliseconds - that's about 160 times longer than the duration of a flash). The other indication we can access is the sound the recorded "cah-chunk" sound the iPhone plays when you are taking a photo. Whilst slightly shorter than the LED flash built into the iPhone, it is still way too long to be able to derive an exact shutter duration from - especially if you are planning to use an electronic flash. It goes without saying that trying to synchronise a 1/30,000 second shutter duration (on an iPhone) to a 1/50,000 flash pulse (on a high-end, high-speed flash gun) based exclusively on a light flash that lasts 1/3 seconds is an exercise in utter futility.

However, if we somehow found a way of getting the iPhone to report exactly when it is taking a photo, we have a secondary problem: Since the iPhone uses a rolling shutter, you cannot use the single flash approach. Even if you were able to somehow fire the flash at exactly the right time, it would only affect a very small 'sliver' of the exposure. The problem is obvious, and would look a little bit like this:

photo_2.jpg

So, the first hurdle is finding out when the iPhone camera is triggering. The second hurdle is the rolling shutter. But if you shomehow managed to overcome both of those; we're facing a third problem: Since the iPhone doesn't support any manual settings, and since flashes are too fast for the iPhone once the exposure has started, your photos will almost certainly come out over-exposed.

From the iPhone's point of view, a flash of light (or, more likely, a rapid series of flashes of light, to counteract the rolling shutter issue), is far, far more light than it expects. In the studio, you would 'expose for the backgrounds, and stop down for the flash' - which, in practice, means that if you shoot with a fast shutter speed, you kill off the ambient light (as described in my Darkening a room by adding light article). You would regulate how much of the strobe light you want to have an effect on your photos by choosing a smaller aperture.

Unfortunately, with the iPhone, you only get one aperture (f/2.8), and you have no influence over the shutter speed or ISO. So: When you take an image, your photos would be exposed for the pre-flash lighting situation. Once the flash goes off, the image would be grossly over-exposed and utterly useless for anything.

In summary

In summary; there are three reasons for why you cannot use an external flash with an iPhone: There's no way of knowing exactly when your iPhone is exposing the photo, and even if you did, you would need to ensure the photo is exposed not with a flash, but for the whole duration of the exposure. The iPhone will not report how long an exposure is (it can vary between 1/15th of a second to 1/30,000th of a second...). Even if you managed to overcome these two problems, your iPhone wouldn't be expecting the light, and you'd dramatically over-expose your images.

The work-around

The obvious work-around for improving your lighting quality for iPhone photos, is to not rely on flash synchronisation at all, but to instead use continuous light. This photo, for example, was taken with a desk lamp and the light from an iPad's backlight (!) - for near studio quality lighting:

20111026_img_0080.jpg

The Ultimate Guide to HDR Photography

Haunting, surreal, and quite possibly the first major way in which digital photography does something which film photography can’t emulate – or even come near. HDR – or High Dynamic Range – photography is nothing new, but as new tools and techniques make the artform more available, HDR photography is taking off in a big way.

If you’ve never had a go… and especially if you don’t even know what I’m on about – you’re in for a real treat…

What is HDR Photography?

paul_hdr.jpg

High Dynamic Range photography or HDR photography is an advanced set of photography techniques that play on image’s dynamic range in exposures. HDR Photography allows photographers to capture a greater range of tonal detail than any camera could capture thru a single photo.

While many imaging experts regard HDR photography as the future of digital photography, the discipline has long been in existence.

HDR photography is present in many pictures taken through modern day digital cameras. The truth is, if you are a real photography enthusiast then there is a great chance that you have taken at least one photo exemplifying HDR photography.

The real functions or even executions of HDR photography may be debatable. But no matter which website or source you consult they will always say it is a technique that employs the great use of exposure range to get distinct values between light and dark areas of the image. Its real intention is to create an image that accurately characterizes the intensity levels found in natural scenes. If you ever wondered why the picture you took was different from the scenery you actually saw, then maybe it’s time for you to learn HDR photography.

HDR Photography is the technique used to capture and represent the full (as possible) DR found in a scene with high perceptual accuracy and precision. To remember things better, think of the 3S: sunlight, shadows and subjects. These are the things that make an ordinary picture an HDR image.

The history of HDR Photography

While the technique is more commonly used now to create astounding images of art, fashion and landscape photography, HDR photography’s humble beginning is ironically designed to capture a rather fearing, shocking and destructive image – nuclear explosion.

Charles Wyckoff (the same guy who inspired Computational Photography) developed HDR photography in 1930s to 1940s. He is genius who took the 1940s Life magazine cover of nuclear explosions – an image that would later change the world. Of course the technique didn’t have the acronym HDR before, but the principles remained the same.

A deeper and perhaps more scientific understanding of HDR photography and imaging was first introduced in 1993. This was done by playing on two established photography elements: tone mapping and bracketing. A complex mathematical theory regarding differently exposed images of the same subject matter was then released two years after. Paul Debevec, a computer graphic researcher, applied this theory and combined several differently exposed images to produce a single HDR image was accomplished. Talk about putting a lot of science and even math to discipline.

Today, things are a lot easier. Thanks to the wide selection of portable and digital cameras as well as easy-to-use software, HDR is no longer limited to people studying nuclear explosion and computer graphics technology. But the technology on image capture, storage, editing and printing devices still has some limitations. And since each of these elements affect the DR of image; we need to study them if we want to get an HDR image with superb quality.

Theory Behind HDR photography

There are two theories behind HDR photography. And as the technology around HDR photography evolves so is the discipline itself. But if one wants to take HDR imagery seriously then he must first understand the concepts and theories that make up this discipline.

The most fundamental of all HDR photography theories is to take multiple shots at varying exposure levels of a particular subject. A special computer program will then combine the images together into a single image. This is just an incarnation of the original theory during the time when there are no digital cameras and advanced computers and programs were nothing more than a work of science-fiction.

The second theory is the one that capitalizes on the RAW processing software to create various exposure levels of the same image. Modern Digital SLR camera and a lot of the Point and Shoot models allow photographers to capture RAW images. A RAW image or file is the data captured by your Camera’s sensor that is not processed yet and therefore does have color information. You can manipulate this file, adjust its color, lighting or while balance.

How to gather data for HDR photographs

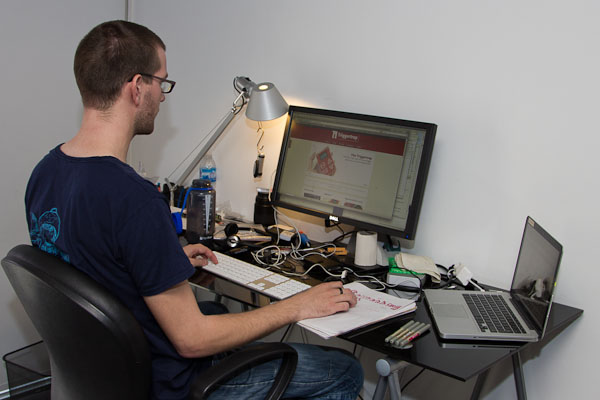
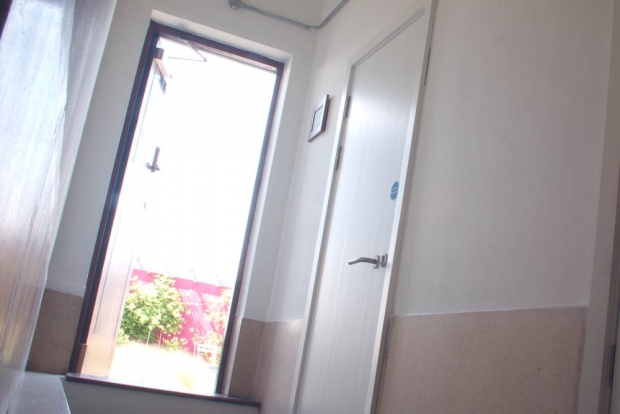
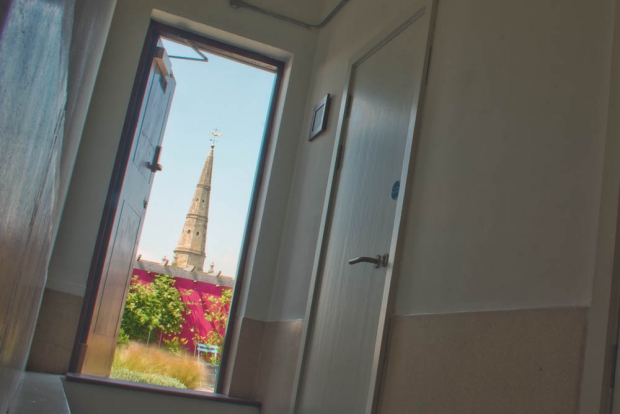
Taking the images is the first stage in HDR photography. You can use a simple point and shoot camera or a fully configurable digital SLR camera camera.

In both techniques you will need a camera with configurable exposure settings. All DSLRs and most point and shoot cameras have this. Certain SLR cameras have bracketing function which makes it easier for photographers to change exposure settings.

For starters, you can use the following setting: ISO 200 and Aperture Priority Mode. And as they say good things come in threes, you can take picture with three different exposure settings: EV 0, EV -2 and EV +2. You can experiment more on these but generally speaking, the more exposure versions you can have, the better your final image will be.

If you want to take more exposures as part of your HDR photos - up to 19, in fact - it's worth taking a closer look at Triggertrap Mobile, a mobile phone app that hooks up to your SLR camera. At $20 for the hardware and $10 for the software, it's an absolute bargain.

Oh, and obviously, It is recommended to use a tripod when taking HDR photo. This is because tripod stabilizes the camera and you need to get the clearest image you can get since you are experimenting on exposure values. The best way to do this is to use a shutter remote or if your camera doesn’t have one, just make sure you press the shutter button lightly.

Post-processing

ir_hdr.jpg

Incredibly, the above photo is an Infra-Red HDR photo. Awesome, eh?

Post processing is the last stage in HDR photography that you can really control. This is where technical skills merge with creative sensibility. And with the introduction of advanced digital cameras and photo editing software, HDR image post-processing is made a lot easier.

However, this does not guarantee that having an excellent HDR image will be as easy as clicking the shutter button. There may be times that the three or more images you took with varying exposure values are simply not enough. With this, the only chance you are left with is to do a post-processing of the image.

Post-processing generally involves color correction, saturation, contrast and brightness and darkness adjustment and other image element manipulation. But in HDR photography we need to concentrate on contrast and brightness and darkness adjustment. Brightness and darkness adjustment is the direct digital translation of exposure manipulation in the picture taking stage. If in the camera you adjust exposure settings, in the post-processing stage you will adjust the brightness.

The main advantage of process is surpassing the limitation of actually configuring your camera in different exposure levels. While some cameras may have eight exposure settings and therefore 8 different images, post-processing can simply give you a limitless number.

After the shoot, transfer the images to your computer. There is a merge to HDR feature in many photo editing software including Adobe Photoshop and above, Photomatix Pro, Dynamic Photo HDR and others.

Post-processing software also allows you to blend photographs with different exposures. This clearly increases the dynamic range of the final output photo. There is also tone mapping which reveals highlight and shadow details in an HDR image made from multiple exposures.

Further exploration

Whether you are an HDR photography amateur, hobbyists or a professional these websites will surely give you something to focus on.

HDR 101

The site claims that it is the first and most visited HDR tutorial on the web. It offers easy to understand tutorials as well as Photomatix software walkthrough. But we think HDR101′s best content is the monthly favorite Flickr.com HDR photos.

HDRSoft’s Resources

HDRSoft, maker of one of the most popular HDR software Photomatix gathered tutorials, DVDs and videos as well as mailing list subscriptions for all HDR photography enthusiasts.

CambridgeInColour

CambridgeInColour offers photography tutorials and forum where photography professionals and enthusiasts like you can discuss anything about photography.

Flickr’s HDR Group

This HDR group has 30,000 members and counting. Share your passion and be inspired with HDR images on different subjects taken by photographers from all over the world.

SmashingMagazine’s 35 Fantastic HDR Pictures

One of the most popular blogs combined “35 extremely beautiful and perfectly executed HDR-pictures” on different subjects and execution.

Visual Photo Guide

Camera, equipment and photography software reviews and video tutorials on HDR photography all in one place.

HDR Crème

HDRcreme is the first HDR photo gallery that lets you share photos, explore and learn about High dynamic range imaging.

Tutorial Blog’s Collection

A Single link to many great HDR Photography resources.

Photo credits

The photos in this article are from Flickr, licenced under CC/Attribution licence. See the full-size photos of Pasargad Bank Branch by Hamed Saber, Moon on Mars by Extranoise, Tour Eiffel by Al Ianni, Toronto City Hall by Paul Bica, San Isidro IR HDR Panorama and HDR 01 by CodyR on Flickr.

Top tip: a Flickr search for ‘HDR’ filtered by ‘most interesting’ is a great way to get some awesome inspiration.

Enjoy!

To protect your camera equipment, fly with a pistol...


I was in the pub the other day, and got to talking with a camera-man who does seriously high-end video stuff. He travels with a lot of equipment all the time, including some ridiculously expensive high-speed video equipment. Of course, everything he owns is fully insured, but insurance isn't everything: He is on the road around 300 days every year, and if something gets stolen or breaks, you have a big problem: It's extremely hard to get a replacement part for a Phantom Flex if you're standing on a mountain-top in Tibet somewhere.

So, he shared a little secret with me: He found the perfect way of protecting his £140,000 ($210,000) worth of equipment he travels with: He travels with a pistol.

Now, of course, there are lots of flights that won't let you check ammunition, but most will allow you to travel with an unloaded fire-arm. On top of that, a starting pistol costs as little as $50.

So... Why does this work? Well, a starting pistol is classed as a firearm, but it isn't actually illegal anywhere. In addition, since you aren't bringing any ammunition, you're basically just packing a small toy gun that isn't good for anyone. However, the airlines are über-paranoid about losing a firearm: Doing so, would cause tremendous amounts of problems for everybody concerned, and so, any luggage containing a 'firearm' is especially tagged and tracked through the luggage systems.

"Of course", my new-found friend said, sipping from his gin and tonic, "It does take me longer to check my bags, but there's no way they'll take the risk of losing them - and so when I travel to very important jobs, my starter pistol comes with me..."

I've never tried it myself, and I haven't looked into the rules, but it does sound like a pretty elegant (if ridiculously extreme) solution to the fear of losing your camera equipment whilst on the move...

Photo (cc) by Mr Smashy

HDR: Making impossible shots possible


If you've ever been faced with photography situations with extreme contrasts, you know that basically, you're out of luck. Say, for example, you are taking a photo out of the door of a building.

You have to make a hard choice; are you going to expose for the outdoors? If so, you end up with something like this:

img_2510.jpg

... And your indoors are completely useless and dark.

Alternatively, you can decide to expose for the light inside the building:

img_2514.jpg

But clearly, that's hardly going to do much good either.

The solution is HDR photography, where you combine a series of exposures:

hdr.jpg

Into one single exposure:

img_2508_hdr.jpg

Okay, so I'm more than happy to admit that this quick example (shot with the Triggertrap Mobile Long Exposure HDR mode using my iPhone to control my Canon EOS 550D - that was what I was testing when I did this one) is hardly the finest example of creative HDR ever created - in fact, it's a distinctly rubbish picture. Nonetheless, it reminded me how powerful HDR can be, and how it completely changes the game for what is possible in photography.

Time for a week-end project?

So, If you've never given it a go before, make it your week-end project: You can easily do a manual HDR set by changing the settings on your camera between each shot; or use the Automatic Bracketing feature built into most cameras to get a 3-shot bracketed set.

And if that isn't enough for you (for example, if you're instead itching to do a 13-exposure HDR for some crazy reason), there are automated solutions that'll do the exposures for you, including Triggertrap Mobile or Promote.

For an in-depth guide on HDR photography, check out the Pixiq Ultimate Guide to HDR Photography!

Nutty Photo Project: Locks on Toilets

3302708559_2998963341

For the past five years or so (with variable amounts of passion – usually low-level, when-I-can-be-bothered. When I bought an iPhone, more often), I’ve been doing an odd little photography projects titled ‘Locks on Toilets’. What is it? Well, it does precisely what it says on the tin: It’s a relatively large collection of photographs of devices that lock the toilet door so nobody can barge in on you while you’re attending to your business.

It’s an odd little project, which I came up with when I was hideously drunk one night – like all great ideas, in other words, and I just sort of continued doing it. Of course, it’s a lot more fun if it’s a collaborative project, so I hereby invite you to join in the slightly odd fun…  

So, what is this all about?

I could spin you a line about how the one thing that all humans have in common is the need to relieve themselves, and how that’s a beautiful thing. Of course, it’d be a complete load of shite (if you’ll forgive my contextually-appropriate french).

Thing is, I don’t have any idea why I’m running this project – I just know I’m having fun doing something that’s so completely and utterly pointless that it becomes awesome.

Show me some examples!

Well of course I will:

Train
Train

Boeing 777 somewhere over Russia.
Boeing 777 somewhere over Russia

Covent garden
Locked with a padlock!

Paddington train station, London, England
London Paddington

Portmellon, Cornwall, UK
Portmellon, Cornwall

Pub in Bath
The no-lock lock in a pub in Bath

Puzzlewood in Forest of Dean

How can I get involved?

First off, you may wish to join the Locks on Toilets group on Flickr – there’s currently nearly 450 entries there, but there’s always space for more! In the group, look at some of the submissions, and submit your own if you fancy it. The group will accept any and all submissions, but it’s cool if you, in the title, add the name and place of the establishment, and it’s cooler than a penguin’s plums if you also geo-tag the photos, so I can eventually do a mash-up plotting all the photos on a map.

Now, I can totally understand if you can’t be bothered using your main pride-and-joy flickr account to do this – I don’t do that either. My main account on Flickr – Photocritic – I keep for stuff I’m actually proud of in some capacity, and I use my alternate account – isharq for stuff which I’m not too fussed about, including this account, so if you fancy it, you can set up a second account.

Go on, it’s all just a bit of fun!

Tell me about your nutty projects

I’ve written about other weird projects before, but I’m curious… What floats your boat?

Have you got any crazy ideas / projects / things you do when you think photography is in danger of getting just a little bit too serious? Leave a comment, I’d love to hear about ‘em!

Hardware hacking: Fixing your X100 charger


Without the easy-to-lose piece of plastic, your FujiFilm charger is useless. Let's go DIY on its ass...

I've had a FujiFilm X100 for a while now, and I still don't completely know how I am getting on with it. Sure, I have taken some rather fabulous photos with it, like these ones:

20120215_dscf0564_600px.jpg

20120205_dscf0501_600px.jpg

20111009_dscf8681_600px.jpg

20110930_dscf8142_600px.jpg

The FujiFilm X100 battery charger problem

But it is not without its niggles. One of the small but incredibly annoying problems with the X100 is that the battery doesn't fit in the battery charger that comes with it. I know, it sounds completely inane, but it's true: To use the X100's battery in the charger, you have to use a tiny piece of plastic in the charger. Without it, the battery fails to make a connection, and won't charge properly. FujiFilm, if you're reading this: That was a complete bonehead move, and you really ought to be ashamed of yourself.

However, as a DIY photographer, I figured this was my chance to make my own life better. I lost the little piece of plastic nearly immediately, and was using toothpicks to hold the battery in place, but when my good friend Sarah told me about Sugru (by the way, Sugru, if you are reading this you should totally hire Sarah. She is awesome. Also, if you aren't reading this, then you obviously need a new community manager. Which brings me back to my original point: Hire Sarah.), I immediately saw a great use for it: Finally, a way of fixing my X100 charger, permanently and once and for all.

Let's get busy!

So here, offered as a deliciously simply to follow step by step guide: How to fix your FujiFilm x100 charger, by the power of Sugru:

1) Make sure you clean your charger properly; The Sugru is pretty hardy stuff, but if it's dusty or greasy, you're going to get less of a bond:

screen_shot_2012_06_26_at_190128.jpg

2) Take two small balls of Sugru (this was about 1/8th of a 5g packet of Sugru - or a grand total of £0.17 / $0.26 worth), and shape them into, er, balls.

3) Insert the battery into the charger, to make an imprint into the Sugru. Push it into the Sugru ever so slightly, and then remove the battery. The material will keep the shape you've just made, and harden over the next 24 hours.

screen_shot_2012_06_26_at_190142.jpg

4) Use a wet finger to gently brush off any excess material. Sure, this is an optional step, but if you're going to hack your own camera equipment, you may as well make it look reasonably good.

5) re-insert the battery to make sure it still fits properly, then remove it again

screen_shot_2012_06_26_at_190135.jpg

6) Leave it to harden for 24 hours

Congratulations! You've spent pennies on fixing a problem that FujiFilm really should have done right in the first place. More importantly, you can now use your well-earned bragging rights down in the pub, telling everyone that you've improved a piece of your own photography gear!

Copyright Infringement: Ignorance is no excuse.

"Hey", I see you think. "That Copyright Notice Looks Familiar..."

This morning, I caught a blogger who rather brazenly had 'borrowed' some of my articles. It isn't the first time this has happened, of course, but in this particular instance, I was particularly insulted; the blogger in question was running a thriving photography business, and had happily stuck his own copyright notice on my article.

This is part 4 in my series of articles about copyright. If you want to start at the beginning, start with What is copyright, and how do infringements harm you, then skip along to Protecting your copyright in a digital world. If you can still stand more of this sort of thing, part three in the series is Just because it's in my RSS feed, doesn’t mean you get to steal it.

Got all that? Great - let's continue with part 4 then...

In this particular case, it was even more impressive than usual - this particular blogger has a whole section on their website on copyright, which includes choice phrases like "All information and material posted on this Website are subject to copyrights" and "use (...) is expressly prohibited, unless prior written permission has been granted."

In quite a few of the recent cases of infringement I've dealt with, the 'defence' has been "I didn't know it was not allowed", or "This is for my own personal use only". I've got to say, I do feel a little bit bad about going in all guns-a-blazing, when I'm met with 'I didn't know'. On the other hand, that's not really how things work. If you are driving a car, you are expected to keep on top of changes in traffic law. If you're a doctor, you're expected to keep an eye out for which drugs you can prescribe for something. If you're a sailor, you have to learn the laws of the water. If you're in advertising, there are certain things you can't say or do to promote your product. If you're a teacher... If you're a football player... You see where I'm going with this.

As a blogger, you are a publisher.

What many people don't seem to understand fully, is that blogging is publishing. Sure, it might be that hardly anybody reads your blog. It's possible that you have your site mostly for your own use only. And it is very, very easy to remove or edit a piece of writing from a blog if anybody takes offence. Nonetheless; the activity of making something publicly available on a web site is still publishing; as the site's publisher, you're responsible for all and any content that goes live on the site.

If you're a publisher, you are liable for any laws you break in the course of your publishing activities. Including copyright infringement.

There are some edge cases here, of course. For example; a forum owner technically 'publishes' all content on a forum, but isn't necessarily legally responsible for everything posted by their members. However; if a member is consistently posting copies of articles to the forum, they might still be on rocky ground. There is at least one large forum run by police-officers, for example, that flaunts copyright law as if there is no tomorrow... Which doesn't mean that that particular forum couldn't get a particularly nasty surprise at some point in the future.

Ignorance is no excuse

The point is; if you participate in any activity, you're expected to know the laws and rules relevant to the activity you're participating in. If you don't, then - I hate to say this - tough luck. Ignorance is no excuse.

It is a shame, really; to drive a car, you have to take a licence; if you buy a house, you have to take some legal advice. On the internet, however, nobody tells you what is appropriate behaviour - and what isn't. It's extremely easy to pirate music (in fact, the embarrassing truth is that it only very recently became as easy to buy as to pirate music online - and services like Rhapsody, Spotify, Pandora and iTunes have a lot to do with that), it's still often easier to obtain movies without paying for them than to get them legally, and if you run a blog, it's very simple to get a lot of high quality content by simply taking it from other websites - like this one.

I've had enough of it, though. I'm not spending most of my life creating content that I think people will like, just to have someone else nick it and publish it on their own websites. If that's you, then the next time I find you, expect an invoice in the post.

Because ignorance is no excuse.

Disclaimer

I have rudimentary legal training in UK media law, but my training is several years old, and you’d be insane to take legal advice from some random bloke off the internet anyway. Nothing in this post is meant as actual legal advice – talk to your solicitor, that’s what they are there for!

Further Reading

This is part of a 4-story series:

  1. What is copyright, and how do infringements harm you?
  2. Protecting your copyright in a Digital World
  3. Just because it's in my RSS feed, doesn't mean you get to steal it
  4. Ignorance is no excuse

In addition, you might enjoy Police Fail: Copyright, what is that? and Even Schools Don't Care About Copyright...

How to keep your photos safe: Backup routines!

As photographers, we spend a lot of time thinking about how to take the most beautiful photos ever. Do you spend enough time keeping them safe?

How often do you back up your photos? If you have to think for more than a fraction of a second to answer that question, the real answer is 'not often enough'

There are a few important steps to creating a backup strategy.

Choose what to back up

This is the easiest bit. Think about this: What do you want to back up? The answer, here, is probably either 'my photos', or 'my photos and lots of other stuff'.

I do both - but I go out of my way to take better, more frequent, and more redundant backups of my photos, because they're more valuable and important to me.

Choose how to back it up

Automatic back-up at home - Until recently, I was using an Apple Time Capsule; but I've had two of the damn things fail on me within a year (and I've written a separate rant about that elsewhere). So I've upgraded to a Drobo FS instead (Amazon US / UK) - Firewire 800 and fully-redundant RAID means that even if one of the drives kick the bucket, I don't lose any of my precious files.

Along the same trait is Automatic back-up over the internet - In addition to my Drobo, I use a service called Mozy, which is an online backup service (for more about why, see 'store the backup' below). It's pretty clever, actually, for about $5 per month you get unlimited storage, and it takes backups in the background, all over the internet. By having your back-ups off-site, your stuff is still safe even if someone steals everything in your house, there is a fire, or similar horribleness. I signed up for a 2-year subscription, set it up, and haven't looked at it since (apart from checking if it's still backing up every now and then. It is. I'm impressed.)

If you don't like Mozy - or if you're looking beyond just backups - there's always Dropbox, which is a bloody good solution, too; very well integrated, includes some clever sharing features, and is tightly integrated with your computer OS - you can even use it to keep folders synced between your different computers, and they have a clever online file browser, too.

Right: That's 50,000 photographs just waiting to be destroyed because someone opened the hard drive enclosure to take a photo...

Consider RAID...

... Over a network: RAID solutions can work in many different ways - you can do them over a network (Check out 'Network Attached Storage' on Amazon (.co.uk or .com)).

... Hooked up directly to your PC or Mac: As far as stand-alone RAID goes, you can buy ready-built solutions (Like the G-Tech G-Raid 3TB FireWire 800 / Hi-Speed USB solution available from Amazon.com, or the WD MyBook 2GB solution from Amazon.co.uk) - but there are loads of other options available, too.

If you're feeling thrifty and a bit DIY-tastic, you can build your own RAID solution by getting two big harddisks. I'm rather fond of Western Digital Caviar Green drives; they are reliable, quiet, and cheap-tastic: Amazon.co.uk / Amazon.com. In addition, you'll need an enclosure. The Drobo seems to be the gold standard, but you don't have to spend that much money; Look for Firewire 800 enclosures if your computer supports it - if not, USB2 or FireWire should do the trick.

Check your backup integrity

3281381941_88a30e70cb_o.jpg

I was kicking myself when I thought I might have lost this photo - turns out that I did have a backup of it, despite deleting the folder by accident. Phew! Click for bigger version on Flickr

Remember that you have to be sure that what you are backing up is actually working: There's no good in taking a backup of a corrupted file. Obviously, you can't check every file for integrity every time, but what you can do is to ensure that you keep older backups, too.

Only recently, I discovered that I had deleted a folder of pictures by accident several months ago. If I had only kept a recent snapshot of my pictures folder (as it were, pun fully intended), I'd have been buggered. Luckily (or rather: due to having a sane backup strategy), I was able to dig out an older backup of my photos folder, which still contained the deleted folder, and I was able to restore my photos. Phew!

For important shoots, I immediately burn them to DVD - that way, I know I have a backup somewhere which isn't being touched.

Think about where you store your backups

Okay, so perhaps this bank vault is a bit over-kill, but if your photos are valuable to you (say, if you're a commercial photographer, or if you can't stand the thought of losing them), you might want to consider renting a deposit box, and keep a backup of your photos on an external harddrive there. You only need a tiny bank box, so it shouldn't cost the world.

iosafe_solo.jpg

It's important to think about how you are storing your backups. Remember that you're backing up for all sorts of reasons: If your computer breaks, and external harddrive is handy. But what if someone breaks into your house? It's no good having a full set of backups on external harddrives if the thieves can just take them with them, too. House fires, floods, etc - there are lots of reasons why keeping your backups in your house is a good idea (they're easily available), but there are risks, too.

If you do have to keep your backup harddrive in your house, you can't do much better than ioSafe's brand new Solo G3 backup solutions. They are fire and water-proof (so likely to survive a house fire, and subsequent fire department rescue operation. They aren't exactly good for travelling (the unit sitting under my desk weighs approximately a billion tonnes), but the flipside of that is that they're also practically bullet-proof. In the beforementioned housefire, that's a very good thing: If you can find your ioSafe Solo in the remaining rubble, it's probably there, hugging your data gently.

iosafe_portable.jpgPersonally, I keep the harddrive connected to the network hidden away in the attic. That way, a casual thief is unlikely to run off with it, so even if my computer is stolen, I don't lose my photos.

In addition, I keep a backup on an external drive which I leave at my parent's house - it's low-tech, and the backups are generally about 2 months old every time I swap the drive over, but it's better than not having it handy.

Finally, I have the Mozy backups - although they would be a pain int he arse to restore: I'd have to download hundreds of GB of data. There's an alternative way, too: ordering DVDs or an external harddrive with your data, but that, too, is a pain... In short, Mozy is my absolute last resort.

And finally... Try recovering the backup

The best thing that might happen to you is that you go your entire life without ever having to restore a back-up. Nonetheless, it is an extremely good idea to try it anyway.

If you're unable to restore your backups (perhaps there's a problem with the backups? Maybe the restore feature of your favourite backup package isn't working?), you may as well not bother with the hassle of backups at all: they're only useful if you can use them if the worst happens.

The bank vault and harddrive photos are from iStockPhoto.

Vimeo Awards 2012: The Winners!


If you are doing anything with video on the internet these days, you can't have failed to notice Vimeo. So when my favourite video-sharing site for creatives is showing off the finest videos of 2012, you'd better believe I pay attention!

You could do a lot worse this lovely Friday, than spending a couple of hours with a beer or a few cups of coffee, and looking through this list...

Category winners are

  1. Action Sports: Dark Side of the Lens
  2. Advertising: K-Swiss Kenny Powers - MFCEO
  3. Animation: Umbra
  4. Captured: Sweatshoppe Video Painting Europe
  5. Documentary: Amar (All Great Achievements Require Time)
  6. Experimental: Prie Dieu
  7. Fashion: Skirt
  8. Lyrical: Symmetry (also winner of the Grand Prize)
  9. Motion Graphics: A History of the Title Sequence
  10. Music Video: Manchester Orchestra: Simple Math
  11. Narrative: BLINKY™
  12. Series: Often Awesome The Series
  13. Remix: Rear Window Timelapse

Grand Prize Winner

Symmetry from Everynone on Vimeo.

Filmmaking team Everynone submitted the winning film, “Symmetry,” to the Lyrical category, which is new this year.  The Lyrical category was created to showcase creative videos of the natural world or personal experiences.

Congratulations, everybody, you're an inspiration to us all!


Facebook: Photo sharing and premium accounts


The IPO is only one of the many things that are changing rapidly on Facebook. People are starting to point out that there's a huge problem at the very core of Facebook: It's an ad-driven site. And like all ad-driven sites, it has an enormous problem: People are so ridiculously blind to online advertising, that even with the incredible possibilities of putting your adverts right in front of the people who would, in theory, be interested in them, you're barking up the wrong tree. Online advertising, quite simply, is working less and less, and eventually the advertisers are going to realise this, and take their advertising spend and using it differently.

Facebook knows this. They are run by clever people, and post-IPO Facebook has plenty of money to hire more clever people. They've seen this one coming for a long time. And they're nearly ready with their response.

Premium accounts & photo sharing

In parallel with the bottom falling out of the advertising market, there are a few sites that are positively thriving; and many of them are photo- and video related. Vimeo, Flickr and 500px have all gone the free-then-premium-account route, and are making quite a lot of money in the process.

So, premium memberships are one of the potentially incredibly lucrative things that Facebook could offer - but what can they offer, that people haven't yet been used to getting for free?

The core service of Facebook will always remain free: Status updates, events and invitations, and the ever-embarrassing stream of breakups and social drama will continue as it has.

Making sense of Instagram

The big shift is what has been starting to show up on Facebook in other avenues: That change will be premium accounts, and it's going to happen within the end of the year.

The brand new Facebook Camera and the recent Instagram acquisition simply don't make any sense in the larger context of Facebook... Unless there is also another change coming.

Instagram, especially, is one of the apps that has attracted a very large user base of mostly casual photographers. Not only that; but casual photographers who are willing to spend money. A perfect place to start building the brand new service, in other words.

Facebook, with only minor changes to their platform, will be a huge competitor to the Vimeo, Flickr and 500px platforms of the worlds; perhaps not for high-end photographers, but certainly for serious amateurs and semi-professionals who want a solid platform to show off their photography.

The benefit is obvious: When Facebook makes this leap, photographers and video-makers no longer have to invite their audiences to a separate site to view their work: You could simply invite your friends directly, from within the familiar walled garden that is Facebook.

My first adventure in time-lapse photography

screen_shot_2012_05_01_at_175150_0_620x3361.jpg

I love experimenting with photography, but I've never really had much of a chance to play with time-lapses until I started working with the Triggertrap.

So, in the process of testing it all, I did a load of time-lapses, and I figured that (since we've now finally launched our iPhone version) it was time to show off some of my experiments as well.

This one is a work in progress, as I haven't quite finished all the balancing, and some of the cuts aren't quite where I'd like them... I also need to fix some of the flicker... But I'm rather proud of it as a first attempt!

Choosing your first dSLR camera

With a slightly better screen than the others, the Nikon is an attractive choice in the bargain-SLR category

Whenever a new excuse for buying stuff (Christmas? Birthdays?) rolls around, the retailers are rubbing their money-grabbing little paws in glee, in anticipation of making a killing over the holiday seasons. Be that as it may, fact remains that there is a lot of choice out there, and whether you are buying your first camera, or whether you are out shopping for a friend of family member, you might need a hand.

Welcome to the 7th edition (!) of my in-depth guide to choosing an entry-level dSLR camera: What should you be looking for, what should you be buying, and why? It’s all in our handy shopping guide, right here… 

Where should you even begin?

Once you’ve decided to start looking for a dSLR, you might have some reason in mind already. Perhaps you feel as if you’re outgrowing your compact camera, whether that’s creatively or technically. Maybe you’re not really feeling as if you’re challenging yourself enough as a photographer. Either way, you’ve decided to go play with the big boys – welcome aboard!

The first and most important thing you need to know is that there aren’t any really bad digital SLR cameras out there.

In fact I would argue that there aren’t actually any bad digital cameras on the market anymore in general – stick to a respected camera brand, and you’re home free. If we’re looking at compact cameras, you can buy a respectible camera for under $100 – the Canon Powershot A2200, for example wil set you back $99 or thereabouts, and is a lot of camera for your hard-earned dollars.

Anyway, we were talking about dSLR cameras. Here are a few things you should be looking at..

Things to consider before making your choice

Do you already own a SLR camera?

If you have already bought into a particular brand of camera, take a good, hard look at your lenses. If you’ve bought a lot of high-end lenses and flashguns etc, swapping from one brand to another might have a lot of hidden costs in them. On the other hand, if you have a lot of old, tattered equipment with scratched lenses, see it as an opportunity: eBay off the lot, and start afresh.

Canon or Nikon?

This is a perennial question which I’m not going to go anywhere near.I defy anybody to be able to tell the difference between a camera taken with a Canon or with a Nikon camera. Or a Sony. Or a Panasonic. Or a Sigma. Things have moved on hugely since the raging Canon-Nikon debates of the early 1980s (and they scarcely made all that much sense then).

Whichever camera system you buy into, you’re going to live with for a while (probably), so do think about it. You – not your camera equipment – is going to be the bottleneck, so don’t worry too much about what you might have heard form the old graybeards…

Buying into a system?

You know best what kind of a photographer you are. If you’re likely to start buying high-end lenses (or ‘fast glass’, as it’s frequently called among seasoned photographers), then you have two choices: Canon or Nikon. There are a lot of other people out there building great DSLR cameras, but once you start talking seriously high-end equipment, it’s one of the two big ones, I’m afraid.

On the other hand, if you are a semi-serious hobbyist, don’t discard other camera brands out of hand: Sony, Olympus and Panasonic are building some very capable cameras indeed – with some serious money-saving opportunities, too!

Body or glass?

If you have to choose between buying an expensive body and cheap glass or a cheap body and expensive glass, then go for the posh lenses. Every time. Personally, I am still using lenses that I bought nearly 10 years ago, even though I’ve changed my camera bodies half a dozen times since: You can take fantastic photos with an entry-level body and expensive lenses.

Putting bargain lenses on a top-level body is, frankly, a complete waste of money. Even better: Buy yourself a nice prime lens, and be amazed at what your camera body can do.

Megapixels?

In general, don’t worry about megapixels – most dSLR cameras come with 10 megapixels or more, and that’s enough. Hell, there’s even a prominent group arguing that more pixels aren’t necessarily better, and that 6mpx is all you need, really. I’m inclined to agree – you very rarely use them at full resolution anyway. What I’m trying to say is that Megapixels should be the last thing you look for in a digital camera in general – and a dSLR especially.

screen_shot_2011_11_25_at_080324.jpg

The above photo was taken with... an iPhone. Proving that any camera can take a good photo.

So, to summarise:

  • Don’t worry too much about the brand of your camera body
  • Buy Canon or Nikon if you anticipate dropping a lot of money on lenses in the long run
  • Spend your money on lenses, not camera bodies
  • Oh. and also consider looking into EVIL cameras - they're smaller and lighter than SLR cameras, but you keep the ability to swap lenses, and they can take great-quality photos! (loads more info about EVIL photography here)

3 great bargains

So, you’ve decided to leap into the pool of DSLRs, but you want to spend as little money as possible? These three cameras are your best options:

Sony Alpha A390

93449.jpgThe Sony Alpha 390 is an absolute bargain, and a great entry into the world of SLR. You get 14.2 mpx (more than enough), RAW image format (which is a must), and an incredibly nifty little feature: In-camera optical ‘SteadyShot’ image stabilisation! This means that any lens you connect to the Sony Alpha camera will be image stabilised – this is a feature you pay tons of money for in the lenses of other camera manufacturers!

The Sony Alpha lenses are compatible with Minolta AF and Konica lenses, so you get a reasonably good choice of glass, and the camera has a pretty wide shutter speed range of 30 seconds to 1/4000th of a second.

On top of all this, the Sony can be picked up with a fabulous kit lens – sure, it’s not the best glass you can buy, but who cares when you’re eager to get started. You can always chuck away (or eBay) the kit lens later, and upgrade to something better, once you know what kind of photos you’re likely to be taking!

You can get the Sony Alpha 390 with a kit lens from Amazon.com for about $449 and from Amazon.co.uk for about £349.

Canon EOS 1100D / Canon Rebel T3

canon_1100d_t3.jpgThe world of digital cameras has come a very long way indeed. I remember buying my first DSLR in the mid-to-late 1990s, and, well, you’d pay a small fortune for something that wasn’t all that amazing.

These days, though, you’re not needing to spend that much money to pick up a big-brand SLR camera. Obviously, Canon felt Sony and the other budget-DSLR manufacturers breathe down their neck, and they had to respond. And boy, did they respond: The EOS 1100D / Rebel T3 is one heck of a camera. Sure, so they’ve cut a few corners here and there, but, frankly, I don’t give a damn.

Personally, if I were to buy a SLR today, I’d buy one of two cameras: A Canon EOS 5D mk III (which costs a small fortune), or a 1100D / T3. Why? Because the imaging sensor is brilliant, and you can start saving up to buy lenses that will be with you and your camera system for a decade or more. When you finally out-grow the 1100D, eBay it and buy a mid-range camera (like the Canon 600D), or start looking at spending serious money for a serious camera (Canon 5D mk III if you want full-frame coverage, 7D if you don’t) – but none of the money you spent on lenses was a waste: It’ll all still be there, ready for you to snap away.

Of the bargain-snappers, only the 1100D / T3 has a CMOS sensor – which makes a surprising difference in image quality: Not necessarily better, but for some reason the grain on a CMOS sensor at higher ISO is a lot more similar to film than CCD sensors pushed to the limit… All of which means that the 1100D photos ‘feel’ more natural when you look at them.

You can get the  Rebel T3 from Amazon.com for about $490 or the Canon 1100D from Amazon.co.uk for about £400 – both with a Canon EF-S 18-55 kit lens.

Nikon D3100

nikon_d3100_angle_medium.jpgNikon’s baby camera is the D3100 – and it’s another bloody strong contender to the bargain crown. It comes with a super-advanced light meter – the 3D Matrix metering system borrowed from far more expensive Nikon cameras, which means that the Nikon is definitely the most capable in terms of getting the light measurements right.

The other thing the D3100 gets right is that it has a fabulous 3-inch LCD screen on the back of the camera, which makes a huge difference when you’re checking your photos in the field, to ensure you've captured what you're looking for all right.

Just like the Canon camera, the Nikon is an opportunity to start climbing the ladder – Buy the most expensive lenses you can afford, get some tasty flashguns, and they’ll be with you for a long time indeed.

I have to admit that I’m a Canon man at heart (I’ve used Canon cameras since I stole my dad’s Canon A1 out of the cupboard when I could barely walk. I didn’t break it, luckily), but it’s starting to seem as if Nikon currently have a nicer progression through the cameras – the D3100 is a peach, and the D5000 or D5100 – which is the next step up without being that much more expensive – is a deceptively simple, yet very serious, camera, for serious photographers.

You can pick up a D3100 from Amazon.com for about $640 and from Amazon.co.uk for £440 or so.

So… What should I choose?

If you want to take the step from compact cameras to SLRs, but foresee that you’ll continue being a casual amateur, go for the Sony. It’s a great little camera, a fantastic bargain, and the lenses available are not bad at all.

If you are ambitious in your photography, grab a dice. Throw it. Even numbers are Canon. Odd numbers are Nikon. They’re both absolutely brilliant cameras, and – considering what you get for your money – bargains. The Canon has a slightly better imaging sensor (but you wouldn’t be able to tell until you’re at higher ISO speeds) and the Nikon has a marginally better light meter (which doesn’t make that much difference in real life) and a better screen (which does). Seriously, if you’re having trouble making up your mind, throw the dice. It’ll save you a lot of headache.

Any final tips?

Buy a cheap camera body, then invest in some lovely lenses. You know it makes sense...

I know I’ve repeated this several times in this article, but if you’re new to SLRs, I would advise to buy the entry-level model from a manufacturer. Start taking photos – you won’t out-grow your camera body for a while, trust me on that, but you might out-grow your lenses. Start by buying a ‘Nifty Fifty‘ (a 50mm prime lens). Most manufacturers have a f/1.8 which is good and a f/1.4 which is great…

Once you have one of those, start thinking about the type of photography you do. If you want to start shooting macro, you’ll need to start looking into a macro lens. If you want to photograph gigs or wildlife, you’ll want a fast tele-zoom (I can’t recommend Sigma’s 70-200mm f/2.8 DSM lens highly enough – it’s a bargain for what you’re getting). If you’re more into in-door or landscape photography, you want to go wider – but only you know exactly what you want.

Buying cheap lenses is false economy – unless you don’t really know what you want to take photos of. If you’re just experimenting, flailing around a little (as we all are, at first), stick with your prime and your kit lens for a while. If you find yourself at the wide end of your kit lens most of the time, perhaps it’s a sign you need to spend a bit of cash on a wider lens. If you’re constantly at full zoom… well, you figure it out.

If you’re worried about spending hundreds – if not thousands – of dollars (or pounds, should you be on my side of the pond) on glass, go ahead and rent the lens you’re considering for a few weeks. Does it do everything you want it to? Is it too heavy? Does it feel right? Is it fast enough? If you’re not happy, rent a different lens, and keep searching. When you find the right lens(es) for you, you’ll know it – and that’s the right time to start shelling out the big bucks.

Seriously: Buy glass first. (If you want to learn more about lenses, I've got everything you could possibly want to know right here...) Worry about camera bodies later. By the time you have bought some serious lenses, you’ll know what you need from a camera (wide angle? Full-frame sensor. Sports? Fast, high-frames-per-second camera. Walking a lot? Buy a capable, but light-weight camera body… Etc)… But it’s a supremely silly thing to do to spend a lot of money on a camera body until you know what you really want/need.

So, Haje, what do you use?

I love my Canon 450D. Its cheap as chips, but does the trick!I’ve had a lot of cool cameras in my time – I worked as a freelance photographer for a while, and bought all the top-shelf gear. At one point, I drove around in a £1,300 car with £49,000 worth of camera equipment in the boot. I think it’s pretty safe to say that I’m a gadget nut, and a camera aficionado to boot.

… Which is why it might surprise you that currently, my main camera is... a Canon EOS 550D. It’s not the newest camera on the market anymore. It never was the best. But it does everything I need from a camera: It’s plastic, so it’s reasonably light weight. It’s relatively sturdy. It uses SD cards (which plug straight into my MacBook Pro – it’s a small thing, but I like it).

The five-fifty takes all my lenses (I have loads, but the ones I’ve used in the past 6 months are a Sigma 17-35mm f/2.8-4.0, a Canon 50mm f/1.4, a Sigma 70-200 f/2.8, and my Lensbaby G3 lens), and it doesn’t look too conspicuous. It’s also cheap enough that I’m not too crazy worried about it getting stolen or dropping it. All in all: Perfect for my uses. And it's one cheapest camera you can buy with a Canon badge on it.

This article was first published in 2007, but has been updated with the most relevant information every year since. It was most recently updated in April 2012.

This self-portrait was taken by a stranger on the Internet


This (admittedly not very interesting) pic of me was taken with my Triggertrap when someone joined the Triggertrap newsletter.

Today's post is brought to you by the how-bloody-meta-is-this department...

So, I've been playing with different concepts of automating the taking of photos, by using the Triggertrap universal camera trigger I invented.

As part of the upcoming Triggertrap website (it's launching on Monday!), I was working on the updated Newsletter sign-ups, and I had an idea: Wouldn't it be cool if someone signing up for a newsletter triggered the camera?

So that's what I did - Now, whenever someone signs up for the Triggertrap newsletter, it automatically takes a photo of me, sitting at my desk, slaving away. Okay, so it isn't a very interesting photograph, but that isn't the point - it's kind of awesome that my camera is taking photos whenever someone else does something. 

If you want to find out how it's done (and if you, too, want to take a photo of me)... Sign up for the newsletter; the explanation is on the sign-up confirmation page. (Pretty sneaky, eh?)

The Avengers and Adventures in Terrible Headaches


Movie poster courtesy of Disney / Marvel

Avengers is one of those movies that makes you wish your cinema seat had a seat belt - it's a no-holds-barred thrillride cocktail of two parts great casting, one part witty script, a large splash of VFX, blended with copious amounts of visual gags, a squeeze of explosions, and garnished with the odd, completely unneccessary yet utterly delicious shots of rather astonishing-looking eyecandy; Cobie Smulders and that other chick they cast.

Superhero movies have been a mixed bag; so I'll keep this review very short indeed by saying: This is not a mixed bag. This is a sack, filled to the brim with finely selected awesome. Go see it.

It's well-paced, has more laugh-out-loud moments than I remember in any other recent film, the acting's good, the VFX is epic, and the music... Well, not always what I would have chosen, but it doesn't directly get in the way of the fun.

The horror of 3D

Of course, I'm currently in Buenos Aires, which means I have two choices for this film: Watch it in English with Spanish subtitles, in 3D. Or, watch it dubbed to Spanish, in 2D.

So, since my Castellano is still lacking at best, we opted for the 3D version.

Honestly? I don't get it. You spend all this money on making a stunning movie - a feast of explosions, colours, and superfluous shots of Scarlett Johansson's finely shaped bum squeezed in very tight trousers, and you ruin it by halving the brightness, slashing the colour saturation, and giving your audience headaches with poorly implemented 3D?

Don't get me wrong - I used to be in the industry of gadgetry and tech (I edited a website about it for a while), and I understand the appeal of 3D. Well-executed 3D is... A beautiful thing. It's 'realistic' (well, as realistic as staring at a 2D screen and see 3D things pop out at you). But the technology simply isn't there yet - or, if it is - it's not affordable enough that small screens in countries that gets violently abused by the government every time you try to import anything with a value of more than a packet of chewing gum.

So; what I'm trying to say is this: Avengers would be a straight-up 10 out of 10 if it managed to restrict itself to a mere traditionalist two dimensions. In three dimensions, it just falls a bit flat.

Eased Time-lapses: Adding some acceleration to Time-lapse videos

So I've been playing with time-lapses a fair bit recently, and I've learned a lot of magical and mysterious things... For example, have you ever considered how it's pretty awesome to be able to speed up time by taking a photo every 2 seconds, and then playing it at 30 fps? When doing it like that, a 1 hour timespan only takes up a minute of video - perfect for sunsets, sunrises, etc. Using this technique, you can create some truly astonishing stuff.

However... That got me thinking. Why have we decided to only have linear intervals? Why stick to a photo every 2 seconds? Why not change the gaps between each photo?

By starting to take photos very quickly at first, and then slowing it down, for example, it would look as if the video was accelerating. Start slowly and speed up, and it looks as if the video is speeding up.

Eased Time-lapse Videos

The next logical step was even more awesome: What if we could use the algorithms used by animators, and actually apply mathematics to the acceleration of each video? So, that's what we decided to do.

Known as Tweened Time-lapse, or Eased Time-lapse videos, we took a leaf out of the animation playbook. So far, I can only share two quick video experiments with you:

The acceleration and decelleration in this video isn't done in post-production: It's done in camera, by varying the intervals between each photograph taken in this time-lapse set. Awesome, eh?

If you want to stay posted on how my experiments progress, or if you want additional information, remember to sign up to the Friends of Triggertrap mailing list!

Free Photography School


Insert a deeply insightful caption with something about building blocks here.

You're just starting out in photography, but you can't quite seem to get the hang of things? Or perhaps you've been taking photos for a while, and you're itching to get some inspiration to develop? Or maybe you've always been a person who learns best when they get a little bit of a push in the right direction?

Well, I've got some good news for you; I'm starting a photography school.

Well, a virtual one, anyway.

The first ever course starts on May 1st, so if you sign up before then, you'll be part of the very first course - but don't worry; we're starting additional courses after that, too.

It's completely free, it'll be a lot of fun, and you'll learn a load about photography in the process. How awesome is that?

For more information and to enroll, check out the Photocritic Photography School website.

Enjoy!

Carving out an online identity

Have you ever thought about how important an online 'brand' is, even when you're a person, rather than a brand? It's something that sprung to mind recently, when I was looking through my Twitter followers. Some of them have great, very easy-to-recognise icons - and others, not so much.

Colin is a great example of someone who is doing it right; He has this icon on a lot of his digital life:

screen_shot_2012_04_12_at_191109.jpg

Between the blue sky, the red hair, and the welding goggles, it is instantly recognisable, no matter what size the photo is shown. That, and it's a bloody awesome photo to begin with, which is a huge bonus.

Myself, I've been using another photo for quite a while:

20101023_img_3789_600px.jpg

But, despite being quite recognisable as me, I never really liked it all that much. Having said that, I never really found a better photo to replace it with, so it's been my online identity for, oh, the best part of two years now. It doesn't help that it's part of a mugshot taken for our The Girl is Mime project, of course:

20101023_img_3789_600px_2.jpg

So, when I was futzing with some stuff at my desk this evening, I was idly staring into nothingness, as the sun was going down. A beautiful golden light struck the wall, and because of some trees outside, it created an awesome pattern, too. I reached for the first camera I could find - my iPhone 4 - stuck my head into the photo, and snapped.

One photo, that was all I had time for; the sun only illuminated my wall for a minute or so... But that was also all I wanted. The original shot may not have been anything to write home about:

photo_1.jpg

... But it definitely had some potential. I loaded it into Snapseed; my favourite iPhone photo editing tool, and played with it for a bit...

photo_2.jpg

... Much better. But there was something raw, something dirty in there; the digital noise from the iPhone's sensor, combined with the play of light and dark; That had to be amplified a little, so I added some grunge filters to make it stand out even further...

photo_3.jpg

... And that's what I decided would be my new online identity for the foreseeable future: It has everything I need from one: It reflects photography, it's creative, and it is (sort of) recogniseable as me. It works at all sizes from the tiniest icon (as seen on Twitter and Flickr), via medium sizes (Google Plus) and in larger sizes, too - like the banner across my user page here on Pixiq.

And, because I'm using the same photo everywhere (more or less...) it's instantly recognisable to anyone who's visited any of my other online presences. Spiffing.

Should you do a photography degree?


I was browsing Quora the other day, and found an awesome question: What's the benefit of studying photography? At first, I just answered 'Not much'... But then I erased those two words, and let things get a little bit out of hand. Enjoy:

Let's take the first things first: Having a degree in photography doesn't make you a photographer. Taking photos makes you a photographer.

With that out of the way, let me start by answering with an anecdote: I studied Journalism in university, as an undergrad. I have to say, it was the biggest waste of time of my life.

On the flipside, it did give me an 'excuse' to spend a lot of time on other projects. Since I was a 'student', nothing was expected of me - other than being a student- and the three years I spent in Uni were incredibly productive - just not in terms of university work.

After University, I was utterly demoralised, and decided I would never work in journalism again, so I set up as a photographer. I was able to snare a few early client, and ended up doing quite a lot of work as a photographer - some fashion work, some architectural stuff, etc. I also started blogging about photography.

You learn best when you're curious...

As a photographer, I am completely self-taught. As a journalist / writer; well, I do technically have a degree in Journalism, but I wouldn't say that it was useful in any way, shape or form. The academic parts of my degree were interesting from an academic standpoint, but they were completely useless to my career as a journalist. The practical aspects of my degree were so far removed from the real life of a journalist, that they were completely useless.

I think I can very safely say that everything I know about writing and photography, I've learned outside of formal learning - and I guess, given that I currently write about photography for a living, I must have done pretty well at both of them.

Mark Twain said: I never let school get in the way of my education. I think that's a pretty healthy path to take.

By all means; if you're interested in having 'MA' behind your name, do it. If you think you are interested in the academic side, and want to study photography from a historical, or a social point of view, knock yourself out.

If you want to be a photographer? I wouldn't bother with a degree.

You learn to be a photographer by taking photos. Be the best photographer you can be: Start by emulating others. Find your favourite photos on Flickr, and recreate them. Then, add your own slant. Make them better. Make the style yours. Combine, create, develop. Work on the artistic side of your photography (the ideas). Work on the technical side of your photography (turning your ideas into photographs). Work on both at the same time. Keep challenging and pushing yourself.

Once you know how to take good photos, you need connections to be able to do anything with the photos. Whether you want to have fine art exhibition, you want to start selling your pictures to magazines or agencies, etc etc etc, it's all about the connections you're able to make.

Making connections is hard, but it's a skill that's completely unrelated to the photography side of things; so whatever you do, don't do a degree just to make connections. Drop an e-mail to your favourite photography blogger. Go to a local Flickr meetup. Go to small photo gallery openings locally, and start talking to people. Show off your work to anyone who'll take a look, and get some feedback. Talk to people, submit your photos to magazines, get your local pub to hang a couple of your photos on the wall, create a website, get active on DeviantArt, Flickr, etc... Get involved.

Success as a photographer doesn't happen overnight. Hell, it doesn't happen over many nights. I know many extremely talented photographers who never got a break - but to be honest, I also know many mediocre photographers, who believe they should have had their break a long time ago. I don't have the heart to tell them that they've got a long way to go before their work is where it needs to be, in order to break through in an incredibly competitive market.

This is where being self-critical and being able to critique your own work comes in: It's not easy, but it'll be one of the most powerful tools you have available to you.

So... Doing a degree or not? I wouldn't.

But whatever you do... never give up.