


I've written this caption four times, but every time it comes out like a cheap sex joke.
You may have heard about a little project I've been working on the past few months; it's an universal camera trigger that lets your camera trigger based on events; a sound, light, lasers, time-lapse photography (even non-linear timelapse photography), and any number of other things you could dream up.
") As a part of this project, I've been spending way more time than what's healthy looking at camera remote control cables, and I've done a few cool hacks to them. Among other things, I've looked at how you can make your own camera connection leads. Making your own is the quickest way to create leads (well, after buying them from us directly, of course), it’s not always the best way to go about it.
As a part of this project, I've been spending way more time than what's healthy looking at camera remote control cables, and I've done a few cool hacks to them. Among other things, I've looked at how you can make your own camera connection leads. Making your own is the quickest way to create leads (well, after buying them from us directly, of course), it’s not always the best way to go about it.
Reducing waste
Why? Well, the problem is that many cameras use rather obscure plugs, and you can’t turn to Maplins or Radioshack to buy them. So, Unless you’re Triggertrap Megacorp and able to order them by the hundreds, for most of us, the only way to actually get your hands on the right connector lead for your camera, is to go online and buy a cheap knock-off remote control for your camera on eBay.
I always thought it was a bit of a waste to take a perfectly good remote control, lop off the remote control part, and only use the cable. So, that got me thinking: Is there a way to leave the remote control intact, but add a 3.5mm socket to the casing, so you can use it as a normal remote control, but so you can also connect the Triggertrap to it when you want to use it?
So basically, we're adding a remote control to your remote control? Well that makes sense. Let's do it.
Before we get started; Here’s how you recognise what camera remote you need, and there’s a list of cameras and their corresponding remotes as well.
Step 1

First of all, you need to source a 3.5mm jack socket. Technically, it's known as a 'Screened Chassis Socket'. Try Maplins or Radioshack, but they also show up on eBay from time to time.
Step 2

Get a remote control that fits your camera. This one is a MC-30 camera for Nikon cameras; but you can adapt most remote controls quite easily.
Step 3

When you look at the insides of these things, you realise why they're so cheap: But it works, which is the important part. Also, its simplicity means that it's easy to adapt to our needs. See that little space at the end of the metal parts? That's where we'll be installing our socket.
Step 4

There's three wires. From the top, they are Ground, Focus, and Shutter. Wanna know how I know that? A multimeter may have helped a little bit.
Step 5

To get the socket to fit in the confined space, I had to take off the little rear wing
Step 6

I didn't have a drill or my Dremel handy, so I used my soldering iron to burn a hole in the side of the remote. Highly not recommended, I probably shaved about 2 years off my life by breathing those fumes. Anything for a good blog post, eh?
Step 7

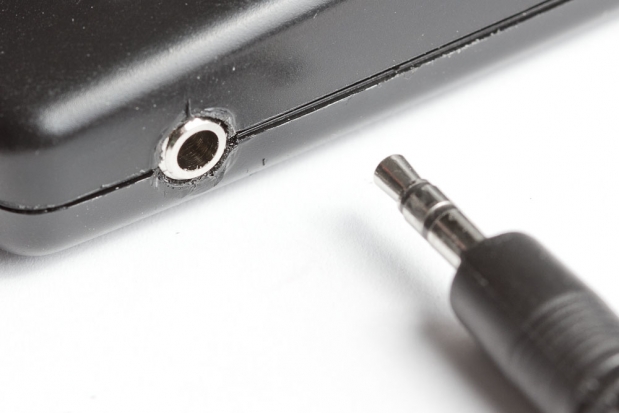
Everything soldered in place and the socket installed. Because the hole is small enough that the threading on the socket grips properly, I didn't need to put the flange back on the end (besides, the remote's walls were too thick to make it fit anyway). I'll have to be careful when inserting the mini jack so I don't use too much force, but so far it works fine.
Step 8

Voila! It's hardly the most beautiful DIY job in the world, but it does the trick.
Step 9

Step 10 – Enjoy the spoils of your endeavours!

Well will you look at that! It works!