Combine a good old-fashioned team-based treasure hunt with a photography competition, and you’ve got a recipe for success, right?
Well, that’s what I thought too, when I signed up to attend Shoot London, an event based out of the Tate gallery, organised by Shoot Experience, a company who organises these kind of events for public and corporate events.
Sadly, it turns out that I’ll probably give future Shoot Experience events a miss – to find out why, I spoke to another participant of the event…
 Anthony was one of the people participating in the Shoot London event on May 17th. He was also on my team, so writing this up as an interview might seem slightly presumptuous, but then, this is my blog, and I do as I damn well please, thankyouverymuch.
Anyway. The basic rules for Shoot London are simple: you’re given ten clues, about the area of London, you have six hours, you submit ten photos. It’s easy to see why it is sponsored: it promotes interest in the city, and organisers end up with lots of creative photos that they have rights to.
In the event, sixty teams entered, and the four of us (Catherine, Daniela, Anthony and yours truly) made up team Auslanders (which, for some reason, the organisers kept calling ‘ozlanders’, as if they could spot the one-fourth-austrialian-ness of the team from a mile away).
The rules
 The rules did not allow any photoshopping, which I’m cool with: it’s a completely different challenge (much, in fact, like the dpchallenge.com concept of days gone by – a photography site which I’m very fond of indeed) if you can only use in-camera effects. We ended up using in-camera settings which made the photos extra sharp; fuzzy; extra vivid; and black and white, depending on what the situation needed.
The rules were not opposed to us having any help at all – there were no restrictions on googling for answers, and we did find it beneficial to phone a friend (thanks for manning the intergoogles for us, Josh!). My iPhone also came in handy, both for quick Google-advice and for navigational purposes.
The ban on PCs was a bit arbitrary though, as we ended up deleting some very good photographs. As Anthony says, “it was emotional to go through the pics on the camera and delete four out of five good ones in order to keep one that was to be submitted”. In retrospect, I should have brought my EeePC along, if only to copy the good photos off the camera.
To be honest, we were also a little bit grumpy about the one-camera-to-take-the-photos rule – between us, we brought 6 cameras, I think (I brought my freshly acquired Canon 450D and my IXUS 960i).
One camera to rule them all
 “Some of the rules seem to be limitations of organisational process more than anything else.”, Anthony muses. “Don’t think that if you have four good photographers with their cameras, you have four times as many chances of taking a good shot: All the photos have to be not just on the same memory card, but taken on the same camera”.
Presumably, this rule exists so the images come out in the same order (you could solve the clues in any order, but had to fill in a little form so the organisers can match the right clue to the right photo), and clearly, if one camera records ‘DC_0284.JPG’ and another records ‘IMG1948.JPG’, it’s hard to tell which photo was taken first.
Having one camera is a downside if the other team members aren’t used to shooting with it – but it’s not a total waste: “Having four team members makes a lot of difference,” Anthony explains, “to help carry gear and props, solve clues, come up with ideas and spot good shots, and to pose for shots. The other three don’t actually need to all be good photographers, but a good photographic eye will help.”
Learning to see what others see
It’s quite interesting to see how the other teams solved the riddles, though, as Anthony explains: “You can sometimes see a shot and think ‘wow that’s original’ … and then see four variations on it following”.
At the end most of the photos taken were shown, projected on a big screen in an auditorium. “I was seriously impressed with some of the photos, and saw some wonderful shots”, Anthony recalls.
“There was one photo with three people with umbrellas jumping on the millennium bridge – it was an amazing photo.”
Haphazard judging
Nonetheless – and this is what sort of ruined the fun for me, sadly – it seems as if the judges were just a little bit too rushed in their, er, judging. “But in many cases the winning shot wasn’t – in my opinion – one of the good ones,” Anthony says. “Judges seemed to favour an obvious joke – equivalent of a zany holiday snap – over a technically interesting or well composed art shot”.
 Far more annoyingly, in one case, the judges ended up giving out a prize to a shot that plainly didn’t solve the clue correctly (they took a photo near the Globe Theatre, which was about a mile away and on the wrong side of the river from St Paul’s Cathedral, which was the correct answer) – while the photo itself also didn’t really strike us as being particularly amazing.
Of course, I fully expect comments along the lines of ‘sore loser’, but it wasn’t the not winning which grated on me: Most of the time, our photo wasn’t as good as some of the other photos which were shown for a given clue, but it was better than the photo which won.
Good fun, but not photographically challenging enough
As Anthony summarised the experience; “there is no shortage of takers for this fun day out, but if you’re already a DSLR-owning, multiple-lens using, flickr-account-holding arty-shot-taking passionate amateur camera geek, this contest may not be what you’re looking for”.
… Which is a damn shame, because the idea really is incredibly good.
Our photos
As mentioned before, we had quite a few photos we were rather proud of – in the interest of completeness, here are our 10 entries – including the ones that were not-so-good. The only editing done on them is a resize from 12 megapixels down to 650 pixels across so they’ll fit on this blog better

Borough market, photo taken by Anthony, Sigma 17-35mm, vivid colours.

Imax cinema, photo taken by Haje, Sigma 17-35mm, vivid colours, the zoom effect was done by zooming while having a long (0.5 second) shutter time. The lights? Well, that’s just the way the underpass by the IMAX looks!

South bank book market, photo taken by Haje, Lensbaby 3G, in-camera black-and-white. I love the retro look the Lensbaby lends to this photo, especially with the top-hat and the old-fashioned looking clothing Daniela is wearing. Oh, and the Moleskine, of course.

Gabriel’s wharf, photo taken by Haje, Sigma 70-200. Not really happy with the way this one turned out, I think this was easily our weakest photo.

Blackfriar’s pub, photo taken by Haje, Lensbaby 3G. A less-than-inspired photo, sadly, but it was raining, and we were a bit scrapped for ideas in this one.

Blackfriar’s pub, photo taken by Haje, Sigma 17-35mm. Yes, we wore hats for all of this, and this is our ‘team portrait’, which simultaneously answered the ‘out of sight, out of mind’ clue

The tube (‘see no evil, hear no evil, speak no evil’), photo taken by Haje, Sigma 17-35. We only had one stop to take this one, and the tube shakes a lot when it goes, so I had to shoot it at a high ISO (flash photography is strictly forbidden on the London Underground). I’m not really happy with the way this one turned out either, sadly.

St. Pauls, photo taken by 10-second self-timer, Sigma 17-35. On this one, we decided to try and do an ‘abby road’, to avoid the rather samey photos we expected everyone else was getting. This is one of the occasions where I was really sad to see the out-takes getting deleted, because we did have some wicked cool alternative shots on this one.

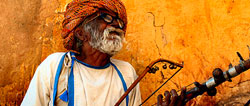
‘The sweet smell of success’, photo taken by Haje, Sigma 70-200 f/2.8 lens. On this one, we just decided that we couldn’t figure out a good way to answer the clue, so we decided to get ironic/sarcastic about it. Catherine went and spoke to the guy, and he was more than happy to be photographed – especially after we gave him about £5 in change. With a bit of increased contrast, I feel this photo would really be quite good.

The Millennium Bridge, photo taken by Haje, Sigma 17-35mm. It’s really difficult to photograph the Millennium bridge well, possibly because it is such an iconic landmark by now – everyone is so familiar with it, that once 60 different teams have had their way with it, there is little left. We did spot this grid, however, and decided to do something interesting. Anthony pointed out that “this photo looks like film frames, with the main frame being taken up by Daniela”, and I can’t but agree – I think it was conceptually one of the coolest photos we did.
This post was co-written by Anthony Steele

 I make little secret of my dislike for microstock, as re-iterated in my ‘
 The counter-argument put forward by Microstock agencies is you will make-up lost income on a higher quantity of sold images. Ultimately, it’s all down to how much you earn in the long run. Say you need an income of $2000 per month, for example – does it matter if you sell 2 photos at $1000 a piece, or 1000 photos at $2 a piece?
 Take a look at those choices. In effect, 1 is illegal, 2 is brutally expensive (and not always possible – a grocery shop might not actually always sell dew-fresh tomatoes, but might still wish to use pictures of them on their website), 4 is probably impossible because photography is quite difficult, and, again, you may not have what you actually want photographed.
 Bruce Livingstone created the first Microstock company iStockPhoto in 2000, and sold it to Getty six years later for a mind-melting $50 million USD. The cynical would say that he was the only one who got rich of micro stock, but they’d be wrong.
 The big bucks microstockers feel they are missing comes down to $40,000 to $24,000 per year. These amounts are well within the range of any professional Microstocker to make. The survey also found that photographers that reported the majority of their income came from RF stock sales earning on average were $63,200 from this licensing model. For the photographers that reported the majority of their income came from RM stock sales the average was $38,500 in stock sales.
 The professional Microstocker has much larger portfolios and higher download rates, though: “I define a professional Microstocker as someone with an average portfolio of 1000-10,000 images and an average download rate of about 30-250 images per day.”, Thomas says.
 At iStockPhoto a large file goes for $10 USD, a Gold level exclusive member would receive $3.50 USD or 35%. “Corbis licenses a 2 MB file for $140 USD of this I am guessing the photographer get about 20%, or $28 USD.”, Thomas estimates. “I have no way of knowing what the true commission is, but I know Getty pays a 20% commission. I can find no reason to believe Corbis would pay much higher.”
 So, what makes a good microstock photo?
  When asked how good a photographer he is, Thomas jokes that he’s a “fucking rock star”, but once the laughter dies down, he admits he’s no better than many other photographers out there. “I am a grinder like 90% of the photographers working. I am passionate about photography and love my job. In my group of photo friends, I am the person who can light anything. In the end, I will let the images speak for themselves.”
 If someone tells you “LOL learn how 2 autofocus, you dweeb”, you need to do 2 things: Live in the happy knowledge that whilst your camera might have had an off day, at least you know how to string a grammatically correct sentence together.
 Ultimately, you are the photographer, and what you decide is how the final result gets done. Nobody can tell you what to do, and if you like your photo, then you’ve won one of the huge battles.
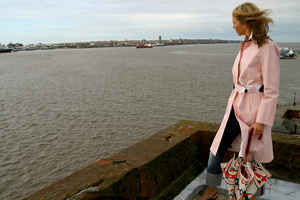 It’s the curse of all writers and poets: They spend months – years, even – crafting their masterpiece, and then nobody ‘gets’ it. They all ‘get it’ wrong. Tell you what though, that’s where part of the beauty comes from: If you are taking a photo which you meant to symbolise the innocence of youth, and your first 10 commenters feel it’s a strong commentary on, say, child abuse, then they are per definition right.
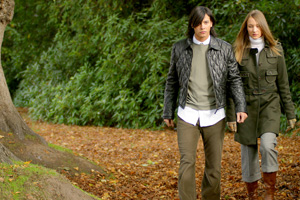 Remember that, just like you are not there to interpret your work, you’re not there to defend it either.
 Technical aspects of your photographs might be objective: A photo can be accidentally over-exposed, blurry, or have some rubbish in the background which makes your photograph less-than-perfect. Once you start killing the technical foibles of your photographic work one by one (don’t go too perfectionist on it though, it’s not useful to end up deleting all of your photos because of every little detail), the actual creative work starts shining through, and this is where the worst potential for getting hurt comes from.
 Luckily, there are quite a few things you can do as a photographer to make your site really zing in the search engines – and for the sake of making a nice round figure (and, of course, so the Digg and Reddit crowds will love it like a kitten loves tuna fish) – here’s a lovely top-10 list to get you started!
 For the sake of photography, you can basically optimise your site for two types of search: Text search (what most people think of when they think ‘search’) and image search (take a guess…).
 Context is important. The search engines want to know what your site is about. You might want to use the word “photo” in all of your filenames, to keep the context of a photography website consistent.
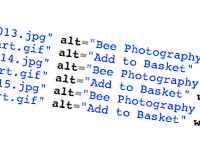 When you add an image to your website, you’re using an <img src="[URL]"> tag. You can – and should – add attributes to this tag, including an alt attribute.
 In addition to using keywords in your ALT tags, make sure that the actual file-name contains the same keywords.
 Use keywords in the page title. The page title is a header tag that causes text to appear in the top bar of the window when the page is open in your browser.
 Anchor text is the text that appears on a page when there is a link; it’s the text that is underlined and/or in a special color to denote a link. These anchor text links should be descriptive, and – if possible – contain keywords relevant to the page you are linking to.
 If you want to have a go at using unsharp masking in the darkroom (heh – if you want to put yourself through stuff like that, let me tell you; I like you), here is a concise guide how it can be done. I have had a lot of surprises when using this technique – mostly positive surprises, but every now and then, things go very wrong. Even then, it looks interesting, if nothing else.

 I like to think that I’m pretty decent at recognising cameras (I smile and nod whenever I meet anyone who carries a 40D, just like me, and I growl (only slightly) when someone’s looking smug, carrying a


 My back-story in two sentences: I started off in audio, and then moved to video/film. I’ve done 3 short films and been an amateur photographer all along. I’d been photographing the urban jungle for awhile and thought I was finally getting some shots that were good enough to be put in front of other people. Pompous? Maybe. Completely clueless? Yeah, that’s more accurate.
 Getting ready for exhibition
 Next is framing. Yes, I had to provide my own frames and that seems to be commonplace. I had quite a few 8″x10″, and some 13″x19″ photographs I’d printed up. Framing can be costly, but I chose to do it on the cheap. I chose Hobby Lobby for the 8×10. I bought the $2 plastic frames with glass front. What I did to make the look “artsy” was turn the backing around. It has more of a corrugated board look that worked well for my city shots.
 Lessons learned
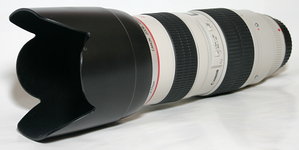

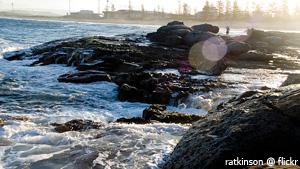 A second way to test for lens flare is what is known as the ‘window test’. Aim the camera someplace indoors, but have a bright window just out of the view of the lens. If your image, upon developing ended up with the tell tale signs of lens flare, you know your camera can’t handle that sort of situation so well.
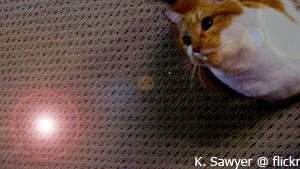 Okay, so I thought we were trying to avoid lens flare. Why would Photoshop come up with something people try to avoid? For the simple fact that lens flare shouldn’t always be avoided. In fact, it can a little something extra to your images when used in the right circumstances.


 £10 also gets you DVDs so you could could consider getting a film which is vaguely photography themed. City of God (Cidade de Deus) is a fantastic film which is about a Brazilian kid who turns into a photographer for a newspaper. Gripping, moving, not too expensive, and photography related – what more could you want? Of course, you get extra bonys point and street cred for buying a foreign arthaus film! (
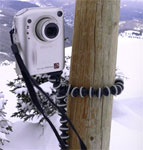 In this price group, the definite winner is the Gorilla Pod. Sure, it looks daft as a paintbrush, but it always gets looks. I got one for review from Joby recently, and I had to call them up and ask if I could please keep it – it really is that good. Basically, it’s a fully-fledged tripod that weighs next to nothing. Wrap it around just about anything (so far, I’ve had it around a car seat, around a desk, around a street lamp, and around a pub bar stool), and your camera is rock-solid. It beats the other micro-tripods hands down. Read more about the
 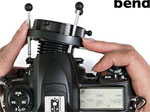 Perfect for getting creative, a
 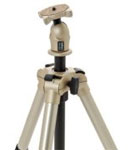 Up to £100 / $200, we are in the territory of some mighty fine tripods. It’s the first thing you should have as a photographer –
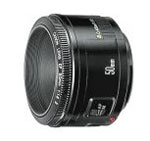 Around this price, you can also get prime lenses. If your photographer dearest one doesn’t have one, surprise them with a 50mm prime. No photographer should be without a good prime lens: They are nothing short of amazing, and for what they are, they’re complete bargains as well – I
 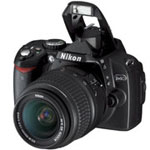 Oh my, now we are suddenly in proper digicam territory. You should be able to get a