dslr

TIPA 2013 - who won what

logo-tipa-2013 Once a year the Technical Press Imaging Association, or TIPA, meets in a desirable location—this year it was Hong Kong, last year in was Cape Town—to settle on which manufacturers have produced the best easy-to-use compact cameras, most innovative tripods, and the swishest top-end dSLRs over the past 12 months.

There are in fact 40 different categories that are decided on by representatives from TIPA's 27 member magazines, as well as the Camera Journal Press Club of Japan.

Canon took most of the dSLR spoils, winning best entry-level with the 100D, best expert with the 6D, and best video dSLR with the 1D C; Nikon, however, won the advanced category with its D7100.

When it came to compact system cameras, or mirror-less cameras, or EVIL cameras, Fujifilm, Olympus, Panasonic, and Samsung all had a look-in. Fujifilm's X-E1 won the best expert CSC award; Olympus took the entry level CSC honours with the PEN E-PL5; the professional CSC prize went to Panasonic for its GH3; and finally the advanced prize was won by the Samsung Smart Camera NX300. If you can wade your through the difference between 'professional', 'advanced' and 'expert', then you're a better woman than I am.

The compact camera categories were split between Nikon and Panasonic. Nikon walked off with awards for its Coolpix S01 in the 'easy' class and its P520 superzoom. The rugged camera was Panasonic's prize, though, for the FT5 (or TS5, depending on where you are).

Canon, Fujinon, Nikon, Sigma, and Sony all won prizes for their lenses, ranging from 'best CSC prime' (the Fujinon XF 14mm ƒ/2.8 R) to 'best professional lens' (Canon's EF 24-70mm ƒ/2.8L II USM), via best entry-level dSLR lens (the Sigma 17-70mm ƒ/2.8-4 DC MACRO OS HSM).

As for best premium camera, that was the Sony RX1; best professional camera was the Leica M; and best imaging innovation was awarded to Samsung for its 45mm ƒ/1.8 (2D/3D) lens.

If you want to check out the rest of the winners, which includes best media storage, imaging monitor, and photo TV, you can see the whole list on TIPA's website.

I can't help but feel that with a carousel of categories where the differences in criteria aren't necessarily discernible, it's more a case of 'These were all really good products and we need to find some way of showing that.' I can't say that the awards will encourage me to buy a Nikon superzoom, but it must be gratifying for the manufacturers to receive a pat on the back.

Delving into the 'Skill vs Kit' myth


Taken with a point-and-shoot

A few days ago I found myself in the midst of an interesting Twitter conversation with a young photographer who has been debating upgrading to a dSLR from her point-and-shoot. However, she has read so many articles telling her not to bother that she wasn't sure if it were the right thing to do. Oh? People are actively saying don't buy an interchangeable lens camera? Really? This is what she told me:

I like photography and find my point-and-shoot limiting but everyone says to me better pictures is you and never the camera.

Oops! Something has definitely got lost in translation there, because I am undoubtedly one of the body of 'everyone' who extols photographic skill over camera prowess every time, but that's not at the expense of achievement. What I don't mean is that a young photographer should feel frustrated because she can't do what she wants to do with her camera and is scared of buying something new. You see, the key phrase in my correspondent's correspondence was 'find my point-and-shoot limiting'.

When we talk about photographic skill trumping your kit's capabilities, what we mean, on a most basic level, is that having the most expensive, all-singing, all-dancing   camera with bells, whistles, and a hotline to the President of the United States won't automatically make you a better photographer. You have to know how to use it. A couple of winters ago, my cousin wanted to upgrade from her Panasonic Lumix point-and-shoot to a Canon 5D Mk II. She asked me what I thought. I told her to save her money and buy something a bit lower down the pecking order; invest in some good lenses and some books instead. Bless my cousin, money burns a hole in her pocket and she couldn't quite understand this. Her response: 'But it'll take better pictures!' Not quite, of course, as she will be the driving force behind her camera, and the one responsible for taking better pictures.

Ultimately, a bad photographer with an expensive camera will still produce bad photographs.

A good photographer with a camera that doesn't allow them the control they desperately want will still take good photos, but they might feel a bit frustrated in the process. Give these frustrated photographers cameras where they can call the shots, and a whole new world opens up to them. It isn't so much about having a 'better' camera, it's about having a camera that allows you to do more.

In my early days with an SLR, I came into a bundle of money and decided that it was time to buy a new lens to augment the few I already had. Not really knowing what to buy, I asked someone with a lot more experience than me what he thought would be a good choice. His advice: 'Leave the money in the bank. When you can't do what you want to do with what you already have, then you'll know what to spend it on.' He was absolutely right. It's not about having kit for the sake of having kit; it's about having kit and knowing what to do with it.

So to any photographer who's frustrated by a point-and-shoot: do seriously consider investing in something that gives you more control and more flexibility. What you don't need to do is spend all of your spare pennies, and probably quite a few that aren't spare, on a camera that's in excess of your needs. Buy the one that fits the bill and spend the rest on a good prime lens. When you can't get in close enough to photograph wildlife, or realise that you love taking photos of teeny-tiny things, or that your kits lens is giving you landscapes that are a bit too mushy, then it's time to think about a long lens, or a macro lens, or a wide-angle lens. (And remember that it is always worth investing in good glass. Cameras might come and go, but lenses will last you for years.) Eventually you might find that you need a camera with better low-light capability or more extensive continuous shooting functions–it might even fall apart or meet a sticky end–it's about knowing what meets your needs and then working to push yourself past that point.

Good photography is always about a good photographer, one who knows what to do with their kit.

Review: Pentax X-5


I spent a few weeks with a Pentax X-5. I used it whilst my brother's girlfriend was decorating the Christmas tree, I took it down to my father's allotment, and I conducted the requisite 'general fiddling' too.

Basic spec

The X-5 has 26× optical zoom capability (22.3 to 580mm, extendable to 4174mm with Digital Intelligent Zoom in 35mm equivalent) with a dual shake-reduction system and 1cm minimum focusing distance in macro mode. The 16 megapixel back-illuminated CMOS sensor has a maximum sensitvity of ISO 6,400. It can shoot upto 10 frames per second, capture HD video, and comes with a range of filters and in-camera tools.

It is powered by four AA batteries and can be picked up for around £180 or $245.

Build and handling

The X-5 feels very much like a scaled-down dSLR in the hands, with a chunky grip and protruding lens. It was comfortable to hold and the button layout was sensible. Would I have preferred to be able to switch on the camera without having to remove the lenscap? Yes. Is it going to change my life any? No.

The X-5 offers you M, P, full auto, and a range of other preset shooting modes. No, there's no Aperture Priority or Shutter Priority modes. After spending far too long messing about with the controls in an attempt to secure a decent exposure in manual mode and getting highly frustrated by the auto-focus with a mind of its own in fully automatic mode, I shot predominantly in Program mode. The ISO settings are squirreled away in a menu, but it was far less problematic to change the sensitivity than it was to deal with auto-of-focus pictures or to refer to the camera's idiosyncratic exposure meter and functionality. (I disliked the meter's display on the LCD and found it unintuitve.)

I wasn't at all comfortable using the electronic viewfinder. It looked far too much as if I should have been playing a video game than taking photos. As a consequence, I used the LCD screen exclusively and enjoyed its tilting ability, especially when I put the camera on a low-set tripod.

Powered by AA batteries, you are supposed to be able to get 330 shots from a fresh set of four. I'm sorry to say that I didn't come anywhere close to that number of images. Maybe 150?

Performance

Once I'd freed myself of the tyranny of the self-selecting auto-focus and switched to Program mode, I quite liked using the X-5. It has a great zoom range, the image quality is absolutely fine for web reproduction, and it's generally simple to achieve what you want (within its capabilities, of course).

The ISO tests showed that it was fine up to ISO 400, but after then, quality began to degrade significantly. Colour reproduction in daylight was good, but I found that the auto white balance tended towards too yellow in incandescent lighting. Set the white balance to incandescent, however, and the colour reproduction was far more accurate. I was pleasantly surprised by the impact of the pop-up flash indoors. It wasn't too harsh.I had pretty good results with the macro mode, too.

I don't have any particular love for in-camera filters, but the X-5's range of 12 were easy to use and could be applied non-destructively to the original image. In addition to those filters, you can play around stretching your images, giving people small faces, and creating collages. You can resize and crop in-camera, as well as edit video, too. There's also the ability to shoot direct to the camera's memory and then transfer the images to an SD card.

The Verdict

You get a lot of camera for your money with the X-5. But, it doesn't offer you anything outstanding and I found some of its features so frustrating to use that, from my perspective, they might not even have been included. Furthermore, I'm just not convinced by the bridge camera concept; they seem to sit in a photographic no-man's-land.

Would I buy it? No. Between my dSLR and a highly specced compact, my needs are met and the X-5 comes in no way close to fulfilling them.

Would I recommend it? If you really want a bridge camera, it offers such great value for money that I don't think you can ignore it.


More images on Flickr.

So, you have a new SLR camera… Now what?

If you’ve been extra super special good over the past year, you might have woken up to Christmas Day with a brand spanking new SLR camera under the Christmas tree.

I don’t want to ruin your sparkly-new-camera buzz, but may I please just take this opportunity to remind you that your shiny new dSLR is still just a tool: Sure, it’s a bloody good tool with lots of new buttons and levers and settings… It doesn’t matter whether you’ve just graduated from a compact camera or perhaps from an older, film-based SLR camera: It’s still all down to you: Your camera might be more powerful than the computers they used to put a man on the moon, but it will still only do what you tell it to. Think of it this way: switching from a 28 year old Datsun to a brand new Maserati won’t make you a better driver, and trading in your battered old Olympus Trip with a shiny new megapixel monster isn’t going to make you a better photographer.

What you have gained, however, is a tremendous amount of new potential. Your new tool will have a ton of new features. Buried somewhere deep behind all those new wheels and buttons is the doorway to life as a better photographer.

Here are the 10 next things you should do to become a better snapper:

screen_shot_2012_01_02_at_124552.jpg1) Read your camera’s manual. I know, you’d be hard-pushed for thinking of anything more boring to do than read a camera manual, but I’ve made a habit of reading every manual of every camera I’ve ever had: It’s the only way to fully understand all the features of your camera and where to find them. Except the A-DEP feature (Automatic Depth of Field), of course. Nobody understands the point of that.

2) Start paying attention to what your camera is doing. Even if you decide to start gently and turn your camera to ‘P’ for Program Mode, it’s a good idea to start keeping an eye on the aperture / shutter combinations your camera is choosing for you. It may take you a while, but slowly and with some practice, you’ll be able to start guessing what your camera’s exposure choices are

3) Try Manual Mode. As soon as you dare, try turning your camera to Manual Exposure mode for a week. You don’t have to keep it there - most photographers use a range of different photography modes - but getting used to your camera controls goes a lot quicker when you have to change all the settings yourself. One top tip: Even in manual mode, you’re not on your own; your camera will still tell you whether it thinks you are about to over- or under-expose your photographs. Feel free to ignore it and expose however you like; it won’t mind. You’re the boss

4) Learn how to use the histogram on your camera. The LCD display on the back of your camera is great for checking colours and composition, but don’t trust it to show you what your exposures are like: Use your histogram for the scientific approach to getting your exposures right!

5) Don’t worry about wasting film. Yeah; I said it: New SLR users are often shy about taking photos, but there’s absolutely no reason to be. Look at it this way: if 1% of your photos come out as masterpieces, it’s better to take 5,000 photos than 50; if you take five thousand shots, you’ll have 50 great shots. If you only take 50, you may not have any. Best of all, the more photos you take, the more comfortable you get with your camera, and the better that percentage gets. Take tons of pictures, you can always delete the rubbish ones later.

6) Don’t be tempted to buy more kit. A SLR with a kit lens is an incredibly powerful combination. Sure, there are tripods, flashes, more lenses, and other gadgets you can buy, but until you are comfortable with… We had you going for a while there, didn’t we?  Ignore us: Buy all the awesome accessories you can lay your hands on, photography is a hell of a lot more fun with gadgets, and it’s a good way to learn as well!

7) Shoot in raw. No, seriously. Shoot in RAW. Stop reading this article right now, switch your camera to RAW mode, and don’t look back.

8) Get some good software. Personally, I’m addicted to Adobe Lightroom, but Aperture is pretty decent, too. You’ll want a solid piece of software to help you deal with those raw files, to make adjustments to your shots, and to help keep track of all your photos.

9) Sign up for Flickr. Flickr is a great way to show off your photos, and it’s great fun to track your own progress as you get better. The first 200 photos are free, and after that, you can get a Pro account for less than a week’s supply of lattes. Then, spam all your photography mates with your Flickr profile, and bribe, beg, or threaten them into giving you feed-back on your photos. Some sobering comments and constructive criticism is the fastest short-cut to better photographs.

10) Imitate your favourites. The quickest way to become a great photographer is to plagiarise the hell out of photographers you admire. Pick 10 photos you really admire, and go about recreating them: Learn the techniques you need, jump through all the hoops they did, and try to get your photo to be as close to identical as possible. Done? Great, you’ve committed copyright infringement. Ssh, don’t tell anyone. On the bright side, you’ve learned a load in the process, haven’t you? So now take the photo you just took, and add your own twist to it; replace, improve, or change something. Let it become the first step of an evolution of your photographic style - pick the bits you love from photographers you admire, and mash them together to create your own style.

Enjoy your new piece of equipment, but never forget that the bottleneck in this creative process is you: your shiny new toy is going to help you, but without you, it’s nothing. Show it who’s boss, and get out there and snap some fantastic shots.

Good luck!

This article was originally posted on the Usual Shutter Specs, an awesome photography gadgets site based in the UK.


Dear Daniela, we hate dSLRs because they're professional. Love, TfL


Here it is, fresh from my inbox, the statement from Transport for London (TfL) clarifying just why dSLRs were banned from the tour of the disused Aldwych underground station over the weekend. Please make sure that you're sitting down and do try to refrain from punching in your screen.

Terms and conditions for the recent sale of tickets to visit Aldwych Underground station clearly stated that digital SLR cameras were not permitted, as these are classed as professional equipment.

There was not a ban on taking photos during tours. However, there were restrictions on professional cameras and tripods because we were concerned that people using them could delay the tours for others, as it was a very tight schedule with more than 2,500 visitors going up and down a spiral staircase of about 160 steps to get to and from the platforms.

We wanted to make the tours as enjoyable and safe as we could for everyone. With the huge public interest in seeing the disused Tube station it was better to have the event with this restriction rather than no visit at all.

We apologise to visitors who wanted to use this kind of camera during tours to the stations.

TfL has, in its infinite wisdom - for the wisdom of a transportation authority must be infinite - classified a dSLR as professional equipment and in doing so, redefined the professional standing of millions of photographers across the globe. What an astonishing turn of events! I'm sure that all the dSLR-owners amongst us must be delighted to know that whatever your previous experience or qualifications you are now, according to TfL, professional photographers. Congratulations!

I find it even more astonishing that this through-the-lens, at-the-speed-of-light optical device also makes us slower to move through an exhibit. This is especially strange, given that the last time I checked, I was generally faster using my dSLR than my compact. Something to do with not having an electronic viewfinder, a speedier autofocus, and a more powerful processor. Maybe I need to invest in a new, professional-grade timekeeping piece to check that? Maybe that would qualify me to work at the Olympics next year? I could time Usain Bolt!

I'm not sure which type of camera TfL was mistaking a dSLR for, but I'm pretty sure that the necessity to use a tripod went out with the wetplate camera. Maybe they have one lurking down there in Aldwych station still?

I'm almost, but not quite, speechless. The general degree of ignorance and naivety on the part of people making these decisions is marvellous. A small dose of logic and some reasoned thinking, perhaps alongside a phonecall or email to some people who actually know, would have saved them from a great deal of embarrassment and the entire photographic community pointing at them and laughing.

Yes, that's right, TfL, we're all having a very sound belly laugh at your expense.


All photos courtesy of Tim Allen, and taken with his LX3.

SOS, Drowning in Lens Choices, Send Help

lens

“Only a complete idiot would pass up the opportunity to grab a 14-50 f/2.8 Zoom EFS EX IS USM ASPH L DFS OMG LOL Mark II at that price”. You may have heard this sentence (with fewer made up acronyms at the end) from some grumpy camera store owner who decided to bite your head off because you dared to consider buying a lens beyond the kit lens your new DSLR came with. (disclaimer – only 94% of them are like this, some are nice). Intimidated by the camera shop troll, you decided to go online, where the user ratings were either “5 stars! Buy this! Remortgate your house it’s worth the £3,000!” or “0 stars! Avoid! This lens gives you smallpox somehow!” and nothing in between. Well now you can relax, because here at Small Aperture, we’re going to help you on your way to a relaxing, informed first lens purchase.

Lens Terminology Explained

First off, let’s look at an example lens name and go over what each part of the description means, so you know what features you’re looking at. I’m going to use the Canon EF-S 55-250mm F/4.0 – 5.6. I’ve picked this lens purely for the name, as it has the most commonly occurring type of description and it will allow me to run through what it all means.

Canon EF-S is the brand name and the fit of the lens – it tells us what kind of cameras it will fit on. I’m a Canon user, so if you have a Canon, take a look at your camera now. If it has a red dot and a white square, your camera can use lenses that are described as either “Canon EF” or “Canon EF-S”. If you only have a red dot, you can only fit EF lenses to the camera. It’s worth pointing out at this stage that you don’t have to buy only Canon lenses as a result of this – any lens that is described as “Canon-fit” will be OK for your camera. If you’re unsure, your best bet is to take your camera with you to the shop, endure the eye rolling and see whether the lens you’re after will fit your camera. It’ll give you a chance to test it, too.

On location, my "walkaround lens" allows me to zoom out and capture environmental detail which my prime would have trouble with.

55-250mm indicates the focal length range. Simply put, the low number is how wide your lens will go (literally how much width and how “zoomed out” your point of view can get) and the high number is how far you can zoom in. For reference, a 17mm focal length will give you a decent amount of width for landscape images and 250 will give you a decent amount of zoom for basic wildlife photography (although those looking to travel abroad on safari and the like would probably be interested in a higher zoom, something like 500mm).

F/4.0-5.6 describes the maximum aperture at both ends of the focal length range (more on aperture in our first PCoF here, read this first if you’re not sure about aperture). In this example, F/4 is the lowest aperture you can set at the “wide” 55mm end of the focal length range, and F/5.6 is the lowest aperture you can set at the “zoom” 250mm end of the focal length. You will notice that some of the more expensive zoom lenses only have one number here, for example the Sigma 70-200mm F/2.8. This means that the lens is able to be set to its lowest aperture of F/2.8 at any focal length, be it 70mm or 200mm.

These are the most commonly occurring suffixes to a lens name that you’ll need to know and understand. There are many, many other suffixes – some that describe features, some that describe the particular product range that brand of lens is in. For example, “L” on a Canon lens is referring to the top of the range series of lenses that Canon make (indicated by a red ring around the base of the lens) whereas “USM” refers to “UltraSonic Motor” and refers to a small motor built into the body designed to aid speed of autofocus. There are so many of these and they tend to be company-specific. In addition, they tend to be half product description, half marketing tool, so don’t get too dazzled or excited by these things.

So Which One Do I Buy?

To know what lens to buy, it’s important to ask yourself what kind of photography you undertake the most.

I took this using a 50mm prime for the extra detail it provides me.

Portraiture

As a portrait photographer who takes a lot of head / head and shoulders images, my main lens is a Prime Lens. A prime lens is one that has a fixed focal length: that is, you can’t zoom in nor can you zoom out. A fixed focal length means that there are significantly fewer moving parts inside the lens. This allows the glass inside the lens to be much more precise, allowing for sharper, higher quality images. This is exactly what you need for striking portraits. The other advantage is that this sometimes brings the price down. I don’t want to be seen as endorsing a particular company over another, but I have used the Canon EF 50mm f/1.8 II for a few years and it is dirt cheap for the quality it provides me. You can pick one up for about £80. For balance, Nikon have an equivalent lens of the same price, the Nikkor 50mm F/1.8 is a good buy and also seems to get very good reviews. Another good reason for using a prime is it teaches you to think about composition more, as you can’t just zoom out or in more to get the desired crop.

Landscape / Architectural

If you are a landscape and architectural sort of person, you will want a lens with a good wide-angle focal length. I only dabble in landscape for my own enjoyment, so I find my walkaround lens (see below) serves me just fine with a wide focal length of 17mm. Those that are serious about landscape will want to look at how wide the focal length goes (14mm is good) and the actual quality of the lens glass itself. Detail and sharpness are of the most importance for the landscape photographer. Maximum aperture is less of a problem, because you will be looking at setting your aperture to ranges of f8 -f11 and beyond anyway, to get all the detail of the landscape in. As I say, my Tamron walkaround creates landscapes that are sharp and vivid enough for me, but those of you looking for more might want to take a look at the Canon EF 17-40 F/4L (where it starts getting pricey), the Tokina 12-24mm f/4 which fits Nikon cameras (very wide angle) or you might even want to go super wide with the Sigma 10-20mm f/4-5.6 EX DC.

All this lens talk is making me want to buy things.

Close Up, Abstract and Insects

If you like looking at ants up close (weirdo) or if your photography is all about extreme close up, abstract work, you need a Macro Lens. These are lenses with very high levels of magnification, and are used for insect and other high-magnification photography. I can’t say I’ve done much of this but it sure looks like a lot of fun! I don’t have time for fun. I would advise reading up extensively on the subject if you’re serious about macro photography.

Don't forget that you can play around with the rules - here I've used a landscape lens to create a portrait. What a rebel!

Stop Trying to Pigeonhole Me you Square! My Photography Transcends Categories, I Photograph All!

If you do a bit of everything (and even if you don’t) you’ll want to find a good “walkaround lens”. This is a term used to describe a general purpose lens that will always come in handy for most situations – something that will do a variety of jobs to a decent level of quality. When on assignment for a magazine commission, I take my both my walkaround lens and my prime for portraiture. Again, not wanting to advertise, but you will find that many people recommend the Tamron 17-50mm f/2.8. Now if you’ve been paying attention, you will see that this means the lens has a maximum aperture of f/2.8 at both 17mm and 50mm focal lengths. You can pick one of these up for around £320-£360 these days and, for the price range, the image quality is excellent. Put it this way: I have been using it for published magazine work for over a year now, and my clients have been more than happy with what we’ve ended up with. It’s good for me because I can use it for portraits but also I can zoom out and grab some surrounding environmental detail aswell.

So who’s feeling spendy? Is spendy a word? Does anyone care? It’s Friday, which means tomorrow is Saturday, which means it’s time to buy your very first lens. Hopefully, by applying what you’ve learned from this, you’ll be able to stride into the camera shop and bellow “SHOPKEEP, PROCURE ME A CANON-FIT PRIME WITH A 50MM FOCAL LENGTH OF THE FINEST QUALITY, SPORTING AN ULTRASONIC MOTOR! MAKE HASTE!“. Go on, do it. I double dare you.

TIPA awards 2011

tipa_logo_en

The Technical Image Press Association has just announced their favourite products of 2011 from their General Assembly, which convened in Istanbul (lucky sods). Representatives from 29 member magazines didn’t just discuss which cameras and imaging products they liked the best, but that does seem to be the most interesting bit. There were over 40 categories, from best entry level dSLR to best photo kiosk (yes, really it was the Mitsubishi Gift Kiosk, by the way), so here are the edited highlights.

dSLRs

They’ve shared the love around here:

  • Best entry level: Canon Eos 600D (yes, I want it even more now)
  • Best advanced: Nikon D7000
  • Best expert: Olympus E5 (it must be the being rugged thing)
  • Best professional: Pentax 645D

Compact cameras

Nikon's P300

Again, there’s been another even split across different manufacturers for these prizes.

  • Best general: Nikon P300 (did they read our reviews round-up yesterday?)
  • Best expert: Olympus XZ-1
  • Best superzoom: Canon PowerShot SX230 HS
  • Best premium camera: Fujufilm Finepix X100

Mirror-less cameras

Okay, so they called them compact system cameras. And there aren’t so many from which to choose. But anyway.

  • Best entry level: Samsung NX100
  • Best expert: Panasonic Lumix DMC-GH2

Sigma 70-200 lens

Lenses

  • Best entry level: Tamron SP 70-300mm F/4-5.6 Di VC USD
  • Best expert: Sigma APO 70-200mm F2.8 EX DG OS HSM
  • Best professional: Canon EF 70-200mm f/2.8L IS II USM

And some of the rest

  • Best film: Kodak Professional Portra 160
  • Best tripod: Vanguard Auctus Plus 323CT
  • Best imaging innovation: Sony SLT, Translucent Mirror technology

You can check out the full list of winners, including best inkjet paper and photobag, on the TIPA website.

The iPhone camera translator

Picture 2

You’ve been hearing this for years, but by now, I think it’s definitely safe to say that the iPhone has truly changed the way we do things. From geo-tagging photos taken with your DSLR to increasing environmental awareness, the iPhone seems to do it all. And now, you can go ahead and throw away that Spanish to English dictionary. This new iPhone app takes translation to a whole new level.

Yes, yes, there are a billion translation apps available for your iPhone. But there’s only one that uses the iPhone’s camera. That’s right. The newly released Word Lens app actually performs a visual translation in real-time using augmented reality through your iPhone’s camera. Whaaaat?!

Just aim your iPhone’s camera to any Spanish text, so long as it’s not sloppy handwriting, and it will instantly translate it into English and display the new text on your screen. And it even translates back from English to Spanish. However, these are the only languages available at this time.

The only kicker is the price. While the app itself is free, it will cost you a hefty $4.99 for each direction of a translation you want. For example, Spanish to English is five bucks, and it will cost you another fiver to get English to Spanish.

I went ahead and purchased the app earlier today, and while it seems to be a little inaccurate at times, it works pretty well for the most part.

Now, all they need to do is add Korean-English translation so I know what I’m ordering next time I go to my local Korean BBQ joint.

Playing with your pictures

sketchafter

So taking photos should be fun, right? Right! And sometimes we want to have a bit of fun with our photos themselves, right? Right! So, ehm, what can we do with our photos to play around with them a bit more? Well, we’ve been pooling braincells over here at the Small Aperture mansion, and just before they expired from over-use, we came up with the following.

First of all, you could go out and buy yourself a toy camera. But maybe you don’t really want to. Perhaps you’d rather fiddle with photos you’ve already taken with your top-of-the-range dSLR. In which case, Photocritic has the perfect tutorial for creating your own post-processing pre-sets in Lightroom.

Or perhaps you’d prefer to go the vintage route? Take a look at Photojojo’s four ways to vintage-ify your pics. This one covers all sorts, from post-processing ideas to tips such as vaseline on the lens or shooting through an old stocking.

Over at befunky.com they’ve what feel like hundreds of different effects that you can apply to your pictures. My personal favourite would be the speech bubbles, though.

And Gareth, a member of the Small Aperture Scriptorium, has this easy method to cartoon-ify your pictures. Begin by selecting an image. How about this one?

And then:

  • Open said selected image in Photoshop
  • Create a duplicate layer
  • Turn that layer to black and white using desaturate (Image>Adjustments>Desaturate)
  • Duplicate the black and white layer and invert it (Image>Adjustments>Invert)
  • In the layers panel, set the blend mode to Colour Dodge
  • You should now have three layers. Select the top layer, the inverted one, and go to Filter>Other>Minimum to add the sketch effect. The higher the value of the pixel radius, the more pronounced the sketch effect.
  • If you want to re-add colour, duplicate the bottom layer (the non-black-and-white one) and add it to the top of the stack. Set the blend mode to Colour.

Tad-dah!

I’m off to do silly things with photos now.

Comparing comparison websites

There isn't a one-size-fits-all camera comparison website out there, sadly (hey! There's a business idea!), but by combining some of them, you can drastically reduce your research time, at least!

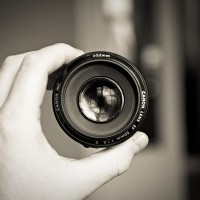
If you have been taking pictures for a long time, you’re probably fairly set in your camera-buying ways. You probably have brands you prefer over others; you know what you want out of your equipment, and you have an idea of the latest developments in camera technology.

When you need to buy a new camera, you’re normally most of the way there before you have even set foot in a shop or headed to your favourite camera-purchasing website. However, it is all a bit different if you are a first-time camera buyer, an occasional picture-taker, or buying a camera as a gift. The market is extensive, and a fairly daunting place. What to do?

There are quite a few camera comparison websites out there so I thought that I’d take a poke around and see which offered the best — or at least most useful — guidance. Seeing as I am a dyed-in-the-wool Canon user, I also employed the assistance of some slightly less camera- (and to be honest, web-) savvy potential consumers: my parents.

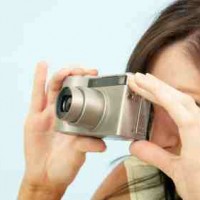
The mission: I told my father that I’d dropped his beloved Canon Ixus in the sea and had £150 to replace it, whilst my mother was entrusted with the task of finding an entry-level dSLR for my brother. So what did we discover?

Cameras.co.uk

Reviews, direct comparisons, and selection according to criteria are set out clearly, but the site is heavily focused on compact cameras. The reviews are arranged by camera type, for example ‘simple and easy’ or ‘pocket-sized’, and offers a numeric comparison across that group before you click through to a detailed review of a specific camera.

There is a range of pre-selected head-to-head camera comparisons, but they are pre-selected so you might feel a little limited there, and none of them looks at dSLRs, so it wasn’t very helpful for my mother. When it comes to the camera selection tool, it includes a price criterion and to my father’s relief, there was a link explaining the different terms.

Verdict of cameras.co.uk: good start for compact cameras, but not so useful for dSLR shopping.

DPReview

This site met exactly the same response from both Ma and Pa: ‘It doesn’t have a price comparison feature!’ That is a fairly significant defect, especially for my father, who was working on a strict budget. He was also quite intimidated by the other comparison criteria. It was all too technical for a some-time picture-taker.

Verdict of dpreview.com: good if you already know about cameras (and if money is no object), but not for a novice.

Digital Camera Reviews

This was the least helpful site we visited. There wasn’t any mechanism to select criteria for your camera, which meant that you had to sift through 601 different entries, covering everything from camera cases to memory cards before finding actual cameras.

Both my parents gave up and didn’t even make it as far as reviews. I took a look and was rather unimpressed: three lines doesn’t tell me what I need to know.

Verdict of digitalcamerareviews.org.uk: don’t bother.

Let’s Go Digital

This site hit an instant snag with my parents: there was no select by price function. When prices were mentioned, they were in US$, which is great for all you American readers, but not for my parents. However, I did like the reviews ascribed to individual cameras.

Verdict of letsgodigital.org: a good site to hit after you’ve done some initial research to establish what you’re looking for in a camera and have a few potential contenders.

Snapsort

Snapsort was my Dad’s favourite. Using its ‘Just tell me!’ function, he was able to tell it how much he had to spend on what sort of camera, and it made a series of recommendations for him. My mother was impressed by the colour-coding on the ratings and that it offered clear explanations of different camera terms and features.

I like that it offers head-to-head comparisons between any cameras of your choosing across two different interfaces, but also features its most popular comparisons. I wasn’t quite so impressed by the usability of the selection criteria interface, it was just a bit on the clunky side for me, and that it only offered statistical evaluations didn’t satisfy my ‘I need an opinion!’ craving. However, the killer feature of this site is that it shows prices in seven different currencies.

Verdict of snapsort.com: a clean design for what is probably the most comprehensive site out there.

What Digital Camera

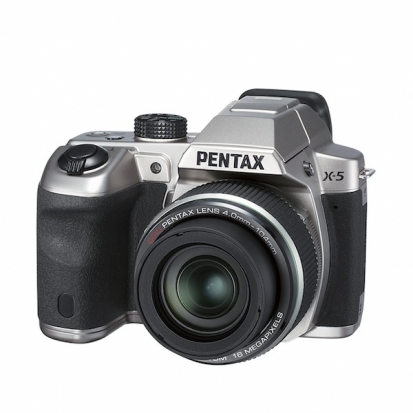
Immediately this site won points with my mother because she was able to select ‘dSLR’ from a drop-down list and could sort the reviews according to price or ranking, and then make direct comparisons between cameras.

Each camera has an extensive review that gives marks out of 20 for design, image quality, performance, value, and features, states it pros and cons, and tells you what the reviewer thought of it. My dad loved that there was clear advice that set out what to look for when purchasing a camera.

Verdict of whatdigitalcamera.com: ugly site design (but hey, I love Small Aperture’s look and there are probably people who don’t) but it helped my parents to make a stress-free and informed selection.

The overall verdict?

There isn't a one-size-fits-all camera comparison site out there, but by combining several of them, you can reduce your research time, at least!

Relying on one site probably won’t give you sufficient breadth of information to make a decision, but by combining their strengths — for example Snapsort’s high-level overview and head-to-head comparisons with What Digital Camera?’s more detailed reviews — you will have a good idea of what is available on the market and can draw up a shortlist of contenders.

Once you’re armed with an overview, you can walk into a shop without feeling quite so overwhelmed and make a selection: After all, there’s nothing quite like holding a camera in your hands to help you come to the right decision!