


After writing about saving money on your photography a while back, we thought that perhaps you’d actually appreciate having a look at some of the suggestions that we made in a bit more detail. A good place to start is with a reflector. Duncan Howsley will tell you all that you need to know!
So you have bought a dSLR and a lens (or two). You have been taking portraits of friends and family. Whilst they look good, they don’t quite match up to your expectations: the lighting is not quite right and there are shadows in odd places. Or maybe you have been reading about off-camera lighting and want to experiment with using light in new ways; maybe you just want to take your pictures to the next level.
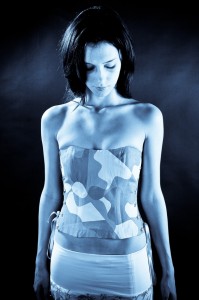
This is lit from the right with a reflector helping to light her face on the left
Unfortunately, buying a lighting set up can be both very expensive and complicated. Okay, so the recent popularity of the Strobist movement has increased awareness of affordable and DIY solutions to this problem, but investing in these systems is still a big step, it doesn’t matter if you’re still wet behind the ears with your dSLR or are a veteran of the manual campaigns. Fear not, however, as other solutions are available!
One of the most simple and affordable ways of controlling light is using reflectors. As if the name didn’t already give it away, they allow you to manipulate the light that’s available by reflecting it at the subject. If you want to splash out and buy a reflector, there are plenty on offer. Most take the form of a large, collapsible disc with both gold and silver faces. These two faces allow for control over the light temperature—essentially, the colour of the light—on the subject. The gold side providing warmer tones.
You can use a reflector with both artificial light and natural light. You can also use them in the same way as fill flash, allowing you to light up the subject’s eyes as well as removing shadows under the nose and chin. Pretty useful.
So, are you ready to get into primary-school-teacher-mode, dig out the scissors and glue and have a go yourself? I thought that you were. You’ll need a roll of aluminium foil, some cardboard, glue, and scissors to make a perfectly sufficient, if not slightly unwieldy, DIY reflector.
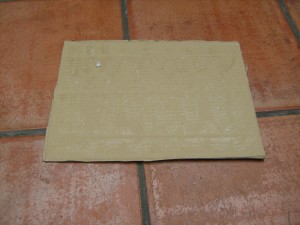
First, select your piece of cardboard. However big it is will be the size of your reflector. A cereal packet will make a cereal-packet-sized reflector, whilst the box that your new vacuum cleaner came in will make a fairly epic sized reflector.

Plain cardboard, still with side flaps at this point
Second, lay out your aluminium foil. It needs to be larger than your piece of cardboard. Foil not as wide as your cardboard? No problem! Use several pieces.

Third, apply glue to your cardboard. (Spray adhesive is probably easiest, but remember to do it somewhere well-ventilated and take adequate precautions.)
There is glue on this. Honest.
Fourth, stick your foil to your cardboard. Avoid sticking yourself to the cardboard. That’s messy. Fold the overhanging foil around the back of the cardboard and stick it down to make it look tidy, et voila! One reflector!

Tah-dah!
No go forth and take beautifully lit shots knowing that your reflector cost you practically nothing.
If primary-school-teacher-mode isn’t quite doing it for you and you want to advance to secondary school DT level, this blog shows you how to make a rather more snazzy reflector.