


You’re working as a photographer, you take fantastic photos, and you’ve even got a pretty sweet website to show off your work… So why is your web server just sitting around in the corner, smoking a fag and nipping at a cup of coffee? Why aren’t the buyers running the door off its hinges, and, come to think of it, where are your damn groupies, already?
The internet is a cold and heartless place, and the biggest source of traffic to any website should be coming from search engines (Photocritic, for example, gets about 70% of its traffic from search engines. Mind you, it’s mostly people looking for pictures of nude women. Go figure.)
 Luckily, there are quite a few things you can do as a photographer to make your site really zing in the search engines – and for the sake of making a nice round figure (and, of course, so the Digg and Reddit crowds will love it like a kitten loves tuna fish) – here’s a lovely top-10 list to get you started!
 For the sake of photography, you can basically optimise your site for two types of search: Text search (what most people think of when they think ‘search’) and image search (take a guess…).
It’s worth noting that this list is in no particular order – but the more of them you implement, the better you are likely to do.
First of all, check out the phenomenal SEOMoz, and check out their ‘Google Search Engine Ranking Factors‘ document. It outlines a lot of the stuff you need to know about making your site accessible to Google etc, the most important of which is ‘Don’t use Flash / Flex to build your site’, and ‘Make sure you haven’t inadvertently blocked search engine spiders from entering the site by using a drop-down menu for your navigation system’
1 – Update often
First off, you could do a lot worse than making sure to update your site frequently, no matter what kind of content you have. Many SEO experts have observed that Google tends to give higher ranking to sites that are updated more frequently.
That might mean that, instead of posting 100 new photos once a month, you post 10 or 12 every 3 days. Another way to have new content often is to have a blog. Sprinkle your photos throughout the blog content and the search engines will eat them up like the proverbial fat lady at a cake sale.
2 – Context and categorisation is king
 Context is important. The search engines want to know what your site is about. You might want to use the word “photo” in all of your filenames, to keep the context of a photography website consistent.
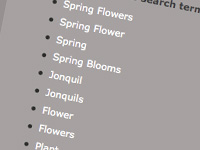
The next step is to stop and think for a secon – what types of photos do you take? Try to organize them into categories and maybe even sub-categories, so that you have some context for each page. See Rolf Hicker’s Photography website for a good example of photo categories. Of course he also…
3 – Place text near your photos
Once you’ve placed your photos on their pages, the nearby text becomes important. Google gets clues about the content of images from the text near them. Consider using captions or quotes that have the same keywords as apply to your photos, and place them next to the photos for maximum value in the search engine ranking.
Linnea Lenkus Fine Art Portrait Studios website, for example, is an excellent example of good use of quotes next to the photo. Contrast this with the Chesler Photo site doesn’t come up on the first several pages in a “maternity” image search, despite having a whole gallery of such photos, probably due to not having enough textual content on the site.
The Digital Photography School website is another fab example of the use of text on a photography page.
4 – ALT tags are your friend. Use them
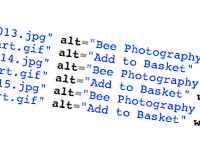 When you add an image to your website, you’re using an <img src="[URL]"> tag. You can – and should – add attributes to this tag, including an alt attribute.
Put an explanation of what the image depicts in your ALT tags. Not only do you make it easier for blind people to navigate your site (although why blind people would want to visit a photography site remains a mystery to me…), but it is one of the few sure-fire things that a search-engine has to go on when deciding what your photographs are about.
 In addition to using keywords in your ALT tags, make sure that the actual file-name contains the same keywords.
Remember that your alt attribute can have spaces; use dashes to separate individual words if you want your filename to contain multiple words.
Don’t stuff the “alt” tag with lots and lots of keywords, however, or it will appear to be spamming; just describe the image honestly in the same way you would describe it to someone over the telephone.
Example: <img src="http://pixiq.com/images/kitten-eating-tuna.jpg" alt="Photograph of a black and white kitten eating tuna. Nom!">
The Mackins Design Studio website is an example of good use of descriptive alt tags as well as filenames. As a counter-note: PremierPhotographer Pat McNulty’s site doesn’t come up on the first several pages of an image search for “castles” despite having a castle category – there could be many reasons for this, but not using ALT attributes will be at least part of the reason.
5 – Add a blog to your site
You probably never knew that Photocritic started off as a blog-belonging-to-a-photo-site, but it’s the truth. I guess it says quite a lot about me as a photographer that the photography blog became at least a bazillion times more popular than my photography site(s), but I guess it was a godsent: I was always a better writer than a photographer anyway.
Maybe it’s because blogs are generally updated regularly, but images used in blogs are often numbered in the top of image search results, even for blogs which have as their regular topic something that has nothing to do with the keyword. See Mr&Mrsijunky’s blog for a good use of blog with photos. In addition, it’s a lot easier to SEO the hell out of a blog than to make an image-led site really fly. Sad, isn’t it?
6 – Start using the TITLE attributes
Use the image “title” tag. Similar to the “alt” tag, it isn’t compatible with all browsers, yet, but will be accessible to Firefox users, and the spiders from Google and other search engines will see it. You can put text similar to what you put in the alt tag in this tag.
Usability expert Roger Johansson explains:
[The ALT attribute] is not meant to be used as a tool tip, or more specifically, to provide additional information about an image. The title attribute, on the other hand, is meant to provide additional information about an element. That information is displayed as a tooltip by most graphical browsers, though manufacturers are free to render title text in other ways.
If you fancy geeking out about alt vs title tags, Johansson’s blog is the place to go…
7 – Keyword the hell out of your page title
 Use keywords in the page title. The page title is a header tag that causes text to appear in the top bar of the window when the page is open in your browser.
Each page of your website should have a different title, a title that contains the keywords applicable to that page, but in title form, not as a list. Check out the browser window title of this very blog entry for a good example…
Also check out how the home page of Photocritic uses different keywords in the title tag, when compared to all the other pages on the site. This differentiation is designed to guide users (and, I admit, search engines) to the right place.
8 – Use keywords in the page URL
That really means the HTML filename for that page. Don’t name your pages page1.html and page2.html. A much better name would be castle-photo-gallery.html or dover-castle-panorama-photos.html
9 – Keep an eye on your directory structure
Use image folders and sub folders. Put all of your images into a folder called “images” when you upload them to your web host. Then, use sub-folders for common categories. The image named Sorbie_Castle.jpg should be in /images/castles/, for example. Not only does it make it easier for yourself, you’ll be able to
10 – Be smart when linking
 Anchor text is the text that appears on a page when there is a link; it’s the text that is underlined and/or in a special color to denote a link. These anchor text links should be descriptive, and – if possible – contain keywords relevant to the page you are linking to.
If you put a link to your castles page somewhere else in your site, don’t say “click here” to see my castle photos. The text comprising the link should have the keyword in it, so it should say see my “castle photos” and the words “castle photos” would be the link to that page.
Do this on your own site and encourage others who link to you to do the same. You can even provide actual text they can use to link to you which contains your keyword. A good way to do this is to have a small note at the bottom of every page inviting people to link back to you, and including a link to a page containing the appropriate code with your keyword in the anchor text.
Do you enjoy a smattering of random photography links? Well, squire, I welcome thee to join me on Twitter - Follow @Photocritic
© Kamps Consulting Ltd. This article is licenced for use on Pixiq only. Please do not reproduce wholly or in part without a license. More info.