


As most of you are aware by now, I'm a bit of an all-round nerd, and I've been keeping an eye on 3D printing for a while now. Yesterday I took delivery of my printer, and I just wanted to share my first little project with you guys: Creating a rubber stamp. I haven't really been in love with any of the 3D printing tech... Until the Form 1 came along. Instead of using filament, the Form 1 prints using a technology called 'stereo lithography', which means that instead of depositing layers of plastic on top of each other, it uses FRIKKIN' LASERS to cure an UV-sensitive resin.
Anyway, enough about that - what I wanted to show off, was the end-to-end process of creating a rubber stamp.
Wot I used
- MacBook Air
- Modeling software: Side Effects Houdini FX, which is a procedural, nodes-based nerdfest of epic proportions (I also tried Blender and 123D, but Houdini 'clicked' with the way I can see myself working, so I'll continue using it for now)
- Printing software: PreForm (comes with the Form 1 printer)
- Form 1 printer
- Sugru
- Ink pad
Wot I did
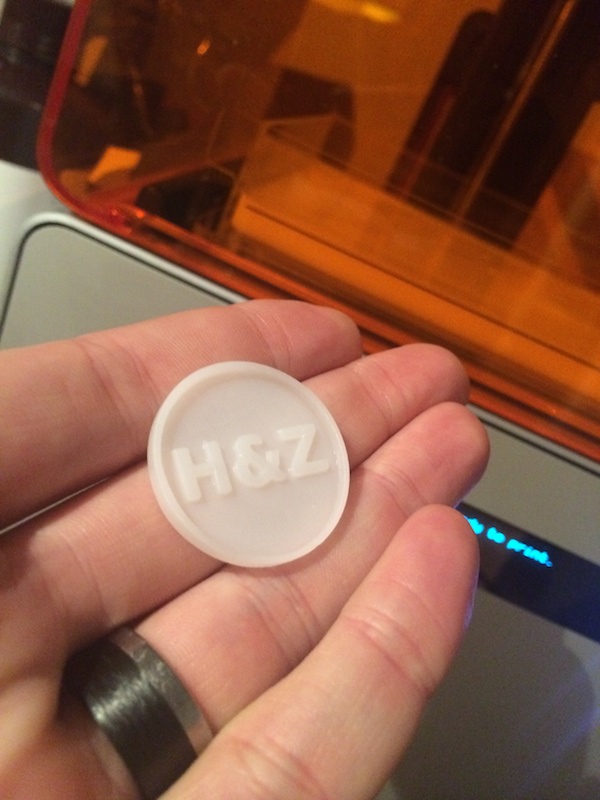
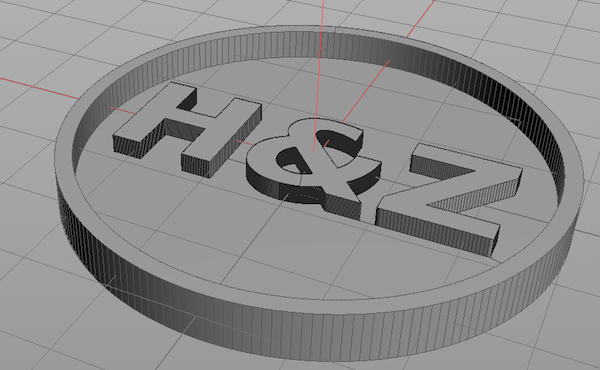 Step 1 was to model the shape I wanted to turn into a stamp. In this case, I wanted to make sort of an signet stamp for my bonnie lass and I. Since our names start with H and Z, I figured it would make sense to use those letters.
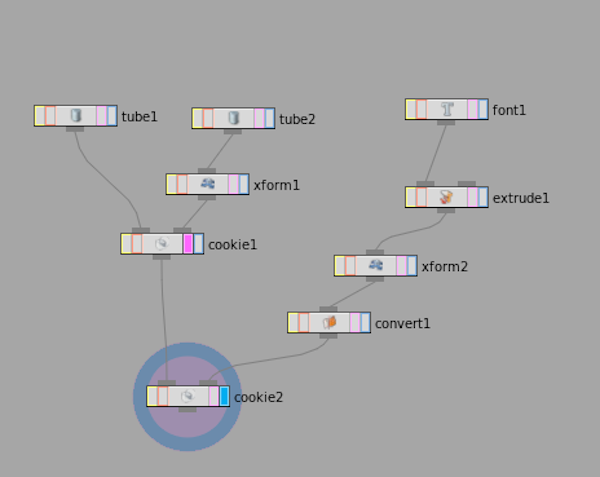 The modelling itself is a little bit outside the scope of this write-up, but above is the node network representing this shape. At the top left, you can see two 'tubes' - these are the outer and inner wall of the stamp. On the right, I'm creating the text, giving it width, then placing it into the circle. The great thing about Houdini, is that if I later want to change the text, I can go into the 'Font' node, and type in something else - everything else just cascades through the node structure, and I can print another stamp easily. The two 'Cookies' you can see are boolean operations, which is combining the various shapes (in effect, adding or subtracting them)
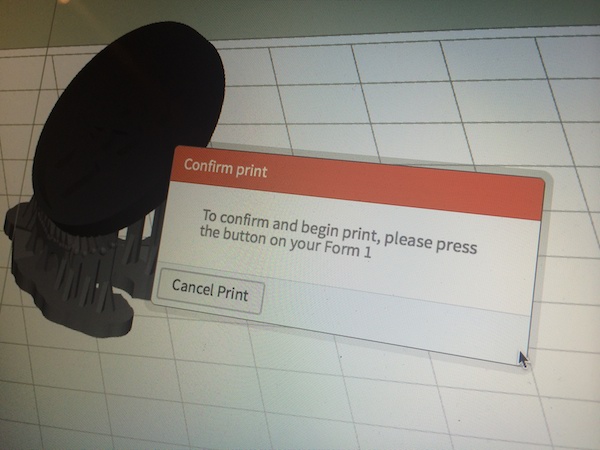 With the model completed, it was time to try to print my very first 3D object! How flippin' exciting. In this photo, you can see the supports the PreForm software adds to the item - and all I had to do next is to press 'print'.
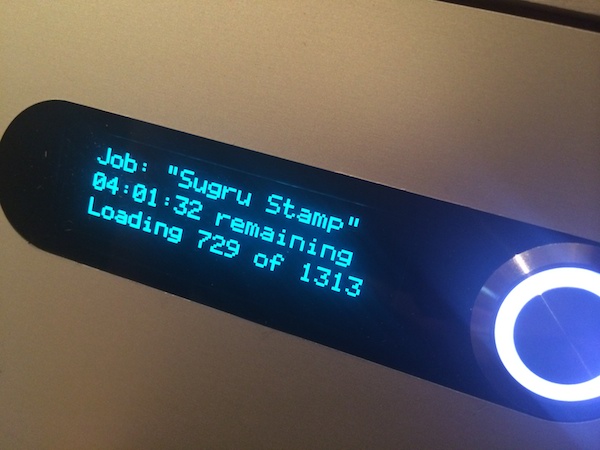 Unbearable excitement would have to be beared for about 4 hours, as I decided to print at the highest resolution. In retrospect, that was completely unnecessary and vastly over-kill (there was no way I'd be able to translate 25 micron layers to a stamp anyway...), but you live you learn!
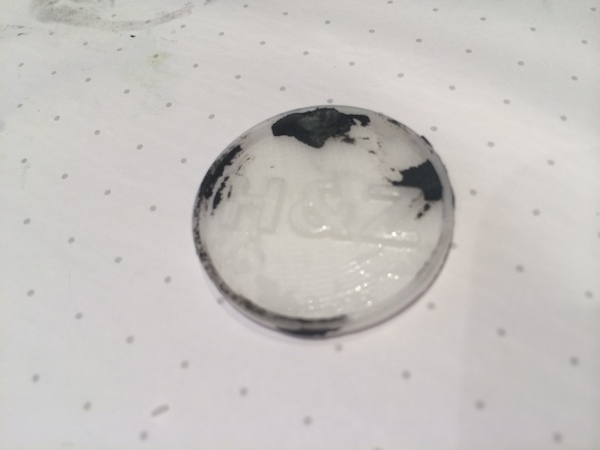
 After a quick bath in acetone (I couldn't find any rubbing alcohol at 18:45 on a Friday night, and I figured 'what's the worst that can happen'? Turns out Acetone works just fine) and a spot of extra curing, I removed the supports, and my mould was ready!
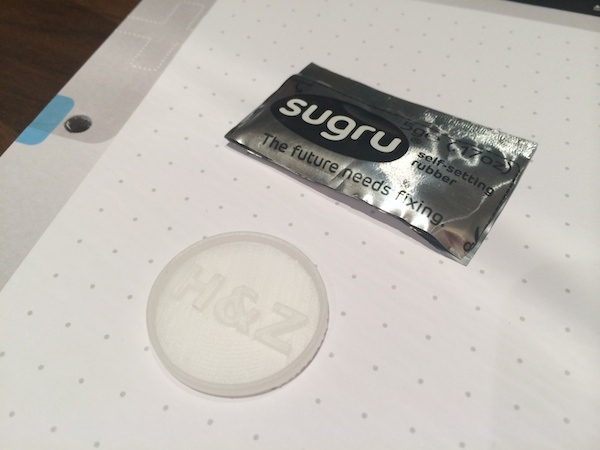 Now, it was time to use the mold to create the stamp itself. I picked Sugru for the job (I am a relentless fanboy - Sugru is awesome, and if you've never tried it: Buy some!)...
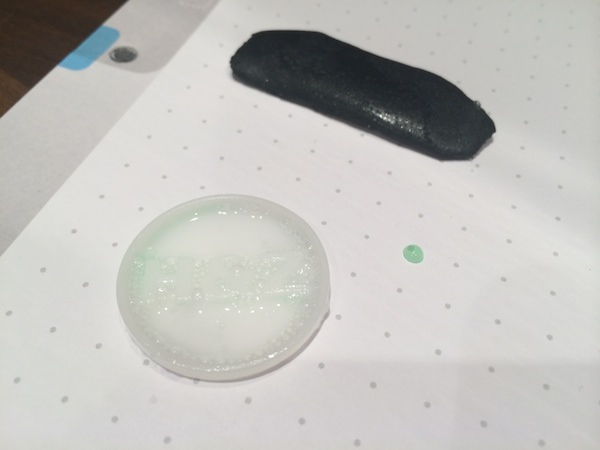 To prevent the Sugru from sticking to the mold, I put some some washing-up liquid on the 3D printed part...
 And then pressed a tea-candle into the back of the Sugru, to use as a handle.
 To my dismay, it turns out I hadn't used enough washing up liquid (or rather: I didn't ensure the whole part was covered), and I was also too impatient, leaving the Sugru in the mold for only an hour. When I removed it from the mold, some of the Sugru was left stuck inside.
 It looked OK, but the top bit was missing, which was a bit of a shame... So I decided to try again!
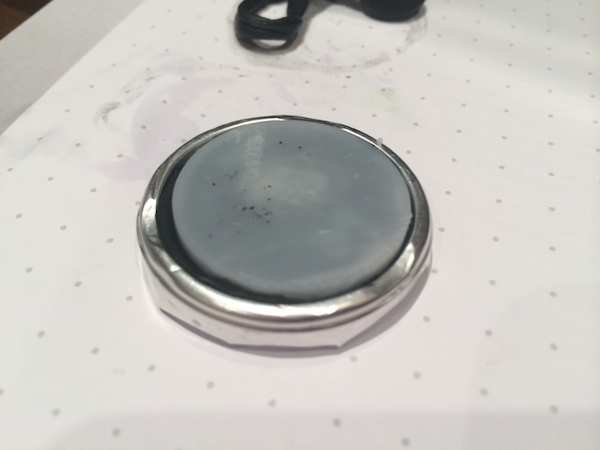
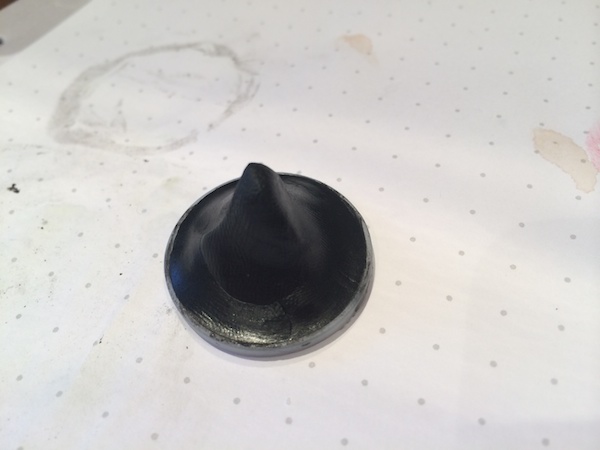 This time, I just created a handle out of the Sugru instead of using a tea candle, jsut to try something new. I did leave it to cure for 10 hours this time, to make absolutely sure it was fully set.
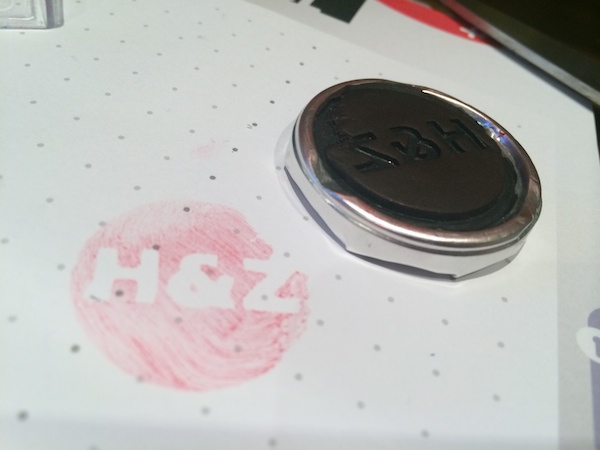
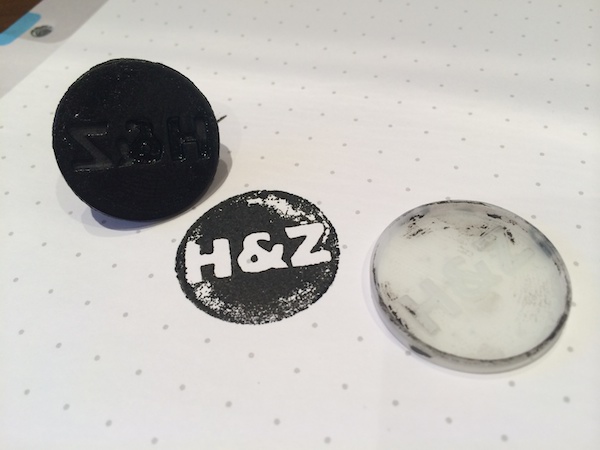 And the final stamp worked well! Hurrah!
What did I learn?
Well, it turns out that 3D printing is pretty easy. 3D modelling is harder than you'd think. Sugru is brilliant, of course. Learning new things is fun. And I'm looking forward to experiment more with casting, making, 3D printing, and other nerdy endeavours.
Next stop: Inventing and 3D printing some photography gadgets!