Advice

The Photocritic second-hand kit buyers' guide

I recently saw an article that listed sound advice when it comes to saving money when purchasing new camera gear. Amongst other suggestions, it mentioned part-exchanging your gear, buying at demo days, and waiting for manufacturers' seasonal cashback offers. What it didn't suggest was to buy second-hand, however. Someone did point out to me that then the gear wouldn't be 'new' in its strictest sense, but I take a slightly less stringent view of the word 'new' in this respect. It's still new to the buyer, after all. I'm a huge fan of buying camera gear second-hand. Some of the lenses that I've picked up have been practically box-fresh, but bought at a half or two-thirds of the retail price. And it's a small step towards reducing waste and the use of valuable resources. But buying second-hand does require you to put some trust in the seller as well use some of your nous and common sense. So what should you do? This guide has been put together using my own experiences together with advice from Campkins Cameras in Cambridge (where I buy lots of my kit) and Adorama, who sell used as well as new gear. It is of course advice, and while it's as thorough as I can make it, it probably falls short of comprehensive somewhere.

What to buy

My own preference is for new bodies but second-hand glass, still there are great deals to be had on very well kept camera bodies. Used accessories can be picked up on the cheap, too. Almost anything that you'd like to establish or augment your photographic arsenal can be purchased second-hand, from vintage kit to barely used up-to-date digital gear.

Given that there are so many places to look for used photographic equipment, it's advisable to begin your search with a clear idea of what you want and how much you have to spend. You might not get very far with 'I want a new lens!'

Where to buy

How long is a piece of string? There are so many places offering second-hand sales it might feel a little overwhelming. The first places that might spring to mind are eBay, Craigslist, and Gumtree. Then there are major retailers who offer second hand sales in addition to their new business: Adorama, KEH, Wex Photographic, Wilkinson Cameras, for example. Your local independent camera dealer probably has a second-hand range, too. It's also worth watching Twitter as well. I quite often see people offering their kit for sale there before taking it to a dealers or trying eBay.

Anyone want to buy my Holga? Boxed. I think I've put two rolls of film through it. Make me an offer.

All of these come with their advantages and disadvantages. Online auction sites offer you the opportunity for great deals on price, but you have to place your trust in the seller that they're honest and reliable and that their descriptions are accurate. What you might think of as mint condition could be different to someone else's idea; and heaven forfend that someone takes your money and doesn't deliver the goods, or fences stolen property. The aftersales care and protections, for example returns and warranties, are less straightforward than with established traders, too.

Purchases made through established companies might be a bit more expensive than what you'll manage on eBay or similar, but most of them have a clear returns policy and even offer a warranty on goods. These companies' ratings systems usually afford you a clearer indication of the condition of the product you're looking to purchase, so you shouldn't receive any nasty surprises when it arrives. But, if you're buying over the Intergoogles, you don't have the opportunity to hold the product in your hand and test it out for yourself. This is perhaps the biggest advantage of local traders. I pop down and test out lenses before spending money on them and ask about a gazillion questions as well. Where I shop offer me a six month warranty on second-hand purchases, which is a great benefit.

It all depends on how confident you are buying over the Internet and how comfortable you feel spending money on goods sight unseen.

When to buy

If you're in the market for a particular camera or lens, it's worth keeping an eye on manufacturers' release cycles. When new models in the line that you're interested in go on sale, you're likely to find a bump in people selling their older versions when they upgrade. For example, Nikon announced its D810 today; as a consequence, people wishing to upgrade from their D7100 or even their D800 or D800E will probably start thinking about selling them on soon.

Nikon's new D810 - what will people be selling on as they upgrade to it?

Taking a look at the second-hand market just after Christmas is a good idea, too. People receive gifts, they're given money to put towards new gear, and they resell their old equipment as a consequence.

Or you can do what I do. Decide on the specifics of your next purchase, but not restrict yourself to a timescale and ring up your local dealers every week to ask if they've anything that fits your requirements.

Questions to ask

You might not have the opportunity to ask questions of goods being sold online by major retailers, but you can ask questions of sellers on auction sites and in bricks-and-mortar shops. The first question I always ask is 'Why is it being sold?' If the seller can't give you an answer that sounds reasonable, you might want to reconsider the purchase. I ask about the original paperwork for the product, too. And I always double-check on the returns policy and the warranty.

If you're buying via an auction site, don't be afraid to ask the seller to clarify anything mentioned in the description, for more images of the product, or anything you'd like to know but hasn't been covered, for example where and when it was purchased originally.

What to look for

Should you be buying via a site that uses a grading system for second-hand goods, read their ratings descriptions carefully to understand the condition of the product you're looking to purchase. Some sites won't sell goods that don't function normally but others will, indicating that they're good for parts. Make sure you know the code!

If you're looking at goods graded N or D on Adorama, these are just about as good as new and it's unlikely that there will be much difference in the price from a brand new product. You're likely to get a better deal on something that Adorama grades as E or OB. OB means 'Open Box' and it's the equivalent of a demonstrator car: it's been used as a display model or for training purposes.

Here are some of the things to look for, but remember it isn't an exhaustive list by any means.

Cameras

  • Actuations - how many times has the shutter been released? Obviously the fewer the better
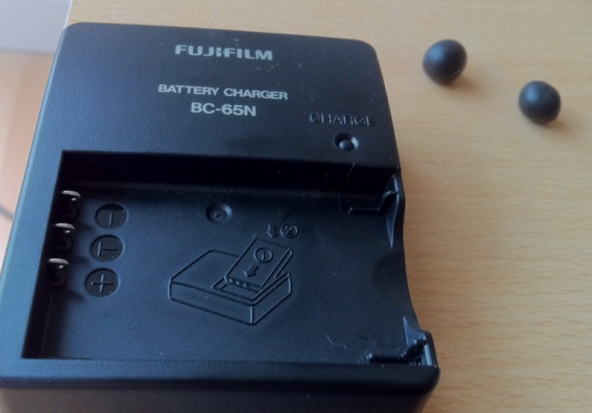
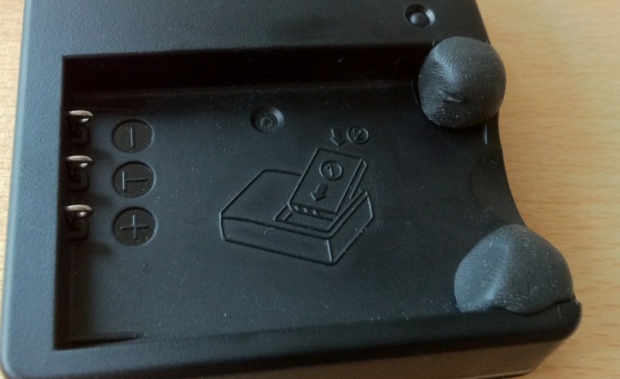
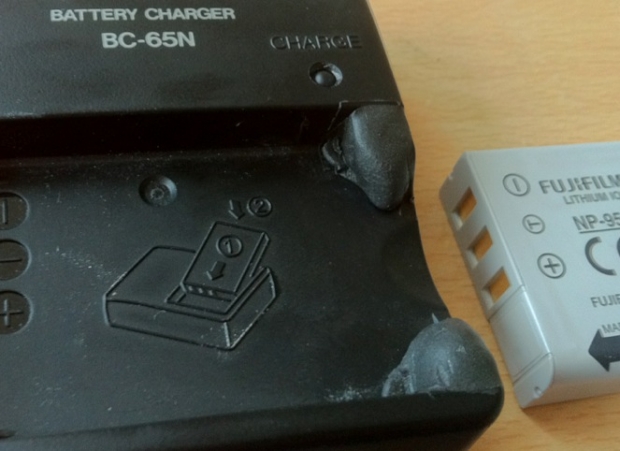
  • Battery and battery connectors - you don't want the battery to have leaked or for any of the connectors to be mis-shapen
  • SD card slot - do cards move in and out cleanly and record without issue?
  • Sensor - are there any dead pixels (you can spot them by taking a shot into the lens cap and looking at it in an editing suite) or dust or oil spots?
  • Lens mount - it mustn't be mis-shapen or have worn threads
  • Auto-focus - does it work properly?
  • Scrapes and scuffs, dents and dings - a couple are to be expected, but you probably don't want it looking as if it were dropped down a well and dragged out again

No. You can't buy the Trip.

Lenses

  • Dust and spots - you'll never get a lens that's perfectly dust-free, even brand-new, but you really don't want obvious dust or dirt spots
  • Fungus - lenses that have been left in dark, slightly damp conditions are prone to growing fungus. You don't want any of that.
  • Scratches - you want a scratch-free lens
  • Aperture blades - check the aperture blades work properly and are clean
  • Zoom and focus rings - twist the zoom and focus rings to ensure they're in full working order
  • Auto-focus - check the auto-focus works properly
  • Threads - you don't want the threads to be stripped or in any way mis-shapen

Finally, remember the adage: if it seems too good to be true, it probably is. Now: happy shopping!

Getting value for money when buying a camera

Last month, Ricoh 'repositioned' the prices of four of its Pentax cameras: two dSLRs, one EVIL camera, and its 645D digital medium format camera. From Ricoh's perspective, it's an attempt to make the Pentax brand more attractive to consumers and present them with some competitively priced options that aren't Canon, Fujifilm, Nikon, Olympus, or Sony. What does this mean from the consumer's perspective, however? What sort of value for money can a Pentax purchase offer? I decided to do a bit of digging.

K-3: £950 body-only

The K-3 is Pentax's flagship dSLR camera, heading its modest line up of current models. It isn't, however, the likes of a Canon, Nikon, or Sony flagship camera, which are all full-frame. This has an APS-C sensor and is much more similar to their high-end smaller-sensored cameras.

The weather-sealing makes the K-3 attractive

The K-3's key features include a maximum sensitivity of ISO 51,200; top frames-per-second speed of 8.3; a 24 megapixel sensor; a dual SD card slot; and full weather sealing. At its new £950 price point, this leaves the K-3 in an interesting position.

For around £850 you can pick up a Canon 70D or a Nikon D7100. It's not a straight-up comparison against the 70D, though. That has lower resolution (20 megapixels); a slower continuous shooting speed (7 frames-per-second), and its sensitivity tops out at ISO 25,600. Where it does beat the K-3 is on connectivity—it has wi-fi functionality—and on video capability. By all accounts if you're interested in recording video, you're better off with the 70D than the K-3. Finally, Canon has a far broader range of lenses than Pentax, which presents you with much more flexibility as well as purchasing options.

Against the Nikon D7100, you're looking at similar resolution, dual SD card slots, and dust and water resistance (but not water-proofing), but lower sensitivity (ISO 25,600) and slower frames-per-second rate (6). Video on the D7100 is also meant to be good and Nikon has a huge lens selection, too. Unless you're very serious about action photography or need cold-resistance too, the D7100 seems a better option to me.

But if you're prepared to spend a bit more, closer to £1,300, you can pick up a full-frame Canon (6D), Nikon (D610), or Sony. Yes, that is Sony's a7, so it isn't a dSLR, but it's food for thought.

K-50: £500 body-only

The K-50 isn't Pentax's 'entry-level' offering, that's the K-500, but it does boast weather resistance, a top sensitivity of ISO 51,200, and a maximum frames-per-second rate of 6. It's sensor is a 16 megapixel APS-C one. So at around £500 (although you can pick them up cheaper), how does it compare?

Against the Nikon D5300, it's a day at the races: some you win and some you lose. Where the K-50 loses in the megapixel race (16 versus 24) it wins in the frames-per-second stakes (6 versus 5) and the ISO handicap (51,200 versus an expanded 25,600). The K-50 doesn't have an entry when it comes to wi-fi and GPS, giving the Nikon a walk-over; but the situation is reversed when it comes to weather sealing. With the D5300 selling for around £550 body-only, it'll be a case of careful consideration what you want from a camera. Something that slots into a system with which you can grow significantly (the Nikon), or something that's reliably built but doesn't offer huge scope for progression with lenses or more extensive specs.

Unless you specifically want a dSLR, it's also worth looking at EVIL options; around the £500 mark there are a few choices that can give you plenty of camera for your money. There's the Sony NEX-6 or a6000, or Fujifilm's X-M1. You'll be getting very similar specs, and in the case of the a6000 and X-M1 wi-fi to boot, but not the weather sealing. The question is, what do you want from your camera?

Q7: £340

The Q7 comes in a swap-shop of multi-colours

With a 1/1.7" sensor, it's actually a struggle to find a direct EVIL competitor for the Q7. Sony and Canon use APS-C sensors, Panasonic and Olympus use Micro Four Thirds, and Nikon favours CX. There's nothing that small. If you're looking for a camera as handily sized as the Q7, that's reasonably priced, but still has interchangeable lenses, take a look at the Olympus E-PM2. Or you could ignore the interchangeable lens issue—with a camera that small, having interchangeable lenses might overwhelm the benefits of its smaller body anyway—and go for a compact. Something like Canon's S120, Olympus' XZ-2, or if you can stretch the pennies further, Sony's RX100.

645D: £4,250 body-only

Excellent value for money

This one is the easiest of the lot. If you're looking to dip your feet into medium format waters, there is nothing as affordable as the Pentax 645D. You'll either be sticking with a top-of-the-range Canon or Nikon dSLR, or a Hasselblad or Mamiya medium format.

Conclusion

Having test-driven a few Pentax cameras, there is a lot to like about them. And if you live anywhere that rain or dust might conceivably be an issue, the weather-sealing is a very attractive prospect. But it's a case of considering what your needs are from a camera and whether or not you're looking for heaps of compatible lenses, both native and third party, as well as accessories and add-ons. How far do you think you might want to take your photographic progress? How far do you want to take your camera? How much money do you have to spend?

Getting good value for money isn't just about the pennies in your pocket right now and the current crop's spec sheets. It's also about long-term planning and ensuring that you and your camera—and the system into which you've bought—have a future together.

Whatever you're looking to buy, it's always worth considering all of your options.

The handy-dandy social media photo sharing guide

One photo, so many options. Where on this huge web of interconnected social media outlets are we best sharing our quick snaps, our painstakingly created works of art, and our selfies? Really, it all comes down to whom you want to see them. The chances are that different people follow you in different social media spaces, and if Twitter's mostly a work thing for you, selfies on the beach aren't all that appropriate a posting there. You're probably best putting those on your friends- and family-only Facebook account. It only takes a few moments of thought, really, but if you're new to the social media fandango, seeing all those apps lined up on your phone can be a little overwhelming. For a bit of fun, I drew up (quite literally, it involved an enormous sheet of paper and felt-tipped pens) this handy-dandy guide to sharing your photos via social media. Of course it isn't meant to be taken deadly seriously, but it's a pretty useful starting point all the same.

Click for bigger!

You can find it looking even more beautiful in print in the delicious-looking Social Photography, which is available now, either in print or to download!

Like the Google+ Stories idea but not keen on Google+? There are options

On Tuesday, tech and photo sites were awash with the Google+ Stories story. Rather than having to sift through your own images and organise them into virtual albums to chart your travels, document your days out, and record your parties, Google+ can auto-algorithmically-awesomely collate them into Stories or Movies by simple virtue of uploading them there. You can then edit them if necessary, add captions when appropriate, share them if you want to, and generally enjoy. Stories and Movies capabilities are already working on the web and Android platforms and will be making their way to iOS shortly. If you're like me and you auto-upload your iPhone images to Google+, open the web interface and you'll find there are some stories ready and waiting for you.

The Story of my cousin's birthday

But what if you don't want to upload your photos to Google+, for whatever reason, yet still rather like this idea of hands-free image curation? With the vast number of image storage and organisation apps and services out there, someone, somewhere, must be offering an alternative. There are plenty of apps that can organise your images and videos into a timeline, for example Dropbox's Carousel and Picturelife, but not that many which create narrative albums based on time, date, and location that are ready to go. There are, it seems, two apps that manage something along the line of Stories.

Flayvr

Flayvr is an Android- and iOS-compatible app that organises your images and videos into editable and shareable 'Flayvrs', or albums. That's pretty much what the Google+ Stories feature does. But unlike Google+, which collates all your photos and videos stored there, this works by collating the photos and videos stored on your device's camera roll, making it much more mobile-centric. If you're using Google+ to store all of your images, regardless of the device used to capture them, its capable of giving you a more complete story.

Still, it's swish and stylish, free to download, and I've had fun using it to collate some 'Flayvrs'.

Keepsake

I've not been able to download Keepsake for a trial spin because it seems to be a US-only iOS app at the moment. However, it does look to be slick and easy to use. It automatically sorts images into stories that you can edit them using the pinch-and-drag mechanism. When you have a complete story, you can share it with your contacts via text message.

It's also worth remembering that Google+ acts as a storage mechanism for your photos as well as organising them into sharable (or not) albums. Flayvr explicitly states that it isn't a data storage service. That's going to be a plus for some and a minus for others.

There aren't many options, but there are some, and I'm sure that Google's move will herald the insertion of automatically curated albums from other sites before long.

Spring cleaning my photography apps

I acquire a huge number of photography-related apps on my phone. Some of them I'm requested to review, some of them I choose to download so that I can compare them against similar apps, some of them I download for a specific purpose and never use again, a few of them I even use on a regular basis. I'm not too bad at sifting through them perodically to delete those which aren't serving any purpose and doing nothing more than consuming memory on my phone, but when I realised that I had four folders of photography apps, I concluded that it was time for a spring clean. Thus began the great app cull of Spring 2014. It was a fairly simple process based on the question 'Do I use this app?' If I did, I kept it; if I didn't, it was sent to the great spare app repository in the cloud. Admittedly, I did make a few exceptions, but all will be revealed.

Snapseed is my go-to editing app (followed by Aviary and ColorTime) so why did I have Photoshop Express lying redundant on my phone?

Adobe Photoshop Express? I don't remember the last time that I used it. I prefer Snapseed or Aviary. Gone!

Camera+? Plenty of people rave about it, but I've never got on with it. Gone!

Camera 360 Ultimate? I downloaded it when I was writing the Surreal book; it's served its purpose. Gone!

Loom? Now integrated with Dropbox making the app defunct. Gone!

Luminance? Again, lots of people love it, but I've never been drawn to it in the same way. Gone!

Marksta? An excellent app if you choose to watermark your mobile images, but I don't. I downloaded it when I was writing the Social book, but seeing as I no longer need it, it's... Gone!

Plastic Bullet? In the unusual event that I want to add filters and washes and heaven-knows-what to my photos, Pixlr-o-matic and FX PhotoStudio get the first looks-in.

Water My Photo? Not used it in almost two years. Does it still work? Gone!

And this list doesn't even skim the surface of those that have already enjoyed their five minutes of screen space and been moved on to pastures new. These include DXP Free (I prefer Juxtaposer); NoCrop, Squaready, and Squaregram (out-flanked by Instacrop and Instasize); and blasts from the past Photogram and Flex Photo Lab.

So what's left? Well, with three folders' worth, still quite a lot. I could probably condense it to two folders if I tried hard enough and made a choice between long exposure apps, plumped for either Instacrop or Instasize, and when I've finished off a few things I'm working on that require apps here and there. But I've still plenty of editing options with Snapseed, Aviary, and ColorTime, not to mention the tools that come with EyeEm, Flickr, and Instagram. There's touchReTouch for heavier duty removals, Touchnote for sending postcards, and Flipagram for flipbook-type-videos. Finally for triggering there's Triggertrap (obviously) and Gorillacam.

And there are a few apps that I've kept despite not having used them very much. I'm hoping that by making them more visible amongst my photo app arsenal, I might feel more inclined to tap them. I'm sure that I was suffering from a case of app-blindness with so many unused ones camouflaging ones that I might otherwise be useful. It's certainly been a liberating experience for my phone's memory; I'm hoping it might be an enlightening one for my mobile photography now.

Less is more, I think.

Hot and happening trends in stock imagery according to iStock by Getty

A few weeks ago we published our guide to selling stock images, with content suggestions, style advice, and labelling tips, among other hints. This week, iStock by Getty Images has released an infographic documenting the eight leading trends in business imagery that they've charted over the past year. If you're looking to sell business images, these are the kinds of subjects that buyers are after:

  1. Transparency and openness - business-type scenarios shot through windows and glass
  2. Show me "Innovation" - unusual concepts, unusually shot
  3. The New Leader - think start-up trendy rather than power-dressed exec
  4. Service-oriented workforce
  5. Dads on deck - or hands-on dads
  6. Women in power - we're growing in number
  7. Hipsters are taking over - beards, bikes, and coffee (apparently)
  8. Working from home - more of us are doing it, so it needs to be reflected

Top Trends In Business Imagery 2014_iStock by Getty Images

Get cracking, then!

Before entering a competition, read the terms and conditions

This isn't a new drum that we're beating here today, but we think it's a significantly important issue to warrant another parade: competition rights grabs. Or the attempt by competition organisers to inveigle themselves of the right to use any of the images entered into their photographic competitions, for any purposes, with no compensation to the photographer. This reminder comes as I received a call for entries to a competition run in conjunction with an organisation that I respect and trust, and hoped would be above cheap tactics to help magazines or other companies amass a photo library for free. Apparently not. To quote from the terms and conditions:

By entering your photos in the competition you agree to grant REDACTED and REDACTED a non-exclusive licence to reproduce, publish and feature the photos in association with this competition, or for any other purpose, at any time, in any publication, website or other associated media outlets, without compensation. By entering you agree to grant REDACTED and REDACTED an exclusive royalty-free licence to use the full set of images taken on your photography trip [which comprises the prize] for 12 months.

To use images submitted to contests as promotional material for the competition or its future iterations is a reasonable condition of entry; but to demand they be made available for use in any publication associated with the organisers, for any purposes, across all media, and without compensation is, in my opinion, exploitative.

I have written extensively about the damage that these terms and conditions do to both photographers and the photographic industry before now, so I shan't reprise it here. But do bear in mind that if you're seeking your big break from a competition that employs these sorts of terms, you are doing yourself and fellow photographers—amateur and professional—a disservice in the long run. Furthermore, don't assume that just because the competition is being organised by or run in conjunction with a big name that it won't be out to take advantage of you.

The finale to this performance is then: always check the terms and conditions of a competition and if you consider anything to be unsavoury, please don't enter.


Seeing as I've been asked: no, I shan't be naming the competition in question. I'd rather not bring any more publicity to it. Just read the T&Cs!

7 super suggestions for selling stock

Love them or loathe them, stock agencies are a significant sector of the photography industry. How else do people who are looking to buy images for use in publications, in advertising campaigns, or on websites acquire them without commissioning a photographer? For some photographers, then, selling stock imagery can be an important source of income. It might not keep the wolf away from the door, but it could well keep the candles burning. In which case, how do you make the best of it? If you're looking to make a bit of pin-money selling your photos, what are the dos and don'ts? If you're already in the stock game, how can you do it better? I spoke to a variety of stock agencies—Alamy, Shutterstock, and EyeEm Market—who kindly shared their words of wisdom to help you make the most out of the stock market.

Content

It might come as a surprise, or it might not, but stock agencies need photos of anything and everything. That's pretty much the entire point of them, you see. Alan Capel, Head of Content at Alamy says: 'Everything can be updated, good photographers will look for a new take on old clichés.' Like me a few weeks ago, people need generic photos of the father-of-the-bride. However, there are particular types of imagery that are preferable and subjects that have growing demand. So think about producing:

  • Real-looking, natural-feeling photos; posed and staged photos aren't so in demand
  • Photos that are out-of-the-office and out-of-the-ordinary; think oil rig as opposed to desk, farm yard instead of back yard, mountain-top rather than table-top
  • Images from the emerging markets: Brazil, Russia, India, China, South Africa
  • Healthcare and medical photos
  • Anything that documents culture and diversity
  • Photos local to you - who else is there to shoot them?

'We’d love to see more adventurous shoots in more unusual locations/scenarios!' says Capel. While he knows that might be easier said than done, 'Photographers are tenacious and resourceful and they will find a way.' And if you're pursuing the emerging markets theme, that should include lifestyle and local culture as well as business and industry photos. Remember: there are consumers in those emerging markets, too!

Be on the alert for local culture and diversity

Is there anything that absolutely should be avoided? Well, if a photo's good, anything goes. But over at EyeEm, they warn people off of pets, pot plants, and predictable self-portraits.

Go for unusual takes on the usual

Spotting trends

It's probably a good idea to keep one eye on what's happening now and another on the horizon. Scott Braut, VP of Content at Shutterstock, recommends using social media to gauge trending topics and examining news headlines for common themes (for example politics, pop culture) to help you pick out favourable subjects. But at the same time, think about what might be happening in two, three, or four years' time: Olympic Games, World Cups, centenaries, and anniversaries.

Keep an eye on forthcoming events and commorations

Style

It's always best to stick to what you know best, which is your own style. But Capel says not be afraid of adding another string to your bow by including mobile images—Alamy has the stockimo app for that, and there's the new EyeEm Market, too—and Braut says that photos with Instagram-esque filters are popular.

You might not like Instagram-esque filters, but they are popular

Selection

Be ruthless when it comes to submitting photos to stock houses: if something about an image doesn't feel right, it's probably wrong. Don't include it.

And both Braut and Capel say the same thing about repetitious photos: don't do it! Make sure that each photo you submit is distinct, so that they don't detract from each other.

Accessibility

People need to be able to find your images to buy and use them. This means that they need to be identifiable through tags, labels, and key-words. Capel suggests thinking along these lines:

  1. Literal - what is actually in the shot
  2. Conceptual - what moods, emotions, concepts does the shot evoke
  3. Photographic – predominant colours, any techniques or treatments used

At EyeEm, their top search terms include the abstract, such as 'happiness' and 'hope' as well as more descriptive, for example 'family' and 'fitness'. Spread your net far and wide, but make sure your terms are accurate.

Martini, cocktail, drink, alcohol, sophisticated, James Bond, shaken-not-stirred, party, olive, gin, Vermouth, low-key, dark

And don't be afraid to re-visit and re-label photos after you've submitted them. You never know what you might think of with fresh eyes.

Practicalities

Photos that have people in them will require a model release if they're to be used commercially. Logos have to be rights cleared and securing that can be a proper pain. It's much better to do away with labels on bottles, use plain clothing, and hide obvious branding.

As much as I love this photo, the chances of me getting a model release for it are slim-to-none

Finally

The word that came up again, and again, and again was 'real'. Buyers want imagery that's natural and believable, not contrived. There's a whole world out there waiting to be documented, so go explore!

The Pre-Photography Checklist


So, you're ready to do a photo shoot? No, seriously, are you really ready for your shoot?

A while ago, I was challenged with creating a pre-shoot checklist for photographers - I figured it'd be rude not to, so I gave it a whirl.

Before you press the shutter button...

  • Check your settings – Is your camera set to the mode you planned to use? Is the ISO set to a useful setting?
  • Fill the frame – Does your subject fill the frame? If not, get in closer, either by walking closer, or by zooming in.
  • Pre-focus – When you press your shutter button half-way, your camera will focus and measure the light. Use that functionality every time
  • Check your focus! – If you’re taking a photo of something with eyes, make sure you have the eyes in focus. If not – well, try to get the important bits in focus.
  • Compose – Keep the shutter button pressed half-way, and re-compose your image so everything you want in your photo shows up the way you want it.
  • Check your edges – Before you press the shutter all the way down, run your eyes along the edges of the frame. Is there anything along the edges that shouldn’t be there? If so – re-compose your shot and try again!
  • Check the background – New photographers are so focused on what’s happening in the foreground, that they fail to notice the huge dog taking a poo in the background. You laugh, but I’ve seen it happen
  • Deep breath – Hold your breath whilst you very slowly press the shutter button all the way down. This helps eliminate camera shake when you are taking the photo.

Best of all, if you want a handy, keep-in-your-pocket version of this checklist, it's printed on the back of my super-handy Photocritic Grey Cards. Spiffing. 


Elbows in, people!

The picture-taking world appears to have been struck by an unfortunate bodily malfunction pandemic that is having an unnecessarily detrimental impact on the quality of photos the globe over. The malfunction affects camera users indiscriminately, with dSLR and CoSyCa owners, smartphoneographers, and compact camera users all under threat of its effects. It manifests itself as an inability for the camera user to hold her or his arms tight into the body when taking a photo, and instead standing with elbows projecting from the body, perpendicular to the torso. These unfortunately afflicted photographers resemble chickens attempting to flap their miserably clipped wings. Symptoms of this malfunction present themselves as camera-shake and unsalvageably blurry images, brought about by the inability to hold the camera steady. It leads to the records of hundreds, thousands of precious moments being consigned to the digital dustbin, notably those involving candles and birthday cakes, because the subjects are unclear, fuzzy, or even in double. Consequently, the emotional impact of the condition is thought to be quite distressing. If caught early, the condition is entirely treatable, but without speedy rectification there is no hope for affected photos.

The impact on photos taken by smartphoneographers is regarded as especially severe, as the reduced size and weight of these devices makes them inherently more difficult to stabilise.

Treatment involves a very simple modification of the body when holding a camera in preparation for taking a photo: the elbows need to be tucked into the abdomen and the arms held close to the torso. This enables the photo-taker to hold the camera with greater security and thereby minimise the chances of a photo obscured by blur and shake. In combination with other techniques, such as holding ones breath and taking a firm stance or leaning against something secure, positive results are anticipated.

Should photo-takers find it especially difficult to modify their stances, or should conditions be suggestive of camera-shake, it is recommended that a tripod or other stabilisation device is employed.

It is hoped that a general information campaign encouraging photo-takers to move their elbows down and in will see an overall improvement in the quality of photos taken and a reduction in people mimicking poultry.

Top tips for terrific travel photos

Seeing as Daniela is currently gallivanting somewhere in Thailand, we thought it presented us with the perfect opportunity to give you our travel photography tips. We've accumulated them from thousands of miles on the road through tens of countries. They might be useful for someone other than ourselves.

1. Be prepared

Like every good Boy Scout and Girl Guide, you need to be well prepared, before you go and when you're away. As contrary as it might sound, even if you favour spontaneous, moment-to-moment travel, a bit of planning will make sure that you get the pictures you deserve. You need to be ready for anything.

Buying supplies at the souq in Tangiers, before taking the train to Fes

Being prepared comes in three parts.

  1. First: Have an idea of what you want to see, do, and experience before you arrive. It doesn't have to be a minute-by-schedule, a wish-list is sufficient. It will help to ensure you see as much as you can and still have the chance to unwind and prevent being overwhelmed and accomplishing next to nothing.
  2. If you know roughly what you're planning on doing, it'll help when you pack your kit. Why take with lenses that you probably won't use at the expense of those you will? Trust me, I schlepped four lenses around the world and used only two of them.
  3. Finally: when you're out and about with your camera, be ready. Remember to re-set your ISO and shutter speed after a night shoot. Have you camera to hand on a bus or train, not in the luggage compartment. And have a smartphone or compact camera with you when you pop out for a bottle of water. You never know what you might see!

2. Tell the story

Every photo tells a story, and the photos from your travels should tell the story of your trip. That means it isn't just about capturing the monuments and the famous views, but about recording the little things that matter, that make a difference, that bring a trip to life.

Bar decorations in Bali, before I got sick

When you look at your travel photos you want to be transported back to the hustle and bustle of the souq in Dubai; your friends and family who weren't there need to sense the crush, the smell, the heat. My photos from Bali include stone lions guarding temples, the bottles of petrol you see for sale by the side of the road, and the pile of medicine I was prescribed when I fell ill. My time there is charted in pictures, big to small.

Sick. Very sick, in Bali

3. Get off the beaten track

I'm a huge advocate of eating in local restaurants and taking the bus to the isolated villages half way up the mountain. It all adds to the experience. But I mean something more when it comes to photos. When you're looking to photograph famous monuments and well-known vistas, look for a fresh approach, an unusual angle, a different feel.

Birds in a row, Rangitoto harbour

4. Take good care

When I first used a mandolin (one to prep vegetables, not the musical instrument) I was advised that carrots are cheaper than fingers. I've a similar approach to taking photos. I'm worth more than my kit; and my safety is worth more than a photo. This means that I don't wander blithely into insalubrious parts of town flashing my camera and I don't ignore the signs telling me that landslips are likely owing to recent heavy rain.

There was a certain element of risk in getting this photo, but it wasn't off-limits

I also make a point of regularly rotating my memory cards, so that if my kit does succumb to theft or failure, I won't have lost all my photos. And if I travel with my laptop, I backup my photos to a hard drive, and if possible a cloud drive, at the end of every day.

The key thing is, your photos are worth more than your kit and you're worth more than both of those.

5. Know 'the rules'

Yes, we would like you to know the rules of photography and we would like you to know when to break them. But that's not quite the point here. We mean the local rules, customs, and mores. Can you take photos of people? Are camera allowed at religious sites? Are certain places out-of-bounds at particular times of the day? Make sure that you know what you can and cannot do; you don't want to offend anyone where you're a guest and you don't want to get into trouble. However far these customs and protocols might seem from your life, they still need to be respected.

A nod to your camera and a smile can establish if photos are permitted

6. Set your alarm

Sunrise and sunset might present you with the best lighting opportunities for your photos, with sizzling stone, luscious landscapes, and perfect portraits, but early in the morning will show you a different side to where you're staying. And you'll escape the tourist crowds, too.

Sun coming up, Bay of Islands

7. Remember to put down your camera

Travel is about a whole lot more than your photos. It's a wealth of experiences and encounters. When you're constantly holding a camera to your face, it means that you can miss out on people, whether your family or anyone new. Remember to put down your camera from time to time, and just enjoy.

Of course, this is just the beginning, the basic principles. Haje covers travel photography in far more depth and detail in his gorgeous Focus on the Fundamentals: Travel book!

Ten top tips for fantastic food photography

Today, 14 November 2013, is International Food Photography Day. I'm not sure that I really need any type of excuse to take photos of many things at all, especially food, but it's definitely a good excuse to brush up on the necessary skills.

Photographing food so that it looks good enough to eat isn't necessarily as intuitive as you think it might be. But, it also isn't that hard, either. Ten simple tips later, and you should have some fabulous food photos.

1. Choose your food carefully

It doesn't matter how tasty your lentil soup actually is, because it is a muddy yellow-brown colour and has a bog-like consistency, it is never going to look as appealing as a strawberry-topped, floaty-light sponge cake.

Stick to foods that are visually appealing - bright, glossy, and with interesting textures - unless you really have to photograph the aubergine paté. If that's the case, try to introduce some contrasting colours, say a garnish, and use an interesting setting, like unusually shaped crockery, to help you out.

2. Use natural lighting

Flashes do horrible things to food, like give them ugly shiny patches. Where you can, photograph food close to a window with plenty of sunlight. Of course, that's not always going to be practical - midnight sun is a bit hard to come by unless you happen to be around either of the poles in high summer - so if you do have to resort to a flash, try to bounce it off a wall or use a diffuser to soften the effect.

The ISO was through the roof, but it meant that I didn't need to use flash for this fire-lit smore

3. It's all about the angles

Experiment with as many different angles as you can manage: from below, from above, from the side and slightly down, side-ways on. Snap, snap, snap!

4. Consider your depth-of-field

If you're shooting from a lower angle, looking over or across your food, you'll probably find that a shallower depth-of-field is preferable. You'll want a ratio of food-in-focus to background blur that lets the subject stand out.

Think about your angles and your depth of field

On the other hand, if you're taking overhead shots, a smaller aperture will be your friend so that everything looks crisp.

5. Get your white balance right

Blue-tinged cream or a green cast on meat is going to look just grim, so get your white balance right for your lighting conditions. (Unless of course the photos are for an article on food poisoning, then maybe you do want everything to look off.)

6. Get close. No, that's not close enough. Closer still.

Food photography is about making things lush and tempting. Get in as close as you can so that when you look at the photograph, you feel as if you can practically reach through it and sneak a cherry from the top of the trifle, and smell the zest from the lemons.

Nothing but olives

7. De-clutter

You don't want anything ugly or distracting in the photo; you want the food to shine. Okay, so this is a given for just about any type of photography, but it's easy for salt and pepper cruets to sneak into a shot when they shouldn't be there, or for a puddle of spilled orange juice to seep across the background. A quick bit of repositioning can do wonders.

8. Make sure the crockery and cutlery is clean

No, you don't want smears of sauce smattering the brim of the plate or thumbprints on the knife.

9. Do you want to style it?

If you're photographing your meal in a restaurant, then it is already going to have been styled. The presentation will be perfect and the crockery will work with the table setting. But if you're doing it at home, then it's worth thinking about the crockery you use, whether or not you need or want a table cloth, and just where you shoot.

Crown Derby china is not going to do very much to show off your seared scallops and for heaven's sake, a boudoir with red velvet curtains is not the ideal setting for a Toy Story birthday cake. But wouldn't that work a treat for red velvet cupcakes?

10. It's not just about the finished product

There's a whole heap of work that goes into preparing something as beautiful as a wedding cake and a whole heap of enjoyment that goes into eating it, so documenting that is just as rewarding as photographing the finished product.

It's not just about the finished product

When I - for my sins - baked my cousin's wedding cake, I photographed the entire process, starting with the ingredients assembled on the kitchen counter and ending with the last crumbs left on the cake stand. It made a great photobook gift for the happy couple, too.

What are you waiting for? Muster your baking pans and set up your tripod!

Five free and easy ways to back-up your smartphone photos

According to a piece of research conducted by the printing company SnapBox, which I initially read about on the Amateur Photographer website, 36% of the people they questioned had lost 'precious picture memories' from their smartphones; 28% because they'd dropped or damaged their smartphones. That's a lot of pixels that've disappeared into the aether and quite a few slightly downcast individuals. It doesn't have to be this way. Snapbox reckons that you should print out your smartphone photos to keep them safe. It would; it's a printing company. I'm also a fan of printing and I periodically have sets of images printed. But I'm a bigger fan of backing up your data. And the truth of the matter is: it can be both free and easy.

Here are five options to auto-upload images from your smartphone to the Cloud, and until you hit their data limits, none of them will cost a penny.

Amazon app logo

1. Amazon Cloud Drive

Set up an Amazon Cloud Drive account, download the Amazon Cloud Drive Photos app, flick the Auto-Save function to 'On' and you're up-and-running.

5GB for free, more GB with payment. iOS and Android.


Dropbox logo

2. Dropbox

Dropbox gives you 2GB of free cloud storage when you sign-up. There's a free app for iOS and Android devices. When you've downloaded it, head to Settings and the Camera Upload option. Flip the toggle from 'Off' to 'On' and you're done.

2GB for free, more GB with payment. iOS and Android.

Flickr logo

3. Flickr

When Flickr updated its app for iOS 7, it included an auto-upload feature that will back-up your camera roll images to your Flickr account and keep them private until you're ready to share them. If you want to share them at all.

With Flickr offering 1TB of free storage, you have to take a lot of mobile images to come close to exhausting your limit. However, you do need to be running iOS 7 for this feature.

Google+ logo

4. Google+

You might not have any interest in a Google+ account, but it does have a free and rather nifty benefit. It allows you to auto-upload all of your smartphone images to a private album from its app. Provided that you upload them as standard sized images, so 2048 pixels on the longest edge, they won't count towards your Google Drive quota, either. Go to Settings > Camera and Photos > Auto Backup and then switch the toggle from 'Off' to 'On'.

A Google+ account is free, the app is free download, and you get 15GB of free Google Drive storage. Storage of 'standard sized' image is unlimited. iOS and Android compatible.

Loom logo

5. Loom

Loom is designed to collate all of your images from all of your devices in one place, and make them accessible from anywhere. In order to make this easy it has integrated auto-upload functions, including one from your iPhone. When you first establish your account, you can power upload everything on your camera roll to Loom in one sitting. After that, it's a case of opening up the app to let it synch.

5GB for free, more GB with payment. Loom is iOS-only at the moment, but an Android version is planned.

Told you: easy. And don't forget that you can set your iPhone to store your images in the iCloud, too. No more lost photos and videos now, mmkay?

Five ways to liven up your autumn photos

This is a guest post by Danny Groner, who is the manager of blogger partnerships and outreach at Shutterstock. Here in the northern hemisphere, autumn is upon us, which means that we've already started to see some of the red, orange, and yellow colours of the season crop up. Marketers and advertisers know how to appeal to our autumnal eye, sprinkling these bright colours everywhere possible. For photographers looking to cover the autumn season, that poses a challenge: How do you shoot these natural settings in new, innovative, and vibrant ways? Here are five suggestions for how to add some flavour to the autumn season:

Apply traditional colours unconventionally

House image via Shutterstock

Keep close to what is proven to work this time of year, but adapt your style to show these colours in another way. For instance, a row of houses, instead of forestry, might offer the same feelings of seasonal foliage without leaves piling up. It's about the season after all. Discover an urban forest beyond the trees.

Bring it indoors

Flowers image via Shutterstock

Flowers and plantlife may grow predominately outdoors, but that doesn't mean that you can't bring their vivacity inside. A well-placed bouquet, taken with the right light and proper angle, can give the same punch as inside its more natural setting. Moreover, solid colored walls can complement the flowers, adding a nice backdrop to your pictures.

Go minimal

Leaf image via Shutterstock

If you do decide to use leaves to help tell your story, you don't have to do it with so many. Sometimes, less is more. In this case, you can see more expression from a lone leaf than you may find inside of a pile of them. It's a living being, and focusing on one will help convey some emotion that can get lost in transit otherwise.

Be abstract

Abstract image via Shutterstock

Your favourite colours can go further if you allow them to blend and dance. Inside pieces of artwork, there's more flexibility and movement than what is naturally created. Reds and oranges can look and feel remarkably louder when paired with some darker colors. Art and photography have a similar relationship worth exploring.

Use non-traditional colours

Snail image via Shutterstock

Nature has so much more to offer than the most traditional colours. Surprise your audience with some other colours, like purples, that show up this time of year but may take a little more digging. It's worth pursuing a shot through a slightly different lens. Even if you don't know what you're looking for as you trudge through piles of leaves, you'll recognise it when you see it. It may not look as familiar at first, but it'll surely be at peace with the season at hand.

Embracing automatic ISO.

Recently, I find myself in more and more situations where I know what I'd like my shutter speed and aperture to be, but realising that the light situation is changing around me. In a recent round of street photography, for example, I wanted to shoot wide open (f/2.8, using my 70-200mm lens), and I knew that I wanted reasonably fast shutter speeds (I spent the day shooting at 1/800 second)... But given that I was walking down Southbank in London, where there's a lot of trees, overhangs, and rapidly changing light situations, what's a guy to do? The solution, more and more often, is automatic ISO: Select the things you care about, and let your camera adapt to the changing lighting situations by varying the ISO.

It isn't that long ago since this would have been completely impossible - Most of the camera bodies I've had so far, have had rubbish quality photos beyond ISO 3200 or so. With my most recent camera bodies, however (Canon EOS 5D mark 3, which I ended up selling because I found it too heavy for everyday street photography, and replacing with a Canon EOS 6D instead), the full breadth of the ISO range is perfectly usable.

'Yah, whatever...'

The above photo, for example, I captured by setting my camera to f/2.8 and 1/800. The camera selected ISO 320 for this shot. Perfectly fine; there's no discernable noise in the image at all.

Going Macro

More extreme, however, was the example I experienced recently. I've done a fair bit of macro photography (I did write the book on it, after all), but I found myself in a situation that was nearly impossible: Taking photos of insects on the move, without my usual flashguns. What to do? I was shooting with my 100mm f/2.8 Macro attached to my Canon EOS 6D, and no light sources or light shapers. All natural meant that I needed a relatively high shutter speed (because I was shooting hand-held), and a relatively small aperture (to deal with the extremely limited depth of field). Even in bright sunlight, that doesn't leave an awful lot of light left... But it turns out that automatic ISO still does the trick:

Shot at 1/800 second shutter speed and f/8.0, the camera chose ISO 4000 to fit the lighting conditions. Which, as it turned out, was perfect!

So I guess the lesson here is that on modern cameras, you can in many situations leave the camera to get things right, whether you're willing to let shutter speed, aperture, or ISO to be variable. Nifty stuff.

8 tips for better Smartphone photographs


Taken with an iPhone 4

Forgive me for stating the obvious: You get much better photos with a camera than without one. So, whilst I would much rather always be taking photos with SLR body with a sharp Prime lens, the truth of the matter is that you'll sometimes come across moments where you're just bursting to take a photo - and you may not have a 'real' camera handy.

If you're a hard-core photographer, you'll probably have a reasonably recent smart-phone. Great news: The phone comes with a surprisingly capable camera built-in.

It's not without limitations, of course, but here's eight tips to get the most out of your mobile phone snaps...

1) Clean your lens

Mobile phones are usually subjected to all sorts of abuse. Mine lives in my hand and my pocket; neither of which is the greatest environment for a clean lens.

Fingerprints, grease, or pocket fluff are the #1 reason for rubbish smart-phone photos, so check it, and clean it before shooting!

2) Shine a light

Modern mobile phones often come with impressive ISO ranges so you can take photos even in low light; but that doesn't mean you should: The small sensor size introduces a lot of noise, which isn't very nice, and certainly isn't conducive to awesome snaps.

Turn up the lights in the room, or go outside in daylight for the best photos.

3) Rez it up

If your camera has several settings, use 'em! As a general rule, the higher the resolution of your mobile camera, the clearer your photographs will be.

Bear in mind, though, that the higher the resolution of your photo, the larger its file size will be, so if you're e-mailing them, try to make them smaller before you kill your grandma's 28.8 kbit/s modem.

4) Nix the digi-zoom

Using digital zoom to zero in on your subject is fun if you want to use your mobile phone instead of binoculars, but it ain't much good if you're wanting to take photos. For photography, keep it zoomed all the way out, and crop the images later instead.

5) Steady now

When taking photographs, the more steady your camera is, the clearer your picture will be. Simples. If you can, lean your elbows on a sturdy surface, or place the phone against a lamp-post or similar for extra crispness.

6) Don't lose your (white) balance

If your mobile phone has the option of adjusting the camera using white balance, go ahead and experiment how the different settings impact on your photographs.

7) Get closer. No, even closer

To avoid having to zoom in or crop your shots later, ensure that your subject fills your viewfinder.

8) Sprinkle some editing magic

Even though your phone may have built-in editing features out of the box, consider editing them with a separate app instead.

For the iPhone, my favourite editing apps are Snapseed and Photoshop Express - Try 'em out, and use the filters and editing tools to add a bit of sizzle.

Got that? Great. Now go snap some photos you're proud of. Oh, and post them in the comments, I'd love to see what you guys come up with!

Photographing people who wear glasses

My brother has worn glasses full time for absolutely years, which has meant that I learned how to photograph him wearing them to avoid hideous green glare rather intuitively. I probably did have to think about it at some point, but I don't really remember and now I just seem to do it. That was until this week, when one of the students at Photocritic Photography School piped up and asked me what he should do when he has a portrait subject who wears glasses. For lots of reasons, the answer is never 'Ask your subject to remove them,' so what do you do?

Look at the light

Me and some wonderful green glare, taken with an iPhone

The most obvious problem that glasses will present to you is that they reflect light. Instead of seeing straight through spectacles' lenses and into your subject's eyes, you'll have a unpleasant, usually green-tinged, reflection glaring back at you.

Going back to GCSE physics, we know that the angle of incidence (or the angle at which light will hit someone's glasses) is equal to the angle of reflection (or the angle at which the light will bounce back off the glasses). If light is coming in at an angle of 31° to the normal of your subject's glasses, it'll bounce off at 31° on the other side of the normal*. There's a helpful diagram here.

Consequently, if your light source is too close to your camera the light has a much greater chance of bouncing straight off your subject's spectacles and into your camera's lens. And if the light is coming from straight behind the camera and your subject is looking straight back at the camera, you haven't got a cat's chance in hell. But the upshot is: know where your light is coming from.

* The normal is an imaginary line running perpendicular to the plane of the glasses.

Altering angles

Minimising glare is easiest by one of three means:

  • move your light source
  • move your subject
  • or move your camera

Pokey-out tongue copy

By shifting your light source or yourself, you can alter either the angle of incidence, and therefore reflection, or take your camera out of the firing line. Sometimes, though, your light source can't be shifted (say, when it's the sun) and you moving might not be an option. Then it's down to your subject.

Tilting and turning

If your subject tilts her or his head downwards, just by a few degrees, not by much, it'll be sufficient to adjust the angle of the light and prevent a reflection bouncing back into the camera lens. Or she or he could turn fractionally away from the light source; not enough to wreak havoc with your shadows, but enough to prevent that horrible glare.

Me, angled away from the light

When you ask subjects to tilt their heads or change the angle of their shoulders, you might find that their spectacle frames begin to encroach into the view of eye. At this point it becomes a trade-off between reflection obfuscation and frame obfuscation. You need to decide where your tipping point is.

Quit posing

If you opt for more candid shots, you'll be able to capture your subjects looking away or looking down and doing it naturally but still without any nasty reflections.

Downward tilt, candidly snapped.

Go with it

Sometimes, you just have say that the glare is there and it's better to have a photo with a reflection than no photo at all!

Hardware hacking: Fixing your X100 charger


Without the easy-to-lose piece of plastic, your FujiFilm charger is useless. Let's go DIY on its ass...

I've had a FujiFilm X100 for a while now, and I still don't completely know how I am getting on with it. Sure, I have taken some rather fabulous photos with it, like these ones:

20120215_dscf0564_600px.jpg

20120205_dscf0501_600px.jpg

20111009_dscf8681_600px.jpg

20110930_dscf8142_600px.jpg

The FujiFilm X100 battery charger problem

But it is not without its niggles. One of the small but incredibly annoying problems with the X100 is that the battery doesn't fit in the battery charger that comes with it. I know, it sounds completely inane, but it's true: To use the X100's battery in the charger, you have to use a tiny piece of plastic in the charger. Without it, the battery fails to make a connection, and won't charge properly. FujiFilm, if you're reading this: That was a complete bonehead move, and you really ought to be ashamed of yourself.

However, as a DIY photographer, I figured this was my chance to make my own life better. I lost the little piece of plastic nearly immediately, and was using toothpicks to hold the battery in place, but when my good friend Sarah told me about Sugru (by the way, Sugru, if you are reading this you should totally hire Sarah. She is awesome. Also, if you aren't reading this, then you obviously need a new community manager. Which brings me back to my original point: Hire Sarah.), I immediately saw a great use for it: Finally, a way of fixing my X100 charger, permanently and once and for all.

Let's get busy!

So here, offered as a deliciously simply to follow step by step guide: How to fix your FujiFilm x100 charger, by the power of Sugru:

1) Make sure you clean your charger properly; The Sugru is pretty hardy stuff, but if it's dusty or greasy, you're going to get less of a bond:

screen_shot_2012_06_26_at_190128.jpg

2) Take two small balls of Sugru (this was about 1/8th of a 5g packet of Sugru - or a grand total of £0.17 / $0.26 worth), and shape them into, er, balls.

3) Insert the battery into the charger, to make an imprint into the Sugru. Push it into the Sugru ever so slightly, and then remove the battery. The material will keep the shape you've just made, and harden over the next 24 hours.

screen_shot_2012_06_26_at_190142.jpg

4) Use a wet finger to gently brush off any excess material. Sure, this is an optional step, but if you're going to hack your own camera equipment, you may as well make it look reasonably good.

5) re-insert the battery to make sure it still fits properly, then remove it again

screen_shot_2012_06_26_at_190135.jpg

6) Leave it to harden for 24 hours

Congratulations! You've spent pennies on fixing a problem that FujiFilm really should have done right in the first place. More importantly, you can now use your well-earned bragging rights down in the pub, telling everyone that you've improved a piece of your own photography gear!

One simple step to improve your photos


When I'm asked what I do for a living, the responses that I get range from the infuriating: 'You must have a really great camera' to the inane: 'People write books about photography?' as well as the interesting. One of the interesting ones landed my way the other evening when I was chatting to someone whose wife enjoys taking photos.

'What one thing can my wife do to improve her photos?'

My answer was immediate, and pretty simple: 'Evaluate them.'

If you want to get better at taking photos, it's all very well being told that you need to practise, practise, practise, but you need to do a little bit more than that. You see, unless you critically assess your photos to work out what worked, what didn't, and why, all that practising will just result in a harddrive full of images that suffer from the same flaws and foibles. So you need to evaluate them: the good, the bad, and the what should I do differently.

Haje has written a very helpful guide to practical photo evaluation. His approach is both creative and technical and I would definitely recommend it for people whose photographic knowledge is above average and are serious about improving. But if you're just starting out, or if you just want to know how to make your holiday snaps that bit better, it might be a touch too complex. 

So here's a simpler version.

  • You do this at home on a big screen. Don't try to evaluate photos properly on the screen on the back of your camera. That's a recipe for disaster.
  • When you look at the photo, choose one thing about it that works. Is the composition bang-on? Have you captured the moment perfectly?
  • Then ask yourself: Why is it working?
  • Now identify one thing that isn't working. Is the exposure slightly off? Are the eyes not quite in focus?
  • In which case, what do you need to do to improve it?
  • Next time, make sure that you do it!

If you follow this process for every photo that you take, you'll quickly discover that you probably have certain photographic strengths and particular photographic weaknesses. By identifying them, you'll be able to build on what you do well, and make adjustments and improvements to remedy the areas where you struggle. With time, you should notice that you're taking better photos all round, and maybe even that what you're good at and what you find less easy, change.

Then, as you learn more, you can progress to far more thorough photo evaluations, and grow even more advanced!

Evaluating your photos

As the end of the year rolls around, it becomes natural to take a look at what you've done over the past year... And as a photographer, taking a closer look at the past year of photography can be extremely exciting indeed!

Apart from just taking a closer look at your own photos, if you're in a self-improving mood (and you may very well be; the new year's resolutions are just around the corner, after all!), perhaps it's a good idea to take a closer look at your year in photos, with a critical hat on.

If you've never actively sat down and consciously evaluated your own photographs, it may be quite hard to get started. In fact, even if you've made a habit of doing just that, it may still be difficult to actually vocalise what makes a photo 'good', and how you can make it 'better'.

I was having this very discussion with a friend of mine online, who asked me 'but I don't even know where to begin to evaluate a photo. Have you got any tips?' I sure do;

Self-Evaluation Aide-Memoire

  • What is the story? All photography is ultimately about storytelling in one way or another: If your audience is to connect with your photograph on an emotional level, there has to be a 'story'. As such, the first challenge is to identify what the story is that I'm trying to tell.
  • Technical Quality Is the image in focus? Is the exposure perfect? What about noise and sharpness?
  • Composition: Does the composition of the photo improve / help tell the story I am trying to convey?
  • What was good? Even if it isn't perfect, there's probably something I like about this photo. What and why?
  • The right tools for the job Could this photo have been better if I had used different equipment? If so, what is the difference between the equipment I did use, and the equipment I wish I had used? Why didn't I use that equipment? Can the effects be recreated with the equipment I do have?
  • Hindsight Now that I am looking at my photograph over a cup of tea, is there anything I wish I had done differently, creatively?
  • Did I tell the story? Now that I've answered all the other questions, the line of questioning comes in a full circle. It's time to go back to the first question, and determine whether the story was successfully told. If the answer is 'no', chances are that one of the questions between the first question and this one holds the answer to why the image 'failed'.

Especially when you are just starting out, using a form asking the above questions can be extremely useful in increasing the percentage of photos that come out great.

Don't worry if the process feels like it takes quite a long time at first; like anything you are learning, it will feel a little unusual and clunky at first, but once you grow accustomed to running through this little checklist, it'll become second nature to evaluate your own photos.

The secret to why this is so successful is that you're not just training yourself in evaluating your photos back in the comfort of your office chair – you'll also gain the ability to evaluate your photos as you are taking them! Bonus.