Reviews

Crowdfunding an iPhone camera: Is the Ladibird project a scam?

Today, I came across an interesting IndieGogo campaign, for the Ladibird; a snap-on professional camera for the iPhone 5. Initially, I thought it was a brilliant idea, but then I started reading about the product, and I immediately became incredibly skeptical. Allow me to explain...

The sample images

First of all, the thing that made me wonder what's going on, were the sample images. They look fantastic, without a doubt, but when you look at the Ladibird video, you see that the product is just a 3D render. So that made me wonder: Where did the example photos come from? Right at the bottom of the page, they explain that the shots are taken with "a 50mm prime lens on a 12 megapixel Nikon D700".

Now, there's a lot of problems with this, in my mind: For one thing, the Nikon D700 is a high-end professional camera that cost USD $3000. It's also a full-frame camera, with a 36mm x 24mm sensor built in. The Nikon lens used (a 50mm f1/8) is also a mighty sharp piece of kit. Do you think it's fair to use photos taken with a pro-level camera as examples for what an iPhone accessory lens can do?

The specifications

In the IndieGogo campaign, the Ladibird manufacturers do the following:

The Specifications

The thing that isn't clear to me, is why they are talking about a 'mirrorless sensor' as if that's a standard. Mirrorless cameras have wildly different sensor sizes; The Pentax Q has a 6.17 x 4.55 mm sensor. The Sony NEX-6 has a 23.5 x 15.6 mm sensor. The Leica M9 has a 36 x 24 mm sensor. And there are tons of sizes in between.

The lens spec itself, too, is fuzzy. They are talking about a "Ladibird 50mm (35mm equivalent) large aperture prime lens", which patently doesn't make sense, unless they have a sensor that is 45% larger than that found in the highest of high-end SLR cameras. A more likely explanation is that they have their terms mixed up, and that they have a lens which actually has a 35mm focal length (Which is roughly a 50mm equivalent on an APS-C size sensor), but it does worry me: Would you trust a lens designed by a company that isn't sure which way around the crop sensor conversion factors go?

Developing sharp lenses is an incredibly difficult and challenging task.

But what about the large sensor and 50mm?

All of this makes sense, apart from the fact that they are talking about limited depth of field, which doesn't depend on the focal length: There's no reason why a 50mm should have more pleasing depth of field than a 100mm lens. It is mostly dependent on the aperture, but that isn't mentioned in the marketing material.

The Ladibird guys have done a great marketing tasks, but as someone who's written a book on mirrorless cameras, and has technical edited a rather chunky stack of books about photography, I can't help but feel I'm somewhat qualified to evaluate this project, and it's setting off all manner of alarm bells.

In their marketing site, they've equaled small sensors with blurry photos. That's patently not true: The Nikon 1 series have tiny sensors in them, but are capable of producing fantastically sharp images. Similarly, my iPhone 5 has a miniscule sensor in it, a quick browse through the 'most interesting' photos taken with the iPhone 5 on Flickr reveals that many of them are tack-sharp works of art. This would infer that a small sensor is in and of itself no reason to buy a Ladibird.

The other argument they make is that the 50mm f/1.8 lens is cruise control to awesome photos. Now, in most cases that might well be true, but those specs alone aren't enough. "50mm" only means that the lens has a focal length of 50mm. There's nothing inherently better about this, and there are many examples of absolutely dreadful 50mm lenses out there. In fact, I could build a 50mm lens myself out of a couple of lens elements, a kitchen roll, and some Blu-Tack in about 20 minutes, but I can pretty much guarantee that the photo quality is going to be severely lacking.

So, is Ladibird a scam?

I have no way of knowing that, but the IndieGogo page does set off an awful lot of alarm bells.

I won't be backing the IndieGogo campaign myself, and I'll tell you why: I know how incredibly hard it is to build photography equipment, and so far, we haven't seen a single prototype or sample image from these guys. Even the mock-up image doesn't seem realistic (to have a 50mm focal length, the lens barrel would probably need to be longer), which makes me wonder how far along in the process they have come.

If the mockup image represents the current state of play, then I fear they're about to get a rude awakening if they think that $20,000 is enough money to develop a fully functional prototype of the Ladibird. For a product this advanced (Apple MFi; App development; Sensor design; Lens design; Testing; industrial design; production design; prototyping...), I'd estimate you may not be able to complete the full development cycle for less than $150,000. Bear in mind two things: $150k is a very low estimate for a product this advanced, and at the end of this phase, they will have perhaps half a dozen prototypes; they still wouldn't have created a single Ladibird for the Indiegogo backers.

Don't get me wrong, I really do want a product like the Ladibird to exist, but wouldn't part with any money until I've seen at least a couple of sample images.

The biggest worry is that the marketing material is such a hodge-podge of technical, factual, and physics-related inaccuracies... Let's put it this way: if Ladibird was a book, and it was passed to me for technical editing, I'd have to craft a very difficult letter to the publisher, suggesting that it's in a shape beyond where a tech-editor can help, recommending that the book was cancelled or seriously re-written. It certainly wouldn't be in a state to offer pre-selling it to the public.

Or, put in other words: I'd probably just wait until the product is available to buy in a store.

Review: Think Tank's Streetwalker Pro camera bag

When Think Tank offered me the chance to spend some time schlepping around my gear in one of their bags to see how it (and I) fared, of course I said yes. Legions rave about their bags and I wanted to give one a go for myself. So I opted for a Streetwalker Pro (the name does have dodgy connotations, I know) and it and my photographic impedimenta have been inseperable since its arrival.

Feature-StreetWalker-Pro-15

The Streetwalker Pro is intended for use on the move—days out and expeditions when you'll want a goodly selection of gear—but not necessarily travel. There's no laptop compartment in the Streetwalker Pro; for one of those, you'll need to look to its slightly larger companion, the Streetwalker Pro Harddrive. When I say I goodly selection of gear, I really mean it. This bag is a veritable TARDIS. It comfortably holds a full-frame body, a 70-200mm, and between two and four other lenses. You can play divider Tetris and get flashes, cables, remote releases, and all sorts in there, too. It has more pockets than I know what to do with. There's a tripod carrying-system. And it comes with a waterproof cover. If I were to fill it completely, I'd probably not be able to pick it up.

Feature-StreetWalker-Pro-12

It's also a taller, narrower bag than your average camera bag. For little me, this is a huge boon. I often find myself waddling about beset by a bag that makes me twice as broad as I am normally, which screws with my spatial awareness, particularly when in crowded places. It's plenty comfortable with well-padded straps. The internal padding leaves your gear feeling secure and the build quality means that you don't fear the bag faling apart on you.

StreetWalker-Pro-9

As it's a day-out-taking-photos-bag, having somewhere to put a sweater would be useful, but there's that much space in the bag you could probably stuff it in and not worry too much. If some of the pockets expanded a little more, that would be useful. My biggest concern, however, was that I found I needed to set it down every time that I wanted to open it up, particularly if what I wanted was towards the bottom of the bag. Other people might not find this so problematic, but I'd appreciate some easy-access zips.

At $190, the Streetwalker Pro is a good bag, but it isn't perfect. My quest for the perfect camera bag continues!

Book review: The Canon 6D Experience

Screen Shot 2013-07-23 at 16.33.28 
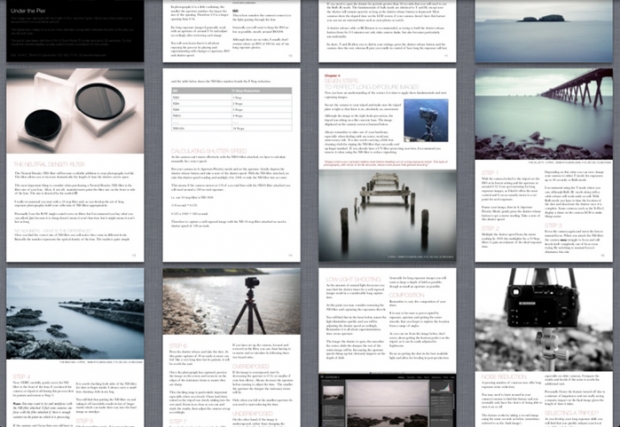
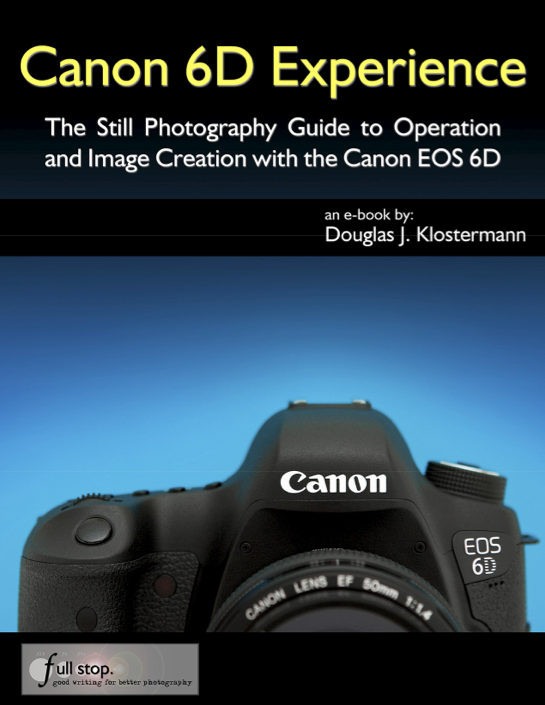
The Canon 6D Experience is part of Douglas J. Klostermann's series of e-book guides to Canon's and Nikon's dSLRs. There are ten Canon books and five Nikon books, ranging in price from $7.99 for guides to the oldest models of camera to $14.99 for the latest cameras. I've been taking a flick through it and seeing how it fits in with my use of my Canon 6D.

The best way to describe the Canon 6D Experience is as an augmented instruction manual. It doesn't just explain what a function is and how to operate it, but what effect or impact it will have on your photography. It shows you how to expose and re-compose your images, provides examples of different apertures and ISOs, and explains about metering. It covers a great many of the functions that I never use in my camera because I almost always shoot in Raw and almost never venture into liveview mode. Towards the end of the book it moves away from the camera itself and covers composition and discusses lenses.

Diagrams and pictures to explain metering

This, then, is perhaps where this book falls down, or falls between two stools. For someone new to dSLRs and still finding their way in photography, would they be starting out with a 6D? In the book's introduction it says: 'If you are relatively new to dSLR photography and are still in the process of learning all the controls of a dSLR and the exposure concepts of digital photography, you have perhaps ventured towards the proverbial deep end of the pool by choosing the advanced 6D!' Of course there will be some beginners who've gone straight for the 6D, but they're not the camera's intended market. This guide will suit them well, but I'm not sure how many will be needing it.

Not sure that we need a look at Raw vs JPEG for a 6D user?

For anyone who's comfortable with Canon cameras and is a competent photographer, a lot of the book's content is superfluous. It isn't that there isn't useful material in there, but that it's buried amongst the information we already know. Having a smaller, more dense publication that looks at the high level functions of the camera and compares it with other models might be more useful.

All of this leads me to think that if the books in this series that cover the lower specced models are written with the same attention to detail, they would be extremely valuable guides for people finding their way in dSLR photography.

On a very picky production level, I would have liked to have seen references to other chapters in the book numbered, or even hyper-linked. It is an ebook, after all. That would have made navigation a great deal easier.

My verdict, then? At $14.99 I can't really recommend the Canon 6D Experience; I just don't think it offers enough to kind of photographer who'd be using this camera. (Unless you really have thrown yourself in at the deep end.) If you're newer to photography and have a Nikon D5200 or a Canon 700D, for example, do check out the other books!

The Canon 6D Experience, by Douglas J. Klostermann, published by full stop and available for download from Dojoklo.

Infinite iPhone colour manipulation with ColorTime

When it comes to smartphone photography my default editing app is Snapseed. It does just about everything that I want in an app that I use on a device with a screen that's the size of the palm of my hand and it's intuitve. Sometimes, however, I find myself looking for a bit more control, the ability to adjust shadows, highlights, and midtones independently, or a white balance correction that is more fine-tuned. I've found it. It's called ColorTime. mzl.ncemfpho.320x480-75

ColorTime allows you to select between shadows, mid-tones, highlights, and saturation, adjusting the intensity on a colourwheel. Dragging up adds white or brightens the image; swiping your finger downwards introduces darker tones; and then you can increase warmer tones by swiping to the right and cooler colours by swiping leftwards.

Furthermore, you can paint particular areas of your image to adjust the tones selectively, or choose between the centre or edges of the image.

A rather blue-tinged peony

There are of course many occasions when any of this is useful, but I've found it particularly helpful for correcting the white balance in my iPhone photos, which always seem to be far too blue, and for adding a golden hour-like glow. If that's all far too subtle and practical for you, it's possible to make near-infinite adjustments: you keep moving your finger upwards (or downwards, left, right, four o'clock, 11 o'clock, whatever) until you reach the edge of the screen, and then you start over again.

... made to look rather more pink with ColorTime

The independent shadow, mid-tone, and highlight functions, in combination with the colour wheel, means that you can add blue to the highlights but orange to the shadows. If you want.

If you decide that you don't like you last adjustment, you hit the back arrow and it revokes it; if you decide that you've screwed it all up and want to start over, select the revert button. Should you not be able to decide, you can toggle between the original image and your adjusted image to decide which works best. Or you could select the animate function and let ColorTime present you with a loop of optins.

There is a crop and rotate function, but I haven't found it that easy to use. It feels underdeveloped and doesn't give you the control that you'd expect when the rest of the app is so responsive. It's not a huge problem, but for the moment, I will continue to crop in Snapseed.

I've really enjoyed using ColorTime and it has provided me with some terrific results. However, it is a learning curve. None of the buttons is labelled and I have occasionally found myself mistakenly adjusting entirely the wrong thing, but thankfully there is that undo feature. And there's a guide that is relatively easy to access.

When you're done, you can save your fixed image to your camera roll, email it far and wide, tweet it, save it to your Dropbox, or choose from a few other options.

photo

ColorTime is £1.49 in the App Store. For anyone who does even a moderate amount of iPhone photography, I reckon it's worth it.

Review: sending files freaking fast with Minbox

When it comes to online storage and collaborative working, I'm a huge fan of Dropbox. For just sending large files the two big names are WeTransfer and YouSendIt. But there's a new kid on the file transfer block that claims to be 'freaking fast'. It's Minbox, and I've been checking it out.

To be able to use Minbox you have to download the app; unlike WeTransfer, there's no send-from-web option. But unlike WeTransfer, the size of your files isn't limited to 2GB. In fact, they're not limited at all. You can send a file as large as you can manage before your internet connection konks out, for free. Minbox advertises itself as being 'freaking fast' and even with the cringingly slow connection that we suffer from at the Photocritic Outpost, the upload was on the speedy side when I tried it out with a bundle of high-res images.

You can upload files from the menu bar, or by right-clicking on a file

To send a file all you have to do is right-click on it and then choose between sharing it as a link or sending via the service. If you want to schedule when it will be sent your recipient, that's entirely possible. You can also opt to convert Raw image files to JPEGs and videos to Mp4 format.

Once you've sent a file, it resides in your Minbox collection for 30 days, after which it will self-destruct. Whether or not it'll do it with Mission Impossible-style smoke, I don't know as nothing I've shared yet has reached its expiration date. If you want to delete the file from your collection, you can do so by following the link from the viewed confirmation email.

Your collections

This is probably my second biggest bugbear with Minbox. At present, either waiting for the files to expire or following the email link are the only means of deleting them from your collection. You can't do it from the collection itself, despite being able to forward or share files from there. It feels a bit inefficient. The good news is that Michael Lawlor, who's Minbox's CTO, assures me that this will be rectified soon.

My biggest bugbear is that at present Minbox is app-based. There's no way I can access my collections from the web, which would allow me to manage and forward files from a computer other than my own. Again, this is on the developers' Big List and should be possible soon.

As a file recipient, you can preview your received file before downloading it and you can email it on or share a link to it from the preview page. Coming soon, you'll also be able to comment on it and share it to Twitter, Tumblr, or Facebook.

All of this is free. If the coders succeed in ironing out those usability kinks, I wouldn't hesitate to recommend it for transfering large files. Even with the kinks, it's an impressive service, if you have a Mac. Other operating systems are currently out of the Minbox, but if enough interest is expressed in providing for them, it's a possibility.

Coming soon there will be a Pro service that'll offer indefinite storage and scheduled expiration, amongst other things.

Minbox: it's one to watch.

Haje's review notes: Canon EOS 6D

After Photocritic editor Daniela came and showed me her shiny new camera - the Canon EOS 6D - I was gobsmacked. I have used my Canon EOS 5D for a while, and for quite a long time, I had been extremely happy with the photos, but living with this nagging feeling that there was something 'off' about the 5d. As soon as I picked up the 6D, I realised what it was. The Canon EOS 5D mark III is an astonishing piece of kit. The low-light capabilities are out of this world, it takes incredible photos, and the controls are so natural that it is probably the camera body I've gotten used to the fastest. It's a masterpiece of electronics and design. However, as I discovered when I first held its baby brother, it's too large.

This may come as a surprise to someone who's met me. I'm a tall guy (around 6'4" / 196 cm or so), and I have freakishly large hands. But, when I was writing a lot of books about photography, I forced myself to use entry-level cameras - not because I particularly wanted to use them, but because one of the key things I make in my books is that equipment doesn't really matter. That is very, very true, up to a point -- but given that most of my books are written for beginners, I had to 'eat my own dogfood', as they say: I figured it wouldn't make any sense to use a 5D mk III and then sing the praises of entry-level SLR cameras.

Dead Rat Orchestra -- Concert photos taken at Islington Assembly Hall, 1 June 2013.

Anyway: Last night, I did my first gig with the Canon EOS 6D, and ran into the first time where the 6D fell short. With the 5D, you can take gorgeous 22-megapixel shots in raw all day long; I never ran into a full buffer. On the 6D, however, I ended up missing several of the shots at the concert due to the camera's buffer being full.

I can't quite convey my disappointment: The 6D is a perfect camera for me in so many ways. I love the 20 megapixels, I love the ergonomics, I love the fact that it's a lot smaller and a bit lighter than the 5D. I like that it has GPS built in (great for travel photography!). I suppose it's naïve to think that any camera can completely replace a camera that's £1,000 more expensive.

Despite this one minor hiccup, I do still think I'll end up selling my 5D mk III. In the end, the consideration is this: How often do I take concert photos (not that often), and how often do I travel and take photos (frequently). The lighter weight, smaller size, and built-in GPS are worth more to me than being able to go all rapid-fire at a gig. And, of course, there's a way of dealing with this shortcoming, too: Become a slightly better photographer, and be a little bit more selective about the photos I take.

See the full gallery of concert photos taken with the 6D over in my Flickr set!

Review: Pentax X-5


I spent a few weeks with a Pentax X-5. I used it whilst my brother's girlfriend was decorating the Christmas tree, I took it down to my father's allotment, and I conducted the requisite 'general fiddling' too.

Basic spec

The X-5 has 26× optical zoom capability (22.3 to 580mm, extendable to 4174mm with Digital Intelligent Zoom in 35mm equivalent) with a dual shake-reduction system and 1cm minimum focusing distance in macro mode. The 16 megapixel back-illuminated CMOS sensor has a maximum sensitvity of ISO 6,400. It can shoot upto 10 frames per second, capture HD video, and comes with a range of filters and in-camera tools.

It is powered by four AA batteries and can be picked up for around £180 or $245.

Build and handling

The X-5 feels very much like a scaled-down dSLR in the hands, with a chunky grip and protruding lens. It was comfortable to hold and the button layout was sensible. Would I have preferred to be able to switch on the camera without having to remove the lenscap? Yes. Is it going to change my life any? No.

The X-5 offers you M, P, full auto, and a range of other preset shooting modes. No, there's no Aperture Priority or Shutter Priority modes. After spending far too long messing about with the controls in an attempt to secure a decent exposure in manual mode and getting highly frustrated by the auto-focus with a mind of its own in fully automatic mode, I shot predominantly in Program mode. The ISO settings are squirreled away in a menu, but it was far less problematic to change the sensitivity than it was to deal with auto-of-focus pictures or to refer to the camera's idiosyncratic exposure meter and functionality. (I disliked the meter's display on the LCD and found it unintuitve.)

I wasn't at all comfortable using the electronic viewfinder. It looked far too much as if I should have been playing a video game than taking photos. As a consequence, I used the LCD screen exclusively and enjoyed its tilting ability, especially when I put the camera on a low-set tripod.

Powered by AA batteries, you are supposed to be able to get 330 shots from a fresh set of four. I'm sorry to say that I didn't come anywhere close to that number of images. Maybe 150?

Performance

Once I'd freed myself of the tyranny of the self-selecting auto-focus and switched to Program mode, I quite liked using the X-5. It has a great zoom range, the image quality is absolutely fine for web reproduction, and it's generally simple to achieve what you want (within its capabilities, of course).

The ISO tests showed that it was fine up to ISO 400, but after then, quality began to degrade significantly. Colour reproduction in daylight was good, but I found that the auto white balance tended towards too yellow in incandescent lighting. Set the white balance to incandescent, however, and the colour reproduction was far more accurate. I was pleasantly surprised by the impact of the pop-up flash indoors. It wasn't too harsh.I had pretty good results with the macro mode, too.

I don't have any particular love for in-camera filters, but the X-5's range of 12 were easy to use and could be applied non-destructively to the original image. In addition to those filters, you can play around stretching your images, giving people small faces, and creating collages. You can resize and crop in-camera, as well as edit video, too. There's also the ability to shoot direct to the camera's memory and then transfer the images to an SD card.

The Verdict

You get a lot of camera for your money with the X-5. But, it doesn't offer you anything outstanding and I found some of its features so frustrating to use that, from my perspective, they might not even have been included. Furthermore, I'm just not convinced by the bridge camera concept; they seem to sit in a photographic no-man's-land.

Would I buy it? No. Between my dSLR and a highly specced compact, my needs are met and the X-5 comes in no way close to fulfilling them.

Would I recommend it? If you really want a bridge camera, it offers such great value for money that I don't think you can ignore it.


More images on Flickr.

Review: Pentax K-30


I spent two weeks with a white-bodied Pentax K-30 and its 18-55mm ƒ/3.5-5.6 kit lens. I took it around and about the villages where I'm currently living, into Cambridge for a day, to a craft evening, to my aunt's birthday dinner, and I conducted the necessary 'general fiddling' at home. 

Basic spec

The Pentax K-30 has a 16.3 megapixel sensor coupled with a PRIME M engine. Sensitivity ranges from ISO 100 to 12,800, but this can be extended to 25,600. It has a maximum frames-per-second rate of six, if switch out of Raw and into JPEG mode. There's also full HD video with a choice of 24, 25, or 30 frames-per-second. It's also unusual amongst its fellow mid-range cameras with its weather sealing, allowing you to take it out in the cold, the wet, and the dusty.

At the moment you can pick up a K-30 with an 18-55mm kit lens for around £470 or just under $1,000. With the added seasonal cashback offer Pentax UK is running, this certainly makes the K-30 better value in the UK.

Build and handling

When I took the K-30 out of its box, my first impressions were of a solidily built camera with an interesting design. No, I wasn't quite convinced by the white body, but it does come in more sedate black as well as a bit more racy blue. The large, blocky, handgrip might not be to everyone's liking, but I found it very comfortable to hold. It is worth bearing in mind, however, that I'm not a big person at all and my hands are very small.

There were a few quirks of ergonomics that I did find irritating, however. The direction of the on/off switch felt counter-intuitive. It's a very minor thing and one that I'm sure I'd not think about twice with a little more use. The placement of the aperture control dial is a different matter, though. It was too far to the left for me to be able to use comfortably. Granted, this is something that's dependent on me and my anatomy, but it's still worthy of consideration.

I also found the shutter release button uncommonly sensitive. On more than a few occasions I took a photo when I was still adjusting the exposure or focusing. It's not a terrible fault, but something that I noticed.

As a general rule the menus were sensible and well laid-out. Every now and again, however, I'd be confronted with a situation where I simply couldn't find what I was looking for. Of course that's frustrating, but the more that you get to use something, the more familiar it becomes.

Performance

My first outing with K-30 was to my aunt's birthday dinner, held in a dimly-lit restaurant. I was very impressed with the colour reproduction and thought that it handled higher ISOs well, but I noticed what I think is probably the K-30's biggest downfall: its pitifully slow auto-focusing capability. I was disappointed when a good proportion of the photos weren't as crisp as I would have wanted them.

In good light, however, I had no complaints about the auto-focusing, and the auto white balance was pleasing, too. I'd be inclined to leave it on auto white balance, rather than fiddle about with the pre-sets.

I did notice a touch of under-exposure in images where there were particularly bright areas. (The photos taken at the river in Cambridge being a good example.) There is the Highlight and Shadow Correction option to help out here, and in these instances, the photos were easily corrected.

When it comes to ISO, you can use the K-30 comfortably up until ISO 1,600. You begin to notice degredation at ISO 3,200, but you could still get away with things here. I wouldn't push the ISO to the maximum 12,800 (expandable to 25,600) unless really necessary.

The K-30 comes with both Custom Image modes and digital filters. Having the two different settings to achieve a range of effects such as monochrome, toy camera, or bleach by-pass seems a bit kooky to me. Surely one function for these types of features is enough? However, I discovered to my cost that digital filters can't be applied to Raw images; there's no automatic 'Save Raw + JPEG' function. Yes, this is an oversight, but all of the effects can be achieved in post-processing if you really want them. So if you screw up, like I did, it isn't the end of the world!

The slow auto-focusing came back to haunt me when I tried to take some photos at a craft evening with my WI group (I took turning 30 very seriously, mmkay?). We meet in a hall with horrible lighting and the K-30 really struggled to pin-point its subject. It feels such a shame when it performs so well in other areas.

The verdict?

I really enjoyed using the K-30. I used it to take some great photos and thought it had some terrific features, especially that weather-proofing. I did feel let down by the slow auto-focusing, which really doesn't allow the camera to capitalise on its fantastic ISO performance. (I'm reliably informed that it does improve with the 18-135mm lens, but that adds to the price considerably when you're starting out.)

Would I buy it? Well, no. But that's because I'm already invested in another system and this isn't the camera I'm looking for.

Would I recommend it? At the moment, in the UK, the K-30 is cracking value for a mid-range dSLR with weather sealing. If you're looking for a decent SLR that will provide you with the opportunity to produce high quality pictures and a lot of fun, you should take a look.


There are more photos on my Flickr stream. You can take a look here.

Review: The Long Exposure eBook


Long exposure photography is about capturing space and silence, like visually holding your breath; it is about capturing the beauty and calmness of a scene... And it's really good fun to boot!

The new book by Ireland-based David Cleland is a fantastic introduction to the process of capturing long exposure photographs. It documents the simple steps he employs every time he embarks on a long exposure photo shoot.

bookinside.jpg

The e-book covers everything from the equipment you will need right through to post- production processing in Adobe’s brilliant Lightroom 4. This guide has been written with the beginner to the long exposure process in mind; however, the enthusiast and professional alike may find something of relevance also. The know-how in this book will enable you to capture stunning long exposure images on even the simplest of camera set-ups.

More info? Head to David's website - and dont' forget to keep an eye on his Twitter, while you're at it!

A tiltpod? What's a tiltpod?


When I was first asked if I'd test-drive a tiltpod, I shrugged my shoulders and thought 'Why not?' A portable, tiltable compact camera or iPhone securing device? There are worse things I could be asked to do, even if I weren't quite sure how I'd end up using them.

About a month on, I love my iPhone tiltpod and I can see the benefit of the compact camera version.

Tiltpods come with a lightweight, magnetic base that's set with a small socket, and a corresponding magnetic ball joint that either screws into the tripod mount of your compact camera or has a slot for your iPhone 4 or 4S. The ball sits in the socket, is held there by the marvel that is magnetism, and being a ball-and-socket, rotates. Rather than being tripods, they're more like gastropods, I suppose.

The camera version's base attaches to your camera via a lanyard and the ball joint is unobtrusive enough to live permanently in the tripod mount. (If you've an off-centred tripod mount, there is a sticky ball joint, instead.) It's a clever bit of design: the chances of losing one bit or the other have been diminished whilst the possibility of actually using it is increased by virtue of it always being there. As for the iPhone version, it can dangle most comfortably from your keyring.

Now that the ergonomics have been covered, what about using the things? Quite serendipitously, a project that is currently consuming just about all of my waking moments has demanded a heap of iPhoneography recently. The tiltpod has proved its mettle here, especially when it came to self-portraits. Find a flat surface, set the angle, use your self-timer function of choice, and away you go. Even if you don't need to be quite so artistically-inclined as my endeavours, a tiltpod is still ideal for grabbing photos of you and your beloveds, instead of pictures with oddly angled arms or devoid of one of your party.

Or you could just use it for Facetiming, if that's more your thing.

As for the camera version, it's pretty much the same deal. Find your surface, set it up, off you go. I've not had any issues with wobble, slide, or slip, and positioning it has been a question of how daring I've felt.

Tiltpods aren't without their limitations, though. Unless you magnetically attach the base to a radiator, lamppost, or railing, you're restricted to taking landscape oriented photos with the camera version. Whether or not you've the stomach to dangle your P310 from a balustrade via a magnet is up to you. I mean, I tried it, in the interests in writing a review, but I don't know if I'd be prepared to step beyond catching distance of my camera lest gravity get the better of it. (The tiltpod team does point out you can always attach the sticky ball joint to your camera to facilitate vertically-oriented shooting, but if you're already using the sticky foot, you can't. And you might not want to stick a sticky foot to your camera, either.)

If you precision-angle your iPhone, you can stand it vertically in its tiltpod. This set up does, however, feel a little precarious for my comfort. I would have apreciated just a little more depth and width in the base, so that I could use it to take portraits and not have to worry about my iPhone tumbling into oblivion, or have my iPhone standing up on my desk without fear of it toppling over should a door slam. Still, it hasn't stopped me from using the tiltpod to cradle my phone on my desk horizontally.

Finally, they do need to sit on a surface: a wall, a shelf, a nest of tables that I stacked one of top of another to gain sufficient height for one particular photo. But the problem itself isn't insurmountable (although my furniture obstacle course might have been) and it's the trade-off for their significant advantage over other camera-stabilising devices: they are emininetly portable.

The camera version stays attached to your camera, so it goes with you (and your camera) automatically. The iPhone version attaches to your keyring. They're designed to be used, not left languishing in a drawer or at the bottom of a bag.

At a smidge under $15 each, a tiltpod doesn't break the bank, although I'll admit that I probably wouldn't have gone out and bought one for myself. I am, though, very happy to have them in my possession. If you do lots of iPhoneography (or Facetime frequently), the iPhone version is worth it. And I reckon that they make pretty nifty presents, too.

Tiltpods are available from Gomite's webstore, costing $14.95 each.


Disclaimer: Gomite did send me two unsolicited review models. I didn't pay for them and I have been allowed to keep them.

Canon 100mm f/2.8 Macro: A love story

Some times you find a lens that is so relentlessly delicious that you simply have to write it a love poem. Since I'm not a poet, I fear it may merely have to be these words. Think of it as short prose, perhaps, masquerading as free-form poetry.

This photo:

6847881597_bff897ee4a_o.jpg

was taken with a Canon 100mm f/2.8 Macro lens. The Non-image-stabilised version. It costs $570 / £420, and is a truly magnificent piece of kit. For one thing, it is supremely sharp. It's a 100mm lens that's perfect for portraiture, and it's bright as well - at f/2.8, it's great for photographing in relatively low light.

Of course, its crowning feature is the 'macro' bit, and that is where it truly shines. The photo above was taken free-hand: No tripod, no flashes, no lighting; just my Canon EOS 550D, and the Canon 100mm lens. It's a little bit grainy, mostly due to having to shoot at ISO 800 to get the shutter speed high enough to be able to get the shot without much motion blur.

I know I keep raving about my 50mm f/1.4, but I've gotta say; this 100mm f/2.8 is storming up there as one of my all-time favourite lenses.

Borrow it if you can, hire it if you must, buy it if you love it.

Happy Valentine's Day! :)

2011: my favourite photos


Out of the shadows

2011 has been a bit of rollercoaster. I completed a project I'd been working on for two years; I quit my day job; I wrote my first book; and I planned a six-month trip overseas. It has been stressful, fulfilling, and thrilling by turns.

Amongst all of the excitement and uncertainty, I even managed to take a few photos. I've shared a few of my favourites in the gallery above.

Which leaves me to toast 2012 - when I'll be skipping the UK in favour of the US, New Zealand, Australia, Bali, Singapore, Hong Kong, and maybe even a late stop in Thailand - and thank you for joining for the ride so far. Next year should be even better!

Some of my best photos from 2011


2011 has been a pretty crazy year all around. This year, I have:

  • been to four different continents and a dozen different countries
  • taken tens - if not hundreds - of thousands of photos (and 6,000 of them were good enough that I decided to keep them in my Lightroom library).
  • gotten engaged.
  • I've (nearly) brought my photography gadget Triggertrap to market 
  • Seen one of my books go on sale, and finished another one that'll go on sale in 2012. 

It's been an incredible ride. But really, in this post, I just wanted to share some of my fave photos from 2011 with you - they're in the gallery above!

Happy new year, and have a well-exposed 2012!

Rock on,

~ Haje


My week with Q


Small, very small

When you read the specs for the Pentax Q, you know intellectually that it's small, but it doesn't really hit home until you see it for yourself. It really is tiny. In fact, it's so dinky you'd be forgiven for thinking that it's a toy… before you hold it in your hand (just the one).

It definitely doesn't feel like a toy. There's a decent heft to it and nothing about its build feels tinny or plasticy. It's a camera that's been made to do business, despite its diminutive size. Fitted with the standard 8.5mm (47mm equivalent in 35mm format) f/1.9 lens, it slipped into my handbag or coat pocket, but not my jeans pocket.

So it came with me everywhere for almost a week, including a visit to my brother over the weekend, a walk in the park to photograph some wildlife, and a Christmas party where it generated plenty of oohs and aahs. It's these experiences on which I've based my review, so there aren't any painstakingly photographed charts to test white balance. But I'll admit to setting up a shot to test the filters when I felt a bit creative, and I wanted to take a closer look at the ISO, so I messed around doing that for a bit.

Hands on

I got used to the layout and menu system fairly quickly. Sure, it was unfamiliar initially, but that was to be expected. You choose your mode, from fully manual to fully auto, using the dial on the top of the camera, where there's also the wheel to adjust aperture or shutter speed. There's a dial on the front that can accommodate your favourite filters and a green button on the back that you can customise to access your most-needed function.

The four-way controller on the back covers white balance, ISO, flash, and the timer. There are also the information and menu buttons to take you down into the guts of the camera. Seeing as the camera's so small, it's hardly a surprise that its buttons are, too. I coped fine with them, but anyone who's a touch bigger than me or has finger nails a sliver shorter than mine might struggle, let alone if you're a body-builder in your spare time.

The flash has a pop-up facility, which I found suitably amusing and of course is useful for preventing the curse of red-eye and ensuring that your extra light won't just bounce off of a longer lens. I was slightly concerned that it might take out my eye if I were to deploy it in a hurry, though.

The response time between switching on and being able to take a photo was good, and navigating between and adjusting shutter speed, aperture, and ISO was intuitive. But when I began taking photos, I ran into a couple of problems.

Frustrations with focusing; irritability with exposure

First, I kept running into arguments with the autofocus. There would be occasions when it simply focused where it thought it should be focusing, not where I wanted it to focus. If I'd had it on auto mode, that might be just about understandable, but in fully manual, it's beyond comprehension and terribly frustrating. You don't get many second chances in photography and seeing them float by because of a tipsy autofocus was disappointing.

Second, every now and again the metering would seem to waltz away and have a party of its own, leaving my images wildly under-exposed. This wasn't nearly so prevalent as the autofocusing issue, but it did mean that I was more exasperated with a camera than was exactly healthy.

Post-processing fixes

So what of the images? I've taken some photos that I really like and my favourites are up there for you to see. The colours weren't muddy or washed-out, although the white balance was occasionally off by a quarter country mile - so much so that my poor brother looked green in a few portraits - but that was nothing that a bit of post-processing couldn't fix. The noise levels didn't want to make me scratch out my eyes until at least ISO 800 or 1000, which is entirely reasonable.

When I compared the RAW and jpeg images straight from the camera, what struck me the most was the barrel distortion from the lens. The warped horizons on landscape shots was very noticeable, and I found the bent look in my office floor almost alarming. Sure, the jpeg option straight from the camera does correct it, and it's something that you can fix yourself in the RAW file in post-processing, but it's rather significant.

Fun with filters

There are more filters and options to do crazy things with colour and processing in the Q than I think I've had hot dinners this year. At first it was almost overwhelming, but as soon as you surrender to your childish desires to combine posterising with bleach-bypassing, or grimace at just how hideous you can make a perfectly decent picture look with selective colour, it's a lot of fun.

Verdict?

When it came to packing the Q into its box and sending it back, I was a lot more reluctant to do so than I thought I'd be. Despite the odd temper tantrum involving autofocusing or exposure, I've enjoyed playing with this camera over the past week or so, and doubtless I'd continue to if I had it for longer. But I've a sneaking suspicion that a great deal of this fun is reliant on knowing that I've a proper optical viewfinder and a much better sensor waiting for me in my dSLR, and my S95 slips into my jeans pocket, has a lens that's far more versatile than the 8.5mm standard lens on the Q, and produces images of about the same quality. If the Q were my only camera, I think I'd spend a fair chunk of my time feeling frustrated.

There's no denying that Pentax, Nikon, Olympus, they're all on to something with teeny-tiny interchangeable lens cameras. These are a significant development in the photographic world, but they're not there yet. So I can't recommend that you buy a Pentax Q when for less you could pick up a Canon S100, a Nikon P300, or an Olympus XZ-1 that delivers just about the same image quality with greater versatility and in a more compact package. One day, maybe; but not today.

Just about every filter you could ever want from FX Photo Studio


There are 20 categories of effects, with a selection of different filters in each one. That's a lot of filters, guys.

So about ten days ago I had my very Violet Elizabeth Bott stamp-my-feet and squeam-and-squeam-and-squeam-until-I'm-sick moment when a free photo filter app didn't offer me the requisite degree of control I expected and left me feeling terribly hard-done-by. Obviously I threw all of my photo-editing toys out of my pram and went into the garden to eat worms because it just wasn't good enough. And then the lovely guys at FX Photo Studio thought that they might be able to placate me with a trial of FX Photo Studio Pro.

It's one of four photo effects options that they offer: FX Photo Studio for iPhone and iPod Touch; FX Photo Studio HD for iPad; and FX Photo Studio and its Pro version for Mac. All of them have the craziest number of filters that you can apply to your images, filters that can be layered one on top of another on top of another, and adjusted to just the degree that you want. All of this sounds as if it might have been enough to convince me to come back inside and play nicely. Was it?

Filters galore!

Well I cannot in any way fault the number of different filters that were laid at my disposal. They're divided into 20 different categories and cover everything from 'Color Fantasy' - which allows you to invert images, to 'solarise' them, and convert to tritone impressions - to a choice of ten different vignettes. Once you've applied a filter, you can apply another one over the top, and another one over the top of that, and, well, you can carry on until you've run out. When you've overlaid a filter, you can mask it and reveal the one beneath using a brush if that takes your fancy, too. If you can't find the look that you want, then I'm not certain you'll ever find it.

Should the mahousive number of filters be a little overwhelming for you, just click the die icon and see what the programme serves up for you at random. I confess that I spent at least fifteen minutes just rolling the die to see just what it would do to my photos, and it was good fun. It might not have produced an image that I'd want to hang on my wall, but it gave me a giggle all the same. When you find a filter, or a sequence of filters, that you particularly like, you can add it to your favourites so that you don't have to go searching for it every time you want to doctor an image.

Yay! Some kind of control!

Every filter that you apply can be adjusted individually using a slider, so you can determine just how much contrast you want in your cross-processed look, or how bright you want the glow to be in your glow filter. If you don't like it, you click the undo button and it takes it back a stage. This is the bit that makes me very happy; you don't lose everything, just the bit that you don't like. The Violet-Elizabeth-Daniela-evil-monster-spoiled-brat-hybrid's tears had dried.

The Pro version also has a set of basic editing functions, too, so you can crop, rotate, adjust the contrast, and sharpen your images. They are, however, basic and don't have anywhere near the nuanced control or variety of options that you get in something like Lightroom. They were handy, but not nearly sufficient for heavy editing. To be fair, they're probably only there to make it easy to make minor edits before you go scrawling over your photos and sending them sky blue pink with lime green spots. Better that than have to fire up another editing suite, make your adjustments, and re-import.

Importing photos

As for importing photos, FX Photo Studio Pro can handle up to 32 megapixel images - the non-Pro version has a slightly more restrained 16 megapixel capability - and can import them in almost any major file format, including RAW. You click the 'Import' button and taa-dah, you can import images from anywhere in your hard-drive, whether that's from Lightroom or from your already-organised and edited images. And when you're done and dusted, you click on the save icon and away your photo goes to whichever file in which you want to store it, in the file format of your choice. Or you could just thrust it onto your unsuspecting fans by sending it straight to Facebook or your social network of choice.

Layout

If anyone has ever used Lightroom, you can't help but notice the aesthetic similarity. It uses a deep grey background, the key adjustment panel is on the right; the import box appears on the left, and at the bottom the image you're working on appears in a scrolling band with every different filter applied so you get an overview before you do anything. You can even compare your before and after images side-by-side. It's clean, simple, and intuitive.

Conclusion?

This is a super-fun piece of software. I spent far more time than was good for me turning a friend into an alien, making a butterfly look as if it'd survived a nuclear explosion, and applying 11 different cross-processing effects to a picture of a pile of leaves. If you're someone who prostrates themselves at the altar of the post-processing filter, I'm sure that you'd be prepared to make a sacrificial offering for FX Photo Studio. With over 170 different filters that you can layer ad infinitum, a slider that controls the degree of impact each filter has, and easily undo something if you reckon that your forty-third layer of filter has gone that bit too far, there's almost nothing you can't do with it. And that might just make it worth £10. Me? Despite all the fun that I had, I'm just not that into filters to warrant splashing out on it and installing yet another piece of software on my computer.

Is the £16 extra worth it for the basic editing functions on the FX Photo Studio Pro? If you're only really looking to have a bit of fun with your photos and need to crop, rotate, fiddle a touch with the exposure, sharpen a smidge, and then let your imagination rip with neon lights bump-mapping, then sure. They're there to make it easier for you to get the look you want from your filters, not to be your major editing workhorse. If you want to carefully adjust the violet hues, work on the contrast, and exert precision control over the white balance in your photos - at which point you probably aren't really going to want to apply a rippled mirror effect followed by a rainbow filter - then it won't be nearly refined enough and you're better putting your money towards Lightroom.

The verdict then? Love filters and you'll love FX Photo Studio. You just need to decide whether you need the £10 version or the £26 version. So yes, I'll play nicely again. But can I please have a pony?

All the details

FX Photo Studio Pro £26.13 or $39.99

FX Photo Studio £9.80 or $14.99

FX Photo Studio HD for iPad $2.99

FX Photo Studio for iPhone or iPod Touch $1.99

Head over to the FX Photo Studio website for more details.


Picfull - a playful, if frustrating, photo filter site

Picfull

Any compact camera released within the past year comes with a dizzying array of filters as standard. It seems to be the current battle-ground of the point-and-shoots. If you can’t sepia tone, posterise, or Warhol-esque your pictures at the click of a button without the tedium of transfering your images from memory card to computer, then why bother? There need to be star filters, cross-processing look-a-likes, and over-saturation options at your fingertips.

But what if you don’t have a camera with such a crazy selection of toys, but you’d like to play? And what if you’re not the sort of camera-owner to have a snazzy post-processing programme waiting to crop, rotate, and adjust the colour and contrast of your images? There are quite a few online, and free, filter-adding options out there. One of them is Picfull.

This is me made to look glow-tastic

Picfull offers 18 different effects that you can apply to your photos, for free. You upload an image, you select which filter you want to apply, you fiddle around with it until you’re happy, and then you save and either download or share it with your adoring fans by email, Twitter, or Facebook. Or you can undo eveyrthing and start again. Or you can apply another filter over the top of the first one.

It’s a really simple concept, if you’re into vintage-looking portraits or pen-and-ink sketches. But I didn’t find the user-interface all that friendly.

How about in ghastly two-tone?

It’s great that it offers you the option to adjust the contrast on your yellowed image, or control just how much blur there is on your blurred effect, but it doesn’t show you how much of an effect your adjustments are having as you move the slider. You have to wait for the effect to be applied. And if you don’t like it, you can’t just undo the move without undoing every previous action, not unless you can remember exactly at what value the contrast used to be, or where the saturation levels were initially.

If you’re making adjustments to the colours in an image, this inability to remember previous values, or undo just one action, is not helpful.

Or there's me looking vintage (in jeans)

I know, Picfull’s a free toy that’s meant to be a bit of fun. In all honesty, I shouldn’t complain. I’m spoiled by the control I have in Lightroom and when do I ever make my photos look as if they were taken on a Holga? But it feels that bit of a waste if you’ve gone to the trouble of developing a site specifically to play with photos, and it isn’t quite as easy as it should be.

I wanted to be able to play with Picfull. Instead I found it a touch on the frustrating side.

Book review: The Rough Guide to Digital Photography

Rough Guide cover

I can’t remember how many different Rough Guides I’ve thumbed through when I’ve been on my travels; they’ve saved me from near-disaster when stranded in northern Spain and helped me to find half-way decent vegetarian food in not-especially-vegetarian-friendly places, not to mention pointing out places where I really must go and get photographs. Clear, comprehensive, and honest, they’re as essential to travel as a passport. So what about a Rough Guides foray into territory beyond travel, The Rough Guide to Digital Photography, by Sophie Goldsworthy? Does it live up to the Rough Guide reputation?

I shan’t take us all around the houses. Yes. It is a worthy addition to the Rough Guides family. But remember, this is a Rough Guide to photography, not a book for advanced amateurs. It’s a serious exposition of the basics, not a deep and meaningful about studio lighting.

It starts with what to look for in a camera and ends with a resources section covering more books, websites, retailers, galleries, and clubs and societies for when you want to learn more and expand. In between it looks at kit (from lenses to external hard drives), exposure, composition, types of photography, post-processing, and even includes phone apps and the film revival.

Goldsworthy’s style is accessible and comprehensive. It’s not just that she knows what she’s talking about when it comes to explaining ISO or running through the basic tools in editing suites, but that she’s able to articulate it as well. Too often you read something that has been written by someone who obviously knows their onions, but can’t explain anything, even if their life depended on it.

You expect there to be plenty of photographs in a book about photography – although believe me, I’ve seen a few where there just are not enough – and this book doesn’t disappoint. However, it doesn’t only include pictures that are great examples of effective leading lines or super colour composition, it has a fair number of comparison photos, too. This is what your photograph will look like if you don’t use a graduated filter, and here’s what it’ll look like with one. Being able to see the effect of a fill flash makes such a difference when you’re learning about it.

There are plenty of quick tip boxes scattered throughout the book, as well as equipment pointers and short expositions on pertinent questions. I’m a Photographer Not a Terrorist gets a look in and cross-processing is explained. Granted the chapter exploring online resources and communities will be out-of-date in a year or so (hell, it was probably out-of-date the moment it came off of the press, things move so fast), but that can’t be helped and when you look at the book as a whole, it really doesn’t matter, either.

Just like a travel Rough Guide, it’s the perfect start to someone’s photographic adventure. It tells you what you need to know so that you get out there and enjoy exploring and discovering for yourself. If you know anyone who’s looking for a good grounding and wants to make the most out of their camera, start here.

The Rough Guide to Digital Photography, by Sophie Goldsworthy. Published by Rough Guides and available from Amazon UK and Amazon US

Testing an indestructible harddrive


Carved out of Aluminium, it doesn't get much more solid than this.

It's no secret that I care a lot about keeping my photos safe, whether I'm at home or out and about.

As a photographer, you often end up trekking three quarters of the way around the world to get some photographs. By its very nature, this journeying tends to make the photos unrepeatable - so how would you go about ensuring that your valuable photographs don't go missing? The two above articles show a pretty good workflow, but when my girlfriend recently dropped a backup drive on the floor, leaving it useless, I was thinking: Perhaps there's another aspect to travel that I hadn't thought about quite enough yet: Your equipment goes through an awful lot of abuse. Perhaps upgrading to some more sturdy harddrives would be a good idea? Preferably something that's completely shock- and water proof?

And so the hunt began. After some googling, I found a company called ioSafe, who make a series of external hard drives that are specifically designed to withstand a seriously abusive relationship. How serious? well, that's the bit I was going to find out...

I procured one of their Rugged Portable drives with FireWire 800 connectivity (it also has USB 3.0, but since my MacBook only has USB 2.0, I didn't bother testing this), and decided to give it a proper test.

Test 1 - shock absorption

To start off, I dropped the harddrive off a table onto a wooden floor a couple of times. This thing is so solidly built that it did dent the floor, but the drive itself escaped without a flash. So I started thinking up more cruel ways of treating the drive.

... And then I came up with the ultimate test. I had a journey from London to Buenos Aires coming up. What better way to test whether a drive is solid enough, than to... Put it in the top pocket of my backpack. I should add, at this point, that my backpack is a great travel tool, but the top pocket has no protection whatsoever: It's a thin material, and it is as close to just using zip-ties to affixing the drive to my suitcase as I dared to go.

So, the drive passed through several set of X-ray machines, and was manhandled by luggage crews both at Heathrow's terminal 5 and Buenos Aires international airport. In fact, when I asked the team at ioSafe whether they thought this would be a good test, their PR boss got back to me and said "In your luggage? Unpadded and unprotected? Heck, you certainly don't pull any punches. What next? Trial by toddler? :-)"

Nonetheless, the drive passed with flying colours: Not a scratch, not a dent, and when I plugged it in, it happily whirred back to life, without skipping a beat.

Verdict: Pass.

Test 2 - Flooding

My second test was, if possible, even worse. I've drowned enough electronics in my life that I know that, generally, when something gets wet, it's game over. When I'm travelling, I protect my backup drive my putting it in a Ziploc bag (I ought to use one of these, really...), but this drive claims to be fully water proof for up to 3 days.

Now, I'm an avid Scuba diver (in fact, I'm a licenced PADI Divemaster), and if I had any dives coming up, I'd have taken the drive down to 40 meters (130 ft) to test it. Sadly, I'm currently in Buenos Aires, and there's not a lot of diving to be done 'round here, so I figured I'd try the next best thing: Leaving the drive in my sink for a little while.

I did a little video of this particular part of the experiment:

Verdict: Pass!

Conclusion

The FireWire 800 drive is bloody quick, and the drive passed both my rounds of torture. Suffice to say that I'd be more than happy to trust the ioSafe Rugged drives with my vital data. If you want to be extra double-plus safe, you could even consider getting the SSD (solid state drive) edition, rather than the Harddrive version. It's more expensive (you can get a 600GB SSD version with a titanium enclosure, but it'll set you back a hefty $3,000), but basing your backups on SSDs makes sense: SSDs have no moveable parts, which makes them even less susceptible to damage if you decide to, say, drop them out of a moving car or similar.

As ever, even with nigh-on bulletproof and water-defying drives, it's a good idea to be as careful as you can with them. The huge difference with these particular drives, then, is that you increase your margins of error drastically.

Highly recommended for photographers on the go who can't afford to leave the integrity of their data to chance!

Pentax Optio RS1500 review

templatesRS1500

We do enjoy getting toys to play with here at the Small Aperture Mansion. The latest to pass through our grubby mitts has been Pentax’s Optio RS1500, the little point-and-shoot with the customisable front. The idea is that you can take off the lens ring and change the ‘skin’ on the front for anything ranging from candy-cane stripes to camouflage. Armed with its 14 megapixels, 4× optical zoom, 15 picture modes, smile detection, and nine filters, we set about finding out what we thought of it.

Build and design

It’s a small, light-weight camera. Even in my tiny hands, it felt little and I dread to think what sort of damage you might do to it if you drop it. Without any of the fun skins that you can slot beneath the front cover to turn it into a zebra or a Green Lantern superhero special, it’s a plain looking beast. The front’s silver and the back’s matt black. I don’t have any problem with that, but half of the appeal of this camera is its chameleon appearance.

Features and controls

The on-off switch and the shutter release are the only buttons on the top of the camera. Everything else – zoom rocker, play back, smile detection, and menu buttons, customisable ‘green button’, together with the four-way controller – is positioned to the right of the LCD screen. I found the menu system quite fiddly to use, and when I tried to put the camera in Program mode – which is as manual as it gets – trying to adjust the ISO wasn’t as intuitive or as quick to access as it should have been.

Afro Ken does the boudoir look

Its fifteen different shooting modes range from auto to portrait via candlelight and blue sky. They’re accessed from the four-way controller, together with the flash, focus control, and self-timer. You can set the green button, which doubles as the delete button, to access the video mode, EV compensation, or ISO. This will help to alleviate the fiddly-ness factor for one of those settings, but not the others. But then, I’m not sure how bothered someone using this camera will be by EV compensation. So it probably doesn’t matter all that much.

Performance

Roasted tomatoes in auto mode

In daylight, this camera produces some decent images and I really couldn’t complain about them too much. Okay, yes, maybe reds and oranges were a touch over-saturated. But honestly, it was fine.

Roasted tomatoes in food mode. Any different?

With fifteen different modes to choose from, it was almost overwhelming, and honestly, I preferred the photo of some roasted tomatoes taken in auto mode rather than taken in food mode.

It’s in lower light situations where the problems begin to creep in. The auto-focus struggled badly and sometimes couldn’t latch on to anything at all. This was hugely frustrating and resulted in pictures that were mushy and had to be binned. Pictures were pretty noisy, too. And Gareth and I both commented that we found the flash glarey.

Gareth also pointed out that the filters were quite poor. It’s as if they’ve been tacked on because every camera needs to have a toy camera and sepia effect now. As for the screen, Haje commented that its quality isn’t great, but it is quite large.

Verdict?

You get what you pay for with a £70 camera. In daylight, it takes some pretty decent photos. Anything approaching low-light, however, presents its auto-focus with some serious problems and the noise in the images that it does manage to produce is quite unpleasant. With its interchangeable skins, it’s a fun, small, light-weight camera. You could do better, and you could do worse.

Portraits in daylight are just fine

Book review: Northerners

Northerners

It’s easy to stereotype the north of England into men in flat caps, women with their hair in curlers – just like Hilda Ogden – pints of bitter, pies, and incessant rain. But it’s a whole lot more than that, and this is something that Sefton Samuels has been capturing through his lens for over forty years. In his Northerners: Portrait of a no-nonsense people he takes you well beyond the cliches, showing you humour, poverty, graft, and talent.

You get to look at ordinary people doing ordinary things: kids making their own fun as they jump from stairwells onto piles of mattresses; street-sweepers, cobblers, and even rag-and-bone men going about their business; bingo halls on a Friday night; football terraces on a Saturday afternoon; and even a day at Chester races.

But there are also portraits of people who would have brought colour and excitement to their lives, too. There’s a chisel-jawed George Best, Morrissey showing his best side, a resplendent Daniel Barenboim conducting the Halle, and a contemplative Harold Wilson smoking his pipe.

Samuels has been called the photographic equivelent of Ken Loach. And whilst maybe that’s true, there’s something of L.S. Lowry about his work, too. It’s simple, it captures the moment, and it’s unmistakeably northern. Whatever this ‘northern’ thing is meant to mean, Samuels has it going on in his pictures, just as Lowry had it in his paintings. So perhaps it’s incredibly fitting that Lowry described Samuels as his favourite photographer.

Samuels’ photographs show you a life that was in many ways slow to change, but when change did come, it was swift and brutal: riots in Moss Side and Toxteth in 1981; the miners’ strike of the early 80s; and the aftermath of the Manchester city centre bombing in 1996.

My favourite images probably come from the Deep Trouble series, which depict the pitmen of Bold Colliery, St Helens. The pictures illuminated only by the miners’ lamps convey perfectly the dark claustrophobia of working deep underground, peril constantly on their shoulders. Whilst they’re very beautiful pictures, there’s also something very matter-of-fact about them, too. No-nonsense, I suppose.

Yes, this is a portrait of Northerners, told with honesty and with love. Love even for Everton, Moss Side, and Toxteth. Samuels is, after all, himself from the North. Looking through it, you get a feeling for these people, for what makes them tick, for their environment, for their lives. But I think that I’ll give the final word to my dad, though, as he’s one of these fabled northerners – Manchester born and bred – so he knows what he’s looking at here: ‘Yes. That’ll do it.’

Northerners: Portrait of a no-nonsense people, by Sefton Samuels. Published by the Ebury Press and available from Amazon UK and Amazon US.